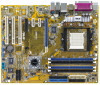
Asus A8N5X A8N5X User's Manual for English Edition - Page 114
RAID driver installation - drivers xp
 |
View all Asus A8N5X manuals
Add to My Manuals
Save this manual to your list of manuals |
Page 114 highlights
3.5 RAID driver installation Creating a RAID driver disk A floppy disk with the RAID driver is required when installing Windows® 2000/XP operating system on a hard disk drive that is included in a RAID set. You can create a RAID driver disk in DOS (using FreeDOS from the support CD). To create a RAID driver disk in DOS environment: 1. Place the motherboard support CD in the optical drive. 2. Restart the computer, then enter the BIOS Setup. 3. Set the optical drive as the first boot priority to boot from the support CD. Save your changes, then exit the BIOS Setup. 4. Restart the computer. The following screen appears during POST. 1) Make Sil3114 32bit SATA/RAID Driver Disk 2) Make Sil3114 64bit SATA/RAID Driver Disk 3) Make Nvidia 2000 RAID Driver Disk 4) Make Nvidia XP RAID Driver Disk 5) Make Nvidia 2003 RAID Driver Disk 6) Make Nvidia 64bit XP RAID Driver Disk 7) Make Nvidia 64bit 2003 RAID Driver Disk 8) Format Floppy Disk 9) FreeDOS command prompt Please choose 1 ~ 9: 5. Place a blank, high-density floppy disk to the floppy disk drive, then press the number of your choice. The following message will appear: Warning!!! Bootable CD will delete all data in floppy Press a key to continue. 6. Press any key to continue. The RAID drivers are copied to the floppy disk. 7. Eject the floppy disk, then write-protect it to prevent computer virus infection. 8. Press any key to continue. To install the RAID driver: 1. During OS installation, the system prompts you to press the F6 key to install third-party SCSI or RAID driver. 2. Press then insert the floppy disk with RAID driver into the floppy disk drive. 3. Follow the succeeding screen instructions to complete the installation. 3-28 Chapter 3: Software support
-
 1
1 -
2
-
3
-
4
-
5
-
6
-
7
-
8
-
9
-
10
-
11
-
12
-
13
-
14
-
15
-
16
-
17
-
18
-
19
-
20
-
21
-
22
-
23
-
24
-
25
-
26
-
27
-
28
-
29
-
30
-
31
-
32
-
33
-
34
-
35
-
36
-
37
-
38
-
39
-
40
-
41
-
42
-
43
-
44
-
45
-
46
-
47
-
48
-
49
-
50
-
51
-
52
-
53
-
54
-
55
-
56
-
57
-
58
-
59
-
60
-
61
-
62
-
63
-
64
-
65
-
66
-
67
-
68
-
69
-
70
-
71
-
72
-
73
-
74
-
75
-
76
-
77
-
78
-
79
-
80
-
81
-
82
-
83
-
84
-
85
-
86
-
87
-
88
-
89
-
90
-
91
-
92
-
93
-
94
-
95
-
96
-
97
-
98
-
99
-
100
-
101
-
102
-
103
-
104
-
105
-
106
-
107
-
108
-
 109
109 -
 110
110 -
 111
111 -
 112
112 -
 113
113 -
 114
114 -
 115
115 -
 116
116
 |
 |
