Asus P5VD2-VM SE User Manual - Page 97
a selected drive. - video
 |
View all Asus P5VD2-VM SE manuals
Add to My Manuals
Save this manual to your list of manuals |
Page 97 highlights
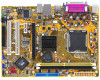
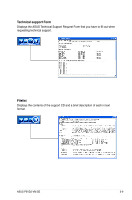
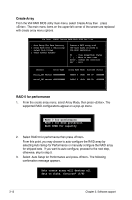
4. Press to confirm or to return to the configuration options. If you selected , proceed to step 9. 5. Select Select Disk Drives, then press . Use arrow keys to select disk drive, then press to mark selected drive. An asterisk appears before a selected drive. 6. Select Block Size, then press to set array block size. A list of valid array block sizes are displayed on a pop-up menu. 4K TIP: For server systems, use of a lower array block 8K size is recommended. For multimedia computer 16K systems used mainly for audio and video editing, a 32K higher array block size is recommended for optimum 64K performance. Use arrow keys to move selection bar on items and press to select. 7. Select Start Create Process and press to set up hard disk for RAID system. The following confirmation message appears: The data on the selected disks will be destroyed. Continue? (Y/N) 8. Press to confirm or to return to the configuration options. 9. Press to go back to main menu. RAID 1 for data protection 1. From the create array menu, select Array Mode, then press . The supported RAID configurations appear on a pop-up menu. RAID 0 for performance RAID 1 for data protection RAID SPAN for capacity 2. Select RAID 1 for data protection then press . ASUS P5VD2-VM SE 3-13
-
 1
1 -
2
-
3
-
4
-
5
-
6
-
7
-
8
-
9
-
10
-
11
-
12
-
13
-
14
-
15
-
16
-
17
-
18
-
19
-
20
-
21
-
22
-
23
-
24
-
25
-
26
-
27
-
28
-
29
-
30
-
31
-
32
-
33
-
34
-
35
-
36
-
37
-
38
-
39
-
40
-
41
-
42
-
43
-
44
-
45
-
46
-
47
-
48
-
49
-
50
-
51
-
52
-
53
-
54
-
55
-
56
-
57
-
58
-
59
-
60
-
61
-
62
-
63
-
64
-
65
-
66
-
67
-
68
-
69
-
70
-
71
-
72
-
73
-
74
-
75
-
76
-
77
-
78
-
79
-
80
-
81
-
82
-
83
-
84
-
85
-
86
-
87
-
88
-
89
-
90
-
91
-
 92
92 -
 93
93 -
 94
94 -
 95
95 -
 96
96 -
 97
97 -
 98
98 -
 99
99 -
 100
100
 |
 |