Asus a7n8xx Motherboard DIY Troubleshooting Guide - Page 35
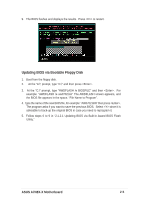
Updating BIOS via Bootable Floppy Disk - a7n8x bios utility
 |
View all Asus a7n8xx manuals
Add to My Manuals
Save this manual to your list of manuals |
Page 35 highlights
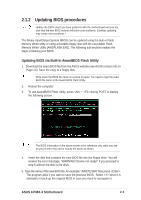
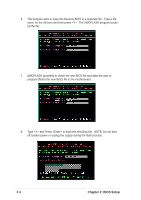
9. The BIOS flashes and displays the results. Press to restart. Updating BIOS via Bootable Floppy Disk 1. Boot from the floppy disk. 2. At the "A:\" prompt, type "C:\" and then press . 3. At the "C:\" prompt, type "AWDFLASH /e BIOSFILE" and then . For example: "AWDFLASH /e aw0702.bin" The AWDFLASH screen appears, and the BIOS file appears in the space, "File Name to Program". 4. Type the name of the new BIOS file, for example: "AW0702.BIN" then press . The program asks if you want to save the previous BIOS. Select since it is advisable to back-up the original BIOS in case you need to reprogram it. 5. Follow steps 6 to 9 in "2.1.2.1 Updating BIOS via Built-in Award BIOS Flash Utility." ASUS A7N8X-X Motherboard 2-5
-
 1
1 -
2
-
3
-
4
-
5
-
6
-
7
-
8
-
9
-
10
-
11
-
12
-
13
-
14
-
15
-
16
-
17
-
18
-
19
-
20
-
21
-
22
-
23
-
24
-
25
-
26
-
27
-
28
-
29
-
 30
30 -
 31
31 -
 32
32 -
 33
33 -
 34
34 -
 35
35 -
 36
36 -
 37
37 -
 38
38 -
 39
39 -
 40
40 -
41
-
42
-
43
-
44
-
45
-
46
-
47
-
48
-
49
-
50
-
51
-
52
-
53
-
54
-
55
-
56
-
57
-
58
-
59
-
60
 |
 |
ASUS A7N8X-X Motherboard
2-5
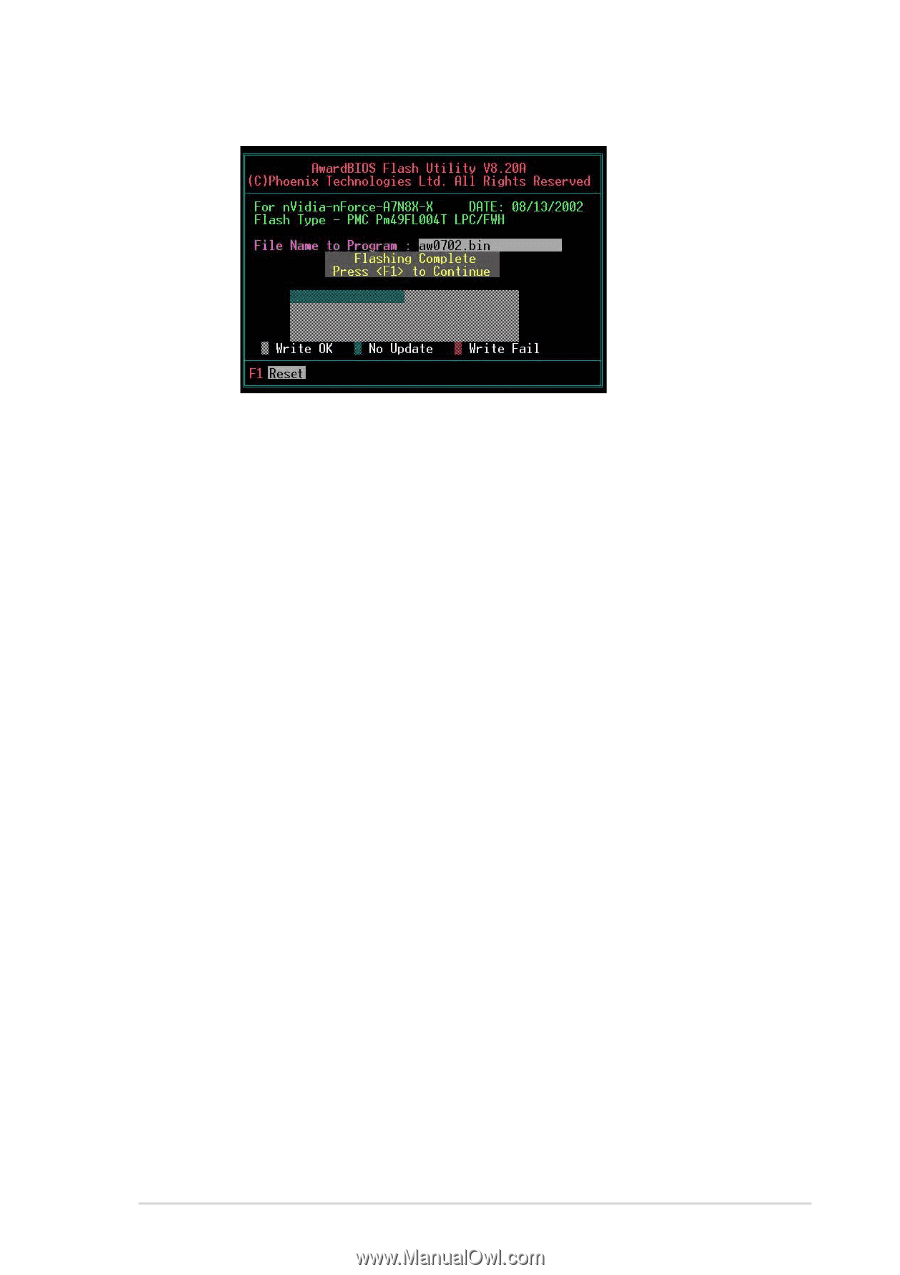
9.
The BIOS flashes and displays the results.
Press <F1> to restart.
1.
Boot from the floppy disk.
2.
At the “A:\” prompt, type “C:\” and then press <Enter>.
3.
At the “C:\” prompt, type “AWDFLASH /e BIOSFILE” and then <Enter>.
For
example: “AWDFLASH /e aw0702.bin” The AWDFLASH screen appears, and
the BIOS file appears in the space, “File Name to Program”.
4.
Type the name of the new BIOS file, for example: “AW0702.BIN” then press <Enter>.
The program asks if you want to save the previous BIOS.
Select <Y> since it is
advisable to back-up the original BIOS in case you need to reprogram it.
5.
Follow steps 6 to 9 in “2.1.2.1 Updating BIOS via Built-in Award BIOS Flash
Utility.”
Updating BIOS via Bootable Floppy Disk