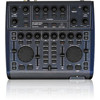
Behringer B-CONTROL DEEJAY BCD2000 Manual - Page 11
Phones Split
 |
View all Behringer B-CONTROL DEEJAY BCD2000 manuals
Add to My Manuals
Save this manual to your list of manuals |
Page 11 highlights
B-CONTROL DEEJAY BCD2000 The output section Set the volume of the MASTER output with the MASTER control . The MASTER output always provides the signal routed to the crossfader. Use the PHONES control to adjust the headphone volume. The PFL MIX control determines the balance between deck A and deck B. Create a play list Before you can play back a song or track, you need to create a list or load an existing list. Click on the ADD button to load a new track onto the current list. “Add Directory” allows you to upload a complete directory from hard-disk. The sequence of songs on the list can always be changed later on. Load a track Load a song from the list by clicking on the title and dragging it to the waveform display of deck A. Alternatively, you can use the Load button to load the next track you have marked from the current list. Start playback Move the crossfader fully to the left and start playback by pressing the PLAY button of deck A. Select a second track, move it to deck B and start it by pressing the PLAY button of deck B. Pre-listen to next song Move the PFL MIX control to the right to pre-listen to the next song on your headphones. You will hear the song played on deck B. Now you have to adapt its tempo to the tempo of the song that is currently being played back on deck A. There are various ways to do this. Either you control the tempo with the pitch fader or use the pitch bend buttons located below the pitch fader. A third alternative is to turn the scratch wheel clockwise (faster) or counter-clockwise (slower). It will be best to use the currently playing kick or snare drum as a “metronome”. Once the rhythms are in sync, the beat has been aligned perfectly. Use the Beat Mix indicator in the waveform display as your optical guide, or simply use the Sync Slave function (button ). Pitch Bend With the pitch bend function, you can modify the tempo of a track, in order to adapt it to the tempo of the track playing on the other channel. There are several ways to do this: 1. Use the pitch fader to control the software’s pitch function. Move the pitch fader up or down to raise or slow down the tempo. The pitch range can be adjusted in the Configuration menu. 2. If the deck is in play mode, you can use the scratch wheel to adapt to the tempo (and beat) of the second track. It’s similar to vinyl records: turn the scratch wheel clockwise to raise the playback tempo; turn it counter-clockwise to slow down the tempo. 3. The bend “+” and bend “–” buttons perform the same functions as the software’s bend buttons: Press either of these buttons to temporarily change the tempo. Loop function The loop function of the B-DJ software can also be controlled from the BCD2000. This is done with the LOOP IN/END and LOOP OUT buttons. Basically, you can define any segment of a currently played song as a loop. First, mark the start and end points on the fly, i.e. during playback (first press = start point; second press = end point). Once the end point has been set, playback returns to the IN point and the loop is started immediately. Press the LOOP OUT button to deactivate loop playback. Sync Slave With its Sync Slave function, the B-DJ software gives you a tool for synchronizing two musical pieces. This function should always be activated in the currently pre-listened channel. Otherwise, there may be jumps in the rhythm, which would be very annoying. The pre-listened song is adapted to the piece currently being played back. 5.2 Additional DJ functions Phones Split In order to listen to both decks separately (Phones Split function), briefly hit the PHONES SPLIT/MASTER OUT button (LED lights up). The signal on deck A can be heard on the left. The signal on deck B can be heard on the right. The PFL MIX control determines the volume ratio between the left and right signals. Master Out Press the PHONES SPLIT/MASTER OUT button longer to activate the Master Out function (button LED starts flashing). When Master Out is on, you will always hear the master signal in your headphones, i. e. the music that is being played on the dance floor. CUE function The CUE function allows you to set cue points in a track. Cue points are positions in the track, which you can mark during playback. Mainly, these will be positions you want to return to later to start the song from this point, e. g. the beginning of a chorus. You can set eight cue points per track and select them at the touch of a button. When you press the CUE button , the song position cursor “jumps” to the selected cue point. If no cue point has been selected, it will automatically go back to the beginning of the track. 5. OPERATION 11


