Bernina 2500DCET Manual - Page 38
Stitch selection dial / position H, Top & bottom cover stitch, Looper conversion arm
 |
View all Bernina 2500DCET manuals
Add to My Manuals
Save this manual to your list of manuals |
Page 38 highlights
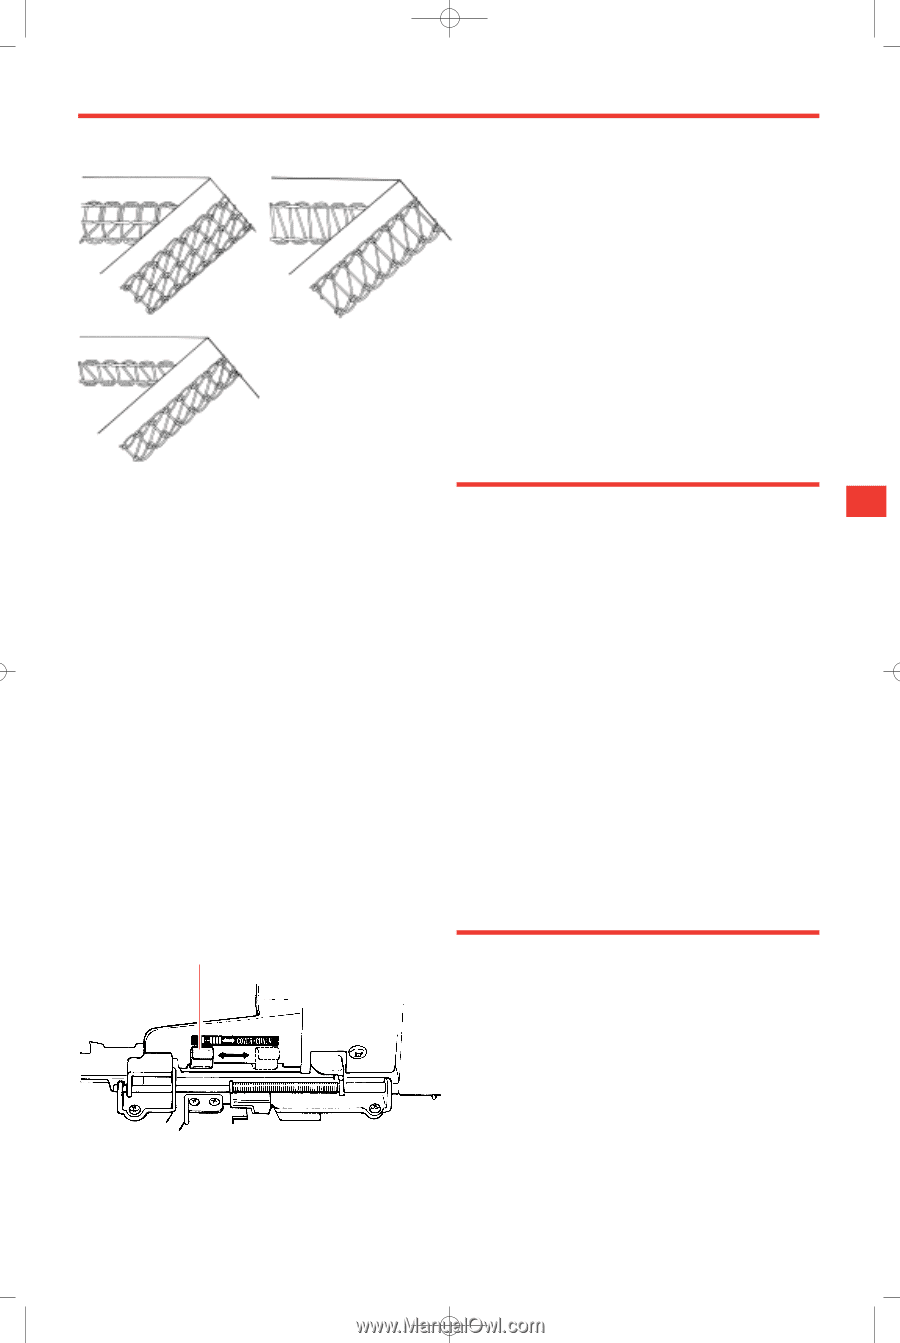
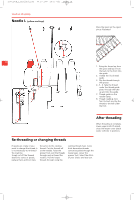
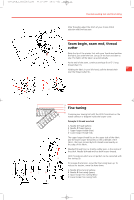
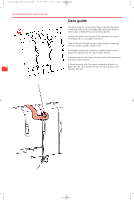
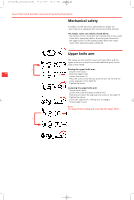
2500_DCE_1_englisch_neu 09.10.2007 14:35 Uhr Seite 39 Cover/chain stitch functions and general operating instructions Top & bottom cover stitch The 5 mm wide top & bottom cover stitch is formed with two or three needle threads, a wiper thread and one looper thread. The needle threads appear as two or three parallel lines on the right side of the fabric. The 2.5 mm top & bottom cover stitch is sewn with two needle threads, one wiper thread and one looper thread. The wiper thread covers the seam on the right side, while the looper thread covers and neatens the seam on the wrong side. The elasticity of cover stitch makes it ideal for all stretch fabrics. The cover stitch is sewn in the fabric and not on the fabric edge, i.e. the fabric is not cut. The upper knife and upper knife arm are raised. The cover stitch gives a truly professional finish to all your home sewing. It is perfect for hems, top stitching, flat joining seams and edging with elastic and bindings. Stitch selection dial / position H 39 To select cover stitch turn the stitch selection dial to position H. The sewing speed on position is automatically reduced from 1500 s.p.m. to max. 500 s.p.m. The needle stop is automatically set to down. The cover stitch formation ends with the needle inserted in the fabric. Note: When sewing is completed or interrupted, the needles stay in the fabric. This is ideal for positioning your work while sewing. To remove your work, raise the needles by turning the handwheel backwards, i.e. away from you in a clockwise direction. WARNING: If sewing in top & bottom cover stitch mode, when lifting the presser foot to its highest position (2), do not use any force. 1 Looper conversion arm · Lower the needle clamp, press Needle stop. The loopers are automatically lowered. · Open the looper cover. · The looper conversion arm can now be moved from overlock to cover/chain stitch or from cover/chain stitch to overlock (1). When the conversion arm is switched from overlock to cover/chain stitch, the upper looper is released and the movement of the lower looper becomes elliptic. When the conversion arm is switched from cover/chain stitch to overlock, the upper looper is reinstated and the lower looper moves left and right.
-
 1
1 -
2
-
3
-
4
-
5
-
6
-
7
-
8
-
9
-
10
-
11
-
12
-
13
-
14
-
15
-
16
-
17
-
18
-
19
-
20
-
21
-
22
-
23
-
24
-
25
-
26
-
27
-
28
-
29
-
30
-
31
-
32
-
 33
33 -
 34
34 -
 35
35 -
 36
36 -
 37
37 -
 38
38 -
 39
39 -
 40
40 -
 41
41 -
 42
42 -
 43
43 -
44
-
45
-
46
-
47
-
48
-
49
-
50
-
51
-
52
-
53
-
54
-
55
-
56
-
57
-
58
-
59
-
60
-
61
-
62
-
63
-
64
-
65
-
66
-
67
-
68
-
69
-
70
-
71
-
72
-
73
-
74
-
75
-
76
-
77
-
78
-
79
-
80
-
81
-
82
 |
 |