Bernina 43 Manual
Bernina 43 Manual
 |
View all Bernina 43 manuals
Add to My Manuals
Save this manual to your list of manuals |
Bernina 43 manual content summary:
- Bernina 43 | Manual - Page 1
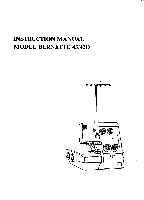
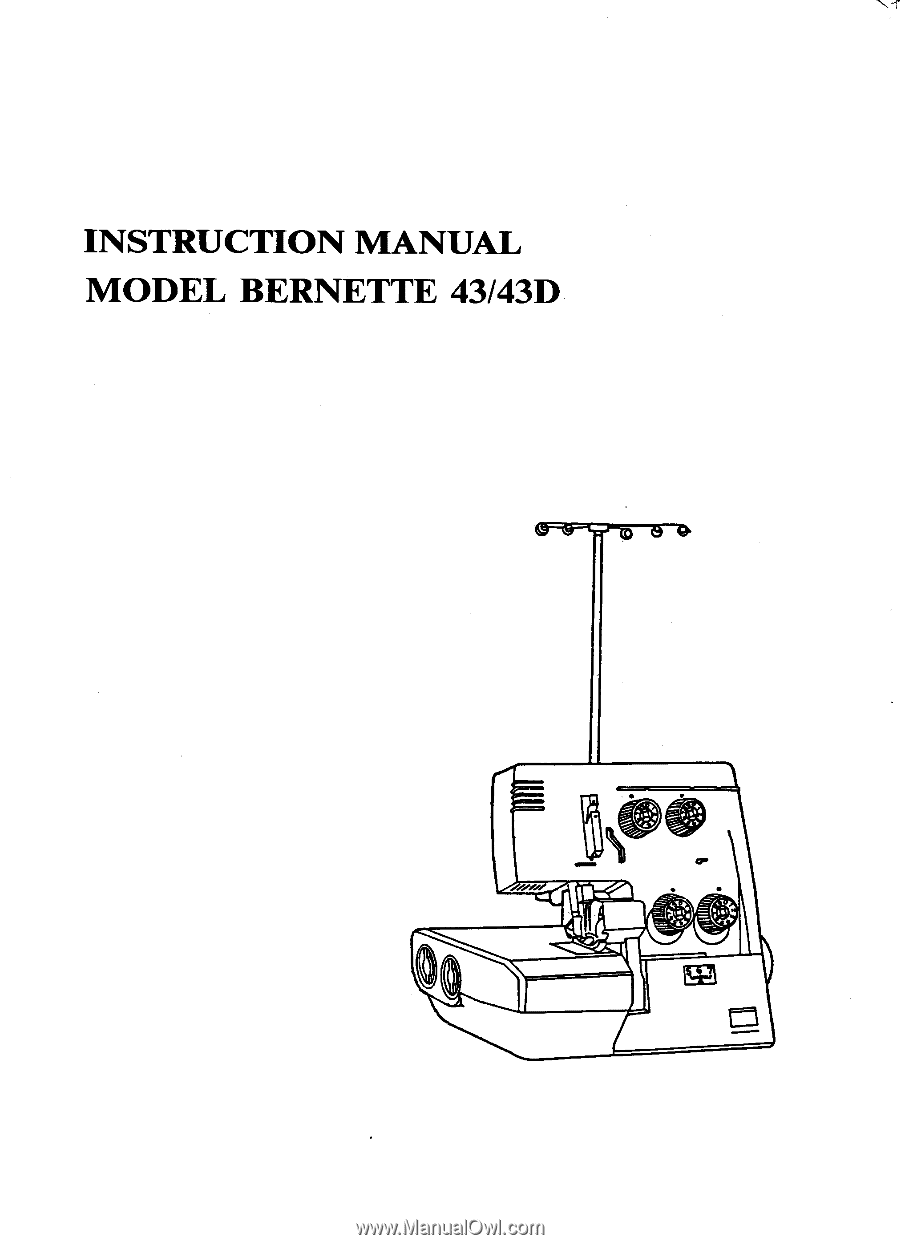
INSTRUCTION MANUAL MODEL BERNETTE 43/43D OFS=CP-5 - 5- 4 CP iii - Bernina 43 | Manual - Page 2
, changing the presser foot, changing knives, changing the needle plate, and the like. 15. Always unplug your overlock machine from the electrical outlet when removing covers, lubricating, or when making any other user servicing adjustments mentioned in the instruction manual. 16. Always unplug - Bernina 43 | Manual - Page 3
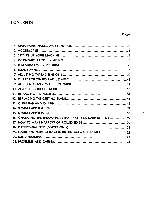
PARTS. NAMES AND FUNCTION 2. ACCESSORIES 3. SETTING UP YOUR MACHINE 4. PREPARATION FOR THREADING 5. THREADING YOUR MACHINE 6. TRIAL SEWING 18. DIFFERENTIAL FEED (DF-TYPE ONLY) 19. GATHERING/STRETCHING/PINTUCKING/SEWING IN TAPE 20. BLIND HEMMING 21. PROBLEMS AND CAUSES Page 2 3 4 5 6 8 9 11 12 13 14 - Bernina 43 | Manual - Page 4
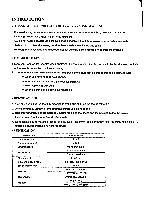
machine. * When replacing any parts. * When cleaning or adjusting the maachine. • BEFORE YOU USE.. 1. Wipe dust and oil off the overlook machine to avoid any stains on the sewing materials. 2. Do trial sewing by using the same sewing materials you intend to sew. 3. Read this instruction manual - Bernina 43 | Manual - Page 5
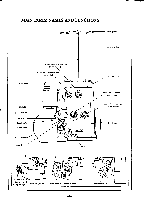
PARTS: NAMES AND FUNCTIONS Thread guide Thread reel bar Front panel Upper thread tension dial (Right needle) Upper thread tension dial (Left needle) Built in light Upper knife holder Presser foot Throat plate ----e Cloth plate Upper looper Lower looper • IYI /slime Front cover Thread guide - Bernina 43 | Manual - Page 6
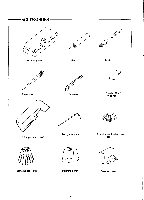
ACCESSORIES Accessory box Oiler Brush Screwdriver Tweezers Needles (3pcs) (HAxl #14) Roll edge Throat plate Hexagon wrench Thread spool holder caps (4pcs) Cone holder (4 pcs) Machine cover Waste collector -3- - Bernina 43 | Manual - Page 7
on the lower right side of As you lightly press on the foot control, the machine will the machine. sew slowly and increase in speed with added pressure. Foot control 0 0 0 Main switch PC:we,' socket Caution: 1. Disconnect the electrical cord from the wall outlet when mchine is not in use or - Bernina 43 | Manual - Page 8
bar to its highest point before threading. • Overlock thread It is advisable to use a good quality overlock thread when sewing with this overlock machine. Thread reel bar ` ; we Highest point I -I Overlock 1 / thread \ I Thread reel stand • For domestic spools Domestic type thread spools can - Bernina 43 | Manual - Page 9
tension to the appropriate Prc: 1 number. ick 4 1W CD • Warning: Switch the overlock machine off ("0") when making any adjustment in the needle area, such as threading needles, changing needles, threading loopers, changing the presser foot, knives or the needle plate, and the like. -6- 0 0 7 - Bernina 43 | Manual - Page 10
Place the needle threads together under the presser foot. ® Close front cover and cloth plate when (See Page 11). r EASY THREAD CHANGING Instructions for changing threads are given below. 1. Cut the the smallest number. 4. Press the Foot Control and run the machine until the upper and lower thread - Bernina 43 | Manual - Page 11
times with your right hand to check that the threads form the overlock stitch. O Then place fabric for trial sewing under the presser foot and start sewing. ® When work is finished, continue running the machine and move work back slowly so that a chain of thread 5-6cm long Is made as shown at left - Bernina 43 | Manual - Page 12
Thread tension differs with the type of fabric and the thickness and type of thread. Adjustment of thread tensions should be made each time you sew. Adjust the tension dials using the upper and lower thread tensions while watching the stitch as illustrated. Thread tension is tightened by turning the - Bernina 43 | Manual - Page 13
ADJUSTING THREAD TENSIONS (CONTINUED) (A) Lower looper thread tension is too tight or upper looper thread is too loose. (B) Upper looper thread tension is too tight or lower looper thread is too loose. Back side Back side Front side Tighten the upper looper thread tension dial or loosen the - Bernina 43 | Manual - Page 14
Heavy weight • Denirit • Tweed • Velour • Canvas • Upholstery • Cotton • Spun polyester • Polyester Standard sewing machine needle Type: HAxl (Japan) or 1301705H (Europe) or 15x1 (USA) 2.0 -3.5m/m Standard 2.51m • Cotton • Spun polyester • Polyester 2.5 -4.0mlm Standard 3.0m/m 8 CD 8 8 C) IC - Bernina 43 | Manual - Page 15
Is a two needle, three or four thread convertible overlock machine. Select your stitches according to what and how you sew : (a) 3-thread overedge stitch, 5mm width. Use only left needle and three threads. Remove the right needle. (b) 3-thread overedge stitch, 3mm width. Use only the right - Bernina 43 | Manual - Page 16
The presser foot pressure of the machine has been pre-set and requires no particular readjustment according to the type of fabric (light-or heavyweight). However, if you need to adjust the presser foot pressure, turn the presser adjusting screw with a coin or screwdriver. For sewing very thin - Bernina 43 | Manual - Page 17
the handwheel towards you. O Open the front cover and lower the presser foot. 3 Using the hexagon wrench, loosen the needle clamp screws and remove sewing. Using a bent or blunt needle may result in breaking thread or poor stitching. REPLACING THE LIGHT BULB * CAUTION: Always disconnect your machine - Bernina 43 | Manual - Page 18
Loosen the upper blade set screw and take off the upper Presser foot Upper blade Upper •lade arm Throat plate blade. 2 Replace the new blade • Replacing the lower blade The lower blade (Fixed knife) of machine is made of a special material which does not require frequent replacement. However - Bernina 43 | Manual - Page 19
it clean and lubricated at all time& First, disconnect machine from power supply by removing plug from socket-outlet. Open of oil to the points indicated by the arrows below. Always use a good qualify sewing machine oil (we suggest Mobil Velocite #10 or equivalent). Portion to be lubricated ta-ro--0- - Bernina 43 | Manual - Page 20
a garment which is shaped, it is necessary to first work a line of straight stitches with a normal sewing machine to ease in the fullness evenly around the hem. To overcast, place the fabric at an angle under the presser foot and sew into the hem edge position in a curved line. At the end of the - Bernina 43 | Manual - Page 21
APPLICATIONS • Application This machine is suitable for sewing the following : •One-piece dress (medium- change presser foot 1. Removing presser foot - raise the foot, pull the one-touch lever toward you, and the foot will drop off. 2. Puffing on presser foot - center the desired presser foot under - Bernina 43 | Manual - Page 22
THE THROAT PLATE (FOR ROLLED OR NARROW HEM) The machine comes with a standard overdge needle throat plate attached to the machine. To change the throat plate when sewing rolled overedges (rolled hems): O Lift and release the presser foot. O Open the front cover. Loosen the throat plate screw - Bernina 43 | Manual - Page 23
ROLLED EDGE Please make sure power is off when replacing the parts and making adjustments. • To adjust tension for rolled or thickness and type of thread. Adjustment of thread tension should be made each time you sew. Important: 1. See page 19 for changing the throat plate 2. Remove left needle ( - Bernina 43 | Manual - Page 24
desired. Please note that the Stretch 4-step and the Gathering 6-step adjustments to the differential feed can be made while sewing. Important:. When sewing without differential feed, the adjustment dial for the differential feed should be set on the "N" position. 2 3 Differential feed adjustment - Bernina 43 | Manual - Page 25
that the stitches just overcast the folded edge. 3. Lower the presser foot and sew. 4. Sew as many rows as desired and press them to lay flat on one side. f Pinlucking Sewing in tape The standard presser foot is equipped with a tape guide. The tape can be sewn in at the same time as - Bernina 43 | Manual - Page 26
side up, place the fabric under the presser foot so that the plastic guide is just touching the folded edge. 5. Adjust the guide so that the needle just pierces the folded edge. 6. Lower the presser foot and sew hem, guiding fabric evenly along the plastic guide. 7. When hem is completed, open the - Bernina 43 | Manual - Page 27
for service, check the information below. Problem Fabric does not feed. Cause © The presser foot pressure is foot pressure. Replace with a new needle. Page 12 14 Attach the needle correctly to the needle bar. Lightly guide on the edges of the fabric while you are sewing. Thread the machine
-
 1
1 -
 2
2 -
 3
3 -
 4
4 -
 5
5 -
 6
6 -
 7
7 -
8
-
9
-
10
-
11
-
12
-
13
-
14
-
15
-
16
-
17
-
18
-
19
-
20
-
21
-
22
-
23
-
24
-
25
-
26
-
27
 |
 |
INSTRUCTION
MANUAL
MODEL
BERNETTE
43/43D
OFS=CP
-
5-
5
- 4
CP
iii