Bernina 43 Manual - Page 15
Adjusting, Overlock, Stitch, Width, Cutting
 |
View all Bernina 43 manuals
Add to My Manuals
Save this manual to your list of manuals |
Page 15 highlights
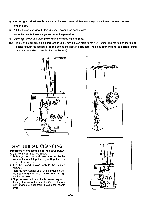
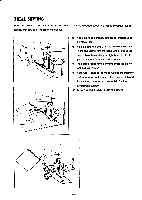
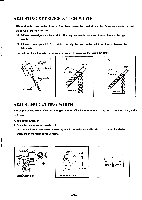
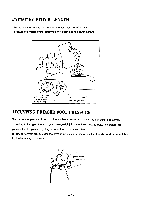
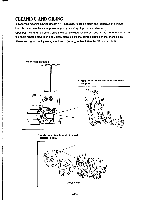
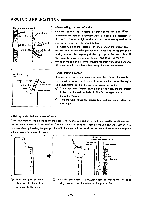
ADJUSTING OVERLOCK STITCH WIDTH This machine Is a two needle, three or four thread convertible overlock machine. Select your stitches according to what and how you sew : (a) 3-thread overedge stitch, 5mm width. Use only left needle and three threads. Remove the right needle. (b) 3-thread overedge stitch, 3mm width. Use only the right needle and three threads. Remove the left needle. The right or the left needle can be removed simply by loosening the needle set screw. Left needle set screw Right needle set screw Right needle (3) Back side (b) 3mm Back side Left needle Front side Front side ADJUSTING CUTTING WIDTH The proper cutting width differs with the type of fabric. Check the seam each time, and adjust the cutting width as follows. 1. Turn power switch off. 2. Open the front cover and cloth plate. 3. Turn the stitch width dial(away or toward you)until the red stitch width indicator matches the desired width line in the front cover window. 1 1 wide 0 narrow 51_1_1 6 I Lif stitch t width Stitch width dial Stitch width dial -12-
-
 1
1 -
2
-
3
-
4
-
5
-
6
-
7
-
8
-
9
-
 10
10 -
 11
11 -
 12
12 -
 13
13 -
 14
14 -
 15
15 -
 16
16 -
 17
17 -
 18
18 -
 19
19 -
 20
20 -
21
-
22
-
23
-
24
-
25
-
26
-
27
 |
 |
