Bernina 43 Manual - Page 21
Application, change, presser, remove, shank
 |
View all Bernina 43 manuals
Add to My Manuals
Save this manual to your list of manuals |
Page 21 highlights
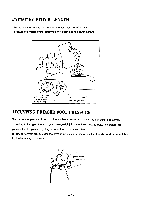
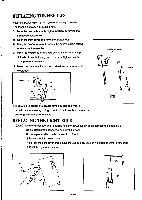
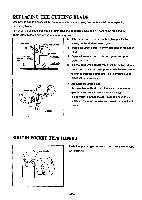
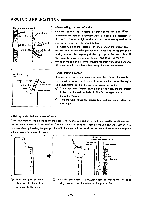
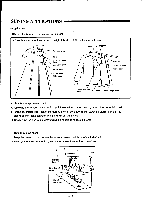
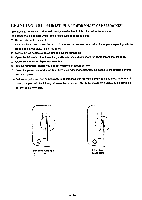
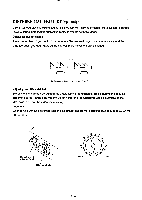
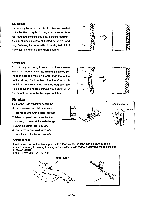
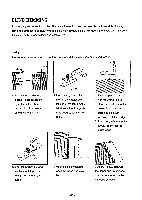
SEWING APPLICATIONS • Application This machine is suitable for sewing the following : •One-piece dress (medium-and heavy-weight fabric) Shoulder seam Yoke seam Sleeve insertion seam Underarm seam Waist seam Facing edge Side seam •Blouse (light-weight fabric) Shoulder Yoke seam seam Yoke seam Underarm seam Facing edge Sleeve insertion seam Side seam Lower edge seam • How to change presser foot 1. Removing presser foot - raise the foot, pull the one-touch lever toward you, and the foot will drop off. 2. Puffing on presser foot - center the desired presser foot under shank. Lower the presser bar until the groove on the shank connects with the small pin on the foot. 3. Gently push the one-touch lever toward the needle to release the lever. • How to remove shank 1. Keep the presser bar up, loosen the shank set screw and the shank will drop off. 2. When you replace the shank, tighten the set screw firmly with a screw driver. Presser bar One touch lever 3 Shank set screw -18-
-
 1
1 -
2
-
3
-
4
-
5
-
6
-
7
-
8
-
9
-
10
-
11
-
12
-
13
-
14
-
15
-
 16
16 -
 17
17 -
 18
18 -
 19
19 -
 20
20 -
 21
21 -
 22
22 -
 23
23 -
 24
24 -
 25
25 -
 26
26 -
27
 |
 |
