Bernina 43 Manual - Page 17
Replacing, Needles, Light
 |
View all Bernina 43 manuals
Add to My Manuals
Save this manual to your list of manuals |
Page 17 highlights
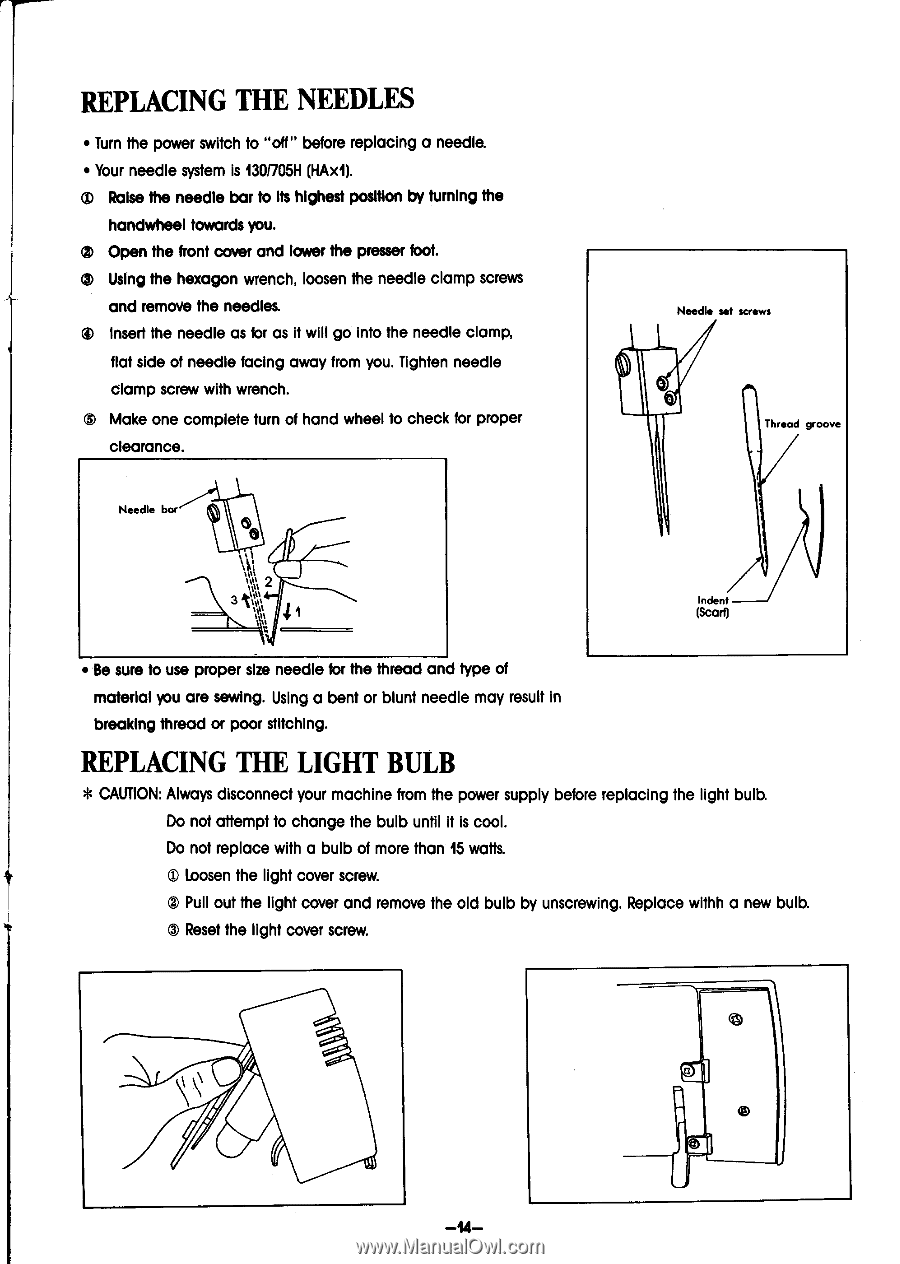
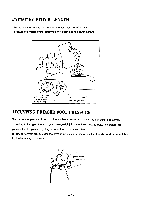
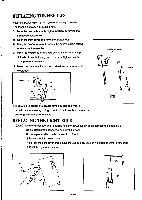
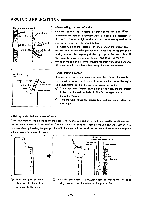
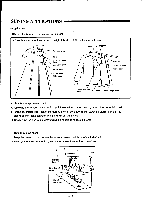
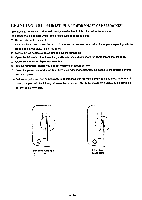
REPLACING THE NEEDLES • Turn the power switch to "off" before replacing a needle. • Your needle system is 1301705H (HAx1). ) Raise the needle bar to its highest position by turning the handwheel towards you. O Open the front cover and lower the presser foot. 3 Using the hexagon wrench, loosen the needle clamp screws and remove the needles. CP Insert the needle as for as it will go Into the needle clamp, flat side of needle facing away from you. Tighten needle damp screw with wrench. GI) Make one complete turn of hand wheel to check for proper clearance. Needle bar Needle set screws Thread groove tv qe Indent (Scarf) • Be sure to use proper size needle for the thread and type of material you are sewing. Using a bent or blunt needle may result in breaking thread or poor stitching. REPLACING THE LIGHT BULB * CAUTION: Always disconnect your machine from the power supply before replacing the light bulb. Do not attempt to change the bulb until it is cool. Do not replace with a bulb of more than 15 watts. C Loosen the light cover screw. • Pull out the light cover and remove the old bulb by unscrewing. Replace withh a new bulb. () Reset the light cover screw. -14-
-
 1
1 -
2
-
3
-
4
-
5
-
6
-
7
-
8
-
9
-
10
-
11
-
 12
12 -
 13
13 -
 14
14 -
 15
15 -
 16
16 -
 17
17 -
 18
18 -
 19
19 -
 20
20 -
 21
21 -
 22
22 -
23
-
24
-
25
-
26
-
27
 |
 |