Bernina 732 Manual
Bernina 732 Manual
 |
View all Bernina 732 manuals
Add to My Manuals
Save this manual to your list of manuals |
Bernina 732 manual content summary:
- Bernina 732 | Manual - Page 1
730, Bernina-Record Automatic Zigzag Sewing Machine with automatic ornamental stitch device Model 731 Automatic Zigzag Sewing Machine with automatic ornamental stitch device Model 732 Automatic Zigzag Sewing Machine without automat ic ornamental stitch device FR. GEGAUF LTD. BERNINA SEWING MACHINE - Bernina 732 | Manual - Page 2
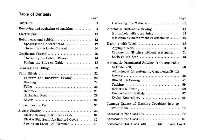
replacing of machine Electric part Bobbin case and bobbin Spooling the Under Thread Threading the Under Thread Needle and Thread Threading the Bobbin Thread Fixing the Slide-on Table Cleaning and Oiling Plain Stitch Forward and Backward Sewing Darning Feller Hemmer Gathering Foot Edger Zipper Sewing - Bernina 732 | Manual - Page 3
tM Ui CERTIFICATE OF GUARANTEE for the BERNINA Sewing Machine Model 730/731/732 No.. (Please quote in all your correspondences) Terms of guarantee overleaf (This certificate should be signed on the basis of the terms listed overleaf. only after instructions have been given) Validity of Guarantee - Bernina 732 | Manual - Page 4
during five years in the machine, and during two years in the motor of the BERNINA Model 730, 731 or Model 732 Sewing Machine supplied by us. All if the buyer does not treat the machine in the right way, as indicated in the instructions for use, if the machine is not properly cleaned and lubricated, - Bernina 732 | Manual - Page 5
Buyer of Machine Name mid Surmitne: Street: Town: Date of Delivery: • • • Supplier of Machine (Signature of Buyer) (Stamp of the firm) (Signature of Supplier) 3 - Bernina 732 | Manual - Page 6
Date Notes o£ BERNINA Representative regarding instructions, home calls, and possible warranty work Notes - Bernina 732 | Manual - Page 7
Thin Instruction-Book is applicable /or both Models 730, 731 and 732, with the exception of .tAntontaric Ornamental Sfitchc4a on page 5t. Removing and replacing Fla. 1 To unpack the machine, put the carrying case in upright position upon a table.and open the ease as you can see in Fig. 1. Grip the - Bernina 732 | Manual - Page 8
9 10 11 12 13 14 15 8 7 6 16 v 3 2 17 18 19 20 record 21 22 • Wr' 23 26 25 24 6 Flu. 2 - Bernina 732 | Manual - Page 9
-Record Sewing Machine, Model 730 (knee operated). The controls referred to in the Operating Instructions being marked and indentified. 1 Cover plate 2 Needle plate 3 Needle holder 4 Thread tension regulator 5 Face plate 6 Light switch 7 Take-up lever 8 Thread tension and thread guide 9 Thread - Bernina 732 | Manual - Page 10
Fig. 2a shows a BERNINA Sewing Machine, Model 731 (knee operated). The controls referred to in the Operating Instructions being marked and identified. 9 10 11 12 13 14 15 8 7 6 BERNINA 5 4 3 1. • 16 17 18 19 20 21 22 23 26 25 24 - Bernina 732 | Manual - Page 11
with buttonholes and satin stitch seams 22 Stitch lenght regulut'tig lever 23 Drup feed knob 24 Knee control lever 25 Free arm 26 Bed _Plate Fig, 3 shows a BERNINA Sewing Machine, Model 732 (knee operated), whereon the controls referred to in the Operating Instructions are marked and identified - Bernina 732 | Manual - Page 12
Electrical part The drive of the BERNINA-Record, Model 730 (731/ 732), is functioning by the universal motor mounted at the rear. With knee lever operated machines motor and rheostat control are concealed beneath the protective housing. With pedal operated machines only the motor appears under this - Bernina 732 | Manual - Page 13
. 5 tread plate downwards, the greater the speed of the machine. Practise speed control several times without threading the machine. The lamp is mounted in the swivelled head cover to enable an even distribution of light over the entire sewing area, completely free from any glare. Care of the motor - Bernina 732 | Manual - Page 14
33 of the hinge and withdraw bobbin case with bobbin (fig. 6). Let go latch 33, which frees the bobbin, allowing it to fall out of the bobbin case. 14 • FL:. '1 Spooling the Under Thread The winding of the bobbin bearing the under thread, with BERNINA of the Models 730, 731 and 732, is done with - Bernina 732 | Manual - Page 15
to the bobbin 37. The thread should wind in clockwise direction. Now push 16 lever 39 towards the bobbin until it gets engaged. Then the motor can be started by a slight pressure on the knee lever, respectively on the pedal starter, the mechanism being still at rest. Operate the machine until the - Bernina 732 | Manual - Page 16
the bobbin into the case and threading the under thread Replacing bobbin case with bobbin into shuttle When replacing bobbin into case, make sure that bobbin turns in direction of arrow when thread is pulled (see fig. 9). After insertion ob bobbin pass thread through slot 27, below tension spring - Bernina 732 | Manual - Page 17
thread selection System 705 needles should be used exclusively on the BERNINA-Record, Model 730, guide. The relation between needle and thread is correct if the thread, when placed in the long needle groove, fills this latter well and can be freely moved to and fro. For sewing the usual needle sizes - Bernina 732 | Manual - Page 18
12) With BERNINA threading is done in one go from reel to needle. Place a reel of thread on one of the two spool-pins situated at the back of the top arm (35). From there lead threadthrough the pre-tension 43, equally placed at the back of arm, then into slot running across top arm. In its - Bernina 732 | Manual - Page 19
marked lines are provided for control. When the fixed marked line on top arm and the dot on mobile part of thread tension device are set one above the other, the perfect thread tension is attained. - With BERNINA sewing machines a numbered scale is not necessary. By means of the adjusting disc 9 the - Bernina 732 | Manual - Page 20
to the right. In order to clamp the sewing table rigidly to the free arm, lever 47 is placed upright. Thread cutter The pressure foot holding device on the BERNINA Sewing machines is designed in such a way that it can also serve al thread cutter. This small gadget helps to save time, especially - Bernina 732 | Manual - Page 21
machine Fluff is collected during sewing, particularly around the shuttle. Such fluff may detrimentally affect the proper function of the machine of the right hand. The presser foot itself need not be removed, but the and insert the plate tongue into the guide provided in the stand. Then depress the - Bernina 732 | Manual - Page 22
machine before sewing and not afterwards. Use clear oil which is free from resin and acid, such as is supplied by all the BERNINA representatives. The use of inferior oils may cause your machine arm, you will have access to the shuttle of which the race should be oiled frequently - but only lightly - Bernina 732 | Manual - Page 23
Expert oiling guarantees the silent running of the sewing machine and increases its durability. The oiling points not visible in the figures 20 and 21 are indicated with red colour on the machine itself. When the machine has been kept in a cold room, it should be opened and placed in a warm room - Bernina 732 | Manual - Page 24
Stitch Plain Stitching with Standard and Special Presser Feet Exchanging the Presser Feet The different tasks of sewing work involve the necessity of frequent changes of the various presser feet. For this reason the BERNINA-Record, Models 730,731 and 732, are equipped with the patented "Plug- -foot - Bernina 732 | Manual - Page 25
regulator lever 22 is pushed upwards to just above number zero, the machine will sew backward. Forward and backward sewing serves to strengthen certain sewing areas and to secure the ends of the threads. The more the stitch regulator lever 22 is displaced either upward or downward, the longer the - Bernina 732 | Manual - Page 26
or hopper foot. 3. Lower feed dog by turning knob 23 to the left upon " darning" symbol (see page 16). 4. Set stitch regulator lever 22 upon zero point to prevent the feed dog from being operated unnecessarily. 5. Adjust zigzag knob 18 upon zero position. The ItERNINA-Record, Models 730, 731 and - Bernina 732 | Manual - Page 27
sew a second layer of threads across the first line of stitches, whereby you begin a bit outwards of the already stitched threads. This second layer should be a bit more covering. Finally stitch pull the stocking over the free arm and the darning apparatus, until the damaged area comes to lie in the - Bernina 732 | Manual - Page 28
darning ring can easily moved in any direction. When beginning it will be useful to sew a full circle around the damaged area to prevent running. Then sew aline of stitches across the direction of the fabric stitches. The lines should be of different lengths and as close to one another as possible - Bernina 732 | Manual - Page 29
foot bar for the purpose. Fold the edge of the material over to the desired hem width and guide the fabric into the spiral-type guide tongue of the raised hemmer as far as the needle, then lower the hemmer. When sewing, lightly guide 44-11? 2nd operation. (fig. 28 case the first time, so that it is folded - Bernina 732 | Manual - Page 30
(Only supplied against extra charge) Insert gathering foot. Adjust machine upon plain stitch sewing. Put the material to be gathered under the gathering foot, that is to say not into the transverse slot. Lower the gathering foot by means of the presser foot lever and insert the piece of material - Bernina 732 | Manual - Page 31
machine upon plain stitch sewing and insert edger instead of regular presser foot. The edger with its stitch hole placed farthest to the right of foot is specially suited for edge stitching. For this purpose the edge stitcher is used without the quilting guide. The edger with the quilting guide - Bernina 732 | Manual - Page 32
THE ZIPPER FOOT (specially designed for inserting zippers; available only against extra charge) Pig. 32 411 When inserting zippers be sure that for the stitching of the left side of the zipper the needle position to the right must be used (see fig. 34). Thus knob 17 should be set - Bernina 732 | Manual - Page 33
Layer of material Zipper Presser foot base ez Presser foot base Zipper Layer of material -- Needle insertion to the left "lc Presser foot base Fig. 33 U Needle insertion to the right Presser foot base Fla. 34 31 - Bernina 732 | Manual - Page 34
), the pointer will move from number zero to number four. The higher the number, the wider the stitches. The adjustment knob 18 can be regulated whilst sewing, but when you are not operating the machine, it can be set only when the needle is raised above the layer of material. Centre - right - Bernina 732 | Manual - Page 35
the previously mentioned two stitch positions. Zigzag Sewing (Use 2-- or 3-ply threads; never 6-ply) For zigzag sewing set the machine as follows: 1. Raise thread take-up lever 7 to its uppermost position. 2. Insert zigzag foot (not to be mistaken for the zig- zag embroidery foot, this latter - Bernina 732 | Manual - Page 36
Elastic Sewing of Knitted Goods • Always use darning thread for basting tricot and other knit goods. Never do it with basting thread. • Use perfectly straight and pointed needles. Size 70 to 80. ■ The thinnest area of material must be placed tinder and to the left of, presser foot. If the seam is - Bernina 732 | Manual - Page 37
Stitch a zigzag seam along edge and about the depth of presser foot. Adjustment of machine: Zigzag Width upOn 3 or 4 Stitch length upon 1 Tricot seams With ordinary tricot it is advisable to make a fold with all seams and then stitch across. Zigzag width upon 2.5-3 Stitch length upon 1.5 - Bernina 732 | Manual - Page 38
the material and the seam are prevented at the same time from being distorted. Zigzag width upon zero nark. Stitch length upon 3. Fig. 41 4 . r ."•11: r nig i.e. 0.. he Eri tioeLlnd: .0. 1' - - 1li1d°t. e'04- - ' .;:0- .0, • anfsieV %1e44! - 4°0°t4e7e0x4:.m„14r10e°p0p,4e9tl0a1j1r.-- 4v - Bernina 732 | Manual - Page 39
• .."•)• Place both pieces of material on top of one another and stitch a first seam along the edge, the depth of a presser foot. Zigzag width L5 Stitch length Cut off projecting edge at about Lis" distance from seam. Now stitch another seam across the new edge of material, the double edge being - Bernina 732 | Manual - Page 40
to facilitate sewing on. Now attach the lace with zigzag stitches and stitch hole is not round. but rather elongated, so that zigzag seams can be sewn with it. The roll hemmer is operated guide as for roll hemming. The Zigzag stitch bridges the entire seam. Tight top thread tension and large stitch - Bernina 732 | Manual - Page 41
type of stitch. - Colour thread, coulaured cord, or a number of adjacent seams a.s.o. will still enhance the effect. Light, soft is introduced into the guide hole of the embroidery foot and stitched onto the undersite of the fabric, sewing a zigzag stitch of 1.5, with a stitch length of 1.5 to - Bernina 732 | Manual - Page 42
buttonholes automatically. To get this higher bottom thread tension without changing the lower tension itself, which is correct for normal sewing, see fig. 50, a hole has been drilled through the finger of the bobbin case through which the under thread has to be 17 It record Fig. 51 19 \Ow 20 - Bernina 732 | Manual - Page 43
. For normal sewing the bobbin case is threaded as explained in this instruction booklet .on page 12. For sewing buttonholes, the machine should be adjusted as follows : 1. Insert buttonhole presser foot. 2. Feed-change knob 23 (fig. 2) must stand at sym- bol » sewing 3. Draw zigzag knob grip - Bernina 732 | Manual - Page 44
of the buttonhole is now effected as follows: 1. Sewing Ile' lefthand Start the machine; then the lefthand edge is sewn in backward stitch. A scale on the buttonhole presser foot serves for determining the length of the buttonhole. After the wished for length of the edge has been attained, stop - Bernina 732 | Manual - Page 45
entirely to the right, passing thereby over stop 1 i see fig. 60). In this position the machine now sews the plain stitch, in order to make fastening threads. When stitching these securing fastening threads, it will be advisable to hold the fabric slightly back. For the next buttonhole zigzag lever - Bernina 732 | Manual - Page 46
distance of stitches The BERNINA-Record, Model 730, is provided with a patented device by means of which the distance between stitches can be altered when sewing buttonholes or working the satin stitch, according to the -material being stitched and the sewing thread. The change is operated with the - Bernina 732 | Manual - Page 47
the nose at the back end of the buttonhole foot, and sew the buttonhole in the described manner. The cord loop projecting beyond the back end of the finished buttonhole is tightened in such a way that the loop under the back fastening disappears. Then the two thread ends are cut (see fig. 621. The - Bernina 732 | Manual - Page 48
to have the machine ready for sewingtheseworks whenusingit-another day. Sewing buttonholes without using the automatic buttonhole device Buttonholes may also be.sewn without using the automatic buttonhole device. In such cases make the following adjustments: I. Insert buttonhole foot marked with - Bernina 732 | Manual - Page 49
. Last needle hole on the left. 12. Set zigzag knob 18 at zero position and sew a few fastening stitches, again pulling the material lightly towards you to shorten the feed. 13. Finally lay the work on the wooden support and cut the cloth between both edges (see fig. 65). File. 65 l.nat elltch on - Bernina 732 | Manual - Page 50
. 2. Set stitch length regulator lever I see fig. 2) to zero, to prevent lowered feed dog from being operated unnecessarily. 3. Set zigzag knob 18 (see fig. 2) on 3 to 4. For top and bottom thread use darning cotton. Wool is employed to cover the damaged area. Top and bottom threads, and darning - Bernina 732 | Manual - Page 51
possible together, because later on no more wool will be used. As soon as the damaged area is entirely covered with wool, the wool thread is cut at the darning foot. Now fasten the wool rows with zigzag stitches across them as is shown in fig. 67c, by shifting the fabric forward and backward - Bernina 732 | Manual - Page 52
dresses, linen, and the like. The buttonhole presser foot is advantageously used for this type of sewing work. First draw the shapes to the underside the design. Then sew a narrow zigzag stitch row with no. l/ to 1 - not too short - along the lines of the design. The sewing thread should be of the - Bernina 732 | Manual - Page 53
I Ornamental stitches, hand-operated Fig, 10 u Zigzag embroidering foot (1 rod line) Ordinary zigzag sewing font The zigzag ornamental stitch With the BERNINA zigzag sewing machine device on the Models no. 730 and 732 the most various ornamental stitcheS can be produced in the simplest possible - Bernina 732 | Manual - Page 54
SATIN STITCH CONTROL Fis; 71 Y :cord tS 21 32 The adjustment of the right stitch length for ornamental stitches and buttonholes is very easy on the BERNINA sewing machine thanks to the patented satin stiteh control. Suppose the stitch length regulating lever is on no. 2 and the stitch length - Bernina 732 | Manual - Page 55
BERNINA-Record sewing machine of the Model 730 and 731 is equipped with the automatic oramental stitch device which enables the creation of ornamental stitches to be sewn without manipulating any controls. Just select the pattern desired, set the control lever, and then simply concentrate on guiding - Bernina 732 | Manual - Page 56
to produce the largest stitch width. After threading the machine, ornamental stitching can be started exactly in the same way with or-dinary sewing. When switching back to normal zigzag stitches, place switching lever 13 again in front position. Stitch width 4 Stitch length nearly zero Pattern - Bernina 732 | Manual - Page 57
75). Ornamental automatic stitches with two needles (see fig. 76) Zigzag stitches are equally possible when sewing with two needles. stitch width may not exceed 3/64" as a maximum. Naturally ornamental stitches made with two needles may also be modified by altering the material feed and by thread - Bernina 732 | Manual - Page 58
arm, to the right, near the tension sight hole, another sight hole has been managed, which is filled with a mark. Now, when the machine is sewing an ornament, the ornamental stitch symbol is moving inside the machine and passes this sight hole, where it can be seen (see fig. 77). Even when operating - Bernina 732 | Manual - Page 59
elastic cloth guide between the fingers on its base, but otherwise is identical with an ordinary presser foot. Blindstitch sewing can be accomplished with the ordinary zigzag stitch or by means of the built-in blindstitch cam. 1. Setting of machine when sewing with ordinary zigzag stitch a) Attach - Bernina 732 | Manual - Page 60
58 After having threaded the machine, put the lower flat piece of cloth underneath the blindstitch foot; then place the upper piece of material on top and fold it in such a way that it always touches the elastic guide; lower the blindstitch foot, and start sewing. The zigzag stitch width should be - Bernina 732 | Manual - Page 61
parts: 3 double needles for pintucks of approximately she, 1/8" and 3/ 32". 3 pintuckera with 3, 5 and 7 grooves. When preparing the machine for pintucking, proceed as follows: 1. Set needle to centre position in stitch pintucking foot corresponding to the needle distance, i.e. Pintucker foot with - Bernina 732 | Manual - Page 62
SI ,;0 4 Thread tension regulator 7 Thread take-up lever 8 Thread tension 9 Thread tension regulation disc. 35 Spool pin 44 Thread guide slit 45 Needle holder eyelet. Threading the two upper threads To thread the two upper threads of the machine for pintucking, proceed aS for normal sewing. Place - Bernina 732 | Manual - Page 63
cord the insert is passed from the ball slipped on a thread reel pin of the container through the groove in the flap, up through the hole in the stitch plate between both teeth rows of the feed dog, and guided away from operator below and to the back of the pintucking foot. Ornamental stitch - Bernina 732 | Manual - Page 64
hemstitch needle on BERNINA zigzag sewing machines Introduce the hemstitch needle into the sewing machine instead of the normal sewing needle. Threading is done in the well known manner (see Operation Instructions on page 14). As upper thread use darning or fine embroidery thread (f. i. DMC no. 100 - Bernina 732 | Manual - Page 65
For fine fabrics, such as organdie, organza a. s. o., set zigzag lever to stitch width 2 and stitch length adjusting lever to 1. After having brought up the under thread, lay the fabric under the presser foot and begin to sew in the well known manner. The result will be a hemstitch as shown in fig - Bernina 732 | Manual - Page 66
1.5, width 3.5 The two outer seams are ornamental stitch no. 19 Stitch: length 1, width 3.5. Fie. f,G , Two seams with normal zigzag stitch Stitch length: 1 Stitch width: 2 Between both zigzag stitches sew an ordinary ornamental seam with normal sewing needle. Two seams beside each other; when - Bernina 732 | Manual - Page 67
stitch sewing machines with transversely set shuttle, zigzag stitch plate and zigzag presser foot Insert the double hemstitch needle into the machine instead of the normal sewing needle. The threading of the upper threads is made in the same way as when sewing pintueks (see Operating Instructions - Bernina 732 | Manual - Page 68
same manner, but take care that the wide needle always enters the previously made hole (see fig. 90). 1 Direction of cloth feed during first working operation Direction of cloth feed during second operation t Ins. 90 Examples with two-needle hemstitch Fig. 91 Fig. 92 10 : 1: * 010411 - Bernina 732 | Manual - Page 69
to the size of the initials. Stitch length is set almost upon zero. After having placed the embroidery frame under the needle, the under thread should be brought up. Lower sewing foot. Start machine and keep it running smoothly at a fair speed, thus achieving the best results. Guide the frame - Bernina 732 | Manual - Page 70
feed on a small stitch length, which can be made with the aid of the satin stitch control; adjust stitch width according to size of initial to be needle in the left stitch and turn embroidery frame into the new direction. In that case you will not sew over the already sewn edge or part of it, but - Bernina 732 | Manual - Page 71
and round embroideries on the BERNINA- Record. With its aid different hole sizes can be surrounded, and round embroideries up to a diameter of approximately one inch can be produced. During sewing around the stitch width may be varied at will. For eyelet embroidery work arrange the machine as - Bernina 732 | Manual - Page 72
the eyelet embroidery stitch plate which is foreseen with exchangeable slide provided with guide journals, whereby also the special embroidery presser foot must be inserted. Always use the embroidery frame We recommend winding strips of cloth around its outer ring to obtain a better tension of the - Bernina 732 | Manual - Page 73
secure the thread by a few stitches. These binding stitches should be parallel to the embroidery stitches, so that they remain practically invisible. When the slide of the stitch plate is reversed, as shown in fig. 97, the guide pin can be used as a centre in sewing circular embroideries. In doing - Bernina 732 | Manual - Page 74
to back; b) the needle is the correct size for the thread; for darning of fine fabrics use needle size no. 70, for other sewing work needle size no. 80 or no. 90. Re sizes of needles and threads see page 13; c) the machine is properly cleaned. Remove free arm cover plate and clean all lint. Cleanse - Bernina 732 | Manual - Page 75
are jammed under the bobbin case tension spring; h ) the machine can easily be started with handwheel. 2. The causes of upper thread breaking may be the following: a) The use of badly polished needles of inferior quality. Needles should always be purchased at a BERNINA shop; b) Needle incorrectly - Bernina 732 | Manual - Page 76
thread tension too tight; c) the material has been pulled from under the pres- ser foot towards the front, after having finished with the sewing work. Thus the needle got bent. Always remove the material from the machine by pulling it back from under the presser foot base; d) size:of needle and size - Bernina 732 | Manual - Page 77
sufficient, by means of lightly pushing the tricot on both sides of said presser foot. 7. The machine operates too slowly The motor does not work correctly (ask the expert!) : a) tension of drive belt may be too tight or too loose (ask the expert !) ; b) the sewing machine has been idle for a long - Bernina 732 | Manual - Page 78
Notes of BERNINA Representative regarding instructions, home calls, and possible warranty work Date Notes 76 - Bernina 732 | Manual - Page 79
Date Notes of BERNINA Representative regarding instructions, home calls, and possible warranty work Notes 77 - Bernina 732 | Manual - Page 80
Date Notes of BERNINA Representative regarding instructions, home calls, and possible warranty work Notes 78 - Bernina 732 | Manual - Page 81
00 53 12 00 02 In Sewing Kit: 1 zigzag presser foot with hinged base 1 zigzag embroidery foot 1 large hemmer 1 blindstitch foot 1 edger with quilting guide 1 pintuck foot with 7 grooves 1 buttonhole foot ] darning foot 1 wool darning foot 6 bobbins, one of which being on machine 1 small screwdriver - Bernina 732 | Manual - Page 82
buttonholer opener 1 wooden support 1 darning attachment for stockings 1 pack of assorted needles of the 705 system 53 11 10 00 53 10 60 00 In Carrying Case: 1 sewing table 1 motor cable with plug 1 pedal starter (only with machines provided with pedal starting device 1 instruction book 53 06 48 - Bernina 732 | Manual - Page 83
1 wooden support 1 darning attachment for stockings 1 pack of assorted needles of the 705 system 1 pintuck foot with 7 grooves In Carrying Case: 53 11 10 00 53 10 60 00 sewing table 1 motor cable with plug 1 pedal starter (only with machines provided with pedal starting device 1 instruction book - Bernina 732 | Manual - Page 84
FR. GEGAUF LTD., BERNINA Sewing Machine Factory, STECKBORN 46, fi ea 41, -•:. C ,ry1a G4 • V~Va1131,:tlt.1 aaa 'a oa t iii % %VUT 'S ',Lvtitt
-
 1
1 -
 2
2 -
 3
3 -
 4
4 -
 5
5 -
 6
6 -
 7
7 -
8
-
9
-
10
-
11
-
12
-
13
-
14
-
15
-
16
-
17
-
18
-
19
-
20
-
21
-
22
-
23
-
24
-
25
-
26
-
27
-
28
-
29
-
30
-
31
-
32
-
33
-
34
-
35
-
36
-
37
-
38
-
39
-
40
-
41
-
42
-
43
-
44
-
45
-
46
-
47
-
48
-
49
-
50
-
51
-
52
-
53
-
54
-
55
-
56
-
57
-
58
-
59
-
60
-
61
-
62
-
63
-
64
-
65
-
66
-
67
-
68
-
69
-
70
-
71
-
72
-
73
-
74
-
75
-
76
-
77
-
78
-
79
-
80
-
81
-
82
-
83
-
84
 |
 |
BERNINA
MIllanMj
Model
730,
Bernina
-Record
Automatic
Zigzag
Sewing
Machine
with
automatic
ornamental
stitch
device
Model
731
Automatic
Zigzag
Sewing
Machine
with
automatic
ornamental
stitch
device
Model
732
Automatic
Zigzag
Sewing
Machine
without
automat
ic
ornamental
stitch
device
FR.
GEGAUF
LTD.
BERNINA
SEWING
MACHINE
FACTORY
STECKBORN
/
Switzerland