Bernina 830LE Manual - Page 53
Customizing Stitch Patterns
 |
View all Bernina 830LE manuals
Add to My Manuals
Save this manual to your list of manuals |
Page 53 highlights
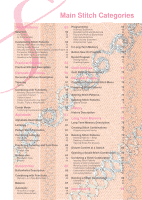
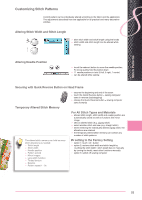
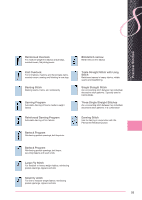
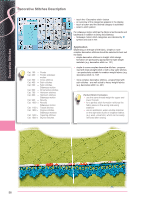
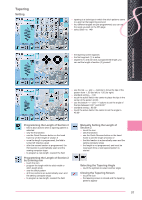
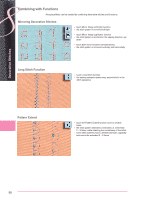
Stitch Patterns Customizing Stitch Patterns A stitch pattern can be individually altered according to the fabric and the application. The adjustments described here are applicable for all practical and many decorative stitches. Altering Stitch Width and Stitch Length ► alter stitch width and stitch length using the knobs ► stitch width and stitch length can be altered while sewing Altering Needle Position ► touch the relevant button to move the needle position. To move quickly hold the button down ► 11 needle positions in total (5 left, 5 right, 1 center) ► can be altered while sewing Securing with Quick Reverse Button on Head Frame Temporary Altered Stitch Memory The altered stitch memory can hold as many stitch alterations as needed: ► Stitch length ► Stitch width ► Needle position ► Pattern extend ► Mirror images ► Long stitch function ► Thread tension ► Balance ► Pattern repeat 1 - 9x ► secures the beginning and end of the seam ► touch the Quick Reverse button = sewing computer sews in reverse (backstepping) ► release the Quick Reverse button = sewing computer sews forwards For All Stitch Types and Materials ► altered stitch length, stitch width and needle position are automatically saved as well as functions like mirror image ► sew an altered stitch (e.g. zigzag stitch) ► select another stitch and sew (e.g. straight stitch) ► when retrieving the individually altered zigzag stitch, the alterations are retained ► the temporary altered stitch memory can contain any number of stitch patterns Resetting to the Factory Setting ► option 1: touch «clr» button ► option 2: restore stitch width and stitch length by touching the stitch width / stitch length bar (or manually by turning the knob); reset other functions manually ► option 3: switch off sewing computer 53
-
 1
1 -
2
-
3
-
4
-
5
-
6
-
7
-
8
-
9
-
10
-
11
-
12
-
13
-
14
-
15
-
16
-
17
-
18
-
19
-
20
-
21
-
22
-
23
-
24
-
25
-
26
-
27
-
28
-
29
-
30
-
31
-
32
-
33
-
34
-
35
-
36
-
37
-
38
-
39
-
40
-
41
-
42
-
43
-
44
-
45
-
46
-
47
-
 48
48 -
 49
49 -
 50
50 -
 51
51 -
 52
52 -
 53
53 -
 54
54 -
 55
55 -
 56
56 -
 57
57 -
 58
58 -
59
-
60
-
61
-
62
-
63
-
64
-
65
-
66
-
67
-
68
-
69
-
70
-
71
-
72
-
73
-
74
-
75
-
76
-
77
-
78
-
79
-
80
-
81
-
82
-
83
-
84
-
85
-
86
-
87
-
88
-
89
-
90
-
91
-
92
-
93
-
94
-
95
-
96
-
97
-
98
-
99
-
100
-
101
-
102
-
103
-
104
-
105
-
106
-
107
-
108
-
109
-
110
-
111
-
112
-
113
-
114
-
115
-
116
-
117
-
118
-
119
-
120
-
121
-
122
-
123
-
124
-
125
-
126
-
127
-
128
-
129
-
130
-
131
-
132
-
133
-
134
-
135
-
136
-
137
-
138
-
139
-
140
-
141
-
142
-
143
-
144
-
145
-
146
-
147
-
148
-
149
-
150
-
151
-
152
-
153
-
154
-
155
-
156
-
157
-
158
-
159
-
160
-
161
-
162
-
163
-
164
-
165
-
166
-
167
-
168
-
169
-
170
-
171
-
172
-
173
-
174
-
175
-
176
-
177
-
178
-
179
-
180
-
181
-
182
-
183
-
184
-
185
-
186
-
187
-
188
-
189
-
190
-
191
-
192
-
193
-
194
-
195
-
196
-
197
-
198
-
199
-
200
-
201
-
202
-
203
-
204
-
205
-
206
-
207
-
208
-
209
-
210
-
211
-
212
 |
 |