Bissell Steam Mop™ Max User Guide - Page 5
ssembly - steam mop max
 |
View all Bissell Steam Mop™ Max manuals
Add to My Manuals
Save this manual to your list of manuals |
Page 5 highlights
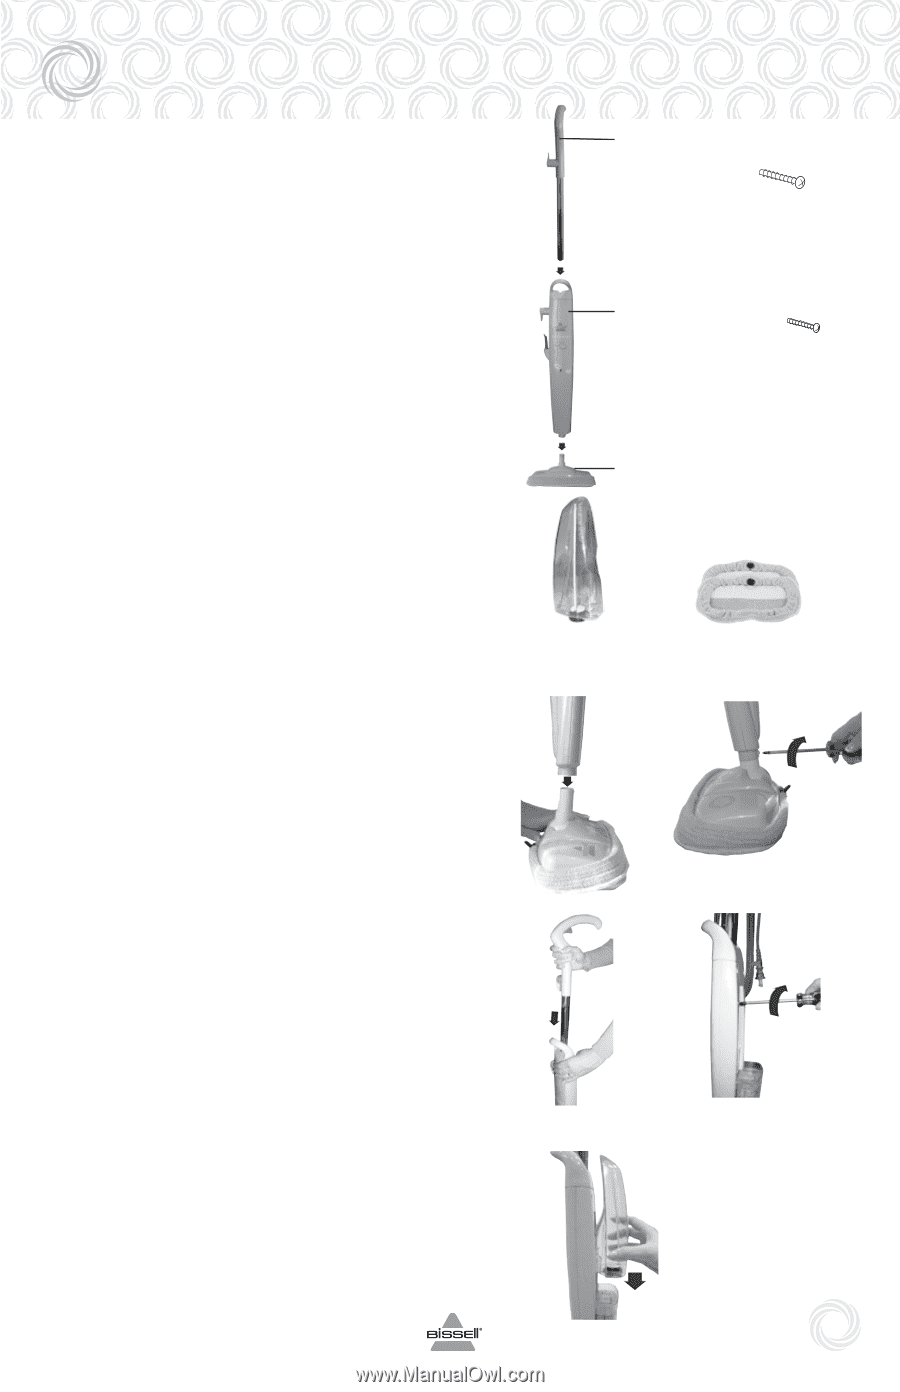
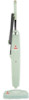
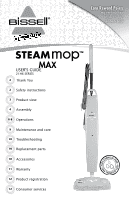
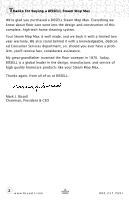
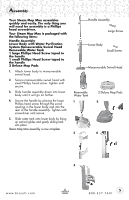
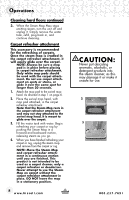
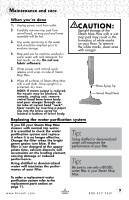
Assembly Your Steam Mop Max assembles quickly and easily. The only thing you will need for assembly is a Phillips head screwdriver. Your Steam Mop Max is packaged with the following items: Handle Assembly Lower Body with Water Purification System Maneuverable Swivel Head Removable Water Tank 1 large Phillips Head Screw taped to the handle 1 small Phillips Head Screw taped to the handle 2 Deluxe Mop Pads 1. Attach lower body to maneuverable swivel head. 2. Secure maneuverable swivel head with small Phillips head screw. Tighten until secure. 3. Slide handle assembly down into lower body until it will go no further. 4. Secure the handle by placing the large Phillips head screw through the screw opening in the lower body and into the rear of the handle assembly. Tighten with screwdriver until secure. 5. Slide water tank onto lower body by lining up vertical glides and gently sliding tank into place. Steam Mop Max assembly is now complete. Handle Assembly Large Screw Lower Body Small Screw Maneuverable Swivel Head Removable Water Tank 1 2 Deluxe Mop Pads 2 3 4 w w w. b i s s e l l . c o m 5 5 800.237.7691
-
 1
1 -
 2
2 -
 3
3 -
 4
4 -
 5
5 -
 6
6 -
 7
7 -
 8
8 -
 9
9 -
 10
10 -
 11
11 -
12
 |
 |