Bosch HDS7152U Installation Instructions - Page 20
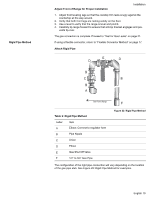
Slide Range into Opening, Check Back of Range for Proper Installation
 |
UPC - 825225842675
View all Bosch HDS7152U manuals
Add to My Manuals
Save this manual to your list of manuals |
Page 20 highlights
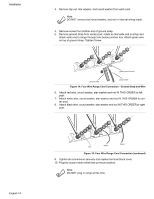
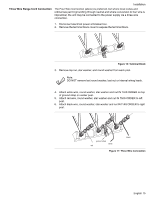
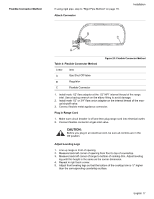
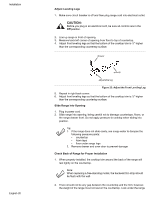
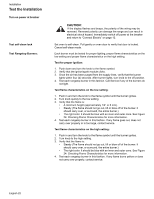
Installation English 18 drawer wrench adjustable leg Figure 21: Adjust the Front Leveling Leg Slide Range into Opening 1. Plug in power cord. 2. Slide range into opening, being careful not to damage countertops, floors, or the range drawer front. Do not apply pressure to cooktop when sliding into position. Be careful not to crimp flexible connector. Tip: 1. If the range does not slide easily: Use soapy water to dampen the following pressure points: • countertop • foam tape • floor under range legs 2. Remove drawer and oven door to prevent damage 3. To prevent damage to the appliance, push on the frame around the oven cavity opening. 3. Wipe up soapy water. Check Back of Range for Proper Installation 1. When properly installed, the cooktop trim around the back of the range will rest lightly on the countertop. Note: When replacing a free-standing model, the backwall trim strip should be flush with the wall. 2. There should not be any gap between the countertop and the trim; however, the weight of the range must not rest on the countertop. Look under the range to verify that both back legs are resting solidly on the floor. Also verify that the left range leg is under the anti-tip bracket. CAUTION: Verify that the weight of the range is not resting on the countertop. This could result in damage to the countertop and the appliance. 3. If the back legs are not resting solidly on the floor or the left leg is not under the anti-tip bracket, slide range out, adjust legs and slide back in.
-
 1
1 -
2
-
3
-
4
-
5
-
6
-
7
-
8
-
9
-
10
-
11
-
12
-
13
-
14
-
 15
15 -
 16
16 -
 17
17 -
 18
18 -
 19
19 -
 20
20 -
 21
21 -
 22
22 -
 23
23 -
 24
24 -
 25
25 -
26
-
27
-
28
-
29
-
30
-
31
-
32
-
33
-
34
-
35
-
36
-
37
-
38
-
39
-
40
-
41
-
42
-
43
-
44
-
45
-
46
-
47
-
48
-
49
-
50
-
51
-
52
-
53
-
54
-
55
-
56
-
57
-
58
-
59
-
60
-
61
-
62
-
63
-
64
-
65
-
66
-
67
-
68
-
69
-
70
-
71
-
72
-
73
-
74
-
75
-
76
-
77
-
78
-
79
-
80
 |
 |
