Bosch TCA6001UC Use & Care Manual - Page 25
and dry contacts
 |
UPC - 825225835035
View all Bosch TCA6001UC manuals
Add to My Manuals
Save this manual to your list of manuals |
Page 25 highlights
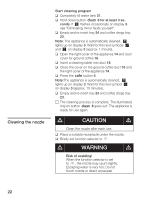
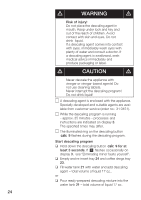
q Place an appropriately large receptacle under nozzle 13. q Set function selector 2 to 0. Note: The appliance is automatically descaled, 3 lights up aon display. Descaling solution flows at intervals into the receptacle. Wait for the next symbolg on display 3 (approx. 10 minutes). q Set function selector 2 to z. Note:The appliance is automatically descaled, a lights up on display 3. Descaling solution flows at intervals into the tray 24. Wait for the next symbol f on display 3 (approx. 10 minutes). q Empty and reĆinsert tray 24 and coffee dregs tray 23. q Rinse out the water tank 21, fill with fresh water up to max and reĆnsert. q Empty the receptacle and place back under the nozzle 13. q Set function selector 2 to 0. Note: The appliance is automatically descaled, a lights up on display 3. Water flows at intervals into the receptacle. Wait for the next symbol g on display 3 (approx. 4 minutes). q Set function selector 2 to z. Note: The appliance is automatically descaled, a lights up on display 3. Water flows at intervals into the tray 24. Wait for the next symbol f on display 3 (approx. 4 minutes). q Empty tray 24 and coffee dregs tray 23. q Clean and dry contacts 26. q ReĆinsert tray 24 and coffee dregs tray 23. Note: The appliance is automatically rinsed. q Wipe splashes off the nozzle 13 and appliance. i The descaling process is complete. The illuminated ring on descaling button 4 9 goes out. The appliance is ready for use again. 25
-
 1
1 -
2
-
3
-
4
-
5
-
6
-
7
-
8
-
9
-
10
-
11
-
12
-
13
-
14
-
15
-
16
-
17
-
18
-
19
-
 20
20 -
 21
21 -
 22
22 -
 23
23 -
 24
24 -
 25
25 -
 26
26 -
 27
27 -
 28
28 -
 29
29 -
 30
30 -
31
-
32
-
33
-
34
-
35
-
36
-
37
-
38
-
39
-
40
-
41
-
42
-
43
-
44
-
45
-
46
-
47
-
48
-
49
-
50
-
51
-
52
-
53
-
54
-
55
-
56
-
57
-
58
-
59
-
60
-
61
-
62
-
63
-
64
-
65
-
66
-
67
-
68
-
69
-
70
-
71
-
72
-
73
-
74
-
75
-
76
-
77
-
78
-
79
-
80
-
81
-
82
-
83
-
84
-
85
-
86
-
87
-
88
-
89
-
90
-
91
 |
 |
