Bose Lifestyle 5 Series III Owner's guide - Page 13
Connecting other components to the Lifestyle, music system - manual
 |
View all Bose Lifestyle 5 Series III manuals
Add to My Manuals
Save this manual to your list of manuals |
Page 13 highlights
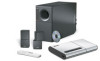
Setting Up Connecting other components to the Lifestyle® 5 music system Use standard audio cables to connect other components to your Lifestyle® music system, matching the red connector to R (right) and white or black connector to L (left). For additional assistance with connecting other components, see your components manuals. Figure 8 Music center connectors ® LIFESTYLE ® MODEL 5 MUSIC CENTER B Z G642 950 D S T BOSE Corporation UL LISTED 917D AUDIO ® EQUIPMENT MANUFACTURED: TÜV Rheinland BOSE CORPORATION, FRAMINGHAM, MA 01701-9168 MADE IN USA geprüdfte Sicherheit SPEAKERS L FIXED R 93 A B OUTPUT TAPE AUX VIDEO SOUND L R REC PLAY INPUT AM LOOP ANTENNA SYSTEM CONTROL 1 ~ POWER 12VAC IN 1.0A 2 Tape input Auxiliary Video sound jacks input jacks input jacks Video components To play video sound through your Lifestyle® music system, connect the R and L audio outputs (fixed outputs preferred) of your stereo TV, stereo VCR, DVD, or laserdisc player to the music center VIDEO SOUND input jacks. You can use a Y-adapter (available at electronics stores) to connect a mono source. However, the left and right speakers then play the same monaural sound. Your TV is the display for the video (picture) signal. The video signal should not be connected to the Lifestyle® music system. Note: To ensure proper stereo sound, connect the L and R audio outputs from your stereo VCR directly to your music center L and R VIDEO SOUND inputs. If you prefer to connect the audio outputs from your TV to the music center, be sure to use the L and R audio outputs and the video output from the VCR to the TV, in addition to coaxial cable.Then, for proper playback of stereo-encoded video tapes, use the TV remote control to select the correct TV inputs (for example, change from "ANTENNA A" to "VIDEO 1" to receive the sound transmitted through the L and R connections). See your TV owner's manual for assistance. Other connections Tape deck To use an external tape recorder (analog audio cassette, analog open reel, digital audio tape, Digital Compact Cassette, or MiniDisc), connect the inputs from the tape deck to the music center TAPE REC OUTPUT jacks. Connect the outputs from the tape deck to the music center TAPE PLAY INPUT jacks, matching the red plug to R (right) and black or white plug to L (left). CD changer, CDI player, DVD player, or laserdisc player To use one of these components, connect its audio outputs to the music center AUX INPUT jacks, matching the red plug to R (right) and black or white plug to L (left). Turntable To connect a turntable, you may need a phono preamplifier (with RIAA equalization). Consult your dealer for the appropriate model. Connect the audio outputs of the phono preamplifier to the music center AUX INPUT jacks, matching the red plug to R (right) and black or white plug to L (left). Note: The Lifestyle® music system cannot turn a connected component on or off. AM251174_03_V.pdf October 22, 2001 11
-
 1
1 -
2
-
3
-
4
-
5
-
6
-
7
-
 8
8 -
 9
9 -
 10
10 -
 11
11 -
 12
12 -
 13
13 -
 14
14 -
 15
15 -
 16
16 -
 17
17 -
 18
18 -
19
-
20
-
21
-
22
-
23
-
24
-
25
-
26
-
27
-
28
-
29
 |
 |
