Bose Lifestyle 5 The Bose® Lifestyle® amplifier - Owner's gu - Page 8
January 4 - i
 |
View all Bose Lifestyle 5 manuals
Add to My Manuals
Save this manual to your list of manuals |
Page 8 highlights
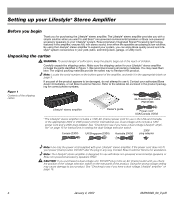
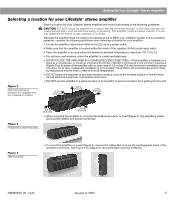
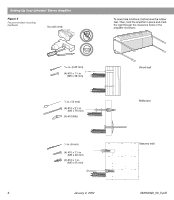
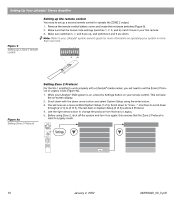
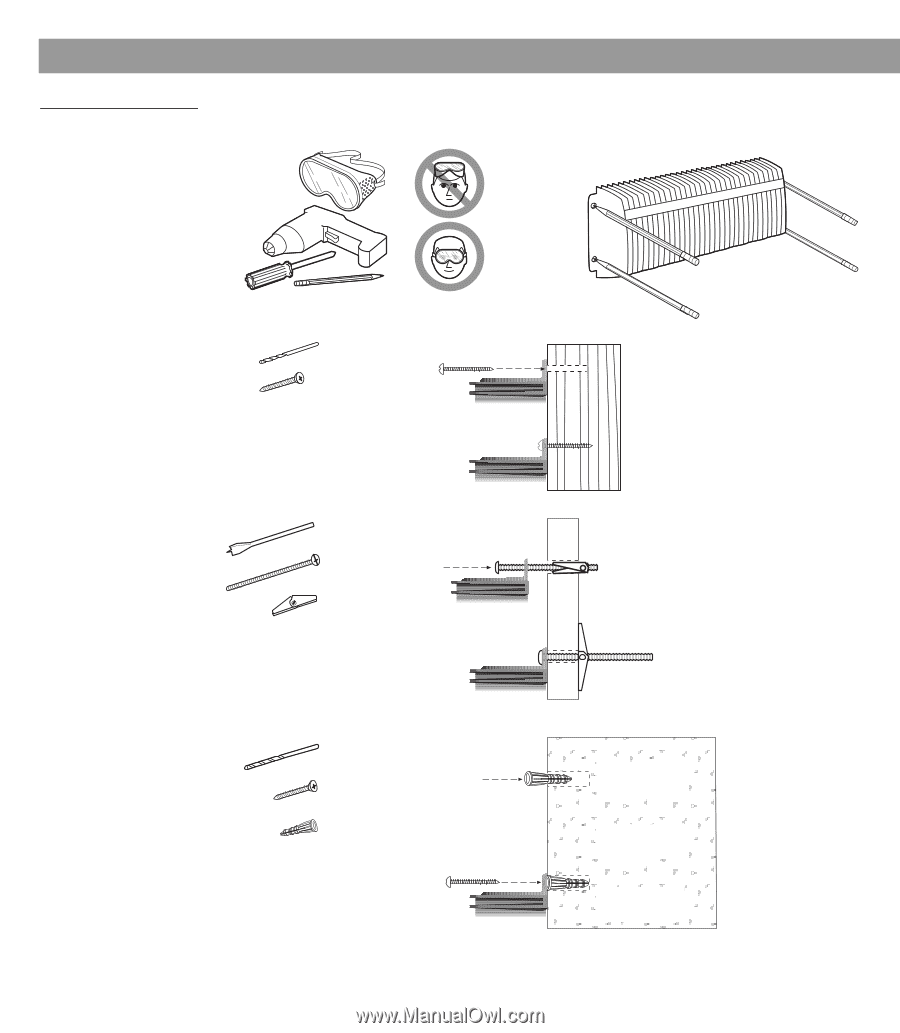
Setting Up Your Lifestyle® Stereo Amplifier Figure 5 Recommended mounting hardware You will need: To mark hole locations, first remove the rubber feet. Then, hold the amplifier in place and mark the wall through the clearance holes in the amplifier enclosure. /3 32 in. (2.25 mm) (4) #10 x 11/2 in. (M5 x 36 mm) 1/2 in. (12 mm) (4) #10 x 21/2 in. (M5 x 75 mm) (4) #10 (M5) 1/4 in. (6 mm) (4) #10 x 11/2 in. (M5 x 36 mm) (4) #10 x 1 in. (M5 x 25 mm) Wood wall Wallboard Masonry wall 6 January 4, 2002 AM262840_00_V.pdf
-
 1
1 -
2
-
 3
3 -
 4
4 -
 5
5 -
 6
6 -
 7
7 -
 8
8 -
 9
9 -
 10
10 -
 11
11 -
 12
12 -
 13
13 -
14
-
15
-
16
-
17
-
18
-
19
-
20
-
21
-
22
 |
 |
6
January 4, 2002
AM262840_00_V.pdf
Setting Up Your Lifestyle
®
Stereo Amplifier
Figure 5
Recommended mounting
hardware
(4) #10 x 1
1
/
2
in.
(M5 x 36 mm)
(4) #10 x 2
1
/
2
in.
(M5 x 75 mm)
3
/
32
in. (2.25 mm)
1
/
2
in. (12 mm)
1
/
4
in. (6 mm)
(4) #10 (M5)
(4) #10 x 1
1
/
2
in.
(M5 x 36 mm)
(4) #10 x 1 in.
(M5 x 25 mm)
You will need:
To mark hole locations,
fi
rst remove the rubber
feet. Then, hold the ampli
fi
er in place and mark
the wall through the clearance holes in the
ampli
fi
er enclosure.
Wood wall
Wallboard
Masonry wall