Bose Lifestyle T20 Installation guide
Bose Lifestyle T20 Manual
 |
View all Bose Lifestyle T20 manuals
Add to My Manuals
Save this manual to your list of manuals |
Bose Lifestyle T20 manual content summary:
- Bose Lifestyle T20 | Installation guide - Page 1
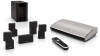
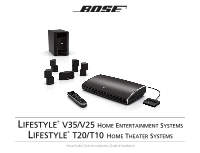
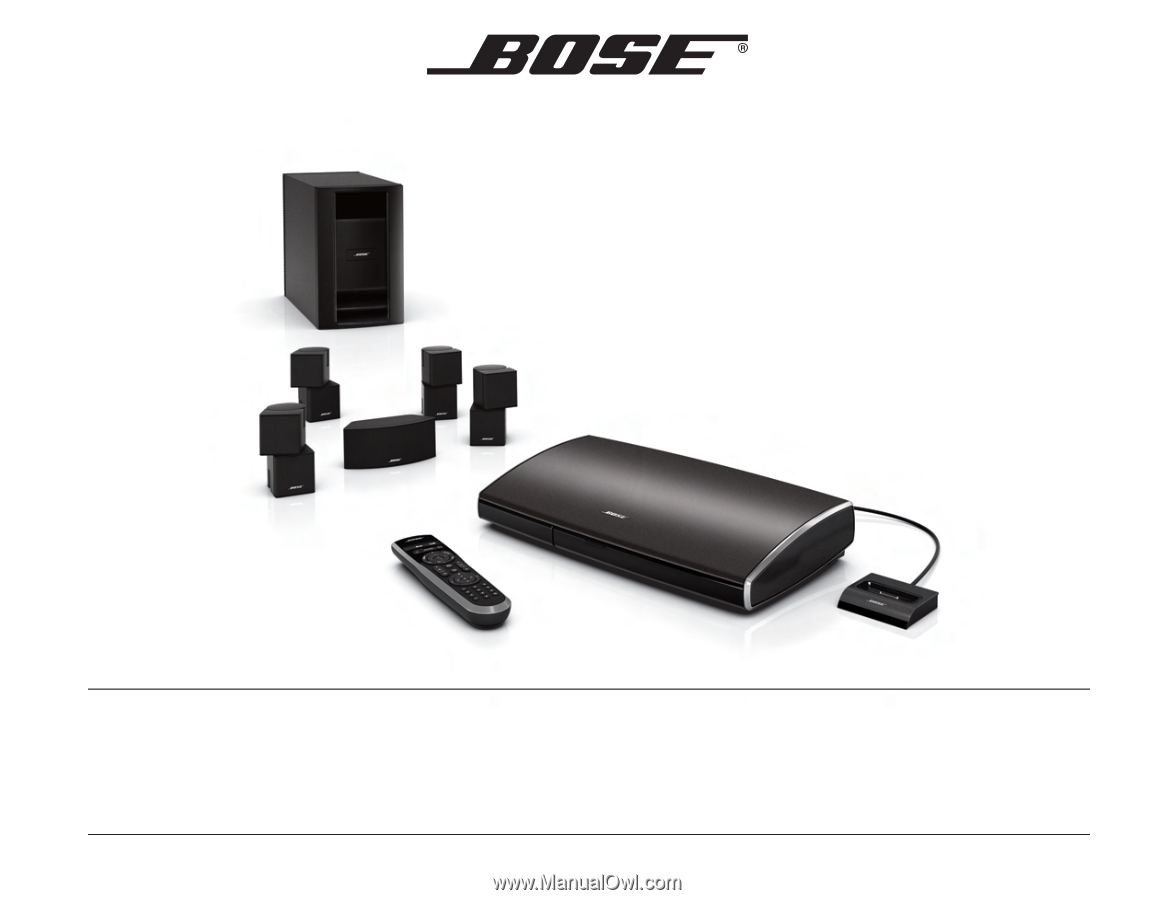
LIFESTYLE® V35/V25 HOME ENTERTAINMENT SYSTEMS LIFESTYLE® T20/ T10 HOME THEATER SYSTEMS Setup Guide | Guía de instalación | Guide d'installation - Bose Lifestyle T20 | Installation guide - Page 2
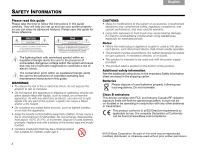
7 TAB 6 TAB 5 SAFETY INFORMATION Please read this guide Please take the time to follow the instructions in this guide carefully. They will help you set up and use your system properly so you can enjoy its advanced features. Please save this guide for future reference. The lightning flash with - Bose Lifestyle T20 | Installation guide - Page 3
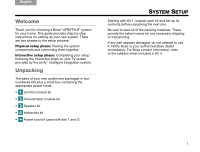
for choosing a Bose® LIFESTYLE® system for your home. This guide provides step-by-step instructions for setting up your new system. There are two phases to the setup process: Physical setup phase: Placing the system components and connecting them together. Interactive setup phase: Completing your - Bose Lifestyle T20 | Installation guide - Page 4
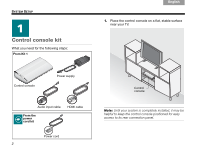
, stable surface near your TV. Control console Power supply Audio input cable From the power cord kit HDMI cable Power cord 2 Control console Note: Until your system is completely installed, it may be helpful to keep the control console positioned for easy access to its rear connection panel. - Bose Lifestyle T20 | Installation guide - Page 5
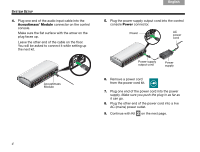
. If an HDMI cable is already connected to an HDMI input on your TV, you can use this one. Just disconnect the other end. TAB 5 TAB 6 TAB 7 TAB 8 SYSTEM SETUP 3. Plug the other end of the HDMI cable you are using into the connector labeled HDMI OUT Video to TV on the control console. HDMI OUT - Bose Lifestyle T20 | Installation guide - Page 6
cable on the floor. You will be asked to connect it while setting up the next kit. Acoustimass Module TAB 4 TAB 3 TAB 2 English 5. Plug the power supply output cord into the control console Power connector. Power AC power cord Power supply output cord Power supply 6. Remove a power cord - Bose Lifestyle T20 | Installation guide - Page 7
steps: From Kit 2 TAB 5 TAB 6 TAB 7 TAB 8 SYSTEM SETUP 1. Place the Acoustimass module on the floor at the same end of the room as the TV. Make sure there is a live AC outlet nearby. Acoustimass module Acoustimass module From the power cord kit Power cord 2. Lay the module on its side and - Bose Lifestyle T20 | Installation guide - Page 8
input cable into the Media Center connector on the Acoustimass module. Make sure the flat surface with the arrow faces the front of the module. Media Center TAB 4 TAB 3 TAB 2 English 4. Remove a power cord from the power cord kit. 5. Plug one end of the power cord into the AC Power connector - Bose Lifestyle T20 | Installation guide - Page 9
speaker cables TAB 7 TAB 8 SYSTEM SETUP Left front (L) White Center front (C) Brown Rear speaker cables Right front (R) Light blue (4) Left or right, front or rear speaker (1) Center front speaker Direct/Reflecting® cube speaker arrays (4) Left or right, front or rear speaker (1) Center - Bose Lifestyle T20 | Installation guide - Page 10
TAB 7 TAB 6 TAB 5 SYSTEM SETUP 1. Place the center front speaker on a stable and level surface directly above or below the center of your TV screen as in the following example. Left front (L) Center front (C) Right front (R) TAB 4 TAB 3 TAB 2 English 2. Place one speaker to the left and - Bose Lifestyle T20 | Installation guide - Page 11
RR) TAB 5 TAB 6 TAB 7 TAB 8 SYSTEM SETUP 4. Locate the colored connectors on the bottom panel of the Acoustimass module. Colored connectors • Make sure the 50 ft (15.2 m) rear speaker cables will reach from the speakers to the Acoustimass® module. • Aim the speakers away from the listeners to - Bose Lifestyle T20 | Installation guide - Page 12
6 TAB 5 SYSTEM SETUP 6. Locate the speaker position markings on the free ends of the speaker cables. TAB 4 TAB 3 TAB 2 English 7. Using the speaker position markings, run each cable out to its respective speaker as in the following setup example of a room. FRONT SPEAKERS Speaker position - Bose Lifestyle T20 | Installation guide - Page 13
speakers: Press the button and insert the wires. Connect the red-collared wire to the red connector. Connect the other wire to the black connector. Note: The rear speaker cables if you still notice interference. CAUTION: Do not put electronic media, such as video or audio tapes, on or next to the - Bose Lifestyle T20 | Installation guide - Page 14
positions. • Do not connect any devices to the control console at this time. The instructions provided on your TV will tell you when to do this. 1. Slide the battery compartment cover off the back of the remote control. AA (IEC LR6) batteries (4) Battery compartment cover 2. Install four AA (IEC - Bose Lifestyle T20 | Installation guide - Page 15
system. • Connect audio/video devices to the control console. • Configure your Bose® remote to control your connected devices. IR emitter cable Stereo audio cable AM antenna* FM antenna* Rubber feet for Acoustimass® module Rubber feet for front center speaker iPod/iPhonecompatible dock - Bose Lifestyle T20 | Installation guide - Page 16
guide. Contacting customer service For additional help in solving problems, contact Bose® Customer Service. See the address sheet included in Kit 4. Applicable only for LIFESTYLE® V25 and V35 home entertainment systems "Made for iPod" means that an electronic accessory has been designed to connect - Bose Lifestyle T20 | Installation guide - Page 17
English TAB 2 TAB 3 TAB 4 TAB 5 TAB 6 TAB 7 TAB 8 15 - Bose Lifestyle T20 | Installation guide - Page 18
©2010 Bose Corporation, The Mountain, Framingham, MA 01701-9168 USA AM324443 Rev.00
-
 1
1 -
 2
2 -
 3
3 -
 4
4 -
 5
5 -
 6
6 -
 7
7 -
8
-
9
-
10
-
11
-
12
-
13
-
14
-
15
-
16
-
17
-
18
 |
 |
L
IFESTYLE
®
V35/V25
H
OME
E
NTERTAINMENT
S
YSTEMS
L
IFESTYLE
®
T20/ T10
H
OME
T
HEATER
S
YSTEMS
Setup Guide | Guía de instalación | Guide d'installation