Brother International PE-DESIGN 10 Added Features of PE-DESIGN 10 Version 10.2 - Page 6
Exporting/Importing an FCM File, Exporting an FCM File
 |
View all Brother International PE-DESIGN 10 manuals
Add to My Manuals
Save this manual to your list of manuals |
Page 6 highlights
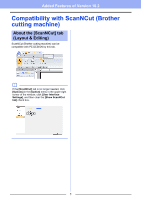
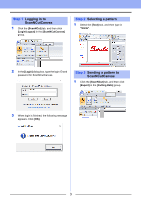
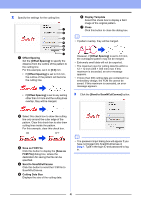
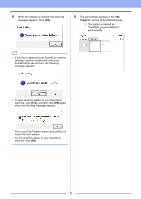
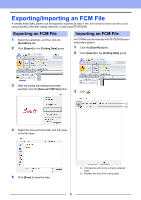
Exporting/Importing an FCM File A created embroidery pattern can be exported/ imported as data in the .fcm format so that it can be cut out using ScanNCut (Brother cutting machine), or edit using PE-DESIGN. Exporting an FCM File Importing an FCM File 1 Select the pattern(s), and then click the [ScanNCut] tab. 2 Click [Export] in the [Cutting Data] group. An FCM file can be imported into PE-DESIGN as an embroidery pattern. 1 Click the [ScanNCut] tab. 2 Click [Import] in the [Cutting Data] group 3 After the cutting line settings have been specified, click the [Save as FCM File] button. 3 Click . 1 2 4 Select the drive and the folder, and then type in the file name. 5 Click [Save] to save the data. 1 Indicates the path to the currently selected folder. 2 Displays the size of the cutting data. 6
-
 1
1 -
 2
2 -
 3
3 -
 4
4 -
 5
5 -
 6
6 -
 7
7
 |
 |
