Brother International PE-DESIGN2.0 Owner's Manual - English - Page 112
Circle and Arc Drawing Mode, Drawing a circle or an ellipse
 |
View all Brother International PE-DESIGN2.0 manuals
Add to My Manuals
Save this manual to your list of manuals |
Page 112 highlights
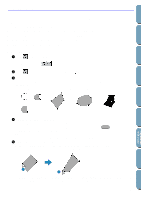
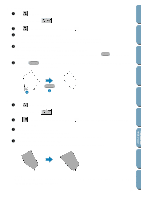
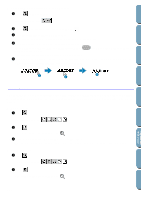
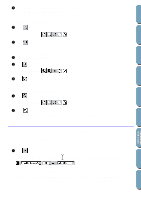
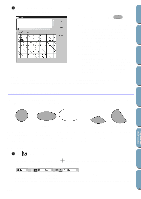
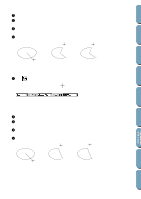
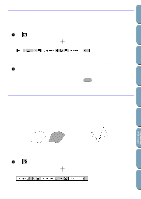
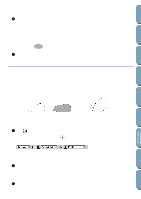
Contents Before Using Getting Started Design Center Layout & Editing 2 Click at a point where you want the text to appear. The Edit Text dialog displays. x Type your text. Press the Enter key to enter new lines of text. x You can also enter a character by clicking it on the character table, then clicking Insert or simply by double-clicking it. This is specially useful if you have to enter accented characters that are not available on your keyboard. x Click OK to confirm. Your text opens on the Design Page. x Click Cancel to exit. • If a character that you entered is not available for the selected font, a warning message displays. Click OK in that dialog to close it and to return to the Edit Text dialog where you can correct your text. NOTE: If you need to edit the entered text, you can do so in the Edit Text dialog which opens when you execute the Text - Edit Text Letters command. See "Edit Text Letters" on page 138. Circle and Arc Drawing Mode The circle or arc drawing mode allows you to create several patterns related to the circle: normal circles (or ellipses), arcs, fan shapes and arc & strings. File Utility Programmable Stich Creator Quick Reference Alphabetic Index Circle Ellipse Arc Fan shape Arc & string All these patterns, except arcs have an outline and a region inside can independently be assigned different sewing attributes. Arcs are simple outlines. Note that you have to decide which pattern type you want to draw before drawing it. You cannot, for example, draw a normal circle and change it into an arc afterwards. s Drawing a circle or an ellipse 1 Click on the Tool Box. The shape of the cursor changes to Attributes bar now looks like this: and displays together with a small ellipse. The Sewing You can select the colors and stitches at this step or after creating the pattern. See "Color" on page 117 and "Stitch" on page 119. You can also set the sewing attributes using the Sew menu (see "Sewing Attribute Setting" on page 144). 102
-
 1
1 -
2
-
3
-
4
-
5
-
6
-
7
-
8
-
9
-
10
-
11
-
12
-
13
-
14
-
15
-
16
-
17
-
18
-
19
-
20
-
21
-
22
-
23
-
24
-
25
-
26
-
27
-
28
-
29
-
30
-
31
-
32
-
33
-
34
-
35
-
36
-
37
-
38
-
39
-
40
-
41
-
42
-
43
-
44
-
45
-
46
-
47
-
48
-
49
-
50
-
51
-
52
-
53
-
54
-
55
-
56
-
57
-
58
-
59
-
60
-
61
-
62
-
63
-
64
-
65
-
66
-
67
-
68
-
69
-
70
-
71
-
72
-
73
-
74
-
75
-
76
-
77
-
78
-
79
-
80
-
81
-
82
-
83
-
84
-
85
-
86
-
87
-
88
-
89
-
90
-
91
-
92
-
93
-
94
-
95
-
96
-
97
-
98
-
99
-
100
-
101
-
102
-
103
-
104
-
105
-
106
-
 107
107 -
 108
108 -
 109
109 -
 110
110 -
 111
111 -
 112
112 -
 113
113 -
 114
114 -
 115
115 -
 116
116 -
 117
117 -
118
-
119
-
120
-
121
-
122
-
123
-
124
-
125
-
126
-
127
-
128
-
129
-
130
-
131
-
132
-
133
-
134
-
135
-
136
-
137
-
138
-
139
-
140
-
141
-
142
-
143
-
144
-
145
-
146
-
147
-
148
-
149
-
150
-
151
-
152
-
153
-
154
-
155
-
156
-
157
-
158
-
159
-
160
-
161
-
162
-
163
-
164
-
165
-
166
-
167
-
168
-
169
-
170
-
171
-
172
-
173
-
174
-
175
-
176
-
177
-
178
-
179
-
180
-
181
-
182
-
183
-
184
-
185
-
186
-
187
-
188
-
189
-
190
-
191
-
192
-
193
-
194
-
195
-
196
-
197
-
198
-
199
-
200
 |
 |
