Brother International RH-9820 Instruction Manual - English - Page 105
Adjusting the lower thread feeding amount <-01 specifications only>
 |
View all Brother International RH-9820 manuals
Add to My Manuals
Save this manual to your list of manuals |
Page 105 highlights
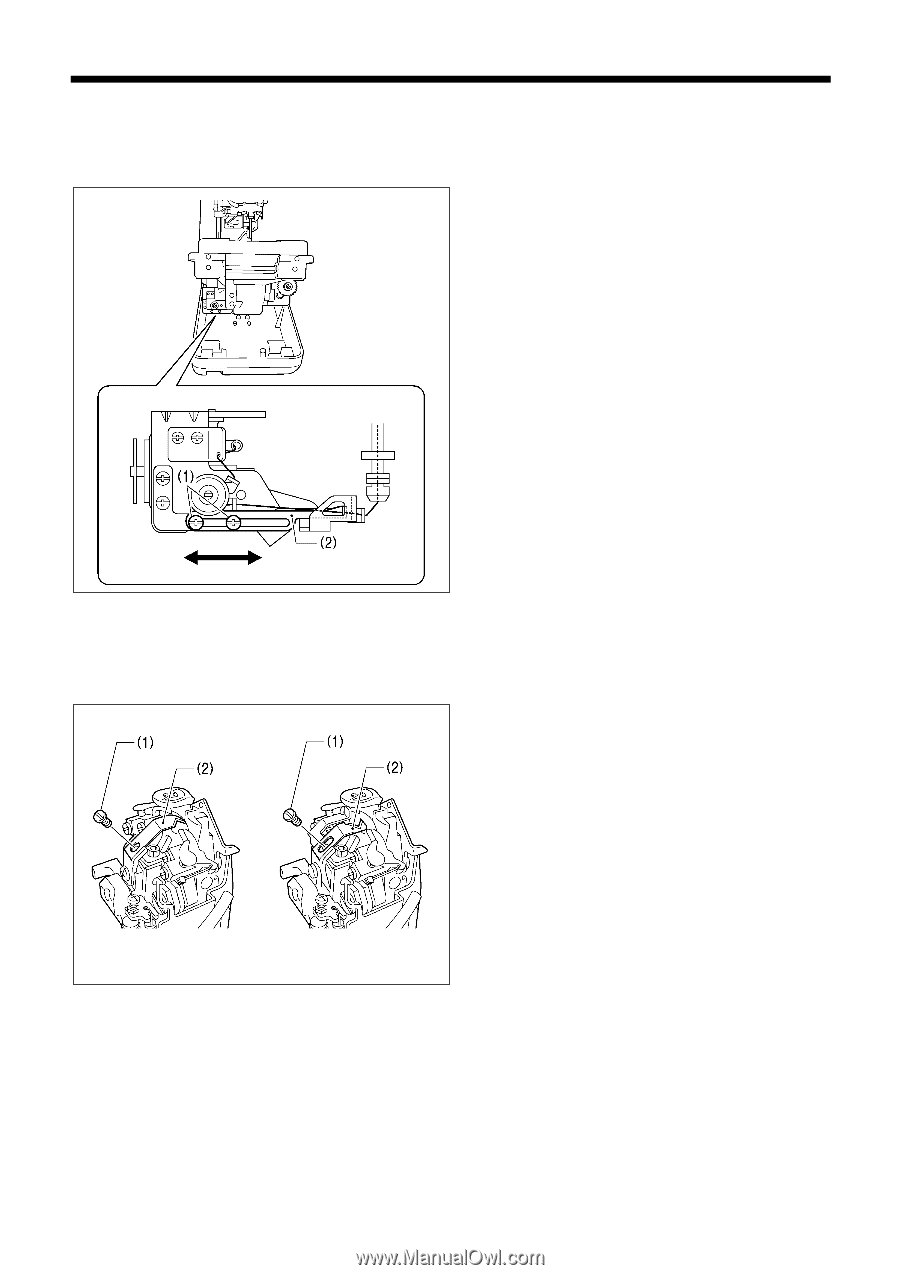
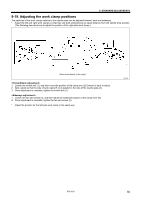
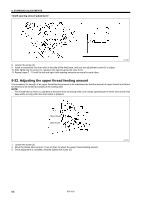
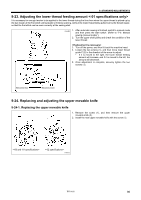
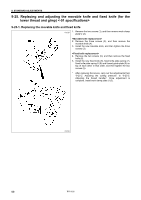
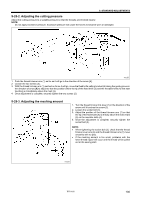
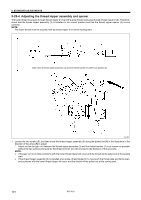
9. STANDARD ADJUSTMENTS 9-23. Adjusting the lower thread feeding amount It is necessary for enough tension to be applied to the lower thread during the time from when the upper thread is picked up by the eye looper at the first stitch until spreader L finishes opening, without the lower thread being pulled out by the thread nipper, so that the first stitch can be sewn correctly at the sewing start. 0399B 1. After automatic sewing is finished, switch to manual mode and then press the start switch. (Refer to "7-6. Manual sewing (manual mode)".) 2. Turn the upper shaft pulley and check the condition of the lower thread. 3. Turn off the power, and then tilt back the machine head. 4. Loosen the two screws (1), and then move lower thread guide C (2) in the direction of the arrow to adjust. * If it is moved to the right, the lower thread feeding amount will increase, and if it is moved to the left, the amount will decrease. 5. Once adjustment is complete, securely tighten the two screws (1). Becomes less Becomes more 9-24. Replacing and adjusting the upper movable knife 9-24-1. Replacing the upper movable knife 1. Remove the screw (1), and then remove the upper movable knife (2). 2. Install the new upper movable knife with the screw (1). 0401B RH-9820 96
-
 1
1 -
2
-
3
-
4
-
5
-
6
-
7
-
8
-
9
-
10
-
11
-
12
-
13
-
14
-
15
-
16
-
17
-
18
-
19
-
20
-
21
-
22
-
23
-
24
-
25
-
26
-
27
-
28
-
29
-
30
-
31
-
32
-
33
-
34
-
35
-
36
-
37
-
38
-
39
-
40
-
41
-
42
-
43
-
44
-
45
-
46
-
47
-
48
-
49
-
50
-
51
-
52
-
53
-
54
-
55
-
56
-
57
-
58
-
59
-
60
-
61
-
62
-
63
-
64
-
65
-
66
-
67
-
68
-
69
-
70
-
71
-
72
-
73
-
74
-
75
-
76
-
77
-
78
-
79
-
80
-
81
-
82
-
83
-
84
-
85
-
86
-
87
-
88
-
89
-
90
-
91
-
92
-
93
-
94
-
95
-
96
-
97
-
98
-
99
-
 100
100 -
 101
101 -
 102
102 -
 103
103 -
 104
104 -
 105
105 -
 106
106 -
 107
107 -
 108
108 -
 109
109 -
 110
110 -
111
-
112
-
113
-
114
-
115
-
116
-
117
-
118
-
119
-
120
-
121
-
122
-
123
-
124
-
125
 |
 |