Brother International XL-2027 Users Manual - English - Page 16
Using, Attachments, Applications
 |
View all Brother International XL-2027 manuals
Add to My Manuals
Save this manual to your list of manuals |
Page 16 highlights
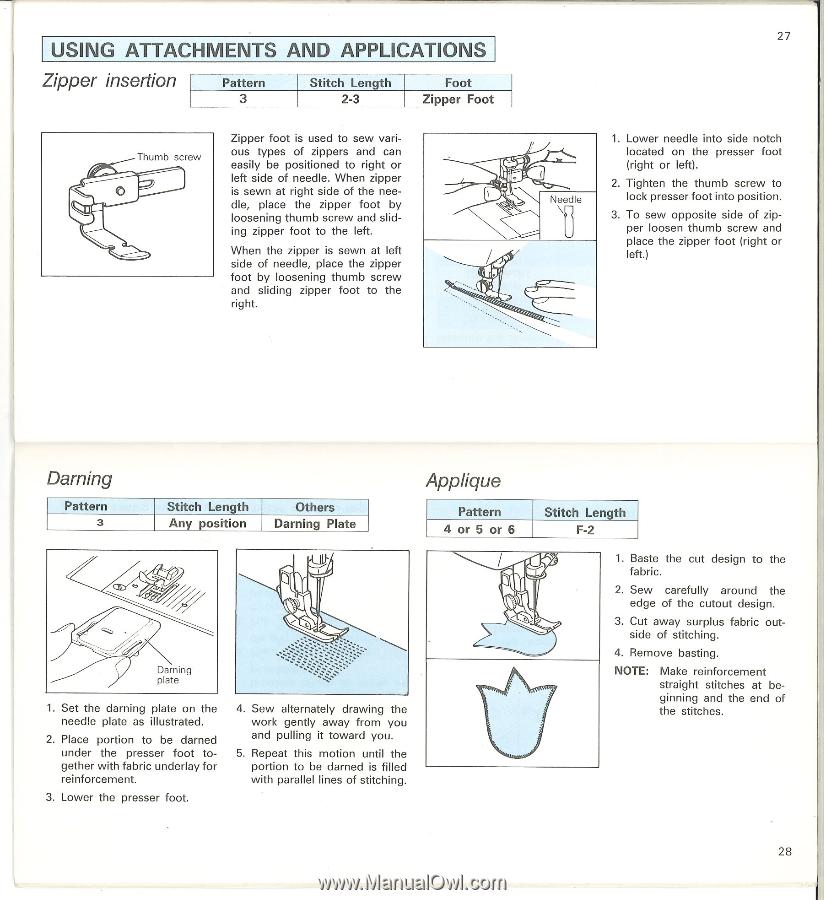
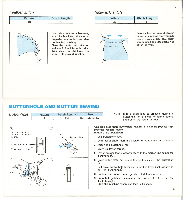
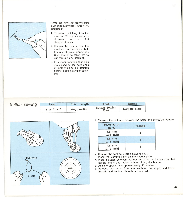
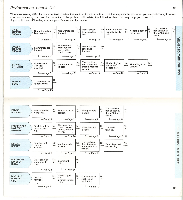
27 USING ATTACHMENTS AND APPLICATIONS Zipper insertion Pattern 3 Stitch Length 2-3 Foot Zipper Foot Thumb screw O Zipper foot is used to sew various types of zippers and can easily be positioned to right or left side of needle. When zipper is sewn at right side of the needle, place the zipper foot by loosening thumb screw and sliding zipper foot to the left. When the zipper is sewn at left side of needle, place the zipper foot by loosening thumb screw and sliding zipper foot to the right. -N Needle 1. Lower needle into side notch located on the presser foot (right or left). 2. Tighten the thumb screw to lock presser foot into position. 3. To sew opposite side of zipper loosen thumb screw and place the zipper foot (right or left.) Darning Pattern 3 Stitch Length Any position Others Darning Plate Applique Pattern 4 or 5 or 6 Darning plate 1. Set the darning plate on the needle plate as illustrated. 2. Place portion to be darned under the presser foot together with fabric underlay for reinforcement. 3. Lower the presser foot. 4. Sew alternately drawing the work gently away from you and pulling it toward you. 5. Repeat this motion until the portion to be darned is filled with parallel lines of stitching. Stitch Length F-2 1. Baste the cut design to the fabric. 2. Sew carefully around the edge of the cutout design. 3. Cut away surplus fabric outside of stitching. 4. Remove basting. NOTE: Make reinforcement straight stitches at beginning and the end of the stitches. 28
-
 1
1 -
2
-
3
-
4
-
5
-
6
-
7
-
8
-
9
-
10
-
 11
11 -
 12
12 -
 13
13 -
 14
14 -
 15
15 -
 16
16 -
 17
17 -
 18
18 -
 19
19 -
 20
20 -
 21
21 -
22
 |
 |