Brother International XR-35 Users Manual - Multi
Brother International XR-35 Manual
 |
View all Brother International XR-35 manuals
Add to My Manuals
Save this manual to your list of manuals |
Brother International XR-35 manual content summary:
- Brother International XR-35 | Users Manual - Multi - Page 1
OPERATION MANUAL MANUAL DE INSTRUCCIONES English Spanish 194232-111 Printed in Taiwan brother® - Brother International XR-35 | Users Manual - Multi - Page 2
needle, threading the bobbin, or changing the presser foot. 15. Always unplug the sewing machine from the electrical outlet when removing covers, lubricating, or when making any other user service adjustments mentioned in this instruction manual. "SAVE THESE INSTRUCTIONS" "This sewing machine is - Brother International XR-35 | Users Manual - Multi - Page 3
BUTTON SEWING Making a Buttonhole 43 Buttonhole Fine Adjustment 45 Button Sewing 47 INDICE CONOZCA SU MAQUINA DE COSER Elementos principales 1 Accesorios 3 Funcionamiento de la maquina de coser 4 Conexion de los enchufes 4 Interruptor principal y de luz 5 Pedal 5 Cambio de la - Brother International XR-35 | Users Manual - Multi - Page 4
HOLDER Used to hold a second spool of thread for twin needle sewing. C) STITCH WIDTH DIAL Controls the stitch width. C) Porta Bobinas Hace bobina para la canilla que va a ser utilizada como hilo inferior. © Porta carretes Soporta el hilo de coser. © Selector de largo de puntada Controla el largo - Brother International XR-35 | Users Manual - Multi - Page 5
de accesorios, dentro de soporte de accesortos. Hansido concebidosparapoderrealizar la mayorfa de las operaciones de costura. OPERATING YOUR SEWING MACHINE any way. Funcionamiento de la maquina de coser Conexion de los enchufes 1. Conecte el enchufe de tres clavijas a la maquina. Enelcord0n, se - Brother International XR-35 | Users Manual - Multi - Page 6
,EI3SO0 30 vmnovw ns V0ZONO0 , W ONIM3S . fl • Jl ONIM• KNOWING YOUR SEWING MACHINE CONOZCA SU MAQUINA DE COSER Main Power and Sewing Light Switches This switch turns the main power and sewing light on or off. 0 Turn on (toward the "I" mark) C) Turn off (toward the "0" mark) lnterruptor principal - Brother International XR-35 | Users Manual - Multi - Page 7
libre 10.7 La costura con brazo libre es practica para coser zonas tubulares y dificiles de acceso en los tejido. Para transformar su maquina en esa modalidad, solohace falta desmontarelsoporte delosaccesorios tirando de el. 0 Levante el soporte. p Deslice el soporte hacia la izquierda. ® Extension - Brother International XR-35 | Users Manual - Multi - Page 8
SEWING M CHINE CONOZCA SU MAQU1NA DE COSER RECOMMENDED WIDTHS AND LENGTHS FOR STITCHES PATTERN STITCH NAME 1 1-STEP AUTOMATIC BUTTONHOLE (3/32) Fija 2,5 (3/32) Fija 2,5 (3/32) Fija 2,5 (3/32) Fija 2,5 (3/32) PAGINA DEL MANUAL 43 30 33 34 35 36 34 37 37 38 38 39 39 39 40 40 41 40 40 42 30 10 - Brother International XR-35 | Users Manual - Multi - Page 9
to give you instructions about how to make the correction. 1. When you slide the bobbin winder pin to the right for bobbin winding, the machine will only allow you to wind the bobbin and the message "BOBBIN WINDING" will appear on the display. 2. When you set the machine to sew a buttonhole, but the - Brother International XR-35 | Users Manual - Multi - Page 10
Using the Instruction keys (Example) Initial Display A F-1.5 # 1:BUTTONHOLE (PRESS 4, KEY) A B ( ) 1. Press the ( ) key. A 2. Press the ( ) key to choose one of the following major categories based on the sewing information you need: Al) SEWING PATTERN A2) USING MACHINE A3) TROUBLE SHOOTING - Brother International XR-35 | Users Manual - Multi - Page 11
(PRESS KEY) A1)SEWING PATTERN (SELECT WITH A KEY AND PRESS KEY) A2)USING MACHINE -> B1)WINDING BOBBIN 4- -> A3)TROUBLE SHOOTING A4)FABRIC•THREAD• NEEDLE B1)NEEDLE BREAKS B1)NORMAL FABRIC B 1)ATTACH BUTTONHOLE FOOT(A) A2)USING MACHINE B2)REPLACING BOBBIN A3)TROUBLE SHOOTING B2)UPPER - Brother International XR-35 | Users Manual - Multi - Page 12
you instructions about how to make the correction. 1 When you slide the bobbin winder pin to the right for bobbin winding, the machine will only allow you to wind the bobbin and the message "BOBBIN WINDING SELECTED" will appear on the display. 2. When you set the machine to sew a buttonhole, but - Brother International XR-35 | Users Manual - Multi - Page 13
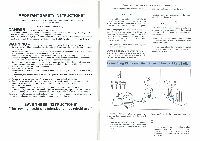
. Pass the thread through the thread guide as shown following the dotted line on the machine. 3. Pass the end of the thread through the hole on the bobbin from the inside. C) Clutch Release Switch ® Bobbin winding Enhebrado de la maquina Bobinado de 1. Gamble elconmutadorbobina-aguja de la marca - Brother International XR-35 | Users Manual - Multi - Page 14
the machine, it will fall out from the shuttle immediately after starting to sew. (J) Bobbin case latch ® Bobbin case finger 0 Tension spring ® Metal finger ® Notch B-1 1. Levante la aguja a su posicion dies alta, girando la ruedecilla hacia usted (en el sentido contrario al de las manecillas de un - Brother International XR-35 | Users Manual - Multi - Page 15
and position the thread under the guide. ® Needle threader ® Guide 2. Move the threader to its lowest position and guide the thread under the hook which passes through the eye of the needle. Cg) Hook Uso del enhebrador (Cuando la maquina esta provista de un en hebrador de aguja) Sepuede usar - Brother International XR-35 | Users Manual - Multi - Page 16
through the eye of the left needle as shown below in fig. B. C) Right needle thread passes through this guide. C) Left needle thread in front of this guide. Costura con aguja doble Su maquina de coser ha sido concebida para poder utilizar una aguja doble ypermitirla costura con dos hilos superiores - Brother International XR-35 | Users Manual - Multi - Page 17
Single Knit, Double Knit, Jersey, Tricot Ball point 14 Cotton Wrapped Polyester NOTE: 1. Select the correct needle and thread size from the above chart. 2. Use the same size thread for the upper and lower threads (spool and bobbin). 28 KNOWING YOUR SEWING MACHINE CONOZCA SU MAOU1NA DE COSER - Brother International XR-35 | Users Manual - Multi - Page 18
14 (provista con su maquina) Algodon: 60-80 Sewing Button and start sewing in the forward direction by applying pressure to the foot controller. Puntadas rectas Numero de puntada 2 (Puntada recta) 21 (Triple Puntada Pespunto) Largo de puntada Ancho de puntada 1-4 5 Fija 2,5 Para empezar a coser - Brother International XR-35 | Users Manual - Multi - Page 19
inferiorypaseloporlos salientes delprensatelas hacia la parte posterior de la maquina. Cortador de hilos OVZDIZA Sti.1931:1 SVGV.I.NrId ONIHOILLS OVZDIZ aNY 1HDIVELLS STRAIGHT AND ZIGZAG STITCHING PUNTADAS RECTAS Y ZIGZAG Finishing Sewing Reverse stitching is used to lock the threads at the end of - Brother International XR-35 | Users Manual - Multi - Page 20
buttonholes and decorative stitches. Select the Zigzag Stitch (3), then set the stitch length in the "F" range and the stitch width. Puntada de realce Cuando se define el largo de la puntada en la parte Sew on coser para esconderlos. 3. Ponga elselector de puntadas en 4 ó 7ajuste en largo y ancho de - Brother International XR-35 | Users Manual - Multi - Page 21
over the folded edge. 3. This stitch requires a tighter thread tension than normal. 4. Sew at a slow speed. 0 • Namero de puntada 5 (Puntada Ondas) Largo de puntada Ancho de puntada F-3 3-5 La puntada ondas puede usarse para coser una puntilla (como encaje) en un tejido lino. 1. Ponga - Brother International XR-35 | Users Manual - Multi - Page 22
Dial to 9. 2. Sew the Scallop Stitch along the edge of the material. 3. If desired, trim around the scallop with scissors to create a scalloped edge. Be careful not to cut the thread. ti ®mil Mitnero de puntada Largo de puntada Ancho de puntada 9 (Puntada FestOn) F-1,5 3-5 Esta maquina puede - Brother International XR-35 | Users Manual - Multi - Page 23
6 mm (1/4") dado que asi permite a la parte derecha (zigzag) de la puntada enganchar la orilla cortada deltejido talcomoilustrado enla fig. A. 3. Si la tolerancia de costura es mas ancha que la puntada, corte cua/quier pedazo de tejido que sobre despues de coser. En la fig. B, puede ver una Puntada - Brother International XR-35 | Users Manual - Multi - Page 24
Set the Pattern Selection Dial to 17. 2. Place the fabric right side up and sew 1 cm (3/8") from the edge of the fabric. 3. Trim close to the Numero de puntada Largo de puntada Ancho de puntada 20 (Triple Puntada Zigzag Elastica) Fija 2,5 3-5 Esta puntada puede server para coser materiales - Brother International XR-35 | Users Manual - Multi - Page 25
7. While gently holding the upper thread, start the machine. 8. Buttonhole stitching is done in order, 1-4, as shown in fig. D. 9. Stop the machine when the bar tacks are sewn. Para coser ojales Numero de Puntada Largo de puntada Ancho de puntada Prensatelas 1 F-1,5 3-5 Prensatelas para ojales - Brother International XR-35 | Users Manual - Multi - Page 26
, turn the material 90 degrees counterclockwise and sew Straight Stitches (2) to the end of the front bar tack of the buttonhole. 2. Remove the material from the machine. It is recommended that pins be placed across both ends of the buttonhole as protection against cutting the stitches. 3. Cut - Brother International XR-35 | Users Manual - Multi - Page 27
hits see step 1. 5. At a slow speed, sew approximately 10 stitches. 6. Remove the material from the machine. Cut the upper and lower threads and tie both threads at the back of the material. Costura de botones Puntada 3 Largo de puntada Ancho de puntada Prensatelas F cualquiera rensatelas para - Brother International XR-35 | Users Manual - Multi - Page 28
about 2) so that the lower thread lies on the underside of the material. 3. Sew a single row or multiple rows of Straight Stitches. 4. Pull the lower thread(s) to gather the material. Fruncido Puntada 2 Largo de puntada 2 1. Ponga el selector de puntadas en 2. 2. Sueltela tension delhilosuperior - Brother International XR-35 | Users Manual - Multi - Page 29
Pull the lower thread up through the work supporting the outside of the hoop with your smaller fingers. Monogramas y bordados Puntada Largo de puntada Ancho de de cada mano, presione el tejido con los dedos medios y anularesyaguantelos exteriores delbastidorcon los meniques. I MONOGRAMMING 1. Sew - Brother International XR-35 | Users Manual - Multi - Page 30
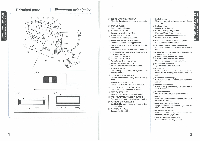
used more than one hour a day. If the machine is used more often, oil every day. Sewing machine oil is available from your local sewing machine dealer or service center. Engrasado 1. Desenchufe la maquina. 2. Ponga 2 ó 3 gotas de aceite en cada uno de los puntos setralados en la fig. A. 3. Despues - Brother International XR-35 | Users Manual - Multi - Page 31
la parte superior de los dientesyelcuerpo de la lanzadera con un cepillo. Performance Checklist Whenever sewing difficulties are encountered, review the section in this instruction manual that details the operation you are performing to make sure you are correctly using the machine. If the problem - Brother International XR-35 | Users Manual - Multi - Page 32
is not correct. Page 23 The combination of needle size/ thread size/fabric is incorrect. 4 Page 28 iNo CONTACT YOUR LOCAL SERVICE CENTER 57 LISTADO DE POSIBLES INCIDENCIAS ROTURA DEL HILO SUPERIOR ROTURA DEL HILO INFERIOR SALTO DE PUNTADAS BAGAS EN LAS PUNTADAS ARRUGAS EN EL TEJIDO El hilo - Brother International XR-35 | Users Manual - Multi - Page 33
MACHINE IS MACHINE thread size bobbin mark. ♦ Page 20 No Darning plate is installed. • CONTACT YOUR LOCAL SERVICE CENTER 59 LISTADO DE POSIBLES INCIDENCIAS EL TEJIDO NO ARRASTRA BIEN LA AGUJA SE ROMPE LA MAQUINA ES RUIDOSA O FUNCIONA MUY DESPACIO LA MAQUINA NO ARRANCA El selector de largo de - Brother International XR-35 | Users Manual - Multi - Page 34
future use. It may become necessary to reship the sewing machine. Improper packing or improper packing material could result in damage during shipping. Instructions for repacking the machine are illustrated below. Embalaje de la maquina Guarde la caja de carton y el embalaje por si acaso necesita - Brother International XR-35 | Users Manual - Multi - Page 35
Stretch Stitch Troubleshooting Twin Needle Sewing 27 30 42 57, 59 26 U Upper Tension Control Dial 27 Upper Threading 23 W Winding the Bobbin 20 Z Zigzag Stitch 33 Zipper Insertion 48 M Modalidad brazo libre Monogramas 0 Ojales P Pedal Pulsador de retroceso Puntada de triple pespunte
-
 1
1 -
 2
2 -
 3
3 -
 4
4 -
 5
5 -
 6
6 -
 7
7 -
8
-
9
-
10
-
11
-
12
-
13
-
14
-
15
-
16
-
17
-
18
-
19
-
20
-
21
-
22
-
23
-
24
-
25
-
26
-
27
-
28
-
29
-
30
-
31
-
32
-
33
-
34
-
35
 |
 |
English
Spanish
194232-111
Printed
in
Taiwan
OPERATION
MANUAL
MANUAL
DE
INSTRUCCIONES
brother®