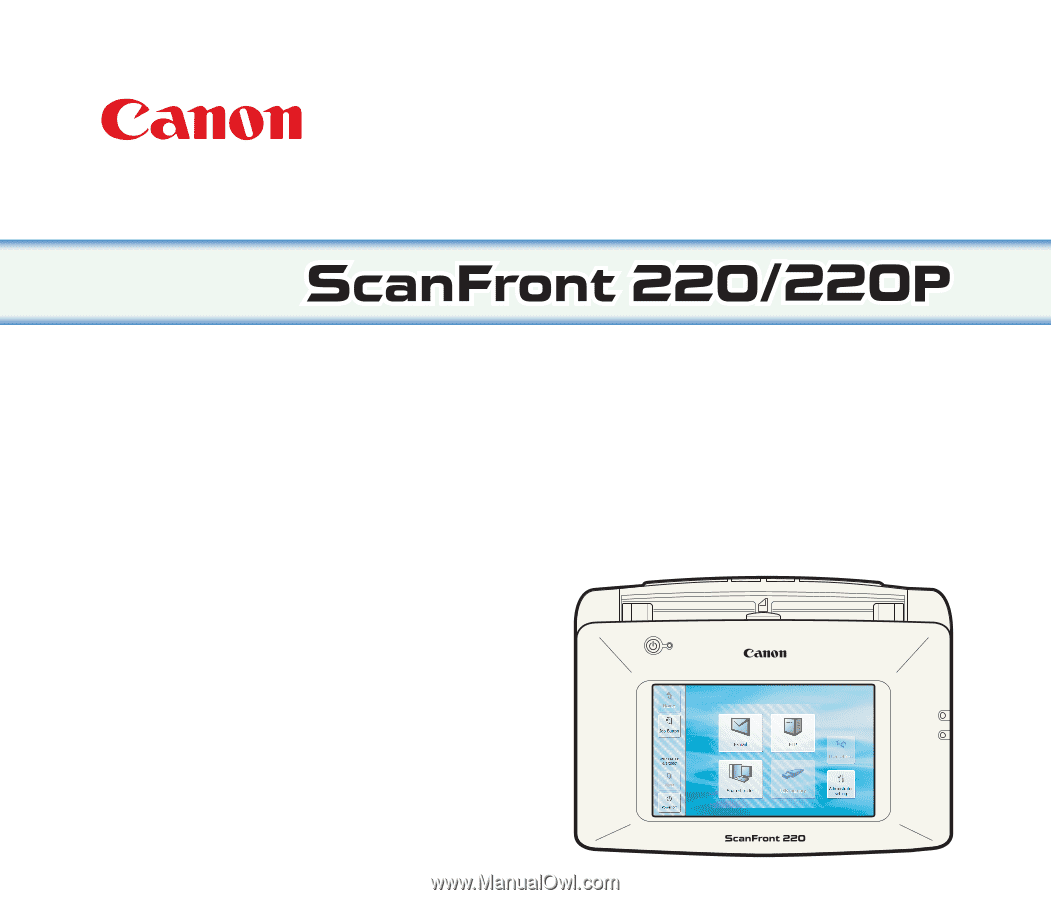
Canon 2263B002 Instruction Manual
Canon 2263B002 - imageFORMULA ScanFront 220 Manual
 |
UPC - 013803085150
View all Canon 2263B002 manuals
Add to My Manuals
Save this manual to your list of manuals |
Canon 2263B002 manual content summary:
- Canon 2263B002 | Instruction Manual - Page 1
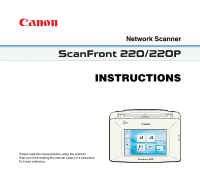
Network Scanner INSTRUCTIONS Please read this manual before using the scanner. After you finish reading this manual, keep it in a safe place for future reference. - Canon 2263B002 | Instruction Manual - Page 2
in accordance with the instructions, may cause harmful interference manual. If such changes or modifications should be made, you could be required to stop operation of the equipment. Canon U.S.A. Inc. One Canon 003 édictée par l'Industrie Canada. For CA, USA Only Included battery contains Perchlorate - Canon 2263B002 | Instruction Manual - Page 3
by any information storage or retrieval system without the prior written permission of CANON ELECTRONICS INC. Disclaimers The information in this document is subject to change without notice. CANON ELECTRONICS INC. MAKES NO WARRANTY OF ANY KIND WITH REGARD TO THIS MATERIAL, EITHER EXPRESS OR IMPLIED - Canon 2263B002 | Instruction Manual - Page 4
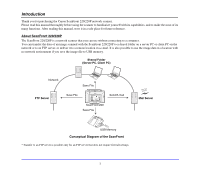
Introduction Thank you for purchasing the Canon ScanFront 220/220P network scanner. Please read this manual thoroughly before using the scanner to familiarize yourself with its capabilities, and to make the most of its many functions. After reading this manual, store it in a safe place for future - Canon 2263B002 | Instruction Manual - Page 5
the ScanFront 220/220P INSTRUCTIONS (electronic manual). INSTRUCTIONS (Electronic Manual): This Manual Describes how to use the scanner, and includes instructions for configuring the scanner settings, as well as handling, maintenance, and troubleshooting information. This manual is stored as a PDF - Canon 2263B002 | Instruction Manual - Page 6
❏ How This Manual is Organized This manual consists of the following chapters. Chapter 1 Before Use This chapter clean the scanner and replace the feed roller. Chapter 8 Troubleshooting This chapter describes how to respond when problems occur or warning messages appear. Chapter 9 Appendices This - Canon 2263B002 | Instruction Manual - Page 7
Disposal 1-5 2. Features of the ScanFront 220/220P 1-6 ScanFront 220/220P 1-6 ScanFront 220P 1-7 3. Names and Functions of Parts 1-8 Front and Document Feed and Eject Trays.......... 1-8 Side and Rear 1-9 4. Network Environment 1-10 Network Environment 1-10 Directory Service Support 1-10 - Canon 2263B002 | Instruction Manual - Page 8
5. Job Button Settings 4-16 Registering New Job Buttons 4-17 Scan Settings Overview 4-18 Copying Job Buttons 4-22 Exporting and Importing Job Buttons 4-23 6. Device Configuration 4-24 Network Setting 4-25 Language/Timezone 4-25 Device Operation 4-25 Login Options 4-26 Administrator - Canon 2263B002 | Instruction Manual - Page 9
Roller 7-6 2. Replacing the Rollers and Document Holding Guide 7-8 Roller Replacement Kit 7-8 Replacing the Document Holding Guide 7-8 Checking the Page Count and Resetting the Counter 7-9 Chapter 8 Troubleshooting 1. Troubleshooting 8-2 2. Error Messages (ScanFront 8-5 3. Error Messages (Web - Canon 2263B002 | Instruction Manual - Page 10
Disposal 1-5 2. Features of the ScanFront 220/220P 1-6 ScanFront 220/220P 1-6 ScanFront 220P 1-7 3. Names and Functions of Parts 1-8 Front and Document Feed and Eject Trays ..........1-8 Side and Rear 1-9 4. Network Environment 1-10 Network Environment 1-10 Directory Service Support 1-10 - Canon 2263B002 | Instruction Manual - Page 11
Chapter 1 Before Use 1. Important Safety Instructions To ensure the safe operation of this scanner, be sure to read the safety warnings and precautions described below. ❏ Installation Location The performance of this - Canon 2263B002 | Instruction Manual - Page 12
with any other electrical devices. Model: MG1-3968 ● If you have any questions regarding the power supply, contact your local authorized Canon dealer or service representative for further information. ❏ Moving the Scanner ● When moving the scanner, always hold it with both hands to avoid dropping it - Canon 2263B002 | Instruction Manual - Page 13
use the machine, immediately turn the power OFF, and disconnect the power plug from the power outlet. Then, contact your local authorized Canon dealer or service representative for further information. ■ Do not drop the scanner, or subject it to impact or strong shock. Should the scanner ever become - Canon 2263B002 | Instruction Manual - Page 14
❏ About the Fingerprint Sensor (ScanFront 220P only) ● The following actions may damage the sensor or cause it to malfunction: - Dropping an object on the fingerprint sensor, or otherwise subjecting it to a strong impact - Scratching the surface of the fingerprint sensor, or poking it with a pointed - Canon 2263B002 | Instruction Manual - Page 15
of the ScanFront 220/220P The main features of the ScanFront 220/220P are described below. ❏ ScanFront 220/ and keyboard to operate the scanner. (See p. 2-6.) ● Supports Directory Services The scanner supports directory services (Active Directory and LDAP), which enables you to reference and use - Canon 2263B002 | Instruction Manual - Page 16
Chapter 1 Before Use ● Text Enhance Mode The background color of the text are processed to enhance the text portions and make them easy to read. * This function may not work effectively for some documents. ● Double Feed Detection by Length When the scanner detects a double feed by comparing the - Canon 2263B002 | Instruction Manual - Page 17
to unlock the panel unit. (See p. 2-10.) d Document Feed Tray Pull out the feed tray to match the length of the document. (See p. 2-4.) e Document Guides Adjust these to match the width of the document. (See p. 2-7.) f Panel Unit Open this when there is a paper jam or to perform maintenance. (See - Canon 2263B002 | Instruction Manual - Page 18
.1/Hi-Speed USB2.0 compatible USB memory device, USB keyboard, or USB mouse. p Power Connector (16 VDC) Connect the plug of the supplied AC adapter. (See p. 3-3.) q Service Switch This is a service switch. Do not insert any object into this hole. r Ventilation Holes 1-9 - Canon 2263B002 | Instruction Manual - Page 19
the local network, and is unable to send to an FTP server that requires firewall settings. ❏ Directory Service Support ● Active Directory Active Directory is a directory service adopted by Windows 2000, and information registered to Active Directory can be used on other computers. The ScanFront - Canon 2263B002 | Instruction Manual - Page 20
Chapter 2 Handling 1. Documents 2-2 Plain Paper 2-2 Business Card 2-2 Card 2-3 2. Preparing the Scanner 2-4 Preparing the Document Feed Tray and Eject Tray 2-4 Feed Selection Lever 2-5 USB Port 2-5 Using a PS/2 Keyboard and PS/2 Mouse 2-6 3. Placing Documents 2-7 Placing a Document 2-7 - Canon 2263B002 | Instruction Manual - Page 21
Chapter 2 Handling 1. Documents The ScanFront can scan documents in a range of sizes from business cards and checks to LTR/A4. It is possible to feed documents of the following sizes and thicknesses depending on the feeding method used. ❏ Plain Paper Size Width: 2" to 8 1/2" (50.8 mm to 216 mm) - Canon 2263B002 | Instruction Manual - Page 22
❏ Card Size 2.12" × 3.37" (53.9 × 85.5 mm) (Conforming to ISO Standards) Thickness 0.0299" (0.76 mm) and below Insertion orientation Landscape CAUTION A card placed into the document feed tray in the portrait orientation may not be output properly because a load is placed on it during feeding. - Canon 2263B002 | Instruction Manual - Page 23
Chapter 2 Handling 2. Preparing the Scanner When placing a document in the scanner, pull out the document feed tray so that it matches the size of the document, and then move the feed selection lever to the appropriate position for the desired feed method (page separation feeding or bypass feeding - Canon 2263B002 | Instruction Manual - Page 24
❏ Feed Selection Lever Change the position of the lever to the desired feed method for the document. Page Separation Feeding Move the lever downward to separate a stack of documents one page at a time in order to continuously feed the documents. Bypass Feeding Move the lever upward to feed a - Canon 2263B002 | Instruction Manual - Page 25
❏ Using a PS/2 Keyboard and PS/2 Mouse You can connect a PS/2 keyboard and mouse to the PS/2 port and use them to operate the scanner. Green (Top): Mouse Purple (Bottom): Keyboard IMPORTANT Turn OFF the scanner before connecting or disconnecting the PS/2 mouse and keyboard. Chapter 2 Handling 2-6 - Canon 2263B002 | Instruction Manual - Page 26
tray with the top edge of the document at the bottom of tray. ❏ Placing a Document Follow the procedure below to place a document. 1. Adjust the document guides to be wider than the width of the document. 3. Place the document face down with its top edge at the bottom of the tray. 2. Fan - Canon 2263B002 | Instruction Manual - Page 27
loaded into the document feed tray. When placing the document, make sure the size of stack does not exceed the loading marks on the document guides. Chapter 2 Handling 3. Place the card face down in the landscape orientation with the top edge at the bottom of the tray. Loading mark ❏ Placing - Canon 2263B002 | Instruction Manual - Page 28
Chapter 2 Handling 4. Clearing a Paper Jam or Double Feed Error When a paper jam or double feed error is detected, feeding and scanning stops. 1. Check the displayed message. If a paper jam or double feed error is detected at the first page of a document, the following messages appear. If a - Canon 2263B002 | Instruction Manual - Page 29
double feed errors continue to occur even after cleaning, purchase a roller replacement kit and replace the rollers (feed roller and retard roller), and document holding guides. (See p. 7-8.) 2-10 - Canon 2263B002 | Instruction Manual - Page 30
Chapter 2 Handling 5. Fingerprint Sensor (ScanFront 220P) The ScanFront 220P is equipped with a fingerprint sensor for registering fingerprints and authenticating users. The fingerprint sensor is a precision component. Be careful when handling this sensor. ❏ Cautions for Handling the Fingerprint - Canon 2263B002 | Instruction Manual - Page 31
fingerprints. The fingerprint authentication function may not work properly for a finger with a fingerprint that is worn down or has few distinguishable features. ● The same finger needs to be scanned three times to register the fingerprint. ● The authentication performance differs depending on the - Canon 2263B002 | Instruction Manual - Page 32
Chapter 3 ScanFront Setup 1. Before Setting Up the Scanner 3-2 Installation Location 3-2 Interfaces 3-2 Connecting the AC Adapter 3-3 Connecting the Network Cable 3-3 2. Turning the Power ON and OFF 3-4 Turning the Power ON 3-4 Turning the Power OFF 3-4 3. Configuring the Scanner Settings - Canon 2263B002 | Instruction Manual - Page 33
Chapter 3 ScanFront Setup 1. Before Setting Up the Scanner Before setting up the scanner, you need to move it to the installation site, and connect the AC adaptor and network cable. ❏ Installation Location The performance of this scanner is affected by the environment in which it is installed. - Canon 2263B002 | Instruction Manual - Page 34
❏ Connecting the AC Adapter Follow the procedure shown below to connect the AC adapter. CAUTION Make sure to use only the AC adapter and power cord included with the scanner. Chapter 3 ScanFront Setup a Connect the power cord and AC adapter. b Insert the plug of the AC adapter into the power - Canon 2263B002 | Instruction Manual - Page 35
Chapter 3 ScanFront Setup 2. Turning the Power ON and OFF Use the power switch to turn the scanner ON, and press the [Power off] button on the touch panel to turn it OFF. ❏ Turning the Power ON Press the power switch to turn the scanner ON. The power indicator lights, and the Home screen or the - Canon 2263B002 | Instruction Manual - Page 36
Chapter 3 ScanFront Setup 3. Configuring the Scanner Settings The scanner setup consists of configuring the initial network settings from the [Administrator setting] screen, and then configuring the settings needed to use the scanner as described in Chapter 4 "Web Menu (Administrator Mode)". ❏ - Canon 2263B002 | Instruction Manual - Page 37
Chapter 3 ScanFront Setup ❏ Web Menu (Administrator Mode) The following setting items are available from the Web Menu (Administrator Mode). For details, see Chapter 4 "Web Menu (Administrator Mode)". Hint From the Web Menu (User Mode), which is available to all users, the configuration of some - Canon 2263B002 | Instruction Manual - Page 38
Chapter 3 ScanFront Setup Setting Item System Settings Backup / Restore Module Version Information Log Settings Description Configure the settings for managing the scanner. Back up or restore the scanner settings. Display the version information, and update the version, of the ScanFront module. - Canon 2263B002 | Instruction Manual - Page 39
Chapter 3 ScanFront Setup 4. Configuring Administrator Settings Enter the administrator password and log in to configure administrator settings. ❏ Logging In to the Administrator Settings Follow the procedure below to configure the [Device name] and [IP address] needed to connect the scanner to a - Canon 2263B002 | Instruction Manual - Page 40
❏ Network Settings Under Network Settings, configure the device name and IP address needed to connect the scanner to a network. Chapter 3 ScanFront Setup IMPORTANT • The device name is the name for the scanner used on the network. When changing this setting, make sure to select a unique name that - Canon 2263B002 | Instruction Manual - Page 41
Reset the counter after replacing the feed roller when the scanner no longer feeds properly. For details, see "Replacing the Rollers and Document Holding Guide" on p. 7-8. Hint • Scanner setting information can be backed up to a folder on a USB memory device if the device is inserted when [Backup - Canon 2263B002 | Instruction Manual - Page 42
❏ Format ScanFront 220 Initialize the ScanFront 220 clears all the settings registered to the ScanFront. Chapter 3 ScanFront Setup ❏ Touch Panel Adjustment You can adjust the touch panel when it does not operate as expected. For details, see "Adjusting the Touch Panel" on p. 8-9. Initialize the - Canon 2263B002 | Instruction Manual - Page 43
Chapter 4 Web Menu (Administrator Mode) 1. Web Menu Overview 4-2 2. Logging In to the Web Menu 4-5 3. User Administration 4-6 Registering New Users 4-7 Restricting User Functions 4-8 Editing Users 4-9 4. Address Book Settings 4-11 Registering New Addresses 4-12 Copying Addresses 4-14 - Canon 2263B002 | Instruction Manual - Page 44
Chapter 4 Web Menu (Administrator Mode) 1. Web Menu Overview The Web Menu function enables you to access and configure the scanner from the Web browser of a remote computer. It can be used to perform tasks such as user registration, basic network communication settings, and job button registration, - Canon 2263B002 | Instruction Manual - Page 45
Chapter 4 Web Menu (Administrator Mode) The Web Menu features an Administrator Mode for configuring administrator settings and a User the scanner, settings for using an authentication server compatible with a directory service, and settings for using an address book server compatible with LDAP. f - Canon 2263B002 | Instruction Manual - Page 46
Chapter 4 Web Menu (Administrator Mode) User Mode For details on configuring the User Mode settings, see Chapter 5 "Web Menu (User Mode)". a b c a User Settings (See "User Settings" on p. 5-4.) Use to change the user settings. b Address Book Settings (See "Address Book Settings" on p. 5-6.) Use to - Canon 2263B002 | Instruction Manual - Page 47
Chapter 4 Web Menu (Administrator Mode) 2. Logging In to the Web Menu You can log in to the Web Menu using the following procedure. IMPORTANT Use the device name or the IP address assigned to the scanner as the URL for accessing the Web Menu. For details on the device name and the IP address, see - Canon 2263B002 | Instruction Manual - Page 48
Chapter 4 Web Menu (Administrator Mode) 3. User Administration From the User Administration screen, you can register and manage users and restrict the functions available to users. bc d e a f a [New User] button Registers a new user. (See "Registering New Users" on p. 4-7.) b [Select All] - Canon 2263B002 | Instruction Manual - Page 49
❏ Registering New Users Click [New User] to register a new user. IMPORTANT • When using an authentication server (see p. 4-28), users that are logged in from an authentication server account are registered automatically. • If an e-mail address is registered for the authentication server account, the - Canon 2263B002 | Instruction Manual - Page 50
• Job Button Screen Chapter 4 Web Menu (Administrator Mode) • When a user is registered, the link for User Mode login is added to the Web Menu login screen. IMPORTANT The setting for the startup screen after login also affects which screen appears after a scanned image is sent. (See "Delivery - Canon 2263B002 | Instruction Manual - Page 51
Use only Job Buttons Disables scanning from the Home screen and displays the Job Button screen when the user logs in. Restriction to Send Restricts the destinations to which the scanner can send images. Deselect a destination to disable it. Ex.) When the destinations are restricted to shared folders - Canon 2263B002 | Instruction Manual - Page 52
By editing a user automatically registered by server authentication, you can set the user's e-mail address. Chapter 4 Web Menu (Administrator Mode) Edit Address Book Enables you to register and edit entries in the user's My Address Book. For details on configuring address books, see "Address Book - Canon 2263B002 | Instruction Manual - Page 53
Chapter 4 Web Menu (Administrator Mode) 4. Address Book Settings From the Address Book Settings screen, you can register entries in the Shared Address Book, which is available to all users. b c a d f g hi e j a Type of Address Book Under normal conditions, you can only select the Shared - Canon 2263B002 | Instruction Manual - Page 54
❏ Registering New Addresses Click [New Address] to register a new address. Hint • The number of addresses that can be registered to the Shared Address Book is up to 1000 in combination with the total number of addresses included in the Shared Job Button. • For the number mentioned above, the count - Canon 2263B002 | Instruction Manual - Page 55
Chapter 4 Web Menu (Administrator Mode) Passive Mode Uses passive mode to send transmissions to the FTP server. IMPORTANT Use passive mode when normal communication with the FTP server cannot be established. However, be aware that communication may not be possible if the network is not functioning - Canon 2263B002 | Instruction Manual - Page 56
IMPORTANT If you do not save the password, password entry will be required each time you send. [OK] button Registers a new shared folder with the specified parameters. Address type: Group This option registers several registered addresses together as a group. Hint Different types of address, such as - Canon 2263B002 | Instruction Manual - Page 57
from ScanFront 220]. 2. Click [Save], specify a save location, and save the address book data. Hint • You can open the saved CSV file with software that supports CSV files such as spread sheet software in order to check the structure of the file. • You can match the structure of a CSV file created - Canon 2263B002 | Instruction Manual - Page 58
Chapter 4 Web Menu (Administrator Mode) 5. Job Button Settings From the Job Button Settings screen, you can register the Shared Job Button, which is available to all users. b c a d e f gh i a Job Button Type You can only select Shared Job Button here. You can manage the My Job Button, - Canon 2263B002 | Instruction Manual - Page 59
❏ Registering New Job Buttons Click [New Job Button] to register a new job button. Job Button Settings Name of Job Button Enter the job button name to display on the touch panel. Hint • Job buttons are sorted and displayed by job button name. If you want to set to display job buttons in a particular - Canon 2263B002 | Instruction Manual - Page 60
E-mail settings Subject Enter a subject for the e-mail message. Message Enter the text of the e-mail message. Delivery Options Action when the same named file exists Select the action to take when a file of the same name exists at the destination. • Display a message Displays a message confirming - Canon 2263B002 | Instruction Manual - Page 61
Chapter 4 Web Menu (Administrator Mode) Mode Select the scanning mode (Black and White, Error Diffusion, Text enhance, Gray, Color). IMPORTANT Depending on the selected mode, the file formats available for saving may be limited. A warning message appears when an unavailable combination is selected - Canon 2263B002 | Instruction Manual - Page 62
Permission Permissions for printing and editing the PDF file are protected by a password. Printing allowed Enables the PDF file to be printed from a printer. Changes allowed Enables editing of the PDF file, such as adding or deleting pages. Enable copying of text, images, and accessibility Enables - Canon 2263B002 | Instruction Manual - Page 63
Chapter 4 Web Menu (Administrator Mode) Detailed settings IMPORTANT The [Double feed detection by Ultrasonic] setting only appears when using the ScanFront 220P. Brightness (Front) Adjusts the brightness of the image to be scanned. Brightness (Back) Enabled for duplex scanning. Use this option when - Canon 2263B002 | Instruction Manual - Page 64
Bleed-through reduction Eliminates bleed-through images, in which images on the reverse side of a scanned document appear on the scanned page, such as when scanning thin documents with text or images on both sides. Hint When using bleed-through reduction, adjust the bleed-through reduction level to - Canon 2263B002 | Instruction Manual - Page 65
❏ Exporting and Importing Job Buttons You can back up your job button data as a settings file in DAT format, and import the backed up job button settings file to another ScanFront unit. Hint If you have multiple ScanFront units, you can use the same job buttons on all of them by importing the job - Canon 2263B002 | Instruction Manual - Page 66
Chapter 4 Web Menu (Administrator Mode) 6. Device Configuration From the Device Configuration screen, you can configure the scanner settings. a a b c b d e c d e a Network Setting Confirm or change the network settings of the scanner. (See "Network Setting" on p. 4-25.) b Language/Timezone - Canon 2263B002 | Instruction Manual - Page 67
❏ Network Setting You can confirm the network settings configured under [Administrator setting] on the scanner. Chapter 4 Web Menu (Administrator Mode) ❏ Language/Timezone You can confirm or change the language and regional settings that appear on the scanner. Network Setting Confirm or change the - Canon 2263B002 | Instruction Manual - Page 68
Auto Logout Set the scanner to automatically log users out after a specified period of inactivity. IMPORTANT When Display Off activates and the touch panel display turns off, touch the panel to restore the display. ❏ Login Options You can set the type of user login screen that appears. Hint The - Canon 2263B002 | Instruction Manual - Page 69
you can configure mail server settings for sending images via e-mail, and settings for accessing a network authentication server compatible with a directory service. IMPORTANT • You can simplify user administration on the scanner by using e-mail addresses registered on an LDAP server, or by logging - Canon 2263B002 | Instruction Manual - Page 70
size before being sent. IMPORTANT If the destination mail server does not support divided attachments, it may not be possible to reconstitute a divided image file cases, turn off this setting, and divide the scanned documents manually before sending. Chapter 4 Web Menu (Administrator Mode) Auth - Canon 2263B002 | Instruction Manual - Page 71
the search base, consult your system administrator. Host Name (Address) Enter the host name or address of the authentication server. Domain Enter a domain name supported by Active Directory. Port number Enter the port number used for the LDAP protocol. The standard port number is 389. User name When - Canon 2263B002 | Instruction Manual - Page 72
❏ Address Book Server You can configure the settings for using an address book server (LDAP server). Chapter 4 Web Menu (Administrator Mode) Address Book Server Setting Select one of these options when using an address book server (LDAP server). If the authentication server and address book server - Canon 2263B002 | Instruction Manual - Page 73
file to update the ScanFront version. (See "Module Version Information/Update" on p. 4-33.) IMPORTANT For details on acquiring version update files, contact your dealer or a Canon service representative. c Log Settings Records usage statistics to a log file. (See "Log Settings" on p. 4-35.) 4-31 - Canon 2263B002 | Instruction Manual - Page 74
❏ Backup and Restore You can backup or restore the scanner settings using the following procedure. Backup All Settings This option saves all the ScanFront settings to a specified folder. IMPORTANT The following settings are not included in the backup data because they are unique to the scanner unit: - Canon 2263B002 | Instruction Manual - Page 75
information, and update the version, of the module in use on the scanner. IMPORTANT If the scanner malfunctions, the version information is required when contacting support services. Acquiring Update Files For details on acquiring the update files needed to update the scanner, consult your dealer or - Canon 2263B002 | Instruction Manual - Page 76
Chapter 4 Web Menu (Administrator Mode) Updating the Scanner You can update the scanner with an acquired update file. IMPORTANT • Make sure to back up your scanner data before performing a version update. • Use the following procedure to update the scanner. Once the version update starts, do not - Canon 2263B002 | Instruction Manual - Page 77
❏ Log Settings You can configure settings for log files. Chapter 4 Web Menu (Administrator Mode) Make Log File Select this check box to create a log file. PC Name (Host Name) Enter the name of the computer containing the publicly shared folder where the log file will be saved. Location Enter the - Canon 2263B002 | Instruction Manual - Page 78
Chapter 5 Web Menu (User Mode) 1. Web Menu Overview 5-2 2. Logging In to the Web Menu 5-3 3. User Settings 5-4 User Settings 5-5 4. Address Book Settings 5-6 Registering New Addresses 5-8 Copying Addresses 5-10 Exporting and Importing Address Books 5-11 5. Job Button Settings 5-12 - Canon 2263B002 | Instruction Manual - Page 79
Chapter 5 Web Menu (User Mode) 1. Web Menu Overview The Web Menu function enables you to access and configure the scanner from the Web browser of a remote computer. From the Web Menu, you can register address books and job buttons. Computer (Web Menu) Settings Network ScanFront220 IMPORTANT • - Canon 2263B002 | Instruction Manual - Page 80
Chapter 5 Web Menu (User Mode) 2. Logging In to the Web Menu You can log in to the Web Menu using the following procedure. Hint Use the device name or the IP address assigned to the scanner as the URL for accessing the Web Menu. Contact the ScanFront administrator for the device name and the IP - Canon 2263B002 | Instruction Manual - Page 81
Chapter 5 Web Menu (User Mode) 3. User Settings From the User Settings screen, you can change the information of a user logged in by Device Authentication. a a Setting (See "User Settings" on p. 5-4) Allows you to edit a user's settings. IMPORTANT • For a user logged in by Server Authentication, you - Canon 2263B002 | Instruction Manual - Page 82
❏ User Settings Click [Setting] to edit the user information. Chapter 5 Web Menu (User Mode) Screen after Login Select the Home screen or the Job Button screen as the first screen to appear after the user logs in. • Home Screen User name Enter a new user name. Change Password Select the [Change - Canon 2263B002 | Instruction Manual - Page 83
Chapter 5 Web Menu (User Mode) 4. Address Book Settings From the Address Book Settings screen, you can register entries in the Shared Address Book, which is available to all users, and the My Address Book, which is provided for each user. a b c d f g hi e j a Type of Address Book Selects the - Canon 2263B002 | Instruction Manual - Page 84
Chapter 5 Web Menu (User Mode) IMPORTANT If the ScanFront administrator has restricted editing of the address books, the following Address Book settings apply. For details, consult the ScanFront administrator. • If editing is restricted for only one address book (either the My Address Book or the - Canon 2263B002 | Instruction Manual - Page 85
❏ Registering New Addresses Select the type of address book (Shared Address Book or My Address Book), and click [New Address] to register a new address. Hint • The number of addresses that can be registered to the Shared Address Book (My Address Book) is up to 1000 in combination with the total - Canon 2263B002 | Instruction Manual - Page 86
Chapter 5 Web Menu (User Mode) Save Password Saves the entered password. Passive Mode Uses passive mode to send transmissions to the FTP server. IMPORTANT Use passive mode when normal communication with the FTP server cannot be established. However, be aware that communication may not be possible - Canon 2263B002 | Instruction Manual - Page 87
IMPORTANT If you do not save the password, password entry will be required each time you send. [OK] button Registers a new shared folder with the specified parameters. Address type: Group This option registers several registered addresses together as a group. Hint Different types of address, such as - Canon 2263B002 | Instruction Manual - Page 88
import the data. 2. Click [Save], specify a save location, and save the address book data. Hint • You can open the saved CSV file with software that supports CSV files such as spread sheet software in order to check the structure of the file. • You can match the structure of a CSV file created - Canon 2263B002 | Instruction Manual - Page 89
Chapter 5 Web Menu (User Mode) 5. Job Button Settings From the Job Button Settings screen, you can register the Shared Job Button, which is available to all users, and the My Job Button, which is provided for each user. a b c d e f gh i a Job Button Type Select the job button (Shared Job - Canon 2263B002 | Instruction Manual - Page 90
Chapter 5 Web Menu (User Mode) IMPORTANT If the ScanFront administrator has restricted editing of the job buttons, the following Job Button settings apply. For details, consult the ScanFront administrator. • If editing is restricted for only one set of job buttons (either the My Job Button or the - Canon 2263B002 | Instruction Manual - Page 91
❏ Registering New Job Buttons Click [New Job Button] to register a new job button. Job Button Settings Name of Job Button Enter the job button name to display on the touch panel. Hint • Job buttons are sorted and displayed by job button name. If you want to set to display job buttons in a particular - Canon 2263B002 | Instruction Manual - Page 92
E-mail settings Subject Enter a subject for the e-mail message. Message Enter the text of the e-mail message. Delivery Options Action when the same named file exists Select the action to take when a file of the same name exists at the destination. • Display a message Displays a message confirming - Canon 2263B002 | Instruction Manual - Page 93
Chapter 5 Web Menu (User Mode) Mode Select the scanning mode (Black and White, Error Diffusion, Text enhance, Gray, Color). IMPORTANT Depending on the selected mode, the file formats available for saving may be limited. A warning message appears when an unavailable combination is selected. Black - Canon 2263B002 | Instruction Manual - Page 94
Permission Permissions for printing and editing the PDF file are protected by a password. Printing allowed Enables the PDF file to be printed from a printer. Changes allowed Enables editing of the PDF file, such as adding or deleting pages. Enable copying of text, images, and accessibility Enables - Canon 2263B002 | Instruction Manual - Page 95
Chapter 5 Web Menu (User Mode) Detailed settings IMPORTANT The [Double feed detection by Ultrasonic] setting only appears when using the ScanFront 220P. Brightness (Front) Adjusts the brightness of the image to be scanned. Brightness (Back) Enabled for duplex scanning. Use this option when the - Canon 2263B002 | Instruction Manual - Page 96
Hint When using bleed-through reduction, adjust the bleed-through reduction level to match the type of document. Color drop-out The color drop-out function has a "drop-out" effect that leaves out a specified color (red, blue, or green) while scanning, and a "color enhancement" effect that emphasizes - Canon 2263B002 | Instruction Manual - Page 97
Exporting from the Scanner You can save the job button settings file to a specified folder. 1. Click [Export from ScanFront 220]. Chapter 5 Web Menu (User Mode) 4. Click [Execute]. Confirm the message that appears, and click [OK] to import the data. 2. Click [Save], specify a save location, and - Canon 2263B002 | Instruction Manual - Page 98
Chapter 6 Operating Procedures 1. Flow of Scanner Operations 6-2 2. Turning the Power ON and OFF 6-3 Turning the Power ON 6-3 Turning the Power OFF 6-3 3. Login Screen 6-4 Login Screen Types 6-4 When Using Server Authentication 6-4 List Type Login 6-5 Key in Type Login 6-6 Fingerprint - Canon 2263B002 | Instruction Manual - Page 99
Chapter 6 Operating Procedures 1. Flow of Scanner Operations The procedure and screen transitions for the process from turning the scanner ON, to sending an image file are as follows. For descriptions of the various settings, refer to the appropriate reference pages. Turn the power ON (See p. - Canon 2263B002 | Instruction Manual - Page 100
Chapter 6 Operating Procedures 2. Turning the Power ON and OFF Use the power switch to turn the scanner ON, and press the [Power off] button on the touch panel to turn it OFF. ❏ Turning the Power ON Press the power switch to turn the scanner ON. The power indicator lights, and the Home screen or - Canon 2263B002 | Instruction Manual - Page 101
Chapter 6 Operating Procedures 3. Login Screen The login screen appears at the startup when the scanner is turned ON. ❏ Login Screen Types There are two types of login screen: a list type login screen for selecting from a list of registered users, and a key in type login screen for entering a - Canon 2263B002 | Instruction Manual - Page 102
❏ List Type Login Use the procedure below to log in to the list type login screen. 1. Select the user to log in as from the list, and then press [Next]. Chapter 6 Operating Procedures 3. Enter a password and then press [OK]. The password input screen appears. 2. Press [Password]. IMPORTANT - Canon 2263B002 | Instruction Manual - Page 103
❏ Key in Type Login In the key in type login screen, enter your user name and password to log in. 1. Press [User name] ([Password]). Chapter 6 Operating Procedures 3. Press [Login] to log in to the scanner. The keyboard screen appears. 2. Enter your user name (password) and then press [OK]. 4. - Canon 2263B002 | Instruction Manual - Page 104
❏ Fingerprint Authentication (Only Available with the ScanFront 220P) Use the procedure below for fingerprint authentication. For details on fingerprint registration, see "Fingerprint Registration (Only Available with the ScanFront 220P)" on p. 6-10. 1. Press [Fingerprint Authentication]. Chapter 6 - Canon 2263B002 | Instruction Manual - Page 105
Chapter 6 Operating Procedures 4. Screen Displayed after Login You can set the screen (Home screen or Job Button screen) that is displayed after a user logs in. (See p. 4-7 and p. 5-4.) ❏ Home Screen ❏ Job Button Screen This screen enables you to select a job button to scan using the conditions - Canon 2263B002 | Instruction Manual - Page 106
Chapter 6 Operating Procedures 5. User Settings Screen The User Settings screen enables you to edit the user password and register a fingerprint (only available with the ScanFront 220P). ❏ Fingerprint Registration Fingerprint registration is enabled when you are using the ScanFront 220P. For details - Canon 2263B002 | Instruction Manual - Page 107
fingerprints. The fingerprint authentication function may not work properly for a finger with a fingerprint that is worn down or has few distinguishable features. ● The same finger needs to be scanned three times to register the fingerprint. ● The authentication performance differs depending on the - Canon 2263B002 | Instruction Manual - Page 108
❏ Registering a Fingerprint Register a fingerprint from the User Settings screen accessed from the Home screen. IMPORTANT If the Home screen is not displayed, use of the Home screen has been restricted for the user by the ScanFront administrator. Confirm this with the administrator. 1. Press [User - Canon 2263B002 | Instruction Manual - Page 109
5. Perform an authentication test for the registered fingerprint by scanning your fingerprint. Chapter 6 Operating Procedures 6. Press [Close] to end fingerprint registration. IMPORTANT If you want to change the registered fingerprint, start registration again from the beginning. 6-12 - Canon 2263B002 | Instruction Manual - Page 110
Chapter 6 Operating Procedures 7. Scanning Procedures You can perform scanning from the Home screen or the Job Button screen. ❏ Scanning From the Home Screen Press a destination selection (E-mail, FTP, Shared folder, or USB memory) button to open an address selection screen and then select an - Canon 2263B002 | Instruction Manual - Page 111
Chapter 6 Operating Procedures ❏ Address Selection Screen From the address selection screen, you can select the address to send an image file and register addresses. b a c e f d g a Address Book type Selects the address book type (Shared Address Book or My Address Book). If the address book - Canon 2263B002 | Instruction Manual - Page 112
Chapter 6 Operating Procedures ❏ USB Memory Screen The USB Memory screen enables you to specify the folder in the USB memory to save the image file. a b c d e f a Path Enter the folder path of the USB memory. You can also press [Downward] to select a folder. b USB Memory Display Displays the - Canon 2263B002 | Instruction Manual - Page 113
❏ Scanning This section describes the procedure for scanning. If you want to save the image file to USB memory, specify the folder in the USB memory to save the image file in Steps 2 to 4. (See "USB Memory Screen" on p. 6-15.) 1. Select a destination. Press a destination button to select a - Canon 2263B002 | Instruction Manual - Page 114
Chapter 6 Operating Procedures 6. Press [Start] to start scanning. Scanning stops after the document has been scanned. 5. Set the scan conditions. (See "Scan/Delivery Options" on p. 6-23.) IMPORTANT When you use a job button for scanning, the subsequent procedure varies as follows in accordance - Canon 2263B002 | Instruction Manual - Page 115
8. Check the scanned images. Chapter 6 Operating Procedures : Display the image of the next page. : Display the image of the previous page. : Move the viewing area around an image when an enlarged view of the image is shown. : Rotate the image 90 degrees counterclockwise. : Rotate the image 90 - Canon 2263B002 | Instruction Manual - Page 116
Chapter 6 Operating Procedures 8. Registering and Editing Addresses If an address to which you want to send an image file is not registered in the address book or the information of a registered address has not been updated, use the procedure below to register a new address or modify an address in - Canon 2263B002 | Instruction Manual - Page 117
3. Press [Downward] to move to a level lower than the selected folder, or press [Edit] and [Create a new folder] to create a new folder. • User name/Password Enter the user name and password of an account with write permission for the shared folder. • Domain/Workgroup If the computer containing the - Canon 2263B002 | Instruction Manual - Page 118
• [Add] button Select addresses to register to the group from [Address Book type] and [Address type]. The selected addresses are displayed in the list. Chapter 6 Operating Procedures IMPORTANT • When you add shared folders to groups, do not add multiple shared folders with different access - Canon 2263B002 | Instruction Manual - Page 119
❏ Copying an Address You can copy addresses between My Address Book and Shared Address Book. 1. Select the address book entry to copy. 2. Select the address, press [Edit], and then press [Copy]. Chapter 6 Operating Procedures 4. Press [New] and paste the address. Hint If the address book already - Canon 2263B002 | Instruction Manual - Page 120
Chapter 6 Operating Procedures 9. Scan/Delivery Options This section describes the scan settings and send settings for the scanner. c a b e d i f g j h a Address Display Area Displays the selection that you made on the address selection screen or the addresses registered to the job button - Canon 2263B002 | Instruction Manual - Page 121
❏ Scan Settings The scan settings include basic condition settings (page size, mode, resolution, scanning side, and brightness) and detailed settings for scanning. Basic Condition Settings Paper size Mode Resolution Scanning side Paper Size Select the size of the document you want to scan. - Canon 2263B002 | Instruction Manual - Page 122
Detailed Settings Press the [Detailed settings] button to open the Detailed Settings screen. Chapter 6 Operating Procedures Double feed detection by length The scanner detects by document length when two or more documents are fed together, and stops feeding when a double feed is detected. IMPORTANT - Canon 2263B002 | Instruction Manual - Page 123
Document orientation Chapter 6 Operating Procedures IMPORTANT If you select [Prefer Quality], the scanning speed is reduced. If you are scanning a large number of pages, select [Prefer Speed] to prevent a decrease in scanning speed. Bleed-through reduction Rotates the scanned image a specified - Canon 2263B002 | Instruction Manual - Page 124
Back side Brightness/contrast Chapter 6 Operating Procedures ❏ File Formats You can select from the three available file formats TIFF, JPEG, and PDF, and the modes available for scanning vary, depending on the file format setting. (See "Mode" on p. 6-24.) TIFF format This is enabled when you scan - Canon 2263B002 | Instruction Manual - Page 125
PDF format Chapter 6 Operating Procedures ❏ Security Settings for PDF Files Security is implemented for PDF files with the encryption and password settings in the security settings. Configure the following settings for saving in PDF format. • Compression Select the compression method. • Quality - Canon 2263B002 | Instruction Manual - Page 126
editing security settings The following settings are restricted by the permissions password. • Printing allowed This permits printing of the PDF file with a printer. • Changes allowed This permits editing of the PDF file; for example, adding and deleting pages. • Enable copying of text, images, and - Canon 2263B002 | Instruction Manual - Page 127
Action when the same named file exists Set the action to perform when there is already a file of the same name at the destination. • Display a message Display a message to confirm overwriting of the file. • Abort sending Cancel sending. • Overwrite the file Overwrite the file at the destination. - Canon 2263B002 | Instruction Manual - Page 128
220P 7-2 Cleaning the Scanning Glass and Rollers 7-3 Cleaning the Retard Roller 7-5 Cleaning the Feed Roller 7-6 2. Replacing the Rollers and Document Holding Guide 7-8 Roller Replacement Kit 7-8 Replacing the Document Holding Guide 7-8 Checking the Page Count and Resetting the Counter 7-9 - Canon 2263B002 | Instruction Manual - Page 129
Chapter 7 Maintenance 1. Routine Cleaning Clean the scanner on a regular basis, as described below, to maintain scanning performance. CAUTION • When cleaning the scanner, do not spray water or detergent directly on the scanner. Doing so may damage precision mechanisms, such as the light source. • - Canon 2263B002 | Instruction Manual - Page 130
the scanning glass may cause streaks on scanned images, as well as feeding errors. If there are scratches on a scanning glass, contact your local authorized Canon dealer. 7-3 - Canon 2263B002 | Instruction Manual - Page 131
dirt on the visible portions only. Forcefully rotating the rollers on this side may cause feed errors. 5. Remove any dirt from the document holding guide using a cloth that has been soaked in water and thoroughly wrung out. 6. Remove the retard roller and feed roller, and remove any dirt from - Canon 2263B002 | Instruction Manual - Page 132
❏ Cleaning the Retard Roller Use the procedure below to remove and attach the retard roller during cleaning or replacement. CAUTION Do not use excessive force when removing or attaching the retard roller. Doing so may cause the roller to become deformed, resulting in feed errors. 1. Open the roller - Canon 2263B002 | Instruction Manual - Page 133
6. Slide the roller lock lever in the direction of the arrow, and then insert it into the hole of the retard roller. Chapter 7 Maintenance ❏ Cleaning the Feed Roller Use the procedure below to remove and attach the feed roller during cleaning or replacement. CAUTION Do not use excessive force when - Canon 2263B002 | Instruction Manual - Page 134
3. Move the feed roller in the direction of the arrow a, and then remove it from the shaft b. Chapter 7 Maintenance 6. Move the roller lock lever in the direction of the arrow, and then insert it into the hole in the feed roller. 4. Remove any dirt from the roller using a cloth that has been - Canon 2263B002 | Instruction Manual - Page 135
roller, and document holding guide. For details, contact your local authorized Canon dealer or service representative. Product name: ScanFront the Counter" on p. 7-9.) • When the rollers start to wear out, problems such as paper jams and improper document feeding become more likely to occur. If - Canon 2263B002 | Instruction Manual - Page 136
❏ Checking the Page Count and Resetting the Counter Check the page count on the Roller Counter Reset screen of the Administrator Setting screen. IMPORTANT The counter counts the number of pages fed by replaced rollers. Make sure to reset the counter when you replace the rollers. 1. Log in to the - Canon 2263B002 | Instruction Manual - Page 137
Chapter 8 Troubleshooting 1. Troubleshooting 8-2 2. Error Messages (ScanFront 8-5 3. Error Messages (Web Menu 8-7 4. Adjusting the Touch Panel 8-9 5. Initializing ScanFront 8-11 - Canon 2263B002 | Instruction Manual - Page 138
Chapter 8 Troubleshooting 1. Troubleshooting If any of the following problems occurs, solve the problem as described in the See p. 7-3.) If there are scratches on a scanning glass, contact your local authorized Canon dealer. The rollers are dirty. Clean the rollers. (See p. 7-3.) The rollers - Canon 2263B002 | Instruction Manual - Page 139
Chapter 8 Troubleshooting Documents are double fed Documents are double fed A Check the connections of the AC adapter and power plug. If the problem is not resolved after checking the connections, contact your local authorized Canon dealer. (1) The date and time settings are incorrect. (2) The - Canon 2263B002 | Instruction Manual - Page 140
Chapter 8 Troubleshooting Cannot connect to the network (device name conflict problem) Cannot delete a folder Cannot delete a folder Cannot scan from the Home screen (certain users only) Cannot log in Cause Solution Cause Solution Cause Solution Cause - Canon 2263B002 | Instruction Manual - Page 141
Chapter 8 Troubleshooting 2. Error Messages (ScanFront) If any of the following error messages appears, solve the problem as described in the corresponding solution. If you are unsure about any other message that appears, contact the support services. Failed to connect FTP server. Failed to - Canon 2263B002 | Instruction Manual - Page 142
Chapter 8 Troubleshooting Password is incorrect. There is no file name specified. Enter a file name or enable the 'Auto file name' setting. Log in failed. Settings may currently - Canon 2263B002 | Instruction Manual - Page 143
Chapter 8 Troubleshooting 3. Error Messages (Web Menu) If any of the following error messages appears, solve the problem as described in the corresponding solution. If you are unsure about any other message that appears, contact the support services. Same Username exists. Please change Username, - Canon 2263B002 | Instruction Manual - Page 144
Chapter 8 Troubleshooting You can't choose TIFF when Gray or Color is selected. You can't choose JPEG when Binary Mode is selected. User is now operating the device. - Canon 2263B002 | Instruction Manual - Page 145
Chapter 8 Troubleshooting 4. Adjusting the Touch Panel If there is no response when you press a button on the touch panel but there is a response when you press somewhere - Canon 2263B002 | Instruction Manual - Page 146
IMPORTANT If you do not tap the panel within a period of 30 seconds after adjustment of the touch panel ends, the adjustment values will not take effect and the touch panel will return to the state prior to adjustment. Chapter 8 Troubleshooting 8-10 - Canon 2263B002 | Instruction Manual - Page 147
Chapter 8 Troubleshooting 5. Initializing ScanFront Initialize the ScanFront to protect user information when you submit the ScanFront for repairs or when you want to delete the user information - Canon 2263B002 | Instruction Manual - Page 148
Chapter 9 Appendices 1. Specifications 9-2 Unit Specifications 9-2 Network Specifications 9-3 Transfer Destinations 9-3 AC Adapter 9-3 Consumable Parts 9-3 External Dimensions 9-4 2. Index 9-5 - Canon 2263B002 | Instruction Manual - Page 149
12" × 3.37" (53.9 × 85.5 mm) Card Thickness: Not more than 0.0299" (0.76 mm) Document Feeding Method Automatic (feeding with page separation mode) Manual (feeding with bypass mode) Loadable Sheets 50 high-quality sheets, or stacks no thicker than 5 mm (including curls) Scanning Sensor Contact image - Canon 2263B002 | Instruction Manual - Page 150
start to wear out, problems such as paper jams and improper document feeding become more likely to occur. If this happens, replace the rollers regardless of the page count. • For information about the roller replacement kit, contact your local authorized Canon dealer or service representative. 9-3 - Canon 2263B002 | Instruction Manual - Page 151
❏ External Dimensions Chapter 9 Appendices 12.2" (310 mm) 6.22" (158 mm) 4.25" (108 mm) 8.66" (220 mm) 8.35" (212 mm) 9.21" (234 mm) 3.9" (99 mm) 9-4 - Canon 2263B002 | Instruction Manual - Page 152
24 Device Operation 4-25 Display Off 4-25 Disposal 1-5 Document Holding Guide 7-8 Documents 2-2 Double Feed Error 2-9 E Editing Users 4-9 Exporting and Importing Job Buttons 4-23, 5-19 External Dimensions 9-4 F Features 1-6 Feed Roller 7-6 Feed Selection Lever 2-5 Feed Tray 2-4 File - Canon 2263B002 | Instruction Manual - Page 153
10, 4-32 Restricting User Functions 4-8 Restriction to Edit 4-9 Retard Roller 7-5 Roller Counter 7-9 Roller Replacement Kit 7-8 Routine Cleaning 7-2 S Safety Instructions 1-2 Scan Settings 5-15, 6-24 Basic Condition Settings 6-24 Detailed Settings 6-25 Scan Settings (Job Button 4-18 Scan - Canon 2263B002 | Instruction Manual - Page 154
Troubleshooting 8-2 Turning Off the Power 3-4, 6-3 Turning On the Power 3-4, 6-3 U Update 4-33 Update Files 4-33 Update the Version 4-33 USB Memory 6-15 USB Memory Screen 6-15 USB - Canon 2263B002 | Instruction Manual - Page 155
INC. 1248, SHIMOKAGEMORI, CHICHIBU-SHI, SAITAMA 369-1892, JAPAN CANON U.S.A. INC. ONE CANON PLAZA, LAKE SUCCESS, N.Y. 11042, U.S.A. CANON CANADA INC. 6390 DIXIE ROAD, MISSISSAUGA, ONTARIO L5T 1P7, CANADA CANON EUROPA N.V. BOVENKERKERWEG 59-61, P.O.BOX 2262, 1180 EG AMSTELVEEN, THE NETHERLANDS
-
 1
1 -
 2
2 -
 3
3 -
 4
4 -
 5
5 -
 6
6 -
 7
7 -
8
-
9
-
10
-
11
-
12
-
13
-
14
-
15
-
16
-
17
-
18
-
19
-
20
-
21
-
22
-
23
-
24
-
25
-
26
-
27
-
28
-
29
-
30
-
31
-
32
-
33
-
34
-
35
-
36
-
37
-
38
-
39
-
40
-
41
-
42
-
43
-
44
-
45
-
46
-
47
-
48
-
49
-
50
-
51
-
52
-
53
-
54
-
55
-
56
-
57
-
58
-
59
-
60
-
61
-
62
-
63
-
64
-
65
-
66
-
67
-
68
-
69
-
70
-
71
-
72
-
73
-
74
-
75
-
76
-
77
-
78
-
79
-
80
-
81
-
82
-
83
-
84
-
85
-
86
-
87
-
88
-
89
-
90
-
91
-
92
-
93
-
94
-
95
-
96
-
97
-
98
-
99
-
100
-
101
-
102
-
103
-
104
-
105
-
106
-
107
-
108
-
109
-
110
-
111
-
112
-
113
-
114
-
115
-
116
-
117
-
118
-
119
-
120
-
121
-
122
-
123
-
124
-
125
-
126
-
127
-
128
-
129
-
130
-
131
-
132
-
133
-
134
-
135
-
136
-
137
-
138
-
139
-
140
-
141
-
142
-
143
-
144
-
145
-
146
-
147
-
148
-
149
-
150
-
151
-
152
-
153
-
154
-
155
 |
 |
Please read this manual before using the scanner.
After you finish reading this manual, keep it in a safe place
for future reference.
Network Scanner
INSTRUCTIONS