Canon CanoScan FB 1200S Printing Guide - Page 20
Scanning, Windows 95/98 Imaging application, it is Scan New.
 |
View all Canon CanoScan FB 1200S manuals
Add to My Manuals
Save this manual to your list of manuals |
Page 20 highlights
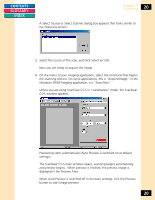
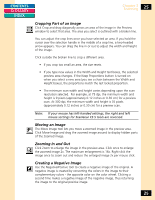
CONTENTS GLOSSARY INDEX Chapter 3 Scanning 20 A Select Source or Select Scanner dialog box appears that looks similar to the following picture: 3. Select the source of the scan, and click Select (or OK). Now you are ready to acquire the image. 4. On the menu of your imaging application, select the command that begins the scanning process. On some applications, this is "Acquire/Image;" in the Windows 95/98 Imaging application, it is "Scan New." Unless you are using ScanGear CS-S in "windowless" mode, the ScanGear CS-S window appears. Previewing starts automatically (Auto Preview is switched on at default settings). The ScanGear CS-S main window opens, scanning begins automatically, and preview begins. When preview is finished, the preview image is displayed in the Preview Area. When Auto Preview is switched off in the basic settings, click the Preview button to start image preview. 20
-
 1
1 -
2
-
3
-
4
-
5
-
6
-
7
-
8
-
9
-
10
-
11
-
12
-
13
-
14
-
 15
15 -
 16
16 -
 17
17 -
 18
18 -
 19
19 -
 20
20 -
 21
21 -
 22
22 -
 23
23 -
 24
24 -
 25
25 -
26
-
27
-
28
-
29
-
30
-
31
-
32
-
33
-
34
-
35
-
36
-
37
-
38
-
39
-
40
-
41
-
42
-
43
-
44
-
45
-
46
-
47
-
48
-
49
-
50
-
51
-
52
-
53
-
54
-
55
-
56
-
57
-
58
-
59
-
60
-
61
-
62
-
63
-
64
-
65
-
66
-
67
-
68
-
69
-
70
-
71
-
72
-
73
-
74
-
75
-
76
-
77
-
78
-
79
-
80
-
81
-
82
-
83
-
84
-
85
-
86
-
87
-
88
-
89
-
90
-
91
-
92
-
93
-
94
-
95
-
96
-
97
-
98
-
99
-
100
-
101
-
102
-
103
-
104
-
105
-
106
-
107
-
108
-
109
-
110
-
111
-
112
-
113
-
114
-
115
 |
 |
