Canon D1250U2F CanoScan N670U/N676U/N1240U Toolbox3.1 for Win Guide
Canon D1250U2F - CanoScan USB Flatbed Scanner Manual
 |
UPC - 013803010756
View all Canon D1250U2F manuals
Add to My Manuals
Save this manual to your list of manuals |
Canon D1250U2F manual content summary:
- Canon D1250U2F | CanoScan N670U/N676U/N1240U Toolbox3.1 for Win Guide - Page 1
English ScanGear Toolbox 3.1 User's Guide for Windows w w 1 Contents Index Next Page - Canon D1250U2F | CanoScan N670U/N676U/N1240U Toolbox3.1 for Win Guide - Page 2
of the equipment or software mentioned herein. 4. Portions of this guide are reproduced herein with the permission of Adobe Systems Incorporated. • ScanGear is a trademark of Canon Inc. • Adobe and Photoshop are trademarks of Adobe Systems Incorporated. • Microsoft and Windows are trademarks or - Canon D1250U2F | CanoScan N670U/N676U/N1240U Toolbox3.1 for Win Guide - Page 3
introduces the buttons contained in the Toolbox's main window. See j Chapter 2 "Using the Toolbox" for the instructions to adjust each button's settings. Mail After scanning, it starts a linked mail program and creates a new message with the image file attached. Save After scanning, it saves the - Canon D1250U2F | CanoScan N670U/N676U/N1240U Toolbox3.1 for Win Guide - Page 4
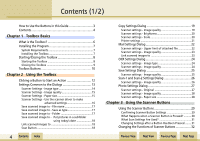
Toolbox 9 Toolbox Buttons 10 Chapter 2 Using the Toolbox Clicking a Button to Start an Action 12 Settings Common to the Dialogs 13 Scanner Settings - Image type 14 Scanner Settings - Image quality 15 Scanner Settings - Paper size 15 Scanner Settings - Use the scanner driver to make advanced - Canon D1250U2F | CanoScan N670U/N676U/N1240U Toolbox3.1 for Win Guide - Page 5
Contents (2/2) Chapter 4 Useful Hints Selecting a Scanner 34 Linking to Other Application Programs 35 Appendices File Formats 37 Uninstalling the Toolbox 38 List of Default Settings 39 Index 40 w w 5 Contents Index Previous View Next View Previous Page Next Page - Canon D1250U2F | CanoScan N670U/N676U/N1240U Toolbox3.1 for Win Guide - Page 6
scan settings. Initiate the scan. Close the scanner driver. View the scanned image in the application program. You can perform the same functions with the following steps using the Toolbox. Start the Toolbox. Select a function button in the main window. Set a few simple settings in the - Canon D1250U2F | CanoScan N670U/N676U/N1240U Toolbox3.1 for Win Guide - Page 7
install the program. Supported System Software: Windows 98 Windows 2000 Professional Windows Millennium Edition Windows XP Professional Windows XP Home Edition Free Hard Disk Space: Approximately 10 MB (before installation) Display: 800 x 600 pixels Medium (16 bit)/High Color (16 bit) or higher - Canon D1250U2F | CanoScan N670U/N676U/N1240U Toolbox3.1 for Win Guide - Page 8
] or [Programs], followed by [Canon ScanGear Toolbox 3.1] and [ScanGear Toolbox 3.1]. This will start the Toolbox and display its main window, which will appear similar to the example below. f Note • Please see jChapter 3 "Using the Scanner Buttons" for instructions for using Toolbox with the - Canon D1250U2F | CanoScan N670U/N676U/N1240U Toolbox3.1 for Win Guide - Page 9
the Toolbox To close the Toolbox, click the close box on the main window. To close the program when you have opened a settings dialog, click the dialog's [Cancel] button or close box, and then click the main window's close box. w w 9 Contents Index Previous View Next View Previous Page Next Page - Canon D1250U2F | CanoScan N670U/N676U/N1240U Toolbox3.1 for Win Guide - Page 10
introduces the buttons contained in the Toolbox's main window. See j Chapter 2 "Using the Toolbox" for the instructions to adjust each button's settings. Mail After scanning, it starts a linked mail program and creates a new message with the image file attached. Save After scanning, it saves the - Canon D1250U2F | CanoScan N670U/N676U/N1240U Toolbox3.1 for Win Guide - Page 11
the "Install the Software" section of the Quick Start Guide. When you click this button, the Toolbox will scan the item, start PhotoRecord and transfer the image file to it. With CanoScan D1250U2F, the Photo button is the only one that can be used to start scanning a film directly without adjusting - Canon D1250U2F | CanoScan N670U/N676U/N1240U Toolbox3.1 for Win Guide - Page 12
Chapter 2 Using the Toolbox Clicking a Button to Start an Action To start a Toolbox function, click the button in the main window. When you click the button, the corresponding settings dialog appears. For example, when you click the Scan-1 button, a Scan settings dialog appears. The explanation - Canon D1250U2F | CanoScan N670U/N676U/N1240U Toolbox3.1 for Win Guide - Page 13
size Sets the size of the item to be scanned. j Use the scanner driver to make advanced settings Sets whether or not the ScanGear CS-U scanner driver is used to adjust the settings. j File name Sets the root of the file name assigned to image files. j Save as type Sets the file format for saved - Canon D1250U2F | CanoScan N670U/N676U/N1240U Toolbox3.1 for Win Guide - Page 14
Chapter 2 Using the Toolbox Settings Common to the Dialogs (2/6) Scanner settings - Image type Select a scanning mode. Black and White: Scans and expresses images in two colors: black and white. Black and White (OCR): Produces sharper results than a standard black and white scan. (See the Note on - Canon D1250U2F | CanoScan N670U/N676U/N1240U Toolbox3.1 for Win Guide - Page 15
you to specify the dimensions will appear. After selecting the units of choice, input the dimensions and click the [OK] button. e Important • The Paper size cannot be selected when the Image type is set to [Color (Multi-Photo Mode)] or [Color (Auto crop)]. • Regarding the Paper size options in the - Canon D1250U2F | CanoScan N670U/N676U/N1240U Toolbox3.1 for Win Guide - Page 16
right of the dialog, the ScanGear CS-U window will open to allow you to set the various scanning options. You can also scan films using function buttons other than Photo if you specify [Film] in the [Image source] menu of the ScanGear CS-U. Refer to the ScanGear CS-U User's Guide for details. f Note - Canon D1250U2F | CanoScan N670U/N676U/N1240U Toolbox3.1 for Win Guide - Page 17
on the error message, return to the currently selected ScanGear Toolbox settings dialog, and click the [Browse] button in the "Save scanned image to" category. Set the save location to the folder bearing the user name with which you log onto Windows XP. f Note • This category is not available in the - Canon D1250U2F | CanoScan N670U/N676U/N1240U Toolbox3.1 for Win Guide - Page 18
example) is automatically created within the selected folder and the scanned images are saved to the subfolder. Link scanned images to Select the application program linked to the button. The name [Cancel] button to return to the Toolbox's main window. Previous View Next View Previous Page Next Page - Canon D1250U2F | CanoScan N670U/N676U/N1240U Toolbox3.1 for Win Guide - Page 19
Dialogs" in this chapter. Scanner settings - Image quality This setting determines the resolution (fineness) at which a scanned image is reproduced. Draft : Scans dpi in Color mode. Standard : Scans at 300 dpi when the Black and White or Grayscale mode is selected. Scans at 150 dpi in Color mode. - Canon D1250U2F | CanoScan N670U/N676U/N1240U Toolbox3.1 for Win Guide - Page 20
the threshold value for black and white when the Black and White option is selected in the Image type category. Scanner settings - Scale This setting allows you to expand or reduce the size of an image for printing to fit the paper specified in the Paper size category. Fit to paper: Automatically - Canon D1250U2F | CanoScan N670U/N676U/N1240U Toolbox3.1 for Win Guide - Page 21
Chapter 2 Using the Toolbox Copy Settings Dialog (3/3) Printer settings These categories control the settings used to print the image on a printer. Paper size: Sets the size of paper on which the image will be printed. Number of copies: Sets the number of copies to print (up to a maximum of 99). - Canon D1250U2F | CanoScan N670U/N676U/N1240U Toolbox3.1 for Win Guide - Page 22
to the Dialogs" in this chapter. Scanner settings - Upper limit of attached file Large image files may take a long time to images, the actual file size may exceed the upper limit. w w 22 Contents Index f Note • Grayscale and color images are saved in the JPEG file format. Black and white images - Canon D1250U2F | CanoScan N670U/N676U/N1240U Toolbox3.1 for Win Guide - Page 23
(2/2) Scanner settings - Image quality This setting determines the resolution (fineness) at which a scanned image is reproduced. The options will change according to the maximum file size set for attachments. e Important • The Image quality cannot be set when the Image type is set to [Color (Multi - Canon D1250U2F | CanoScan N670U/N676U/N1240U Toolbox3.1 for Win Guide - Page 24
and White (OCR) and Grayscale modes are available. None of the color modes can be selected. Some OCR programs cannot accept Grayscale images. In this case, select [Black and White] or [Black and White (OCR)]. Scanner settings - Image quality This setting determines the resolution (fineness) at which - Canon D1250U2F | CanoScan N670U/N676U/N1240U Toolbox3.1 for Win Guide - Page 25
of the settings not included here, see j "Settings Common to the Dialogs" in this chapter. Scanner settings - Image quality This setting determines the resolution (fineness) at which a scanned image is reproduced. Resolutions from 75 to 1200 dpi are available with this setting. e Important • The - Canon D1250U2F | CanoScan N670U/N676U/N1240U Toolbox3.1 for Win Guide - Page 26
) if you installed all the software according to the "Install the Software" section of the Quick Start Guide. The respective program icons will " in Chapter 4. Scanner settings - Image quality This setting determines the resolution (fineness) at which a scanned image is reproduced. Resolutions from - Canon D1250U2F | CanoScan N670U/N676U/N1240U Toolbox3.1 for Win Guide - Page 27
. The Photo button will be linked to PhotoRecord if you installed all the software according to the "Install the Software" section of the Quick Start Guide. (CanoScan D1250U2F only) e Important • With the CanoScan D1250U2, film cannot be scanned using this button. f Note • For an explanation of the - Canon D1250U2F | CanoScan N670U/N676U/N1240U Toolbox3.1 for Win Guide - Page 28
. • The Descreen function is turned off when you select the [Color Photo] or [Monochrome Photo] settings. • Please see the Quick Start Guide for instructions for placing film on the document glass. Scanner settings - Image quality Select a scanning resolution (fineness) from 75 to 600 dpi (300 to - Canon D1250U2F | CanoScan N670U/N676U/N1240U Toolbox3.1 for Win Guide - Page 29
Buttons (1/3) There are three buttons at the front of the scanner. Confirming Scanner Button Settings Please examine the row of symbols above the buttons in the Toolbox's main window. SCAN COPY E-MAIL The CanoScan D1250U2F also has another button on its document cover. Pressing any one - Canon D1250U2F | CanoScan N670U/N676U/N1240U Toolbox3.1 for Win Guide - Page 30
ap- pear.) Pressing the scanner's (PHOTO) button will start the Toolbox and display its main window and the Photo settings dialog. After the image is scanned, the linked application program, PhotoRecord, will start and display that image. (Only CanoScan D1250U2F is equipped with a PHOTO button - Canon D1250U2F | CanoScan N670U/N676U/N1240U Toolbox3.1 for Win Guide - Page 31
when a scan is initiated by simply pressing a scanner button. What image type is selected? What are the Image quality and paper size settings? The answer is you can click the [Copy] button in the main window and set the Image type to Grayscale, the Image quality to Standard, and the Paper size to A5 - Canon D1250U2F | CanoScan N670U/N676U/N1240U Toolbox3.1 for Win Guide - Page 32
topic explains how to assign a different function to a scanner button. e Important • The PHOTO button on the CanoScan D1250U2F's document cover is permanently assigned to the Photo function and cannot be reassigned. 1. Start the Toolbox. Its main window will display. 2. Click the [Settings] button - Canon D1250U2F | CanoScan N670U/N676U/N1240U Toolbox3.1 for Win Guide - Page 33
4. Click the [OK] button. This will change the button's function. f Note • Selecting the [Show main window] option in the list box under the Scanner button causes the Toolbox main window (the window shown above) to display when that button is pressed. • Click the [Defaults] button to restore the - Canon D1250U2F | CanoScan N670U/N676U/N1240U Toolbox3.1 for Win Guide - Page 34
connected to the computer. 1. Start the Toolbox. The main window will display. 2. Click the [Settings] button. 4. Click the [OK] button. 3. Click the arrow button in the list box at the right of the Scanner category and select the scanner. w w 34 Contents Index Previous View Next View Previous - Canon D1250U2F | CanoScan N670U/N676U/N1240U Toolbox3.1 for Win Guide - Page 35
do not support image files cannot be linked. f Note • Only Color (24 bit), Grayscale (8 bit), and Black and White (1 bit) image files can be transferred from the Toolbox to an application program. Images created with other bit counts cannot be transferred. 1. Start the Toolbox. The main window will - Canon D1250U2F | CanoScan N670U/N676U/N1240U Toolbox3.1 for Win Guide - Page 36
Chapter 4 Useful Hints Linking to Other Application Programs (2/2) 5. Confirm that the desired application program is displayed and click the [Apply] button. f Note • You can label the Scan-1 or Scan-2 button with the name of the linked application program. Click the Scan-1 or Scan-2 name under - Canon D1250U2F | CanoScan N670U/N676U/N1240U Toolbox3.1 for Win Guide - Page 37
of the different file formats. ■ BMP File This is the standard Windows bitmap file format. It is supported by most Windows application programs. This format is frequently selected when an image file will only be used in a Windows environment. The ".bmp" file name extension is generally assigned to - Canon D1250U2F | CanoScan N670U/N676U/N1240U Toolbox3.1 for Win Guide - Page 38
name set to an administrator when you uninstall software programs. 1. Click the Windows [Start] menu and select [All Programs] or [Programs], followed by [Canon ScanGear Toolbox 3.1] and [Uninstall ScanGear Toolbox 3.1]. Follow the onscreen instructions to complete the procedure. f Note • If you - Canon D1250U2F | CanoScan N670U/N676U/N1240U Toolbox3.1 for Win Guide - Page 39
of the case the D1250U2F scanner is used. With the D1250U2 scanner, the settings are; Image type: Color Photo, Image quality: 300dpi, Paper size: L Landscape. *3 The application programs linked to ScanGear Toolbox when you install the software according to Quick Start Guide. w w 39 Contents Index - Canon D1250U2F | CanoScan N670U/N676U/N1240U Toolbox3.1 for Win Guide - Page 40
B Brightness 20 Buttons (Main Window) 10 Buttons (Scanner) 29 Buttons (Settings dialog) 13 Buttons (This guide) 3 C Closing the Toolbox 17 Film 27 I Image Quality 15 , 19 , 23 , 24 , 25 , 26 , 28 Image Type 14 , 19 Color (Auto crop) 14 Color (Magazine) 14 Color (Multi-Photo Mode) 14 Color (Photos
-
 1
1 -
 2
2 -
 3
3 -
 4
4 -
 5
5 -
 6
6 -
 7
7 -
8
-
9
-
10
-
11
-
12
-
13
-
14
-
15
-
16
-
17
-
18
-
19
-
20
-
21
-
22
-
23
-
24
-
25
-
26
-
27
-
28
-
29
-
30
-
31
-
32
-
33
-
34
-
35
-
36
-
37
-
38
-
39
-
40
 |
 |

w
ww
1
Contents
Index
Next Page
User
’
s Guide
for Windows
ScanGear Toolbox 3.1
English