Canon D1250U2F CanoScan N670U/N676U/N1240U Toolbox3.1 for Win Guide - Page 30
Using the Scanner Buttons 2/3
 |
UPC - 013803010756
View all Canon D1250U2F manuals
Add to My Manuals
Save this manual to your list of manuals |
Page 30 highlights
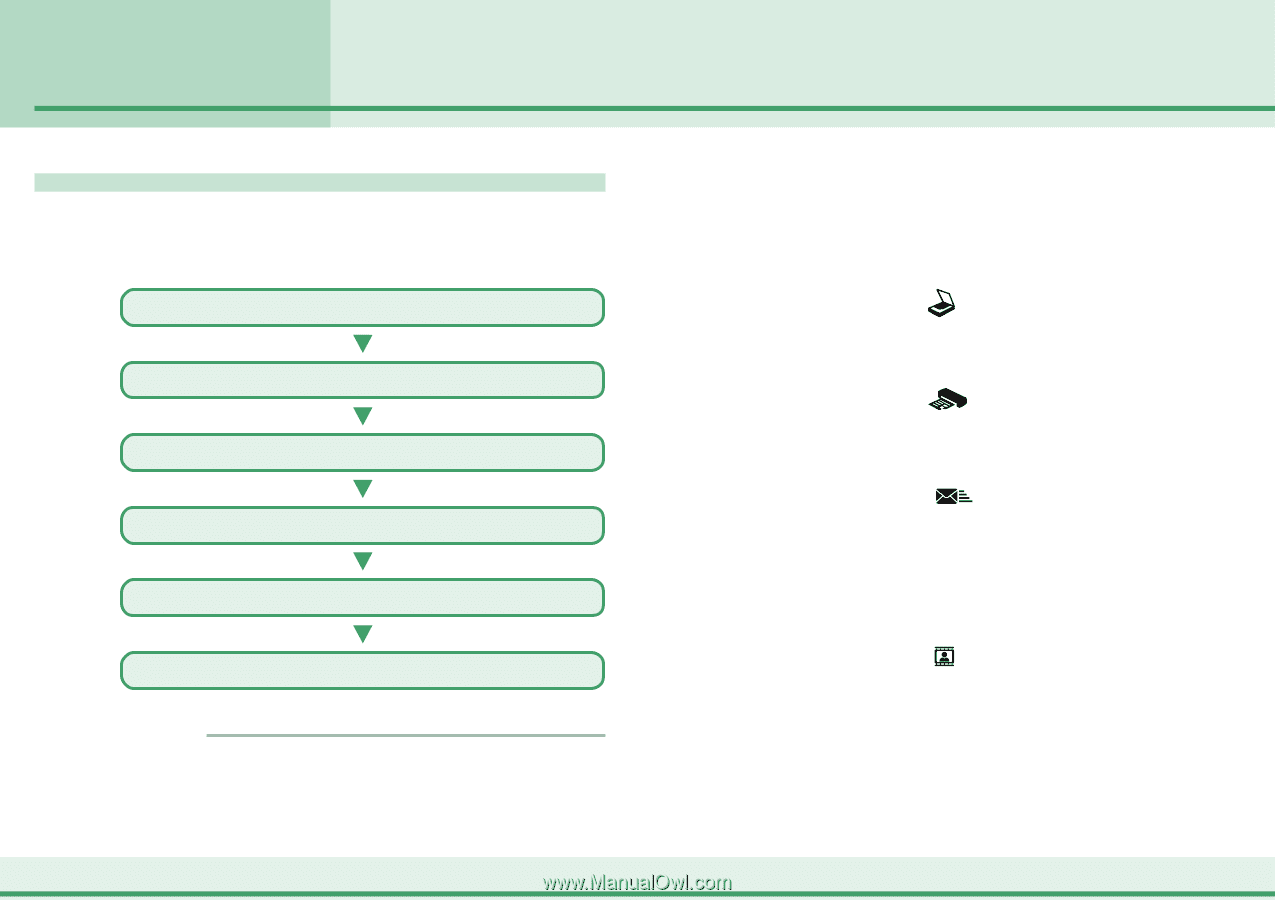
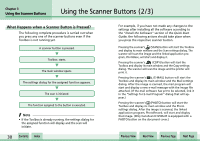
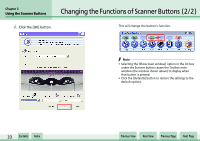
Chapter 3 Using the Scanner Buttons Using the Scanner Buttons (2/3) What Happens when a Scanner Button is Pressed? The following complete procedure is carried out when you press any one of the scanner buttons even if the Toolbox is not running yet. A scanner button is pressed. Toolbox starts. The main window opens. The settings dialog for the assigned function appears. The scan is initiated. The function assigned to the button is executed. f Note • If the Toolbox is already running, the settings dialog for the assigned function will display and the scan will initiate. w w 30 Contents Index For example, if you have not made any changes to the settings after installing all the software according to the "Install the Software" section of the Quick Start Guide, the following actions should take place when you press the respective scanner button. Pressing the scanner's (SCAN) button will start the Toolbox and display its main window and the Scan settings dialog. The scanner will scan the image and the linked application program, PhotoBase, will start and display it. Pressing the scanner's (COPY) button will start the Toolbox and display its main window and the Copy settings dialog. The scanner will scan the image and the printer will print it. Pressing the scanner's (E-MAIL) button will start the Toolbox and display its main window and the Mail settings dialog. After the image is scanned, the mail program will start and display a new e-mail message with the image file attached. (If the mail software has yet to be selected, link it in the "Settings for E-mail Program" dialog that will ap- pear.) Pressing the scanner's (PHOTO) button will start the Toolbox and display its main window and the Photo settings dialog. After the image is scanned, the linked application program, PhotoRecord, will start and display that image. (Only CanoScan D1250U2F is equipped with a PHOTO button on the document cover.) Previous View Next View Previous Page Next Page
-
 1
1 -
2
-
3
-
4
-
5
-
6
-
7
-
8
-
9
-
10
-
11
-
12
-
13
-
14
-
15
-
16
-
17
-
18
-
19
-
20
-
21
-
22
-
23
-
24
-
 25
25 -
 26
26 -
 27
27 -
 28
28 -
 29
29 -
 30
30 -
 31
31 -
 32
32 -
 33
33 -
 34
34 -
 35
35 -
36
-
37
-
38
-
39
-
40
 |
 |