Canon MultiPASS F80 MultiPASS F80 Setup Sheet
Canon MultiPASS F80 Manual
 |
View all Canon MultiPASS F80 manuals
Add to My Manuals
Save this manual to your list of manuals |
Canon MultiPASS F80 manual content summary:
- Canon MultiPASS F80 | MultiPASS F80 Setup Sheet - Page 1
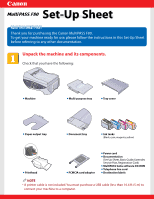
l Document tray l Ink tanks (Black, cyan, magenta, yellow) l Printhead l PCMCIA card adapter l Power cord l Documentation (Set-Up Sheet, Basic Guide, Extended Service Plan, Registration Card) l MultiPASS Suite software CD-ROM l Telephone line cord l Destination labels NOTE • A printer cable is - Canon MultiPASS F80 | MultiPASS F80 Setup Sheet - Page 2
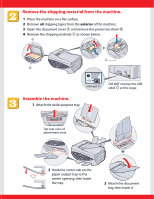
Remove the shipping material from the machine. 1 Place the machine on a flat surface. 2 Remove all shipping tapes from the exterior of the machine. 3 Open the document cover A and remove the protective sheet B. 4 Remove the shipping material C as shown below. A C B USB label D DO NOT remove the - Canon MultiPASS F80 | MultiPASS F80 Setup Sheet - Page 3
(print side up) in the multi-purpose tray q and adjust the paper guide A service offered by some companies. (For details, refer to the Comprehensive Guide.) - to answer all voice and fax calls manually (a telephone must be connected to the machine). - to receive faxes - Canon MultiPASS F80 | MultiPASS F80 Setup Sheet - Page 4
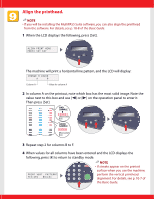
connect the machine, the Alarm light blinks, and the messages above should appear in the LCD. 3 If nothing appears in the LCD, press [ON/OFF (1 sec.)] to turn on the machine. • If you need to turn off the machine, press [ON/OFF (1 sec.)] for one second. Install the printhead. IMPORTANT • To turn - Canon MultiPASS F80 | MultiPASS F80 Setup Sheet - Page 5
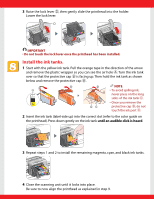
(label-side up) into the correct slot (refer to the color guide on the printhead). Press down gently on the ink tank until an audible click is heard. 3 Repeat steps 1 and 2 to install the remaining magenta, cyan, and black ink tanks. 4 Close the scanning unit until it locks into place. Be sure - Canon MultiPASS F80 | MultiPASS F80 Setup Sheet - Page 6
. NOTE • If you will be installing the MultiPASS Suite software, you can also align the printhead from the software. For details, see p. 10-8 of the Basic Guide. 1 When the LCD displays the following, press [Set]. ALIGN PRINT HEAD PRESS SET KEY The machine will print a horizontal line pattern, and - Canon MultiPASS F80 | MultiPASS F80 Setup Sheet - Page 7
NOT connect the USB cable before installing the software. NOTE • When installing the software in Windows XP or Windows 2000, log onto the system as a member of the Administrator group. • If you have previously installed an earlier version of the MultiPASS Suite software (version 4.1 or earlier), you - Canon MultiPASS F80 | MultiPASS F80 Setup Sheet - Page 8
the Basic Guide for basic operation instructions of all functions of your machine. If after reading the Basic Guide you require more detailed information, refer to the Comprehensive Guide or Software Guide (included in the CD-ROM). Part no. HT3-2116-000-V.2.0 © 2002 Canon Inc. Canon, MultiPASS, and
-
 1
1 -
 2
2 -
 3
3 -
 4
4 -
 5
5 -
 6
6 -
 7
7 -
8
 |
 |
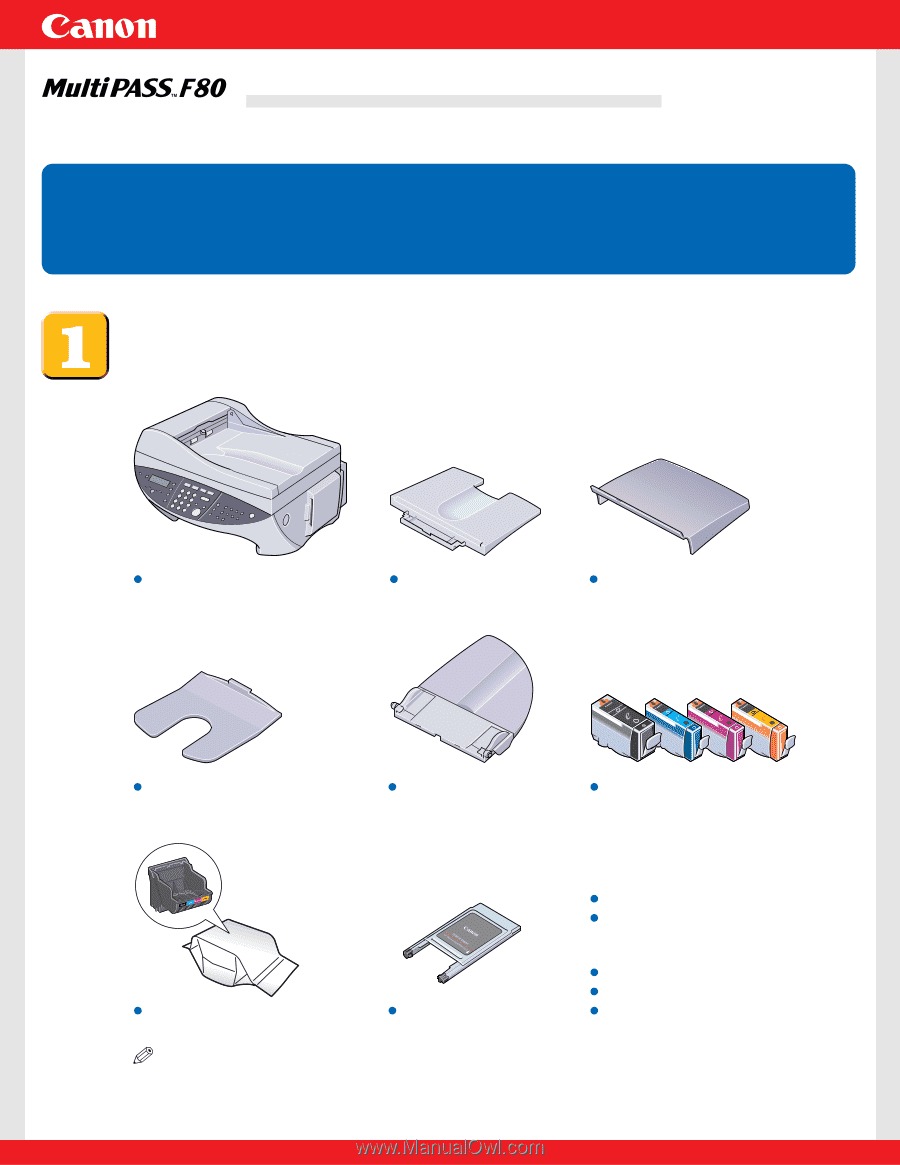
Unpack the machine and its components.
Check that you have the following:
NOTE
• A printer cable is not included.You must purchase a USB cable (less than 16.4 ft./5 m) to
connect your machine to a computer.
Machine
Multi-purpose tray
Tray cover
Document tray
PCMCIA card adapter
Printhead
Ink tanks
(Black, cyan, magenta, yellow)
Paper output tray
Power cord
Documentation
(Set-Up Sheet, Basic Guide, Extended
Service Plan, Registration Card)
MultiPASS Suite software CD-ROM
Telephone line cord
Destination labels
Thank you for purchasing the Canon MultiPASS F80.
To get your machine ready for use, please follow the instructions in this Set-Up Sheet
before referring to any other documentation.
READ THIS SHEET FIRST
READ THIS SHEET FIRST
Set-Up Sheet
Set-Up Sheet