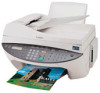
Canon MultiPASS F80 MultiPASS F80 Setup Sheet - Page 5
Install the ink tanks.
 |
View all Canon MultiPASS F80 manuals
Add to My Manuals
Save this manual to your list of manuals |
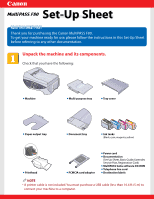
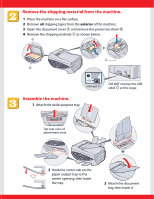
Page 5 highlights
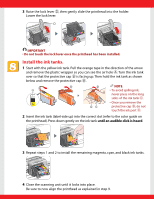
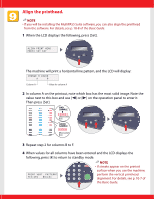
3 Raise the lock lever D, then gently slide the printhead into the holder. Lower the lock lever. D IMPORTANT • Do not touch the lock lever once the printhead has been installed. Install the ink tanks. 1 Start with the yellow ink tank. Pull the orange tape in the direction of the arrow and remove the plastic wrapper so you can see the air hole A. Turn the ink tank over so that the protective cap B is facing up. Then hold the ink tank as shown below and remove the protective cap B. A Ink Tank BCI-3eY PULL PULL InkBTCanI-k3eY Yellow Made in Japan PUSU B B NOTE • To avoid spilling ink, never press on the long sides of the ink tank C. DC • Once you remove the protective cap B, do not touch the ink port D. 2 Insert the ink tank (label-side up) into the correct slot (refer to the color guide on the printhead). Press down gently on the ink tank until an audible click is heard. 3 Repeat steps 1 and 2 to install the remaining magenta, cyan, and black ink tanks. 4 Close the scanning unit until it locks into place. Be sure to now align the printhead as explained in step 9.
-
 1
1 -
 2
2 -
 3
3 -
 4
4 -
 5
5 -
 6
6 -
 7
7 -
 8
8
 |
 |
