Canon PIXMA MG6120 Network Guide - Page 10
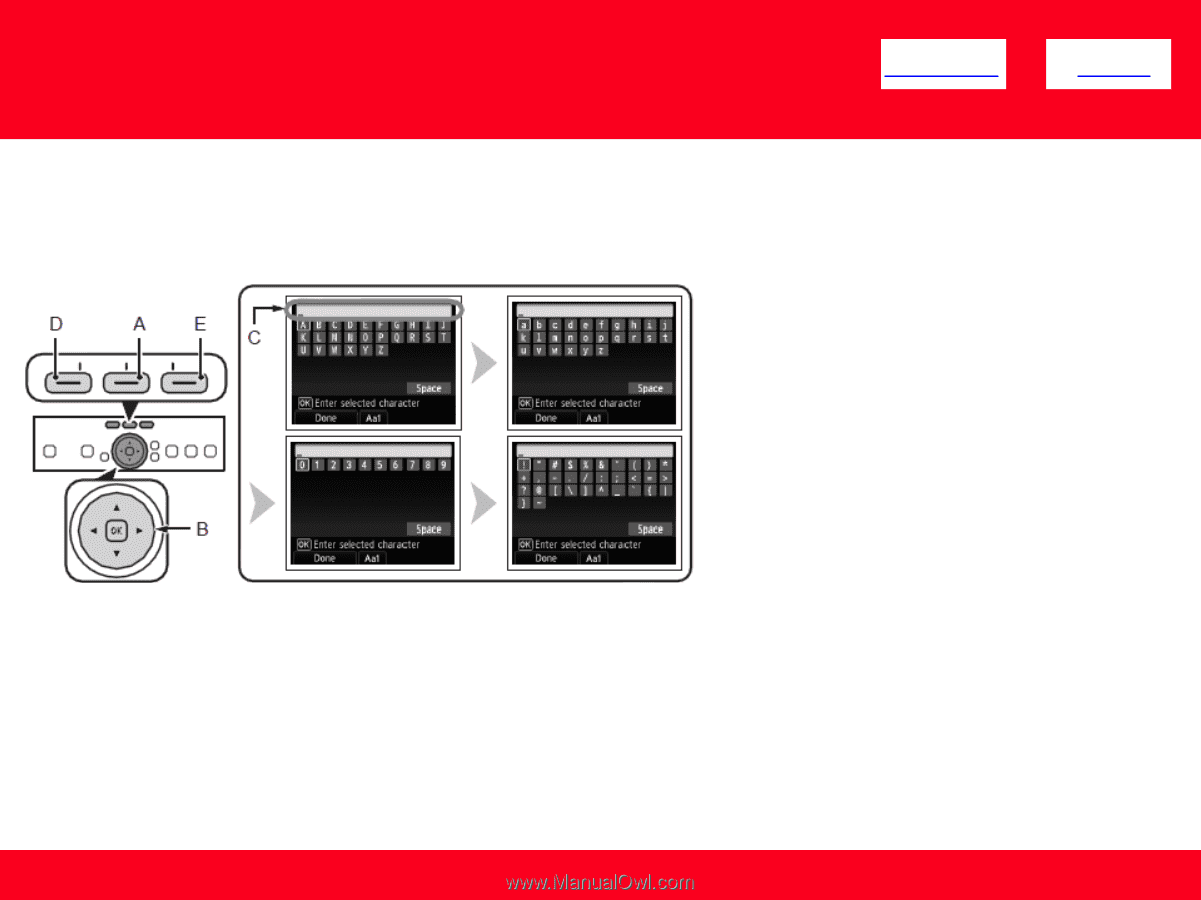
screen keyboard using the, it. Entered characters are, C of the on-screen, Repeat 1 and 2
 |
View all Canon PIXMA MG6120 manuals
Add to My Manuals
Save this manual to your list of manuals |
Page 10 highlights
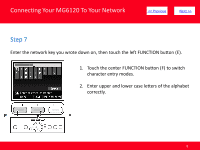
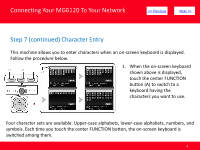
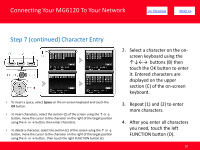
Connecting Your MG6120 To Your Network > Step 7 (continued) Character Entry • To insert a space, select Space on the on-screen keyboard and touch the OK button. • To insert characters, select the section (C) of the screen using the ↑ or ↓ button, move the cursor to the character on the right of the target position using the ← or → button, then enter characters. • To delete a character, select the section (C) of the screen using the ↑ or ↓ button, move the cursor to the character on the right of the target position using the ← or → button , then touch the right FUNCTION button (E). 2. Select a character on the onscreen keyboard using the buttons (B) then touch the OK button to enter it. Entered characters are displayed on the upper section (C) of the on-screen keyboard. 3. Repeat (1) and (2) to enter more characters. 4. After you enter all characters you need, touch the left FUNCTION button (D). 10
-
 1
1 -
2
-
3
-
4
-
 5
5 -
 6
6 -
 7
7 -
 8
8 -
 9
9 -
 10
10 -
 11
11 -
 12
12 -
 13
13 -
 14
14 -
 15
15 -
16
-
17
 |
 |