Canon PowerShot ELPH 350 HS User Guide - Page 103
Sending Images to a Registered, Web Service
 |
View all Canon PowerShot ELPH 350 HS manuals
Add to My Manuals
Save this manual to your list of manuals |
Page 103 highlights
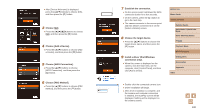
Sending Images to a Registered Web Service Registering Web Services Use a smartphone or computer to add to the camera Web services that you want to use. ●● A smartphone or computer with a browser and Internet connection is required to complete camera settings for CANON iMAGE GATEWAY and other Web services. ●● Check the CANON iMAGE GATEWAY website for details on browser (Microsoft Internet Explorer, etc.) requirements, including settings and version information. ●● For information on countries and regions where CANON iMAGE GATEWAY is available, visit the Canon website (http://www.canon. com/cig/). ●● You must have an account with Web services other than CANON iMAGE GATEWAY if you desire to use them. For further details, check the websites for each Web service you want to register. ●● Separate ISP connection and access point fees may be applicable. Registering CANON iMAGE GATEWAY After linking the camera and CANON iMAGE GATEWAY, add CANON iMAGE GATEWAY as a destination Web service on the camera. 1 Log in to CANON iMAGE GATEWAY and access the camera link settings page. ●●From a computer or smartphone, access http://www.canon.com/cig/ to visit CANON iMAGE GATEWAY. ●●Once the login screen is displayed, enter your user name and password to log in. If you do not have a CANON iMAGE GATEWAY account, follow the instructions to complete member registration (free of charge). 2 Choose the type of camera. ●●On this camera model, [ ] is displayed in the Wi-Fi menu. ●●Once you choose [ ], a page is displayed for entering the authentication code. On this page in step 7, you will enter the authentication code displayed on the camera after steps 3 - 6. 3 Access the Wi-Fi menu. ●●Press the [ ] button to turn the camera on. ●●Press the [ ] button. ●●After [Device Nickname] is displayed, press the [ ][ ] buttons to choose [OK], and then press the [ ] button. Before Use Basic Guide Advanced Guide Camera Basics Auto Mode / Hybrid Auto Mode Other Shooting Modes P Mode Playback Mode Wi-Fi Functions Setting Menu Accessories Appendix Index 103
-
 1
1 -
2
-
3
-
4
-
5
-
6
-
7
-
8
-
9
-
10
-
11
-
12
-
13
-
14
-
15
-
16
-
17
-
18
-
19
-
20
-
21
-
22
-
23
-
24
-
25
-
26
-
27
-
28
-
29
-
30
-
31
-
32
-
33
-
34
-
35
-
36
-
37
-
38
-
39
-
40
-
41
-
42
-
43
-
44
-
45
-
46
-
47
-
48
-
49
-
50
-
51
-
52
-
53
-
54
-
55
-
56
-
57
-
58
-
59
-
60
-
61
-
62
-
63
-
64
-
65
-
66
-
67
-
68
-
69
-
70
-
71
-
72
-
73
-
74
-
75
-
76
-
77
-
78
-
79
-
80
-
81
-
82
-
83
-
84
-
85
-
86
-
87
-
88
-
89
-
90
-
91
-
92
-
93
-
94
-
95
-
96
-
97
-
 98
98 -
 99
99 -
 100
100 -
 101
101 -
 102
102 -
 103
103 -
 104
104 -
 105
105 -
 106
106 -
 107
107 -
 108
108 -
109
-
110
-
111
-
112
-
113
-
114
-
115
-
116
-
117
-
118
-
119
-
120
-
121
-
122
-
123
-
124
-
125
-
126
-
127
-
128
-
129
-
130
-
131
-
132
-
133
-
134
-
135
-
136
-
137
-
138
-
139
-
140
-
141
-
142
-
143
-
144
-
145
-
146
-
147
-
148
-
149
-
150
-
151
-
152
-
153
-
154
-
155
-
156
-
157
-
158
-
159
-
160
-
161
-
162
 |
 |
