Canon PowerShot SD630 PowerShot SD630 DIGITAL ELPH/DIGITAL IXUS 65 Camera User - Page 17
Touch Control Dial, Using the Clock
 |
View all Canon PowerShot SD630 manuals
Add to My Manuals
Save this manual to your list of manuals |
Page 17 highlights
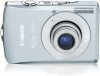
Before Using the Camera-The Components Guide Touch Control Dial Placing a finger on the touch control dial displays the playback mode and shooting mode touch icons on the LCD monitor and you can confirm the functions assigned to each button. zUnavailable buttons are grayed out. zPlace a finger on the touch control dial over a function you want to set, and the icon will enlarge on the LCD monitor. zIt is easy to select the image you wish to see with the touch control dial. (See Basic Guide, p. 11). zIt is easy to select the area settings for the world clock (p. 23) using the touch control dial. zYou can set the touch icons to On/Off in the (Set up) menu (p. 29). Touch Icons Sample of shooting mode Using the Clock You can display the current date and time for a 5-second* interval using the following two methods. * Default setting Method 1 Hold the FUNC./SET button down while turning on the power. Method 2 In a shooting mode, hold the FUNC./SET button down. If you hold the camera horizontally, it displays the time. If you hold it vertically, the time and date display. However, if you hold the camera vertically and use method 1 to display the date and time, the time will be initially displayed in the same way as when the camera is held horizontally. zYou can change the display color by pressing the or button. zThe clock display will cease when the display interval is over or when you operate the FUNC./SET, MENU or shutter button or the mode switch. zThe clock's display interval can be changed in the (Set up) menu (p. 29). 15
-
 1
1 -
2
-
3
-
4
-
5
-
6
-
7
-
8
-
9
-
10
-
11
-
 12
12 -
 13
13 -
 14
14 -
 15
15 -
 16
16 -
 17
17 -
 18
18 -
 19
19 -
 20
20 -
 21
21 -
 22
22 -
23
-
24
-
25
-
26
-
27
-
28
-
29
-
30
-
31
-
32
-
33
-
34
-
35
-
36
-
37
-
38
-
39
-
40
-
41
-
42
-
43
-
44
-
45
-
46
-
47
-
48
-
49
-
50
-
51
-
52
-
53
-
54
-
55
-
56
-
57
-
58
-
59
-
60
-
61
-
62
-
63
-
64
-
65
-
66
-
67
-
68
-
69
-
70
-
71
-
72
-
73
-
74
-
75
-
76
-
77
-
78
-
79
-
80
-
81
-
82
-
83
-
84
-
85
-
86
-
87
-
88
-
89
-
90
-
91
-
92
-
93
-
94
-
95
-
96
-
97
-
98
-
99
-
100
-
101
-
102
-
103
-
104
-
105
-
106
-
107
-
108
-
109
-
110
-
111
-
112
-
113
-
114
-
115
-
116
-
117
-
118
-
119
-
120
-
121
-
122
-
123
-
124
-
125
-
126
-
127
-
128
-
129
-
130
-
131
-
132
-
133
-
134
-
135
-
136
-
137
-
138
-
139
 |
 |
