Canon SELPHY CP710 SELPHY CP710/CP510 User Guide - Page 46
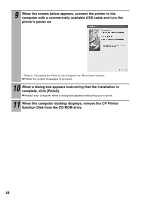
When the computer desktop displays, remove the CP Printer
 |
View all Canon SELPHY CP710 manuals
Add to My Manuals
Save this manual to your list of manuals |
Page 46 highlights
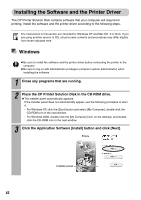
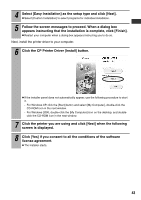
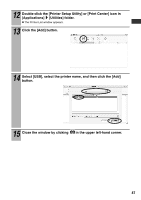
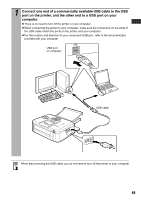
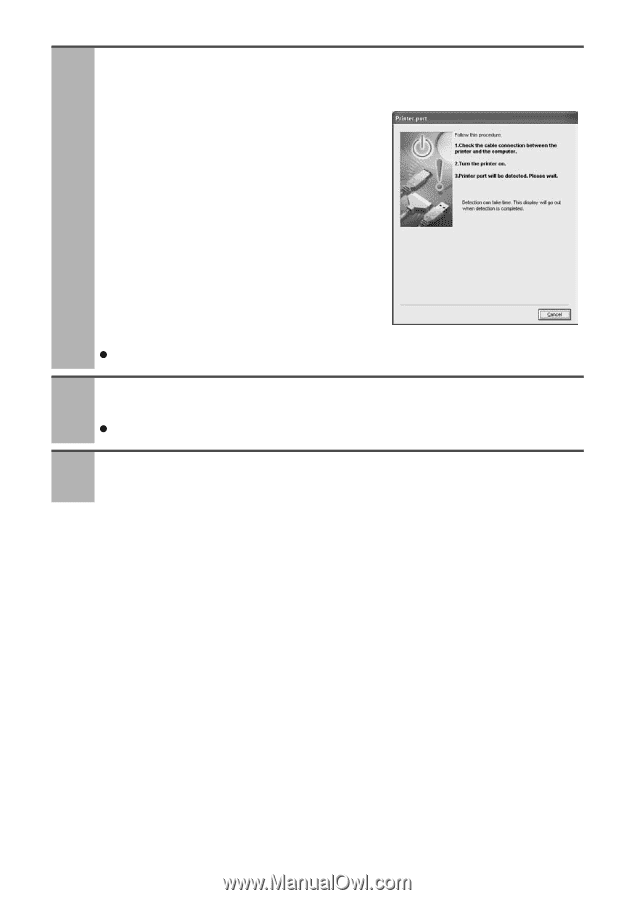
9 When the screen below appears, connect the printer to the computer with a commercially available USB cable and turn the printer's power on. Refer to "Connecting the Printer to Your Computer" (p. 48) on how to connect. z Follow the screen messages to proceed. 10 When a dialog box appears instructing that the installation is complete, click [Finish]. z Restart your computer when a dialog box appears instructing you to do so. 11 When the computer desktop displays, remove the CP Printer Solution Disk from the CD-ROM drive. 44
-
 1
1 -
2
-
3
-
4
-
5
-
6
-
7
-
8
-
9
-
10
-
11
-
12
-
13
-
14
-
15
-
16
-
17
-
18
-
19
-
20
-
21
-
22
-
23
-
24
-
25
-
26
-
27
-
28
-
29
-
30
-
31
-
32
-
33
-
34
-
35
-
36
-
37
-
38
-
39
-
40
-
 41
41 -
 42
42 -
 43
43 -
 44
44 -
 45
45 -
 46
46 -
 47
47 -
 48
48 -
 49
49 -
 50
50 -
 51
51 -
52
-
53
-
54
-
55
-
56
-
57
-
58
-
59
-
60
-
61
-
62
-
63
-
64
-
65
-
66
-
67
-
68
-
69
 |
 |
44
9
When the screen below appears, connect the printer to the
computer with a commercially available USB cable and turn the
printer’s power on.
Refer to
"Connecting the Printer to Your Computer" (p. 48)
on how to connect.
Follow the screen messages to proceed.
10
When a dialog box appears instructing that the installation is
complete, click [Finish].
Restart your computer when a dialog box appears instructing you to do so.
11
When the computer desktop displays, remove the CP Printer
Solution Disk from the CD-ROM drive.