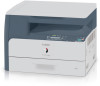
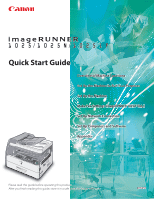
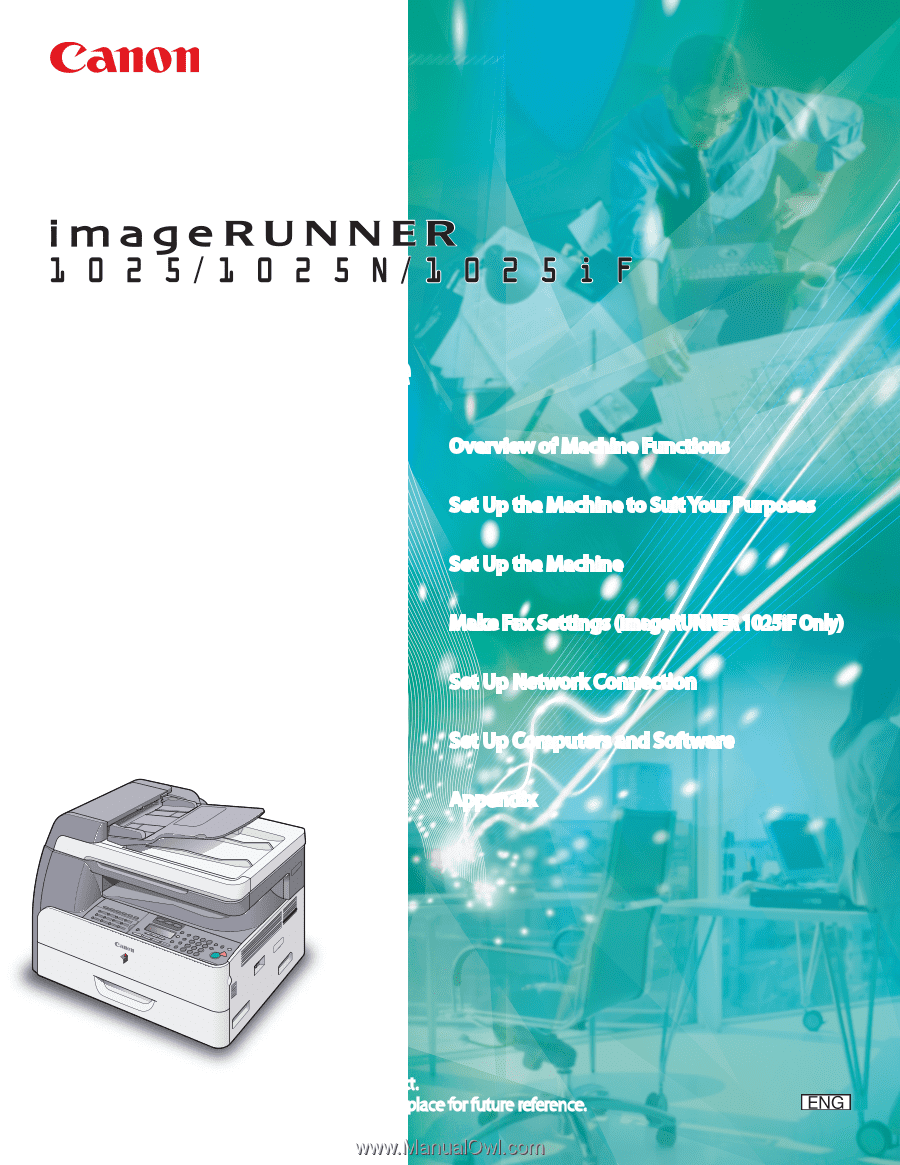
Canon imageRUNNER 1025 Series Quick Start Guide
Canon imageRUNNER 1025 Manual
 |
View all Canon imageRUNNER 1025 manuals
Add to My Manuals
Save this manual to your list of manuals |
Canon imageRUNNER 1025 manual content summary:
- Canon imageRUNNER 1025 | Series Quick Start Guide - Page 1
the Machine to Suit Your Purposes Set Up the Machine Make Fax Settings (imageRUNNER 1025iF Only) Set Up Network Connection Set Up Computers and Software Appendix Please read this guide before operating this product. After you finish reading this guide, store it in a safe place for future reference. - Canon imageRUNNER 1025 | Series Quick Start Guide - Page 2
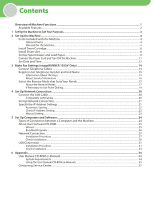
the Machine...4 Optional Items...4 Manuals for the Machine...5 Install Toner Cartridge...6 Install Drum Unit...8 Set Up Paper Drawer and Load Paper...9 Connect the Power Cord and Turn ON the Machine...11 Set Date and Time...12 3 Make Fax Settings (imageRUNNER 1025iF Only 14 Connect Telephone Cables - Canon imageRUNNER 1025 | Series Quick Start Guide - Page 3
Operation Guide and e-Manual. Depending on the system configuration and product purchased, some features described in the manuals may manual are those taken when no optional equipment is attached to the imageRUNNER 1025iF. If there is any difference between the imageRUNNER 1025, 1025N or 1025iF - Canon imageRUNNER 1025 | Series Quick Start Guide - Page 4
basis. : available -: not available opt. : optional Copy Print (UFRII LT) Print (PCL) Scan imageRUNNER 1025 opt. imageRUNNER 1025N opt. imageRUNNER 1025iF opt. Fax I-Fax/E-mail/ FTP/SMB RUI (Network Board) ADF - - opt. - - - The Card Reader-E1, Cassette Feeding Module-N2, and - Canon imageRUNNER 1025 | Series Quick Start Guide - Page 5
1 Set Up the Machine to Suit Your Purposes Determine which machine functions (Copy, Fax, Scan, PC Print, PC Fax, Remote UI, E-Mail, I-Fax, Scan to File Server) you intend to use, and make the settings according to the flowchart below. For example, if you intend to use only the - Canon imageRUNNER 1025 | Series Quick Start Guide - Page 6
● Drum Unit Warranty Notice ● Installation Checklist ● Registration Card ● Unpacking Instruction Sheet ● Quick Start Guide (This Document) ● Basic Operation Guide ● User Software CD-ROM ● Manual CD-ROM ● Cassette Feeding Module-N2 *1 imageRUNNER 1025iF Only *2 imageRUNNER 1025N and 1025iF Only - Canon imageRUNNER 1025 | Series Quick Start Guide - Page 7
(This Document) Basic Operation Guide e-Manual ● Quick Start Guide (This Document): The Quick Start Guide contains the machine setup and software installation. Read this guide before operating this product. ● Basic Operation Guide: The Basic Operation Guide contains the basic operation features - Canon imageRUNNER 1025 | Series Quick Start Guide - Page 8
1 Remove the plastic case from the box. 3 Open the front cover. 2 Open the case and remove the toner cartridge. Keep the box and case for future use. 4 Pull the toner cartridge lever (A) towards you and insert the cartridge into the machine with the arrow (B) pointing towards the machine. - Do - Canon imageRUNNER 1025 | Series Quick Start Guide - Page 9
careful that your hands or clothes do not get dirty from touching the toner. - If your hands or clothes get dirty from touching the toner, wash them immediately in cold water. Do not use hot water. If you do, the toner may be set permanently. Do not pull out the seal at an - Canon imageRUNNER 1025 | Series Quick Start Guide - Page 10
the machine (A), and push the unit into the machine as far as it will go. 2 Open the package of the new drum unit and remove the protective packing material (A). 5 After the unit is completely inserted, remove the orange paper. 3 Hold the unit by its grips on both sides. Do not touch the - Canon imageRUNNER 1025 | Series Quick Start Guide - Page 11
. 2 Set Up the Machine Be careful not to get your fingers caught. Set Up Paper Drawer and Load Paper 1 Pull out the paper drawer until it stops. 2 Incline the rear paper end guide until it is unlocked, then remove it from the paper drawer. If you use LTR size, go to step 4. If you use other - Canon imageRUNNER 1025 | Series Quick Start Guide - Page 12
print side facing up. Make sure to set the guide to the mark for the size of the paper to be loaded correctly. If the guide is positioned incorrectly, it may cause paper jams, dirty prints, etc. 4 Even the edges of the paper stack. - When loading paper, be careful not to cut your fingers on the - Canon imageRUNNER 1025 | Series Quick Start Guide - Page 13
into the optional paper drawer. For attaching the optional paper drawer, see the instruction sheet that comes with the optional paper drawer. - For details on loading paper in the stack bypass, see Chapter 2, "Originals and Print Media," in the Basic Operation Guide. Connect the Power Cord and - Canon imageRUNNER 1025 | Series Quick Start Guide - Page 14
machine may enter the sleep mode while you are setting it up. Press [Power] to turn the machine back ON and continue the setup. 1 Press [Additional Functions]. 2 Press [ ] or [ ] to select , then press [OK]. ADD.FUNCTIONS 6.TIMER SETTINGS 3 Confirm that is - Canon imageRUNNER 1025 | Series Quick Start Guide - Page 15
in . • • • - You can also set the time zone and daylight saving time. For instructions, see "Introduction of the Machine" in the e-Manual. 2 Set Up the Machine 13 - Canon imageRUNNER 1025 | Series Quick Start Guide - Page 16
3 Make Fax Settings (imageRUNNER 1025iF Only) This section describes how to make the fax settings. If you are using the imageRUNNER 1025/1025N, skip the procedure described in this section and go to "Set Up Network Connection," on p. 20. Connect Telephone Cables 1 Connect the telephone cable to the - Canon imageRUNNER 1025 | Series Quick Start Guide - Page 17
imageRUNNER 1025iF Only) Register User Telephone Number and Unit Name This section describes the procedure for registering the user telephone number and unit name. For instructions . Press [Power] to turn the machine back ON and continue the setup. 1 Press [Additional Functions]. 2 Press [ ] or [ ] - Canon imageRUNNER 1025 | Series Quick Start Guide - Page 18
3 Make Fax Settings (imageRUNNER 1025iF Only) 4 Confirm that is displayed, then press [OK]. maximum) (your name, company name, etc.), then press [OK]. Ex. UNIT NAME :a Canon 12 Press [Stop] to return to the standby mode. About Sender Information Before sending documents, - Canon imageRUNNER 1025 | Series Quick Start Guide - Page 19
3 Make Fax Settings (imageRUNNER 1025iF Only) Select the Receive Mode that Suits Your Needs About the Receive Receiving VOICE CALL The telephone with built-in answering machine rings and records voice messages. Rings for every call, whether it is a fax call or a voice call. For a fax - Canon imageRUNNER 1025 | Series Quick Start Guide - Page 20
imageRUNNER 1025iF the receive mode is set to and your machine is connected to not supported with . - DRPD (Distinctive Ring Pattern Detection) service assigns two Press [Power] to turn the machine back ON and continue the setup. 1 Press [Additional Functions]. 2 Press [ ] or [ ] - Canon imageRUNNER 1025 | Series Quick Start Guide - Page 21
3 Make Fax Settings (imageRUNNER 1025iF Only) If Necessary to Use Pulse Dialing By default, the telephone line type on the machine is set to tone dialing. If you use tone - Canon imageRUNNER 1025 | Series Quick Start Guide - Page 22
-T/100Base-TX port on the back of the machine and the other end to a network router or a hub. - The machine does not come with a LAN cable. - You can use the imageRUNNER 1025 in a network environment if the optional network board is installed. - If you use the machine as a local printer, connect the - Canon imageRUNNER 1025 | Series Quick Start Guide - Page 23
settings from a web browser on the computer by using the Remote UI software. w E-Mail: Send scanned documents attached to e-mail message through a network. w Scan to File Server: Send a scanned document to a file server from the computer. w I-Fax: Send a document to a machine that is compatible - Canon imageRUNNER 1025 | Series Quick Start Guide - Page 24
network cable. After connecting the LAN cable, wait for 30 seconds until the machine obtains the IP address. This machine also supports automatic IP addresses using BOOTP and RARP protocols. If you use these protocols, follow the procedures on "Manual and continue the setup. 1 Press [ - Canon imageRUNNER 1025 | Series Quick Start Guide - Page 25
are setting it up. Press [Power] to turn the machine back ON and continue the setup. 1 Press [Additional Functions]. 2 Press [ ] or [ ] to select - Canon imageRUNNER 1025 | Series Quick Start Guide - Page 26
to the following: Scan document from a computer → "Scan," in the e-Manual PC Print → "Print," in the e-Manual PC Fax → "Fax," in the e-Manual - The scanner driver is available only through a USB connection. - You can use the USB connection and network connection together. - Do - Canon imageRUNNER 1025 | Series Quick Start Guide - Page 27
supports the PCL5e and PCL6 printer drivers. Scanner Driver*** Scanner Driver enables computer to use the machine as scanner. scanned with a scanner into an application, attach them to e-mail messages, save them to the computer, etc. * Only for the imageRUNNER 1025iF. ** The PCL printer driver - Canon imageRUNNER 1025 | Series Quick Start Guide - Page 28
] (See step 3 of "Installation Procedure" in "Network Connection,") then follow the instructions that appear on the screen. For details, see the Readme file and online help for this program. The NetSpot Device Installer is not supported on Windows 64-bit version. Canon Font Manager* Font Manager is - Canon imageRUNNER 1025 | Series Quick Start Guide - Page 29
Network Connection Before Installation • The following procedures are explained using sample screens from Windows XP Professional. In the following procedures, the imageRUNNER 1025iF network correctly, and confirm that the power is ON. 2 Insert the User Software CD-ROM. If the CD-ROM Setup - Canon imageRUNNER 1025 | Series Quick Start Guide - Page 30
you use imageRUNNER 1025iF. Select only [Printer], if you use imageRUNNER 1025 or 1025N. In any of the following conditions, select [Canon Driver Information Assist Service] to install the DIAS service. 1. If you want to get device information via a print server as a shared network printer 2. When - Canon imageRUNNER 1025 | Series Quick Start Guide - Page 31
17 A printer test page is printed out from the machine. If you select the [Fax:Canon iR1024/1025 (FAX)], [Fax Sending Settings] screen appears. Specify the necessary information such as name, telephone connect to the machine through a network, repeat the procedure from step 1 for each computer. 29 - Canon imageRUNNER 1025 | Series Quick Start Guide - Page 32
[Printers]. Windows 2000: From the Windows task bar, click [Start] → [Settings] → [Control Panel] → double-click [Printers]. Make sure the corresponding printer driver icon is displayed. 2 Set your machine as the default printer. Right-click the printer icon for this machine. Select [Set as Default - Canon imageRUNNER 1025 | Series Quick Start Guide - Page 33
Procedure 1 Double-click the CD-ROM icon, then double-click [MInst] ([MInst.exe]). 5 3 Insert the User Software CD-ROM. 2 6 4 If the CD-ROM Setup screen is not displayed, click [start] on the Windows task bar → [My Computer]. Windows Vista: Click [Start] on the Windows task bar → [Computer - Canon imageRUNNER 1025 | Series Quick Start Guide - Page 34
Computers and Software 7 11 8 12 14 Attach the ferrite core (A) as close as possible to the B-type side (square) of the USB cable (B). (imageRUNNER 1025N/1025iF Only) 15 9 10 32 13 Connect the machine and your computer with a USB cable (A) . - A USB cable is not included. - If the Found New - Canon imageRUNNER 1025 | Series Quick Start Guide - Page 35
bar, click [Start] → [Settings] → [Control Panel] → double-click [Scanners and Cameras]. Make sure the corresponding scanner driver icon is displayed. 4 Check if there is the [Canon iR Toolbox 4.9] icon on the Windows desktop. If the [Canon iR Toolbox 4.9] icon is displayed on the Windows desktop - Canon imageRUNNER 1025 | Series Quick Start Guide - Page 36
on the CD-ROM via your computer screen. The manual describes all of the functions and troubleshooting for the machine. Follow the instructions below to use the User Manual CD-ROM (e-Manual). System Requirements The User Manual CD-ROM (e-Manual) can be used in the following system environments - Canon imageRUNNER 1025 | Series Quick Start Guide - Page 37
(Windows Vista: click [Start] on the Windows task bar → [Computer]. Windows 2000: double-click [My Computer] on the Windows desktop.) Open the User Manual CD-ROM icon, then double-click start.exe. - Depending on the operating system you are using, a security protection message may be displayed. In - Canon imageRUNNER 1025 | Series Quick Start Guide - Page 38
Explorer for Windows XP, ActiveX blocks pop-ups in the background. If the e-Manual is not displayed properly, look for an information bar at the top of to functions, such as the maintenance and troubleshooting topics. J [Office Locations] Click to display Canon contact details in a separate window. - Canon imageRUNNER 1025 | Series Quick Start Guide - Page 39
Center If you have a problem with your machine and you cannot solve it even if you refer to the manuals or online help, please contact your local authorized Canon dealer from whom you purchased the equipment (if under warranty), or with whom you have a servicing contact. If you are not sure who - Canon imageRUNNER 1025 | Series Quick Start Guide - Page 40
CHINA CO., LTD. 15F Jinbao Building No.89 Jinbao Street, Dongcheng District, Beijing 100005, China CANON SINGAPORE PTE. LTD. 1 HarbourFront Avenue #04-01 Keppel Bay Tower, Singapore 098632 CANON HONGKONG CO., LTD. 19/F., The Metropolis Tower, 10 Metropolis Drive, Hunghom, Kowloon, Hong Kong FT5
-
 1
1 -
 2
2 -
 3
3 -
 4
4 -
 5
5 -
 6
6 -
 7
7 -
8
-
9
-
10
-
11
-
12
-
13
-
14
-
15
-
16
-
17
-
18
-
19
-
20
-
21
-
22
-
23
-
24
-
25
-
26
-
27
-
28
-
29
-
30
-
31
-
32
-
33
-
34
-
35
-
36
-
37
-
38
-
39
-
40
 |
 |
Quick Start Guide
Overview of Machine Functions
Set Up the Machine to Suit Your Purposes
Set Up the Machine
Make Fax Settings
(imageRUNNER 1025iF Only)
Set Up Network Connection
Set Up Computers and Software
Appendix
Please read this guide before operating this product.
After you finish reading this guide, store it in a safe place for future reference.