Casio CLASSPad300 User Manual
Casio CLASSPad300 - ClassPad 300 Touch-Screen Graphing Scientific Calculator Manual
 |
UPC - 079767161071
View all Casio CLASSPad300 manuals
Add to My Manuals
Save this manual to your list of manuals |
Casio CLASSPad300 manual content summary:
- Casio CLASSPad300 | User Manual - Page 1
For ClassPad 300 PLUS E ClassPad Manager Version 2.2 (PROGRAM-LINKTM) User's Guide RJA510188-4 http://world.casio.com/edu/ http://classpad.net/ - Casio CLASSPad300 | User Manual - Page 2
Note Display examples shown in this User's Guide are intended for illustrative purposes only. The actual text and values that appear on display may differ from the examples shown in this User's Guide. - Casio CLASSPad300 | User Manual - Page 3
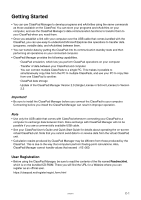
use a commercially available USB cable. • See your ClassPad User's Guide and Quick Start Guide for details about operating the on-screen virtual ClassPad unit. Note that you cannot send data to or receive data from the virtual ClassPad unit. • Calculation results produced by ClassPad Manager may be - Casio CLASSPad300 | User Manual - Page 4
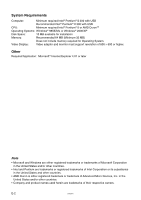
Intel® Pentium® II 200 with USB Recommended Intel® Pentium® II 300 with USB CPU: Minimum required Intel® Pentium® II or AMD memory required for Operating System. Video Display: Video adaptor and monitor must support resolution of 800 × 600 or higher. Other Required Application: Microsoft ® - Casio CLASSPad300 | User Manual - Page 5
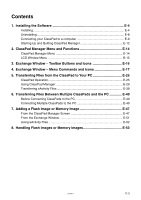
Contents 1. Installing the Software E-4 Installing ...E-4 Uninstalling ...E-8 Connecting your ClassPad to a computer E-9 Starting Up and Quitting ClassPad Manager E-12 2. ClassPad Manager Menu and Functions E-14 ClassPad Manager Menu E-14 LCD Window Menu E-15 3. Exchange Window - Toolbar - Casio CLASSPad300 | User Manual - Page 6
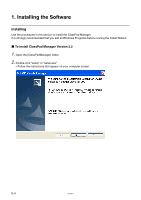
. It is strongly recommended that you exit all Windows Programs before running the Install Wizard. k To install ClassPad Manager Version 2.2 1. Open the [ClassPadManager] folder. 2. Double-click "setup" or "setup.exe". • Follow the instructions that appear on your computer screen. E-4 20050901 - Casio CLASSPad300 | User Manual - Page 7
3. Click the [Next] button to advance to the next screen. 1. Installing the Software 4. Carefully read the terms and conditions of the license agreement. 5. If you agree to the terms and conditions of the license agreement, click "I accept the - Casio CLASSPad300 | User Manual - Page 8
1. Installing the Software 6. Perform either of the following two operations to specify the drive and folder where you want to install ClassPad Manager. 6-a To use the default settings, simply click the [Next] button. 6-b To specify a different folder, click the "Change..." button. Specify the - Casio CLASSPad300 | User Manual - Page 9
7. Click the [Install] button to start installation. 1. Installing the Software 8. On the screen that appears after installation is complete, click the [Finish] button. This finalizes installation of the software on your computer. 20050901 E-7 - Casio CLASSPad300 | User Manual - Page 10
1. Display the Windows Control Panel. 2. Click [Add/Remove Programs]. 3. In the list of applications on the dialog box that appears, select "CASIO ClassPad Manager ClassPad 300 PLUS". 4. Click the [Add/Remove] button to start a program maintenance wizard. 5. Click the [Yes] button. • This completes - Casio CLASSPad300 | User Manual - Page 11
Connect the USB cable to your ClassPad. • This will automatically cause your ClassPad to turn on and enter data communication standby. • If your ClassPad does not enter communication standby at this time, perform the steps under step 3 on page E-27. Attention Windows XP Users (After installing the - Casio CLASSPad300 | User Manual - Page 12
1. Installing the Software u Windows XP Users After installing the ClassPad Manager, perform the following steps to install the USB driver on your computer. 1. Connecting ClassPad to a computer running Windows XP causes the screen shown below to appear on your computer display. Select "No, not this - Casio CLASSPad300 | User Manual - Page 13
to let you know that the software has not passed the "Windows Logo Test", there is no need for concern. Simply click [Continue Anyway] and proceed with installation. 4. Click [Finish]. k To disconnect your ClassPad from a computer 1. Disconnect the USB cable from your ClassPad. 20050901 E-11 - Casio CLASSPad300 | User Manual - Page 14
the Software Starting Up and Quitting ClassPad Manager k To start up and quit ClassPad Manager 1. On your computer's desktop, double-click "ClassPad Manager". • This starts up ClassPad Manager. 2. On ClassPad Manager, perform the data exchange and management tasks you want. 3. To quit ClassPad - Casio CLASSPad300 | User Manual - Page 15
1. Installing the Software Viewing "About ClassPad Manager" Information "About ClassPad Manager" is a dialog box that shows version information about ClassPad Manager, and your serial number. You can use either of the following two procedures to display "About ClassPad Manager" information. • Right- - Casio CLASSPad300 | User Manual - Page 16
, and Save As. - Pastes the text currently on the Windows clipboard. - Captures a screenshot of the LCD and stores it on the Windows clipboard. - Keeps the ClassPad Manager window and all of its sub-windows on top of all other windows. - Minimizes the - Casio CLASSPad300 | User Manual - Page 17
2. ClassPad Manager Menu and Functions LCD Window Menu k LCD Window Shortcut Menu Right-clicking the LCD displays a shortcut menu that contains the same commands as the ClassPad Manager Menu, except for the [LCD Window] command. 20050901 E-15 - Casio CLASSPad300 | User Manual - Page 18
3. Exchange Window - Toolbar Buttons and Icons The following describes the toolbar buttons and icons that appear on the Exchange Window. - Copies the currently selected file(s). - Pastes copied file(s). - Deletes the currently selected folder(s) or file(s). - Creates a new folder. - Displays - Casio CLASSPad300 | User Manual - Page 19
The following describes the commands of the shortcut menus that appear when you right-click on the Exchange Window. k Right-clicking the "ClassPads" icon ( ) • Collapse/Expand - Collapses/Expands the folder tree. k Right-clicking the "Shared" folder ( ) • Paste - Pastes copied files to all the - Casio CLASSPad300 | User Manual - Page 20
column one • Paste - Pastes copied files to all the "Shared" folders of the ClassPads that are currently connected to the ClassPad Manager. k Right-clicking a ClassPad icon ( ) under the "ClassPads" icon • Collapse/Expand - Collapses/Expands the folder tree. • Disconnect - Disconnects the currently - Casio CLASSPad300 | User Manual - Page 21
Manager. • New Folder - Creates a new folder on the currently selected ClassPad. • Paste - Pastes copied folder(s) on the currently selected ClassPad. k Right-clicking a folder icon ( ) under a ClassPad icon • Copy - Copies the folder. • Paste - Pastes copied file(s) into the folder. 20050901 - Casio CLASSPad300 | User Manual - Page 22
4. Exchange Window - Menu Commands and Icons k Right-clicking the blank space in column two, while a folder icon ( ) is selected in column one • Paste - Pastes copied file(s). k Right-clicking a file or variable icon ( ) in column two • Copy - Copies the currently selected file(s). E-20 20050901 - Casio CLASSPad300 | User Manual - Page 23
4. Exchange Window - Menu Commands and Icons k Right-clicking the Computer icon ( ) • Collapse/Expand - Collapses/Expands the folder tree. • Add Image - Adds a new image or inserts an existing image. k Right-clicking the blank space in column four, while the Computer icon ( ) is selected in column - Casio CLASSPad300 | User Manual - Page 24
4. Exchange Window - Menu Commands and Icons k Right-clicking a flash image icon ( ) or a memory image icon ( ) • Collapse/Expand - Collapses/Expands the folder tree. • Set as Active Image* - Sets the currently selected image as the active image. • Remove Image* - Removes the currently selected - Casio CLASSPad300 | User Manual - Page 25
4. Exchange Window - Menu Commands and Icons k Right-clicking the blank space in column four, while a flash image icon ( ) or a memory image icon ( ) is selected in column three • Create New Folder - Creates a new folder. • Paste - Pastes copied folder(s). k Right-clicking a folder icon ( ) under - Casio CLASSPad300 | User Manual - Page 26
4. Exchange Window - Menu Commands and Icons k Right-clicking the blank space in column four, while a folder icon ( ) is selected in column three • Paste - Pastes copied file(s) into the folder. k Right-clicking a file or variable icon ( ) in column four • Copy - Copies the currently selected file - Casio CLASSPad300 | User Manual - Page 27
your ClassPad is set up properly with USB chosen, it will automatically go into a standby state when you plug the USB cable into your ClassPad (if the USB cable is first connected to the PC). k To set up your ClassPad for data communication 1. Tap m to display the application menu. ClassPad 300 PLUS - Casio CLASSPad300 | User Manual - Page 28
5. Transferring Files from the ClassPad to Your PC 2. Scroll down the Menu and tap B. E-26 20050901 - Casio CLASSPad300 | User Manual - Page 29
[Open Setup Menu] from the pull-down menu. 3-b. Tap the Cable Type down arrow and choose [USB cable] from the pull-down menu. 3-c. Tap the Wakeup Enable down arrow and choose [On] from the pull-down menu. 3-d. Tap [Set] when you are finished. 4. Connect your ClassPad to the PC. 20050901 E-27 - Casio CLASSPad300 | User Manual - Page 30
If the message shown to the right appears, check your cable to make sure it is plugged in securely. Next, repeat steps 1 through 5 above. • If the message shown to the right appears, too much time passed without any data communication after the ClassPad entered the standby state. Tap [Retry] to go - Casio CLASSPad300 | User Manual - Page 31
data transfer and other operations using ClassPad Manager. k To establish a connection between your ClassPad and ClassPad Manager 1. After setting up your ClassPad for data communication (page E-25), start up the ClassPad Manager. 2. Move the cursor to the ClassPad Manager window and right-click - Casio CLASSPad300 | User Manual - Page 32
four) show information about your computer. 4. The ClassPad Manager will automatically detect and connect to the ClassPad. • At this time, your ClassPad screen will show this. • See "To name a ClassPad" on page E-32 for information about how to rename a ClassPad the first time you connect it to the - Casio CLASSPad300 | User Manual - Page 33
to Your PC 5. After the connection is established, your computer screen will show ClassPad folders in columns one and two, and flash or memory images will appear in columns three and four. • Clicking a folder in column one displays the - Casio CLASSPad300 | User Manual - Page 34
it to the PC. For example, you may choose to use a name such as "Diane's ClassPad" or "Mr. Fukaya #3." The name can be up to 90 characters long. 3. To change the name of a ClassPad, right-click that ClassPad in column one of the Exchange window and then select Rename from the menu that - Casio CLASSPad300 | User Manual - Page 35
to Your PC k To transfer a single folder 1. Start up ClassPad Manager and establish a connection with your ClassPad. 2. In column one of the ClassPad Manager Exchange Window, select the folder you want to transfer. • To transfer the "test" folder (and its contents), click "test". This will list - Casio CLASSPad300 | User Manual - Page 36
to Your PC k To transfer multiple folders 1. Start up ClassPad Manager and establish a connection with your ClassPad. 2. In column one of the ClassPad Manager Exchange Window, click your ClassPad icon displayed under . • This displays the folders in column two. 3. Select all of the folders - Casio CLASSPad300 | User Manual - Page 37
to Your PC k To transfer selected files to a folder 1. Start up ClassPad Manager and establish a connection with your ClassPad. 2. In column two, select the file(s) you want to transfer. 3. In column three, click the folder to which you want to transfer the file(s). • Here - Casio CLASSPad300 | User Manual - Page 38
appear in column four. 5. Repeat steps 2 through 4 to transfer more files, if you want. 6. After you are finished, terminate the connection between your ClassPad and computer (see page E-38). k To create a new folder 1. In column three of the Exchange Window, click the flash or memory image where - Casio CLASSPad300 | User Manual - Page 39
5. Transferring Files from the ClassPad to Your PC 3. On the dialog box that appears, type in the name you want to assign to the new folder ([test] for this example) - Casio CLASSPad300 | User Manual - Page 40
to Your PC k To terminate the connection between your ClassPad and ClassPad Manager 1. Right-click your ClassPad icon, and then select [Disconnect] from the shortcut menu that appears. • This will cause your ClassPad display to show this. Your computer screen will show this. E-38 20050901 - Casio CLASSPad300 | User Manual - Page 41
digits of the ClassPad Manager application and the ClassPad operating system are identical. ClassPad Version Dialog Box ClassPad Manager Version Dialog Box • See the ClassPad User's Guide for information about viewing the ClassPad version number. • See "1. Installing the Software" for information - Casio CLASSPad300 | User Manual - Page 42
hub you use. If you plan to use a hub, refer to the manufacturer's instructions for installation and use. 3. Connect each ClassPad USB cable to the PC or the USB hub. Connecting Multiple ClassPads to the PC k To open the Exchange Window 1. Open ClassPad Manager on the PC. 2. Right-click anywhere on - Casio CLASSPad300 | User Manual - Page 43
6. Transferring Files Between Multiple ClassPads and the PC 3. Choose [Exchange Window] from the menu that appears. 4. The Exchange Window is now ready to use. 20050901 E-41 - Casio CLASSPad300 | User Manual - Page 44
connected. 1. Connect a ClassPad to a cable. The message "Standby ClassPad1 Press [Clear] key to terminate." should be displayed on each ClassPad. See page E-28 for a picture of what the ClassPad will display. 2. The PC will recognize the ClassPad as new hardware. Follow the instructions that appear - Casio CLASSPad300 | User Manual - Page 45
. 2. Drag that file to the "Shared" folder in column one (at the top, above all the connected ClassPads). 3. This will copy file to a "Shared" folder on each ClassPad. If a ClassPad does not already have a folder named "Shared," one will be created automatically. Note Files placed in the "Shared - Casio CLASSPad300 | User Manual - Page 46
and the PC k To copy files from one ClassPad to all other connected ClassPads 1. In column one, click the "+" next to the name of the ClassPad that contains the files you want to copy. 2. Under the name of the ClassPad you expanded in step 1, click the folder. The files in that folder will now - Casio CLASSPad300 | User Manual - Page 47
(s) to the "Shared" folder at the top of column one. k To copy files from one ClassPad to one specific connected ClassPad 1. Perform steps 1 through 3 under "To copy files from one ClassPad to all other connected ClassPads" to select the file(s) you want to copy. 2. Click the "+" next to the name of - Casio CLASSPad300 | User Manual - Page 48
. • To verify that transfer was successful, click the folder on the destination ClassPad. k To disconnect the ClassPads from the ClassPad Manager 1. In column one, right-click the ClassPad you want to disconnect. 2. On the menu that appears, choose [Disconnect]. 3. Repeat steps 1 and 2 for each - Casio CLASSPad300 | User Manual - Page 49
Manager Screen Use the following procedures to add a flash image or a memory image from the ClassPad Manager screen. k To add a flash image from the ClassPad Manager screen 1. Right-click the ClassPad Manager and then select [Flash Image] / [New] on the shortcut menu that appears. 20050901 E-47 - Casio CLASSPad300 | User Manual - Page 50
7. Adding a Flash Image or Memory Image 2. Type in the name you want to assign to the image, and then click [Save]. E-48 20050901 - Casio CLASSPad300 | User Manual - Page 51
7. Adding a Flash Image or Memory Image k To add a memory image from the ClassPad Manager screen 1. Right-click ClassPad Manager, and then select [Memory Image] / [New] on the shortcut menu that appears. 20050901 E-49 - Casio CLASSPad300 | User Manual - Page 52
7. Adding a Flash Image or Memory Image 2. Type in the name you want to assign to the image, and then click [Save]. E-50 20050901 - Casio CLASSPad300 | User Manual - Page 53
7. Adding a Flash Image or Memory Image From the Exchange Window You can also add a flash image or memory image from the Exchange Window. The following procedure shows how to add a flash image. The procedure for adding a memory image is virtually identical. k To add a flash image from the Exchange - Casio CLASSPad300 | User Manual - Page 54
[Yes]. Using eActivity Files If you experience problems running an eActivity that contains a flash image on the ClassPad emulator after you transfer the eActivity from your ClassPad, it could mean that the ClassPad operating system and ClassPad Manager versions are not compatible. See "Transferring - Casio CLASSPad300 | User Manual - Page 55
8. Handling Flash Images or Memory Images You can perform the following operations using the Exchange Window: • Remove an image from the Exchange Window • Insert an existing image to the Exchange Window • Move an image from one location on your PC to another • Change the name of an image k To remove - Casio CLASSPad300 | User Manual - Page 56
8. Handling Flash Images or Memory Images k To insert an existing image to the Exchange Window 1. Right-click [Computer], and choose [Add Image] from the shortcut menu that appears. This displays an open dialog box. • Alternatively, you could right-click in column four. E-54 20050901 - Casio CLASSPad300 | User Manual - Page 57
8. Handling Flash Images or Memory Images 2. Select the flash image file (*.fls) or memory image file (*.mcs) you want to insert, and then click [Open]. The image will appear on the Exchange Window. k To move an image from one location on your PC to another 1. Right-click the image you want to move - Casio CLASSPad300 | User Manual - Page 58
8. Handling Flash Images or Memory Images k To rename an image 1. Right-click the image you want to rename and then choose [Rename]. 2. Type the new name in the dialog box that appears, and then choose [OK]. • This will rename the image. E-56 20050901 - Casio CLASSPad300 | User Manual - Page 59
CASIO COMPUTER CO., LTD. 6-2, Hon-machi 1-chome Shibuya-ku, Tokyo 151-8543, Japan SA0509-B
-
 1
1 -
 2
2 -
 3
3 -
 4
4 -
 5
5 -
 6
6 -
 7
7 -
8
-
9
-
10
-
11
-
12
-
13
-
14
-
15
-
16
-
17
-
18
-
19
-
20
-
21
-
22
-
23
-
24
-
25
-
26
-
27
-
28
-
29
-
30
-
31
-
32
-
33
-
34
-
35
-
36
-
37
-
38
-
39
-
40
-
41
-
42
-
43
-
44
-
45
-
46
-
47
-
48
-
49
-
50
-
51
-
52
-
53
-
54
-
55
-
56
-
57
-
58
-
59
 |
 |

RJA510188-4
E
For ClassPad 300 PLUS
http://classpad.net
/
Version 2.2
ClassPad
Manager
User’s Guide
(PROGRAM-LINK
TM
)