Casio CLASSPad300 User Manual - Page 32
Click [Exchange Window]., column two show information about your ClassPads
 |
UPC - 079767161071
View all Casio CLASSPad300 manuals
Add to My Manuals
Save this manual to your list of manuals |
Page 32 highlights
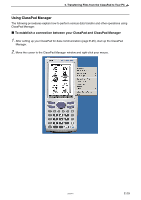
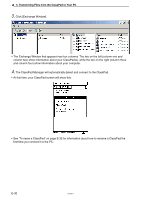
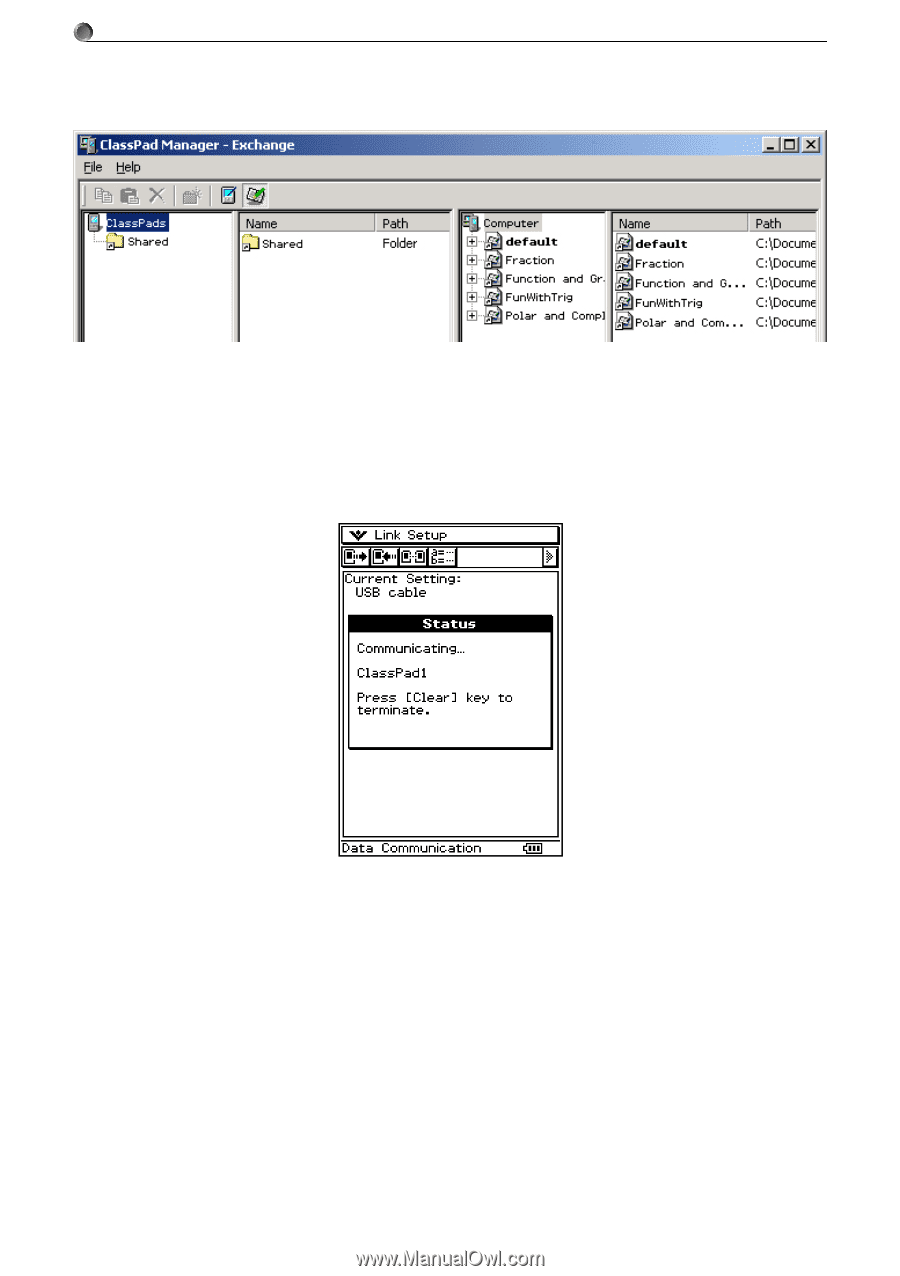
5. Transferring Files from the ClassPad to Your PC 3. Click [Exchange Window]. • The Exchange Window that appears has four columns. The two on the left (column one and column two) show information about your ClassPad(s), while the two on the right (column three and column four) show information about your computer. 4. The ClassPad Manager will automatically detect and connect to the ClassPad. • At this time, your ClassPad screen will show this. • See "To name a ClassPad" on page E-32 for information about how to rename a ClassPad the first time you connect it to the PC. E-30 20050901
-
 1
1 -
2
-
3
-
4
-
5
-
6
-
7
-
8
-
9
-
10
-
11
-
12
-
13
-
14
-
15
-
16
-
17
-
18
-
19
-
20
-
21
-
22
-
23
-
24
-
25
-
26
-
 27
27 -
 28
28 -
 29
29 -
 30
30 -
 31
31 -
 32
32 -
 33
33 -
 34
34 -
 35
35 -
 36
36 -
 37
37 -
38
-
39
-
40
-
41
-
42
-
43
-
44
-
45
-
46
-
47
-
48
-
49
-
50
-
51
-
52
-
53
-
54
-
55
-
56
-
57
-
58
-
59
 |
 |
E-30
20050901
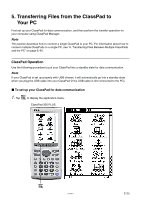
5.
Transferring Files from the ClassPad to Your PC
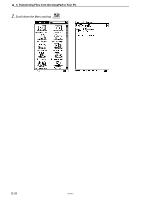
• The Exchange Window that appears has four columns. The two on the left (column one and
column two) show information about your ClassPad(s), while the two on the right (column three
and column four) show information about your computer.
3
.
Click [Exchange Window].
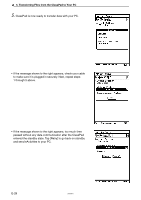
4
.
The ClassPad Manager will automatically detect and connect to the ClassPad.
• At this time, your ClassPad screen will show this.
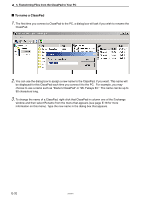
• See “To name a ClassPad” on page E-32 for information about how to rename a ClassPad the
first time you connect it to the PC.