Casio IT-3000 User Guide
Casio IT-3000 - Win CE .NET 4.1 400 MHz Manual
 |
UPC - 079767602345
View all Casio IT-3000 manuals
Add to My Manuals
Save this manual to your list of manuals |
Casio IT-3000 manual content summary:
- Casio IT-3000 | User Guide - Page 1
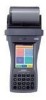
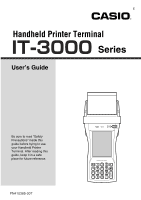
E Handheld Printer Terminal Series User's Guide Be sure to read "Safety Precautions" inside this guide before trying to use your Handheld Printer Terminal. After reading this guide, keep it in a safe place for future reference. PN410385-007 - Casio IT-3000 | User Guide - Page 2
names used in this guide are trademarks or registered trademarks of their respective owners. Information in this document is subject to change without advance notice. CASIO Computer Co., Ltd. makes no representations or warranties with respect to the contents or use of this manual and specifically - Casio IT-3000 | User Guide - Page 3
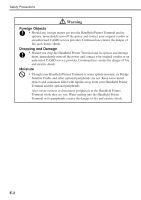
of electric shock. Abnormal Conditions • Should the Handheld Printer Terminal and its options become hot or start to emit smoke or a strange odor, immediately turn off the power, and contact your original vendor or an authorized CASIO service provider. Continued use creates the danger of fire and - Casio IT-3000 | User Guide - Page 4
the power and contact your original vendor or an authorized CASIO service provider. Continued use creates the danger of fire and electric shock. Moisture • Though your Handheld Printer Terminal is water splash-resistant, its Bridge Satellite Cradle and other optional peripherals are not. Keep loose - Casio IT-3000 | User Guide - Page 5
with the Operation of Other Equipment (Using Wireless Data Communication Function) The Handheld Printer Terminal contains a built-in wireless communication device of a low-power data communication system. The frequency band that is used is also used by microwave ovens and other industrial - Casio IT-3000 | User Guide - Page 6
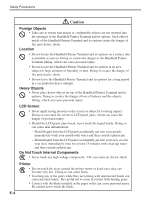
and its options on a surface that is unstable or uneven. Doing so creates the danger of the Handheld Printer Terminal falling, which can cause personal injury. • Do not locate the Handheld Printer Terminal and its options in an area subject to large amounts of humidity or dust. Doing so creates the - Casio IT-3000 | User Guide - Page 7
use the battery pack with any device other than the Handheld Printer Terminal. Doing so can create the danger of battery pack heat emission, explosion, and fire. • Note that the battery pack's positive (+) and negative (-) polarities must be oriented correctly when it is loaded into battery charger - Casio IT-3000 | User Guide - Page 8
or your skin, immediately rinse it off with clean tap water. Prolonged contact with battery pack fluid can cause skin irritation. • Keep the battery pack out of the reach of small children. Do not let small children remove the battery pack from battery charger or the Handheld Printer Terminal. E-6 - Casio IT-3000 | User Guide - Page 9
use the Handheld Printer Terminal at a voltage other than the specified voltage. Also, do not connect the Handheld Printer Terminal using the battery charger and Bridge Satellite Cradle, be sure to use the respective AC adaptors. Use CASIO service provider about repair or replacement. Use of - Casio IT-3000 | User Guide - Page 10
Note that CASIO Computer Co., Ltd. shall not be held liable to you or any third party for any damages or loss caused by deletion or corruption of data due to use of the Handheld Printer Terminal, malfunction or repair of the Handheld Printer Terminal or its peripherals, or due to the batteries going - Casio IT-3000 | User Guide - Page 11
can cause data to be lost. When the battery goes low, charge it as soon as possible. • Do not leave dead batteries in the Handheld Printer Terminal for a long period. Dead batteries can leak, leading to malfunction and damage to the Handheld Printer Terminal. • Use the Handheld Printer Terminal and - Casio IT-3000 | User Guide - Page 12
subject to change without notice. • Note that CASIO COMPUTER CO., LTD. shall not be held liable to you or any third parties for any losses or damages arising from the use of this guide. • Although the utmost care has been taken in preparing this manual, please contact the manufacturer if you should - Casio IT-3000 | User Guide - Page 13
antenna or transmitter. Declaration of Conformity Model Numbers: IT-3000M53E, IT-3000M54E2, IT-3000M55U, IT-3000M56U, HA-B61IO, HA-B30CHG Trade Name: CASIO Responsible party: Casio America, Inc. Industrial Handheld Division Address: 2700 Augustine Drive Suite 155, Santa Clara, California - Casio IT-3000 | User Guide - Page 14
Member states with restrictive use NONE Manufacturer CASIO COMPUTER CO., LTD. Brand CASIO Type IT-3000M53E, IT-3000M54E2, IT-3000M55E, IT-3000M56E are tested and found to conform with the essential requirements for protection of health and the safety of the user and any other persons - Casio IT-3000 | User Guide - Page 15
49(0)40-528-65-424 Products are for distribution within all member states of the EU. France limited to 2446.5-2483.5 Mhz Indoor use. Belgium limited to 2400-2483.5 Mhz Indoor, 2460-2483.5 Mhz Outdoor use. The information described above dates from January 2003 and may be subjected to future changes - Casio IT-3000 | User Guide - Page 16
E-35 Using the Printer E-36 When Using Roll Paper E-36 When Using Formed Sheet Paper E-39 Precautions When Using Printer E-43 Using the C-MOS Imager (IT-3000M55E/IT-3000M55U/IT-3000M56E/IT-3000M56U only) ...... E-45 Warning Label E-46 Magnetic Card Reader E-47 Performing Data Communication - Casio IT-3000 | User Guide - Page 17
for the Cradle-type Battery Charger E-63 Cradle-type Battery Charger (HA-B30CHG) Specifications E-64 Using the AC Adaptor (AD-S10095AE/AU E-65 Specifications ...E-66 Using PC Cards E-67 Attachment of PC Card Removal Tape to a PC Card E-67 Inserting a PC Card (When Using the Roll Paper Holder - Casio IT-3000 | User Guide - Page 18
(2 pcs) Handheld Printer Terminal n Neck strap and stylus holder Neck strap rings Battery pack PC card fixers Stylus Hand strap Roll paper 58mm Paper Width Adjuster User's Guide (this manual) 2. Charge the battery pack. Use the AC Adaptor (AD-S10095AE/AU), Cradle-type Battery Charger or Bridge - Casio IT-3000 | User Guide - Page 19
3. Load the battery pack into the Handheld Printer Terminal. 1 Turn the battery pack cover lock switch on the side of the Handheld Printer Terminal to the "FREE" position. 2 Open the battery pack cover. 3 Install the battery pack(DT-9723LIC). Push it all way to the end inside the compartment until - Casio IT-3000 | User Guide - Page 20
Before Getting Started 4. Hold down the power key for about one second to turn on the power. Start up the application you want to run. E-18 - Casio IT-3000 | User Guide - Page 21
Handheld Printer Terminal System Configuration IT-3000 Series Options Bridge Satellite Cradle HA-B61IO Cradle-type Battery Charger HA-B30CHG Required AC Adaptor for Bridge Satellite Cradle / Cradle-type Battery Charger AD-S42120BE E-19 - Casio IT-3000 | User Guide - Page 22
Handheld Priter Terminal System Configuration Battery Pack DT-9723LIC Formed Sheet Paper Holder HA-B93PH Splash Protect Cover HA-B92PCV E-20 Screen Protect Cover HA-B90DCV - Casio IT-3000 | User Guide - Page 23
AC Adaptor AD-S10095AE AD-S10095AU * See page 66. E-21 - Casio IT-3000 | User Guide - Page 24
DT-888RSC DT-380USB Cables Dsub 9-Pin (Female) RS-232C Cross Cable for Bridge Satellite Cradle RS-422 Modular Cable for connecting Bridge Satellite Cradle USB Cable for connecting Bridge Satellite Cradle and PC HA-B80AX RS-232C Cross Cable for connecting Handheld Printer Terminal and PC E-22 - Casio IT-3000 | User Guide - Page 25
General Guide IT-3000M53E/M54E2/M55E/M55U/M56E/M56U 3 17 1 4 11 23 5 18 2 6 7 8 12 25 24 9 13 14 19 15 10 20 16 18 22 21 * The C-MOS Imager is only installed on the IT-3000M55E/ M55U/M56E/M56U * Magnetic Card Reader is only installed on the IT-3000M54E2/ M55E/M55U E-23 - Casio IT-3000 | User Guide - Page 26
Guide 1 SD Memory Card Slot Slot for inserting SD memory card. 2 Program Key (L) This key can be assigned any function available. IT-3000M55E/IT-3000M55U/IT-3000M56E/IT-3000M56U The default settings are as follows. This key is used to read bar codes and 2D code. 3 Roll Paper Holder Roll paper - Casio IT-3000 | User Guide - Page 27
Cradle and Cradle-type Battery Charger. 21 Neck Strap Hooks Hook the neck strap here. 22 Magnetic Card Reader Magnetic cards are read by passing through this magnetic card (IT-3000M54E2/ reader. M55E/M55U) Remove the cover to use. 23 Reset Switch Press to reset the Handheld Printer Terminal - Casio IT-3000 | User Guide - Page 28
Guide Key Functions 1 Fn Key This key is used to switch the character input mode or make various settings in combination with other keys, or start up a pre-registered application. 2 Numeric Keys These keys are used used to feed paper when pressed after pressing the Fn key when printing paper is - Casio IT-3000 | User Guide - Page 29
it with a charged battery pack. You can use the AC Adaptor, Cradle-type Battery Charger or Bridge Satellite Cradle to charge the battery pack. When charging the battery pack with these options, first install the battery pack in the Handheld Printer Terminal. For information about use of the options - Casio IT-3000 | User Guide - Page 30
of the Handheld Printer Terminal to the "FREE" position. 3. Open the battery pack cover. 4. Remove the battery pack. Press down the battery pack eject button (see the arrow). Remove the battery pack by pulling on the tape. 5. Install a charged battery pack in the Handheld Printer Terminal. Make sure - Casio IT-3000 | User Guide - Page 31
"LOCK" position. Important! • When replacing the battery pack, make sure you do not leave the Handheld Printer Terminal without a battery pack for more than about 10 minutes. Doing so can cause data in the memory to be deleted. • Never try to use other type of battery than the one that is specified - Casio IT-3000 | User Guide - Page 32
strap to the hand strap hook located on the bottom of 1 the Handheld Printer Terminal. 2. Pull on the hand strap in the direction shown in the the back of the Handheld Printer Terminal. 3. Fasten the wire of Hook A by inserting into the indentation in the Handheld Printer Terminal. • Pull up - Casio IT-3000 | User Guide - Page 33
of the Handheld Printer Terminal using the tip of stylus. Hook the protrusive part (**) of 3000M53E. * ; The rings give an extra mechanical strength for the Neck Strap. The metallic hooks of the Neck Strap can, in rare case, be worn by abrasion induced by swinging the IT-3000 terminal specifically - Casio IT-3000 | User Guide - Page 34
in reverse way, remove the neck strap rings from each neck strap mounting hook on the Handheld Printer Terminal and then push back the neck strap mounting hooks into each silo. Attaching the Stylus Holder The stylus holder provided can be attached to the neck strap as necessary. When attaching the - Casio IT-3000 | User Guide - Page 35
with Bracket A and Bracket B. • Do not pass the strap through the stylus holder when folding it back. • Place the stylus in the stylus holder after first re-attaching the neck strap to the Handheld Printer Terminal. Important! • Do not swing the Handheld Printer Terminal with the neck strap. E-33 - Casio IT-3000 | User Guide - Page 36
Configuring Handheld Printer Terminal Settings Calibrating Touch Screen Alignment Whenever you feel that the stylus on the control panel. • Press the stylus against the center of the target mark (+ mark) as indicated on the screen. The screen shown below appears after you press stylus against the - Casio IT-3000 | User Guide - Page 37
use your Handheld Printer Terminal in a location where it is hot, it automatically dims the screen to protect against damage. Display Auto Dimmer The display auto dimmer automatically lowers display brightness if you do not perform any operation for a specific amount of time. This saves the battery - Casio IT-3000 | User Guide - Page 38
Using the Printer The printer can print on roll paper (80 mm or 58 mm wide) or 80 mm wide formed sheet paper. When printing on formed sheet paper, use the paper holder (HA-B93PH) sold separately. When Using Roll Paper Installing the Roll Paper 1. Check that the power is off. If the power is on, - Casio IT-3000 | User Guide - Page 39
• Close the splash protect cover when using outdoors in the rain and so forth. 1 2 FREE LOCK LOCK FREE 2 Important! • Always print with the roll paper properly installed. Printing without properly installing roll paper can damage the printer. • If the roll paper should happen to become jammed in - Casio IT-3000 | User Guide - Page 40
Using the Printer Attaching the 58 mm Paper Width Adjuster Attach the 58 mm Paper Width Adjuster inside the roll paper holder when using 58 mm wide roll paper. Refer to the procedure described in "Installing the Roll Paper" for information on opening and closing the roll paper holder. 1. Remove the - Casio IT-3000 | User Guide - Page 41
of the roll paper holder as shown in the illustration to align at the FREE position ( 2 ), and then push up the ridged ( ) portion ( 2 ) to open. • Please note that the positions of the lock knobs on the left and right sides are different. 4. Turn over the Handheld Printer Terminal. 2 1 FREE LOCK - Casio IT-3000 | User Guide - Page 42
Using the Printer 5. Loosen the two screws shown in the illustration (the screws cannot be removed). 6. Open the cover (PC card . Store the removed screws in a safe place so that they do not become lost. 8. Turn the Handheld Printer Terminal back over. 9. Remove the entire roll paper holder. E-40 - Casio IT-3000 | User Guide - Page 43
Fasten Part A of the Paper Holder to the Handheld Printer Terminal. Press both ends of Part A to fasten to the Handheld Printer Terminal. 11. Insert the projections on both sides of Part into the grooves of Part B and fasten to the Handheld Printer Terminal with the four screws for the Paper Holder - Casio IT-3000 | User Guide - Page 44
stops with the side to be printed facing downward. The paper will be fed into the printer automatically and be positioned at the printing position. • If the formed sheet paper becomes jammed, open the top cover (Part A) of the Paper Holder as shown in the illustration ( 1 2 ) and remove the jammed - Casio IT-3000 | User Guide - Page 45
lines is about one second or more. In the case of using formed sheet paper, either use a large frame with free spaces available or set the printer to continuously print to prevent the line change errors. 3. Because printing may pause if the battery remaining capacity is low, line alignment error or - Casio IT-3000 | User Guide - Page 46
Recommended paper: Use only specified papers by CASIO. 4. Paper scraps may accumulate and printing quality may decrease when the printer has been used for a long period of time. The thermal head must be cleaned when this happens. Contact your nearest CASIO distributor or an authorized CASIO service - Casio IT-3000 | User Guide - Page 47
(IT-3000M55E/IT-3000M55U/IT-3000M56E/IT-3000M56U only) 1. Turn on the Handheld Printer Terminal, position its C-MOS Imager reader port near the bar code or 2D code, and then press the Trigger Key (R or L). 2. The Handheld Printer Terminal reads the code by emitting laser and red lights. Indicator - Casio IT-3000 | User Guide - Page 48
the C-MOS Imager (IT-3000M55E/IT-3000M55U/IT-3000M56E/IT-3000M56U only) Warning Label IT-3000M55U/M56U Laser light is emitted from this port IT-3000M55E/M56E • This label is a warning label for Class 2 laser products that comply with IEC60825-1+A2:2001 CAUTION • Use of controls or adjustments or - Casio IT-3000 | User Guide - Page 49
The Magnetic Card Reader comes as standard with IT-3000M55E/M55U/M54E2. Only use cards that are compatible with the ISO standards. not allow magnets to come in close proximity to the magnetic card since this can prevent data on the card from being read. In addition, do not stack magnetic cards on - Casio IT-3000 | User Guide - Page 50
If you need to use such a device, move away from the communicating Handheld Printer Terminals. In case of a cellular phone, keep it at least 30cm (117⁄8") away. RS-232C Communication (IT-3000M53E/IT-3000M54E2 only) You can also transfer data directly between the Handheld Printer Terminal and your - Casio IT-3000 | User Guide - Page 51
Bluetooth® Communication Bluetooth® protocol can also be used to transfer data between two Handheld Printer Terminals. The two Handheld Printer Terminals should be no more than five meters apart (as long as there is nothing blocking the path in between). Important! Observe the following precautions - Casio IT-3000 | User Guide - Page 52
abnormally due to misoperation or some other reason. Use the stylus to press the reset switch on the back of the Handheld Printer Terminal. This starts the reset operation. If reset does not find a memory problem The Handheld Printer Terminal restarts, and normal operation is restored. If reset - Casio IT-3000 | User Guide - Page 53
factory settings. • When you are no longer able to use the Handheld Printer Terminal because you forgot your password. • When the Handheld Printer Terminal does not operate normally due to a memory problem. • When the message "A problem with memory contents has been found. ..." appears. To perform - Casio IT-3000 | User Guide - Page 54
3000 Specifications 1. Terminal Model: IT-3000M53E, IT-3000M55E, IT-3000M55U, IT-3000M54E2, CPU: IT-3000M56E, IT-3000M56U Marvell® PXA255 Application Processor (400 MHz max.) Memory: OS: 64MB RAM, 64MB ROM (user defined: Approx. 30MB) Microsoft® Windows® CE .NET operating system : Data Matrix - Casio IT-3000 | User Guide - Page 55
/ 511/16''W × 107/16''D × 11/8 / 23/4''H) *; display part, **; printer part (All sizes exclude extruding parts.) Weight: IT-3000M53E Approx. 635g (22.4 oz) IT-3000M54E2 Approx. 680g (23.99 oz) IT-3000M55E/M55U Approx. 700g (24.69 oz) IT-3000M56E/M56U Approx. 655g (23.10 oz) 13. Environment - Casio IT-3000 | User Guide - Page 56
it possible to transfer system data and file data between the Handheld Printer Terminal and a computer using an RS-232C interface or USB interface. You can also use the Bridge Satellite Cradle to charge the battery pack installed on the Handheld Printer Terminal. General Guide Top Front Bottom - Casio IT-3000 | User Guide - Page 57
. Green: System is operating. This lamp shows when the Handheld Printer Terminal is performing data communication. Off: No data communication being performed Green flashing: Data communication in progress Red: Problem with a connection between Bridge Satellite Cradle This lamp indicates the Power - Casio IT-3000 | User Guide - Page 58
Use the AC adaptor available as an option for the Bridge Satellite Cradle to supply the power to it. Always make sure that the power is being supplied to the Bridge Satellite Cradle by the AC adaptor before performing any type of data communication operation with the Handheld Printer Terminal - Casio IT-3000 | User Guide - Page 59
Cradle. • If the system is operating normally and data communication is enabled, the system status indicator lamp lights green. • The communication indicator lamp flashes green when data communication starts. When charging is initiated, Indicator 1 (left side) on the Handheld Printer Terminal lights - Casio IT-3000 | User Guide - Page 60
Unit Daisy Chain Disabled/Termination 5 OFF ON * Connection Type Setting Host Computer Daisy Chain 3 OFF ON 4 OFF * OFF Bridge Satellite Cradle Data Rate Setting 115,200bps 1 2 ON OFF * *Initial factory setting Important! Note that other DIP settings are used for testing and inspection - Casio IT-3000 | User Guide - Page 61
(HA-B61IO) Connect "C-OUT" of the Bridge Satellite Cradle connected to the host computer to "C-IN" of the next Bridge Satellite Cradle you want to connect. RS-232C cable or USB cable To host computer RS-422 modular cables (DT-888RSC) Important! You can use the optional RS-422 modular cables (DT - Casio IT-3000 | User Guide - Page 62
115,200bps 5. Charging Charging System: Fixed-voltage (with current limiter) Charge Time: Approximately 8.0 hours 6. Power Supply Power Requirement: AC adaptor (AD-S42120BE) Power Consumption: DC12V approximately 2,200mA Output to Handheld Printer Terminal: DC10V 1,800mA (max.) * The - Casio IT-3000 | User Guide - Page 63
Using the Cradle-type Battery Charger (HA-B30CHG) The optionally available Cradle-type Battery Charger (HA-B30CHG) lets you charge the Handheld Printer Terminal's battery simply by placing the Handheld Printer Terminal onto the charger. General Guide Top Front Bottom Right Back E-61 - Casio IT-3000 | User Guide - Page 64
Using the Cradle-type Battery Charger (HA-B30CHG) 1 Power Indicator Lamp 2 Terminal Detect Switches 3 Power Contacts 4 Power Switch 5 AC Adaptor Jack E-62 This lamp indicates the power status and the mounting status of the Handheld Printer Terminal. Off: Power off Red: Power on, Handheld Printer - Casio IT-3000 | User Guide - Page 65
contact with each other, place the Handheld Printer Terminal onto the Cradle-type Battery Charger. This causes the Cradle-type Battery Charger power indicator lamp to light green. When charging is initiated, Indicator 1 (left side) on the Handheld Printer Terminal lights red. When charging has been - Casio IT-3000 | User Guide - Page 66
-type Battery Charger (HA-B30CHG) Specifications 1. Charging Charging System: Fixed-voltage (with current limiter) Charge Time: Approximately 8.0 hours 2. Power Supply Power Requirement: AC adaptor (AD-S42120BE*) Power Consumption: 12V DC, approximately 2,100mA Output to Handheld Printer - Casio IT-3000 | User Guide - Page 67
. • Use only the dedicated AC Adaptor (AD-S10095AE/AU) to charge the battery pack. • Turn off the power of the Handheld Printer Terminal when connecting the AC Adaptor. • When the battery pack has been reinstalled with the battery charger still plugged into the Handheld Printer Terminal, always - Casio IT-3000 | User Guide - Page 68
Using the AC Adaptor (AD-S10095AE/AU) Specifications 1. Charging Specification 1A 9.5W Approximately 78(W) × 50(D) × 30(H) mm (31⁄16"W × 115⁄16"D × 13⁄16"H) Approximately 130g (4.6oz) Approximately 0°C to 40°C (32°F to 104°F) Humidity: 30% to 80% RH (non-condensation) The AD-S10095 series - Casio IT-3000 | User Guide - Page 69
from being able to be removed. Inserting a PC Card (When Using the Roll Paper Holder) 1. Check that the power is off. If the power is on, always make sure to turn it off by pressing the power key. 2. Turn over the Handheld Printer Terminal. 3. Loosen the two screws shown in the illustration (the - Casio IT-3000 | User Guide - Page 70
Using PC Cards 4. Open the cover (PC card slot cover) as shown in the illustration. 5. Insert a PC card having PC card removal tape attached. Insert the PC card all the way in with the top of the card facing towards the top of the Handheld Printer Terminal. Fold up the end of the PC card - Casio IT-3000 | User Guide - Page 71
by pressing the power key. 2. Spread apart both ends of Part A of the Paper Holder ( 1 ) and remove it from the Handheld Printer Terminal ( 2 ), and then remove Part C and Part D ( 3 ). • Remove Part C and Part D using an ordinary screwdriver as shown in the illustration. 1 C 3 2 A 1 D 3 E-69 - Casio IT-3000 | User Guide - Page 72
the illustration. • Insert all the way in to the center of Part B. • Cushion A and Cushion C can be used in combination. 6. Align the grooves of Part B with the projections on both sides of Part A, and then fasten the Paper Holder to the Handheld Printer Terminal using the Paper Holder screws. E-70 - Casio IT-3000 | User Guide - Page 73
the left and right sides ( 3 ). Next, push on both ends of Part A to fasten to the Handheld Printer Terminal. When Removing the PC card Press the eject button on the left side of the PC card slot with the stylus, and then pull out the PC card while grabbing onto the end of the PC - Casio IT-3000 | User Guide - Page 74
Using SD Memory Cards SD memory card can be installed in the SD Memory Card slot on the Handheld Printer Terminal. Insert (or the top of the SD memory card aligns with the entrance of the slot of the Handheld Printer Terminal ( 2 ). 2 1 3. Close the cover of the SD memory card slot. Removing - Casio IT-3000 | User Guide - Page 75
Connecting a Bar Code Reader (IT-3000M53E/IT-3000M54E2 only) Connect a bar code reader to the RS-232C interface connector (8-Pin) on the Handheld Printer Terminal. Connecting the bar code reader 1. Check that the power is off. If the power is on, always make sure to turn it off by pressing - Casio IT-3000 | User Guide - Page 76
prevents the screen from being cracked or damaged when carrying. 1. Remove the two screws on the right side of the Handheld Printer Terminal. Store the screws in a safe place after they have been removed. 2. Fasten the Screen Protect Cover with the two screws provided with the Screen Protect - Casio IT-3000 | User Guide - Page 77
Attaching the Splash Protect Cover to the Handheld Printer Terminal lets you use it even during inclement weather. inner cover Attach the Splash Protect Cover by following the procedure described below. 1. Press the ridged ( ) portions ( 1 ) of the paper outlet cover while spreading apart the - Casio IT-3000 | User Guide - Page 78
of the transparent film after roll paper has been torn off. • Check that the tabs on the inside of the Splash Protect Cover (located on the left and right sides) have entered the indentations on the left and right sides of the Handheld Printer Terminal ( 2 ). Transparent film Splash Protect Cover - Casio IT-3000 | User Guide - Page 79
Using the Battery Pack Important! • Make sure to attach the contact cover provided when removing the Battery Pack from the Handheld Printer Terminal and storing. • If the battery pack has been left over unused for a long period of time, the capacity remained decreases due to spontaneous discharge
-
 1
1 -
 2
2 -
 3
3 -
 4
4 -
 5
5 -
 6
6 -
 7
7 -
8
-
9
-
10
-
11
-
12
-
13
-
14
-
15
-
16
-
17
-
18
-
19
-
20
-
21
-
22
-
23
-
24
-
25
-
26
-
27
-
28
-
29
-
30
-
31
-
32
-
33
-
34
-
35
-
36
-
37
-
38
-
39
-
40
-
41
-
42
-
43
-
44
-
45
-
46
-
47
-
48
-
49
-
50
-
51
-
52
-
53
-
54
-
55
-
56
-
57
-
58
-
59
-
60
-
61
-
62
-
63
-
64
-
65
-
66
-
67
-
68
-
69
-
70
-
71
-
72
-
73
-
74
-
75
-
76
-
77
-
78
-
79
 |
 |
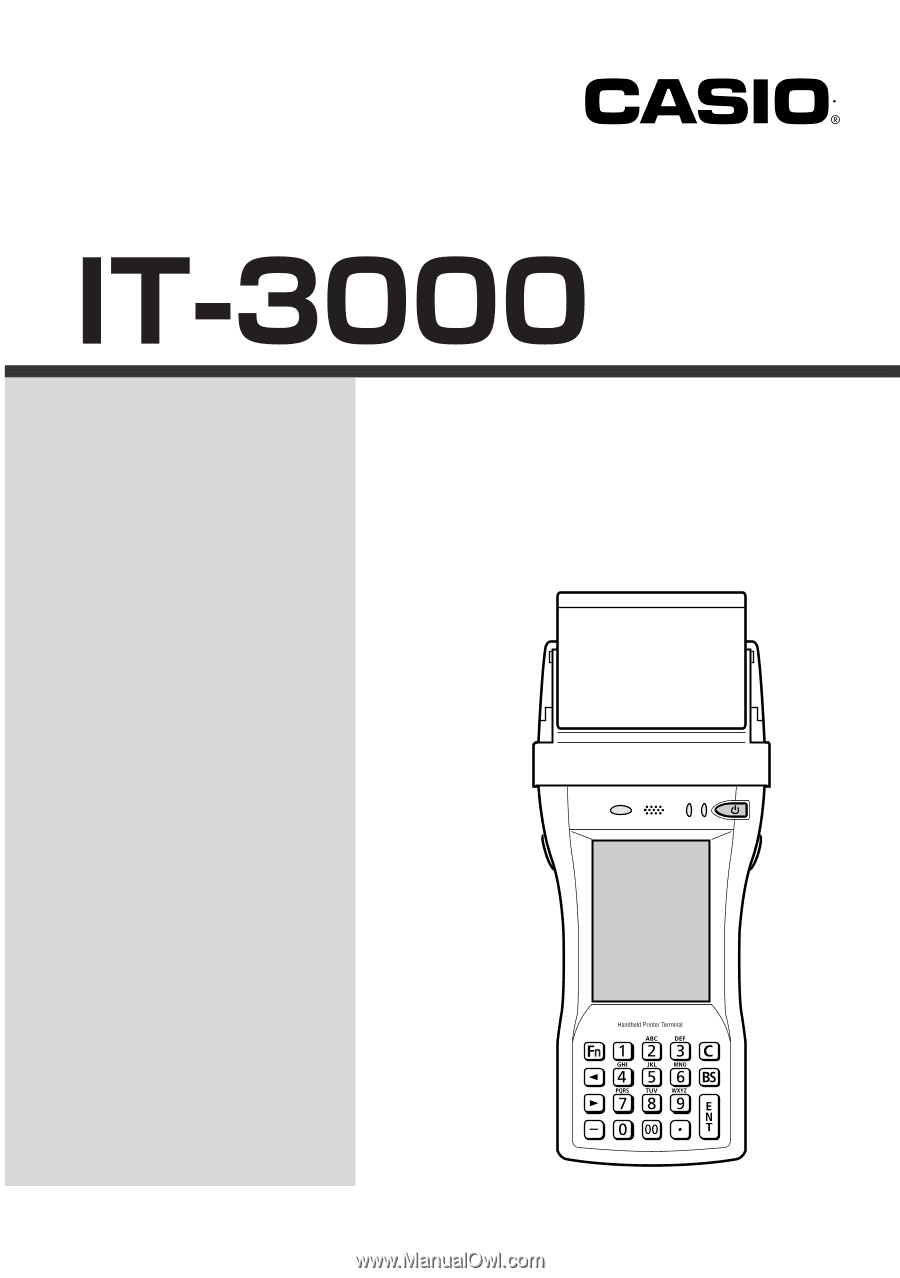
Handheld Printer Terminal
User’s Guide
Series
Be sure to read “Safety
Precautions” inside this
guide before trying to use
your Handheld Printer
Terminal. After reading this
guide, keep it in a safe
place for future reference.
E
PN410385-007