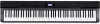
Casio PX330 User Guide
Casio PX330 Manual
 |
View all Casio PX330 manuals
Add to My Manuals
Save this manual to your list of manuals |
Casio PX330 manual content summary:
- Casio PX330 | User Guide - Page 1
English ES USER'S GUIDE GUÍA DEL USUARIO Please keep all information for future reference. Guarde toda documentación para futuras consultas. Español PX330ES1B Safety Precautions Before trying to use the piano, be sure to read the separate "Safety Precautions". Precauciones de seguridad Antes de - Casio PX330 | User Guide - Page 2
secures easy access to the power cord. Declaration of Conformity Model Number: PX-330 Trade Name: CASIO COMPUTER CO., LTD. Responsible party: CASIO AMERICA, INC. Address: 570 MT. PLEASANT AVENUE, DOVER, NEW JERSEY 07801 Telephone number: 973-361-5400 This device complies with Part 15 of the FCC - Casio PX330 | User Guide - Page 3
....... E-51 Using MIDI E-52 Transferring Data between the Digital Piano and a Computer E-52 Reference E-56 Troubleshooting E-56 Product Specifications E-57 Operating Precautions E-58 Appendix A-1 Tone List A-1 Drum Assignment List A-3 Rhythm List A-4 Music Preset List A-6 Fingering Guide - Casio PX330 | User Guide - Page 4
General Guide 89 bl 1 23456 7 bk bm bn bo bp bq ∗ do br bs bt cs ct dk dl dn ck cl cm cn co cp cq cr dm Back dp Left Side el E-2 dq dr ds Bottom em dt ek en - Casio PX330 | User Guide - Page 5
Guide • This manual uses ON/OFF, PART button 8 POWER button ck GRAND PIANO (MODERN) button em PHONES jacks cl GRAND PIANO (CLASSIC) button en Pedal connector cm ELEC PIANO button * Installing the Music Stand Insert the bottom of the music stand into the groove on the top of the Digital Piano - Casio PX330 | User Guide - Page 6
br (TONE) and bs (FUNCTION) buttons, press the el (POWER) button. The Digital Piano will turn on and initialize its internal system. You will be able to use the Digital Piano in a short while. NOTE • See "Turning on the Digital Piano and Playing Something" (page E-9) for information about turning - Casio PX330 | User Guide - Page 7
AC adaptor (JEITA Standard, with unified polarity plug) that comes with this Digital Piano. Use of a different type of AC adaptor can cause malfunction of the Digital Piano. Specified AC Adaptor: AD-A12150LW • Use the supplied power cord to connect the AC adaptor as shown in the illustration below - Casio PX330 | User Guide - Page 8
use both operations (jacks) at the same time, you need to purchase another optionally available pedal. Pedal Functions z Damper Pedal Pressing the damper pedal while playing will cause the notes you play to reverberate for a very long time. • Whenever a piano tone is selected, pressing this pedal - Casio PX330 | User Guide - Page 9
(SP-32) to the pedal connector on the bottom of the Digital Piano. You can then use the pedals for expression that is similar to that available on an acoustic piano. Bottom Pedal connector NOTE • The SP-32 Pedal Unit supports half-pedal operation (pressing the pedal part way). You can adjust the - Casio PX330 | User Guide - Page 10
one shown in the illustration for connection of the amplifier. Use the piano's VOLUME controller to adjust the volume level. Bundled and Optional Accessories Use only accessories that are specified for use with this Digital Piano. Use of unauthorized accessories creates the risk of fire, electric - Casio PX330 | User Guide - Page 11
be played. 3. Use the 1 (VOLUME) controller to adjust the volume level. 4. Play something on the keyboard. Selecting a Tone Your Digital Piano has 250 tones, divided into eight groups. • For more information, see the "Tone List" (page A-1). • The Digital Piano has built-in demonstration tunes that - Casio PX330 | User Guide - Page 12
bt (w, q) buttons to select "002 Mellow Piano". Lit 3. Use the bt (w, q) buttons to select the tone you want in the group you selected in step 2. Example: When "006 Picked Bass" is selected Layered tone number Layered tone name 4. To unlayer the tones and return the keyboard to a single tone - Casio PX330 | User Guide - Page 13
Tone: GRAND PIANO Using Built-in Tones Moving the Keyboard Split Point You can use the procedure below to specify the location on the keyboard where it display as shown below. 2. Select the tone you want to assign to the left side (lower range) of the keyboard. Example: To select GM SLAP BASS 1 in - Casio PX330 | User Guide - Page 14
) button. The FUNCTION lamp will light and the function screen will appear on the display. Lit 2. Use the dk (i) and ct (u) buttons to select the Tmpr/Effect screen. Currently selected range Shift amount 2. Use the 7 (PART) button to select the range whose octave you want to change. • Each press of - Casio PX330 | User Guide - Page 15
types. 1: LightChorus 2: Chorus 3: Deep Chorus 4: Flanger 1. Hold down the ct (CHORUS) button until the chorus type selection screen shown below appears on the display. 2. Use the bt (w, q) buttons to select the reverb type you want. 3. Press the cs (REVERB) button to exit the reverb type screen - Casio PX330 | User Guide - Page 16
per measure screen shown below appears on the display. 2. Use the bt (w, q) buttons to select the beats per measure value you want. 3. Press the by tapping a beat with a button. ■ To adjust the tempo using q and w buttons 1. Use the bk (TEMPO w, q) buttons to adjust the tempo setting. Each press of - Casio PX330 | User Guide - Page 17
Unit To use the SP-3 Pedal Unit as the right keyboard damper pedal, connect it to the dr (DAMPER PEDAL) terminal. • Half-pedal operation is not supported in this case. To use the SP-3 Pedal Unit as the left keyboard (initial default setting) or right keyboard damper pedal (selectable), connect it - Casio PX330 | User Guide - Page 18
can use the following procedure to change the octave of the left and right Duet Mode keyboards. 1. While holding down the bs (FUNCTION) button, press the dk (SPLIT) button. This displays the Duet Mode on/off screen shown in step 2 under "Configuring the Digital Piano for Duet Play" (page E-16). If - Casio PX330 | User Guide - Page 19
parts With Auto Accompaniment, simply select the accompaniment rhythm you want and the matching accompaniment (drums, guitar, etc.) will play automatically when you play a chord with your left hand. It's like having your own personal backup group along with you wherever you go. This Digital Piano - Casio PX330 | User Guide - Page 20
procedure to adjust the volume level of the Auto Accompaniment, without affecting the volume of Digital Piano output. For details, see "Auto Accompaniment Volume" (page E-41). • You can change the size of the chord keyboard by using the split feature to move the split point (page E-11). The - Casio PX330 | User Guide - Page 21
, see the "Fingering Guide" (page A-8). Chord keyboard Fingered 1: Play the component notes of the chord on the keyboard. Fingered 2: Unlike Fingered with the lowest keyboard note as the bass note. Using Auto Accompaniment ■ CASIO CHORD With "CASIO Chord", you can use simplified fingerings to - Casio PX330 | User Guide - Page 22
configure tone, tempo, and other settings to match the currently selected rhythm pattern. At this time, Auto Accompaniment play also will keyboard. This will start Auto Accompaniment play. NOTE • One-Touch Presets are not supported for user rhythms (001 through 010 of the USER RHYTHMS group). Using - Casio PX330 | User Guide - Page 23
the keyboard. Harmony will be added to your melody notes based on the chords you play. Using Auto Accompaniment Creating Your Own Original Rhythms You can use rhythm editing to modify a built-in Auto Accompaniment rhythm to create an original "user rhythm" of your own. You can select a part (drum - Casio PX330 | User Guide - Page 24
part. Example: When bass is selected Instrument part name 5. Edit the selected part as desired. The table below describes the parameters you can edit. • Use the ct (u) and dk (i) buttons to select system. *3 In the case of the intro and ending, specifying a rhythm for one part (drum, bass, etc.) - Casio PX330 | User Guide - Page 25
you want to change. Use the bt (w, q) buttons to select the number or character you want. • The rhythm name characters you can select are shown below. To be replaced by the new data. NOTE • If the size of the accompaniment pattern or instrument part data is too large to be edited, a memory full - Casio PX330 | User Guide - Page 26
/STOP btw, q 2REPEAT 7PART Playing Tone Demo Songs Your Digital Piano comes with eight built-in demo tunes, which demonstrate the characteristics of each of the eight tone groups. No. Tone Group Name 01 GRAND PIANO MODERN 02 GRAND PIANO CLASSIC 03 ELEC PIANO 04 VIBES/CLAVI 05 ORGAN 06 - Casio PX330 | User Guide - Page 27
without loading it into Digital Piano memory. For details, see "Playing Back a Song from a Memory Card" (page E-48). 2. Press the bl (USER SONGS) button so its lamp is lit. • Each press of the button toggles between the upper and lower lamps. Lit 3. Use the bt (w, q) buttons to select the user song - Casio PX330 | User Guide - Page 28
Accompaniment, without affecting the volume of keyboard tone output. For details, see "Song Volume" (page E-41). Practicing Either Hand's Part (Part Off) You can turn off the right hand part*1 or left hand part*2 of a song and play that part on the Digital Piano while the song plays back. *1 Song - Casio PX330 | User Guide - Page 29
progression of the Music Preset. Play the melody on the keyboard. • The preset chord progression repeats until you stop it select a group, and then use the bt (w, q) buttons to select the Music Preset you want. This will configure the Digital Piano with settings (tone, rhythm, etc.) of the selected - Casio PX330 | User Guide - Page 30
Preset. 3. Press the bo (BALLAD/PIANO RHYTHMS) and bp (USER RHYTHMS) buttons at the same time. This displays a screen for selecting the type of editing operation you want for data storage 7. Use the bt (w, q) buttons to select the Music Preset number where you want to store the edited data. E-28 - Casio PX330 | User Guide - Page 31
editing step timing. The initial resolution is R1 (one measure), but you also can select R4 (1 beat = 4 quarter notes) when you want to specify chords for each beat. Use the instrument part buttons (ck through cr) to select one of the eight resolutions shown below. ck cl cm cn co cp cq cr R1 - Casio PX330 | User Guide - Page 32
to select. 3. Change the content of the selected step as desired. 3-1. Select a chord fingering mode and use the chord keyboard ( part of the Music Preset, and the cursor will advance to the next step.* You can use this operation to insert a new step between the current and following step. * Using - Casio PX330 | User Guide - Page 33
part. ON: Sounds the part. OFF: Mutes the part. ON: Sounds the part. OFF: Mutes the part. ON: Sounds the part. Toggles the Chord 1 through 5 parts (page E-22) on or off. OFF: Mutes the parts. ON: Sounds the parts. Selects progression being edited. You can use it to match the chord progression - Casio PX330 | User Guide - Page 34
save Digital Piano setups (tone, rhythm, tempo, etc.) and for quick and easy recall when you need them. Registrations are stored using eight banks 2 3 4 Banks 5 6 7 8 Bank 7, Area B data Tone Settings Keyboard Tone: 003 Harpsichord Brightness: 2 Reverb: 1 Room Chorus: Off · · Auto - Casio PX330 | User Guide - Page 35
cp cq cr dm 2. Use the bt (w, q) buttons to select the bank where the registration you want to recall is located. 3. Use the rhythm group buttons (bm through bp) or instrument part buttons (ck through cr) to specify the area. This will configure the Digital Piano with the registration data located - Casio PX330 | User Guide - Page 36
and store up to five songs in Digital Piano memory for later playback. You can divide a song into parts (by instrument, by left hand and right hand, etc.) and record each part separately. You can even use "punch-in recording" to edit specific parts of existing recordings. Recording or Playing Back - Casio PX330 | User Guide - Page 37
a final song. ■ What is a track? A "track" is a separate recorded part of a song. The recorder of this Digital Piano supports a total of 17 tracks, which are divided between two types described below. z System Track In addition to notes you play on the keyboard and other performance operation data - Casio PX330 | User Guide - Page 38
Recording Your Keyboard Play ■ Supported Track Data The following describes the data that can be recorded to each type of track. System Track, Tracks 01 through 16 Keyboard notes, keyboard tone setting (main), pedal and pitch bend wheel operation System Track only Layer, split, octave shift, reverb, - Casio PX330 | User Guide - Page 39
, press the bt (NO) button. 1. Turn on the recorder, enter the record mode, and select the track that contains the section you want to re-record. • See step 3 under "Recording to a Specific Track (Part)" (page E-35). 2. Hold down the 9 (RECORDER) button until the punch-in recording screen appears - Casio PX330 | User Guide - Page 40
Punch-in Recording Location (Auto Punch-in Recording) You can use the following procedure to specify a particular range for punch-in setup screen. 4. Select the track that contains the range of measures you want to re-record. • See step 3 under "Recording to a Specific Track (Part)" (page E-35 - Casio PX330 | User Guide - Page 41
than One Measure Use the procedure below to specify a punch-in recording area that includes a part of a measure select the track that contains the section you want to re-record. • For information about selecting a track, see step 3 under "Recording to a Specific Track (Part Keyboard Play E-39 English - Casio PX330 | User Guide - Page 42
use the settings in this section to adjust the tuning and touch of the keyboard, to configure pedal and MIDI settings, and to configure other parameters in order to tailor Digital Piano . Parameter or group Setting 2. Use the ct (u) and dk (i) buttons to select one of the parameters (1 through - Casio PX330 | User Guide - Page 43
Kirnberger 3 / • Pressing a keyboard key while the 05: Werckmeister 14: Gurjari Todi / 15: Chandrakauns / 16: Charukeshi C to B using standard equal temperament (00: Equal), regardless of the temperament setting currently selected the damper pedal is depressed on a grand piano. No - Casio PX330 | User Guide - Page 44
Rename File RENAME See page E-48. - 7 MIDI Group MIDI 7-1 Keyboard Channel KeyboardCh Selects the keyboard channel, which is the channel used to send MIDI data corresponding to Digital Piano keyboard play to an external device. 01 to 16 7-2 Accomp MIDI Out AccompOut Turn on this setting - Casio PX330 | User Guide - Page 45
8-1 Display Contrast Contrast Adjusts the contrast of the Digital Piano's display. 00 to 16 8-2 Soft/Sostenuto Pedal Ped.Assign Jack Setting Specifies whether the pedal unit connected to the SOFT/SOSTENUTO jack is a soft pedal or a sostenuto pedal. • See page E-15 for details about the two - Casio PX330 | User Guide - Page 46
the CASIO website from your computer to Digital Piano memory. Once you do, you can use them as user songs and user rhythms. z Use a memory card with a capacity of 2GB or less. Use of a card with a capacity that is greater than 2GB or other types of memory cards is not supported. z In this manual - Casio PX330 | User Guide - Page 47
memory card facing upwards (so you can see it), carefully insert it into the Digital Piano's memory card slot (dn) until stops with a click. Top Formatting a Memory Card IMPORTANT! • Format a memory card before using it for the first time. • Before formatting a memory card, make sure it does not - Casio PX330 | User Guide - Page 48
Card Use the following procedure to save Digital Piano data to a memory card. • Recorder songs can be saved as a standard MIDI file (SMF format 0). • User songs (downloaded songs, etc.) cannot be saved to a memory card. 1. Insert a memory card into the Digital Piano's memory card slot. 2. Select - Casio PX330 | User Guide - Page 49
by pressing the cs (EXIT) button. 4. Use the bt (w, q) buttons to select the file you want. 5. Press the dl (ENTER) button. • The message "Please Wait" will remain on the display while the load operation is being performed. Do not perform any Digital Piano operation while this message is on the - Casio PX330 | User Guide - Page 50
on the Digital Piano will automatically create the four folders shown below. You put playback song data into any one of the folders. You can use the four folders to group your music data by family member, genre, or some other categories. Use buttons bm through bp (A through D) to select a folder - Casio PX330 | User Guide - Page 51
any folder on the memory card. 3. After selecting a folder, you can rename it if you want. • Perform steps 6 through 8 of the procedure under "Renaming a Memory Card File" (page E-48) to rename the folder. Using a Memory Card Saving Data to Digital Piano Memory (Internal Area) Instead of a Memory - Casio PX330 | User Guide - Page 52
to save a Digital Piano user area (user rhythm, user rhythm song, etc.) that does not contain any data to the memory card. Select a user Use a different memory card. 1. The data on the memory card is too big to play. 1. This Digital Piano supports playback of song data files with a maximum size - Casio PX330 | User Guide - Page 53
as the MIDI device. CASIO USB-MIDI : (For Windows Vista, Windows 7, Mac OS X) USB Audio Device: (For Windows XP) • For information about how to select the MIDI device, see the user documentation that comes with the music software you are using. IMPORTANT! • Be sure to turn on the Digital Piano first - Casio PX330 | User Guide - Page 54
and connections that apply to MIDI data send and receive by this Digital Piano, see the latest support information provided by the website at the following URL. http://world.casio.com/ Using MIDI What is MIDI? The letters MIDI stand for Musical Instrument Digital Interface, which is the name - Casio PX330 | User Guide - Page 55
the Digital Piano (see below). * Windows Vista, Windows 7: Double-click "Computer". Mac OS: Skip step 4 and double-click "PIANO" on your Mac desktop. PIANO drive (Digital Piano memory) This folder is not a data folder. You should not try to use it for normal Digital Piano operation. 6. Referring - Casio PX330 | User Guide - Page 56
to exit the storage mode. • If you are using a Macintosh, drag the PIANO folder to the Trash and then press the Digital Piano's bs (FUNCTION) button. IMPORTANT! • The message "ERROR, DATA EXCHANGE" will appear on the display if a problem occurs during data transfer. If this happens, check the - Casio PX330 | User Guide - Page 57
simplified playback on the Digital Piano. • When you copy a user song data file to the MUSICLIB folder, you need to rename it according to specified format (page E-53, step 6). You do not need to rename the file if you use the procedure below. CASIO format song data MIDI file song data 1. Perform - Casio PX330 | User Guide - Page 58
Reference Troubleshooting Problem Cause Action See Page No sound is produced when I press a keyboard key. 1. The VOLUME controller is set to "MIN". 1. Rotate the VOLUME controller more towards ) E-9 "MAX". The pitch of the Digital Piano is off. 2. Headphones or an adaptor plug is plugged - Casio PX330 | User Guide - Page 59
English Reference Product Specifications Model PX-330BK/PX-330WE Keyboard 88-key piano keyboard, with Touch Response (3 types) Maximum Polyphony 128 notes Tones 250 (with Layer and Split) Effects Reverb (4 types), Chorus (4 types), Brilliance (-3 to 0 to 3), Acoustic Resonance Metronome - Casio PX330 | User Guide - Page 60
windows and using headphones. • Any reproduction of the contents of this manual, either in part or its entirety, is prohibited. Except for your own, personal use, any other use of the contents of this manual without the consent of CASIO the power outlet if you do not plan to use the Digital Piano - Casio PX330 | User Guide - Page 61
source of heat (including amplifiers). 8. Use only attachments and accessories specified by the manufacturer. 9. Refer all servicing to qualified service personnel. Servicing is required after any of the following occurs: when the product is damaged, when the power supply cord or plug is damaged - Casio PX330 | User Guide - Page 62
PIANO MODERN GRAND PIANO VARIATION ROCK PIANO LA PIANO MODERN PIANO DANCE PIANO GRAND PIANO CLASSIC MELLOW PIANO HONKY-TONK OCTAVE PIANO STRINGS PIANO PIANO PAD ELEC.PIANO 1 ELEC.PIANO 2 60'S E.PIANO E.GRAND 80 DYNO ELEC.PIANO FM ELEC.PIANO MELLOW E.PIANO POP ELEC.PIANO 057 129 058 130 059 131 060 - Casio PX330 | User Guide - Page 63
SOUND TRACK 135 62 63 64 65 66 GM THUMB PIANO 146 218 HIP-HOP SET 171 243 POWER SET 172 244 ELECTRONIC SET 120 121 122 123 124 125 126 127 0 1 2 3 8 9 16 24 25 30 31 32 40 48 Bank Select MSB/ MSB de Selección de banco 0 0 0 0 0 0 0 selected, pressing multiple keys on the far left side of the keyboard - Casio PX330 | User Guide - Page 64
56 Bb3 58 C4 60 D4 62 E4 64 C#4 61 Eb4 63 F4 65 G4 67 POWER SET Hip-Hop Kick 2 Power Kick 2 Hip-Hop Kick 1 Power Kick 1 Hip-Hop Side Stick Hip-Hop Snare 1 Power Snare 1 Hip-Hop Hand Clap Hip-Hop Snare 2 Power Snare 2 Room Low Tom 2 Hip-Hop Closed Hi-Hat Room Low Tom 1 Hip-Hop Pedal - Casio PX330 | User Guide - Page 65
BEAT 16 BEAT SHUFFLE HIP-HOP DANCE POP DISCO POP TECHNO POP TRANCE MODERN R&B MODERN DANCE DISCO SOUL STRAIGHT ROCK SHUFFLE ROCK BLUES 1 BLUES 2 EP BLUES SLOW BLUES SOFT ROCK LATIN ROCK SLOW ROCK 50'S ROCK 50'S PIANO ROCK NEW ORLNS R&R 60'S ROCK ROCK 70'S PIANO ROCK ROCK WALTZ SLOW BIG BAND MIDDLE - Casio PX330 | User Guide - Page 66
059 125 060 126 061 127 062 128 063 129 064 130 065 131 066 132 067 133 068 134 069 135 070 136 SOUTHEAST ASIAN ENKA PIANO ROCK BALLAD 90'S BALLAD MODERN BALLAD ELECTRIC BALLAD SLOW BALLAD 1 SLOW BALLAD 2 R&B BALLAD 16 BEAT BALLAD SOUL BALLAD POP BALLAD 1 POP BALLAD 2 PIANO WALTZ - Casio PX330 | User Guide - Page 67
Rising Sun 13 Believer 14 Pop Ska 15 Weep Blues 16 Sugar Pop 17 JoyWorldPop 18 My Life 19 Ribbon Heat Up 63 Hard Rock 64 Grunge Rock 65 Latin Rock 66 Hanging By 67 R&R 68 Piano R&R 69 Blues 70 Symphony 25 129 Symphony 40 130 HungriaDance 131 Eine Kleine 132 - Casio PX330 | User Guide - Page 68
227 8 228 9 229 10 230 11 231 12 232 13 233 14 234 15 235 16 236 17 237 18 238 19 239 20 240 21 241 22 242 23 243 24 244 276 57 277 58 278 59 279 60 280 61 281 62 282 63 283 64 284 65 285 66 286 67 287 68 288 JAZZ BALLAD 69 289 70 290 - Casio PX330 | User Guide - Page 69
Fingering Guide/ Guía de digitación Fingered 1, Fingered 2 Chords/ Acordes Fingered 1, Fingered 2 C Cm 2, interpreted as Am7. *2 With Fingered 2, interpreted as Am7b5. *3 Inverted form not supported in some cases. *1 Con Fingered 2, se interpreta como Am7. *2 Con Fingered 2, se interpreta como Am7b5 - Casio PX330 | User Guide - Page 70
aug sus4 sus2 7 m7 M7 m7b5 7b5 7sus4 add9 madd9 mM7 dim7 69 6 m6 • Since the chord input range is limited, this model may not support some of the chords shown above. • Debido a que el rango de entrada de acordes es limitado, es posible que este modelo no admita algunos de - Casio PX330 | User Guide - Page 71
Model PX-330 MIDI Implementation Chart Version : 1.0 Function Transmitted Recognized Remarks Basic Channel Default Changed 1 - 16 1 - 16 1 - 16 1 - 16 Mode Default Messages Altered Mode 3 X Mode 3 X Note Number True voice Velocity Note ON Note OFF After Touch Key's Ch's Pitch - Casio PX330 | User Guide - Page 72
This recycle mark indicates that the packaging conforms to the environmental protection legislation in Germany. Esta marca de reciclaje indica que el empaquetado se ajusta a la legislación de protección ambiental en Alemania. C MA1106-B Printed in China PX330ES1B
-
 1
1 -
 2
2 -
 3
3 -
 4
4 -
 5
5 -
 6
6 -
 7
7 -
8
-
9
-
10
-
11
-
12
-
13
-
14
-
15
-
16
-
17
-
18
-
19
-
20
-
21
-
22
-
23
-
24
-
25
-
26
-
27
-
28
-
29
-
30
-
31
-
32
-
33
-
34
-
35
-
36
-
37
-
38
-
39
-
40
-
41
-
42
-
43
-
44
-
45
-
46
-
47
-
48
-
49
-
50
-
51
-
52
-
53
-
54
-
55
-
56
-
57
-
58
-
59
-
60
-
61
-
62
-
63
-
64
-
65
-
66
-
67
-
68
-
69
-
70
-
71
-
72
 |
 |

PX330ES1B
ES
USER’S GUIDE
GUÍA DEL USUARIO
Please keep all information for future reference.
Guarde toda documentación para futuras consultas.
Safety Precautions
Before trying to use the piano, be sure to read
the separate “Safety Precautions”.
Precauciones de seguridad
Antes de intentar usar el piano, asegúrese de
leer las “Precauciones de seguridad” separadas.
English
Español