Cisco PIX 506E User Guide - Page 8
PIX 506/506E Lithium Battery Location, Warning, Step 1 - used
 |
UPC - 746320661315
View all Cisco PIX 506E manuals
Add to My Manuals
Save this manual to your list of manuals |
Page 8 highlights
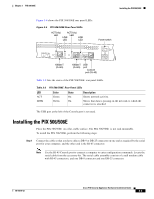
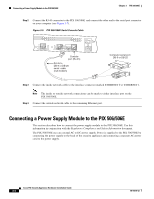
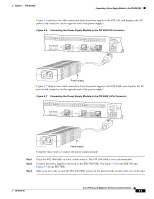
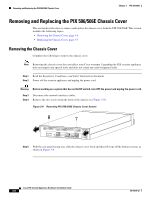
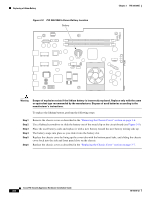
Replacing a Lithium Battery Figure 3-9 PIX 506/506E Lithium Battery Location Battery Chapter 3 PIX 506/506E Front 119680 Warning Danger of explosion exists if the lithium battery is incorrectly replaced. Replace only with the same or equivalent type recommended by the manufacturer. Dispose of used batteries according to the manufacturer's instructions. To replace the lithium battery, perform the following steps: Step 1 Step 2 Step 3 Step 4 Step 5 Step 6 Remove the chassis cover as described in the "Removing the Chassis Cover" section on page 3-6. Use a flathead screwdriver to slide the battery out of the metal clip on the circuit board (see Figure 3-9). Place the used battery aside and replace it with a new battery. Install the new battery writing side up. The battery snaps into place as you slide it into the battery slot. Replace the chassis cover by lining up the cover tabs with the bottom panel tabs, and sliding the chassis cover back into the side and front panel slots on the chassis. Replace the chassis cover as described in the "Replacing the Chassis Cover" section on page 3-7. Cisco PIX Security Appliance Hardware Installation Guide 3-8 78-15170-02
-
 1
1 -
2
-
 3
3 -
 4
4 -
 5
5 -
 6
6 -
 7
7 -
 8
8
 |
 |
