Cisco X2000 User Manual
Cisco X2000 Manual
 |
View all Cisco X2000 manuals
Add to My Manuals
Save this manual to your list of manuals |
Cisco X2000 manual content summary:
- Cisco X2000 | User Manual - Page 1
Gebruikershandleiding 189 Podręcznik użytkownika 217 Användarhandbok 242 266 EN User Guide AR CA Guide de l'utilisateur DE Benutzerhandbuch ES Guía del usuario FR Guide de l'utilisateur Linksys X2000/X3000 User Guide IT Guida per l'utente NL Gebruikershandleiding PL Podręcznik użytkownika - Cisco X2000 | User Manual - Page 2
EN 3 AR 29 CA 56 DE 82 ES 109 FR 136 IT 162 NL 189 PL 217 SE 242 TH 266 - Cisco X2000 | User Manual - Page 3
Linksys X2000/X3000 User Guide Contents Product Overview X2000 4 Top 4 Back 5 Bottom 5 Wall-mounting placement 5 X3000 6 Top 6 Back 7 Bottom 7 Wall-mounting placement 7 Installation Set up your modem-router automatically 8 Set up your modem-router manually 9 Connect your - Cisco X2000 | User Manual - Page 4
Overview X2000 Top Product Overview Ethernet If the LED is continuously lit, the modem router is successfully connected to a device through that port. Wi-Fi Protected Setup™ Button Press this button to have Wi-Fi Protected Setup™ search for your Wi-Fi Protected Setup™-supported wireless device - Cisco X2000 | User Manual - Page 5
Power-The Power port connects to the included power adapter. Power button-Press | (on) to turn on the modem router. (Button not available on North American models.) Bottom Reset-This button allows you to reset the router to its factory defaults. Press and hold the Reset button for approximately five - Cisco X2000 | User Manual - Page 6
X2000/X3000 X3000 Top Product Overview Ethernet If the LED is continuously lit, the modem router is successfully connected to a device through that port. Wi-Fi Protected Setup™ Button Press this button to have Wi-Fi Protected Setup™ search for your Wi-Fi Protected Setup™-supported wireless - Cisco X2000 | User Manual - Page 7
Linksys X2000/X3000 Product Overview Back DSL-Connects to the ADSL line. Cable-To use the modem router as only a router, use a network cable to connect this port to a separate modem's LAN/Ethernet port. Ethernet-Using Ethernet cables (also called network cables), these Ethernet ports connect the - Cisco X2000 | User Manual - Page 8
Linksys X2000/X3000 Installation Set up your modem-router automatically 1. Insert the CD into your CD or DVD drive. 2. Click Set up your Linksys Router. AutoPlay DVD/CD-RW Drive (E:) Linksys Router Setup Always do this for software and games: AutoPlay DVD/CD-RW Drive (E:) Linksys Router Setup - Cisco X2000 | User Manual - Page 9
the on-screen instructions to finish the setup. Set up your modem-router manually Note Run the Setup CD-ROM to install the modem-router. If you cannot run the Setup CD-ROM, refer to the steps below. Note If you are setting up your modem-router in New Zealand, see "NOTE FOR USERS IN NEW ZEALAND - Cisco X2000 | User Manual - Page 10
to configure the modem-router. 8. The LEDs for Power, Wireless, and Ethernet (one for each connected computer) should light up. If not, make sure the modem-router is powered on and the cables are securely connected. Set up your modem-router as only a router Note Run the Setup CD-ROM to install the - Cisco X2000 | User Manual - Page 11
up. If not, make sure the modem-router is powered on and the cables are securely connected. NOTE FOR USERS IN NEW ZEALAND To set up the device, follow these instructions: 1. Access the Setup > Basic Setup screen. 2. Select RFC 2364 PPPoA from the Encapsulation drop-down menu. 3. For the Virtual - Cisco X2000 | User Manual - Page 12
wireless network followed by -guest. 2. Open a web browser. 3. On the login screen, enter the password of your guest network. Then click Login. 4. To disable Guest Access or change settings, click Change. Then, follow the on-screen instructions. How to use Cisco Connect Main Menu - Router Settings - Cisco X2000 | User Manual - Page 13
. IP stands for Internet Protocol. LAN stands for Local Area Network.) Advanced settings To access settings for advanced users, click this option. Then, follow the on-screen instructions. Advanced Configuration Advanced Configuration After setting up the router with the setup software (located - Cisco X2000 | User Manual - Page 14
Linksys X2000/X3000 3. In the Password field, enter the password created by the setup software. If you did not run the setup software, then enter the default, admin. Note You can also access the browser‑based utility through Cisco Connect. 4. Click OK to continue. How to use the browser-based - Cisco X2000 | User Manual - Page 15
Setup section configures the router to your Internet connection. Most of this information can be obtained through your Internet Service Provider (ISP). Internet Connection Type Select the type of Internet connection your ISP provides from the drop-down menu. The available types are: •• Bridged Mode - Cisco X2000 | User Manual - Page 16
), or if the router should always be connected. Select the appropriate option. PPTP Point-to-Point Tunneling Protocol (PPTP) is a service that generally applies to connections in Europe. If your PPTP connection supports DHCP or a dynamic IP address, then select Obtain an IP Address Automatically. If - Cisco X2000 | User Manual - Page 17
Linksys X2000/X3000 L2TP Layer 2 Tunneling Protocol (L2TP) is a service that generally applies to connections in Israel. Telstra Cable Telstra Cable is a service that generally applies to connections in Australia. Network Setup The Network Setup section configures the IP settings for your local - Cisco X2000 | User Manual - Page 18
the bottom of the router. If you used the setup software for installation, then the default Network Name is changed to an easy-to-remember name. Note If you restore the router's factory default settings (by pressing the Reset button or using the Administration > Factory Defaults screen), the Network - Cisco X2000 | User Manual - Page 19
Wi-Fi Protected Setup, note the wireless settings, and then manually configure those client devices. Wireless > Wireless Security The wireless security settings configure the security of your wireless network(s). The router supports the following wireless security options: WPA2/WPA Mixed Mode, WPA2 - Cisco X2000 | User Manual - Page 20
Configuration WPA2/WPA Mixed Mode Note If you select WPA2/WPA Mixed Mode as your Security Mode, each device in your wireless network MUST use WPA2/WPA and the same passphrase. Passphrase Enter a passphrase of 8-63 characters. The default is password. If you used the setup software for installation - Cisco X2000 | User Manual - Page 21
is connected to the router.) Note If you select WPA2 Enterprise as your Security Mode, each device in your wireless network MUST use WPA2 Enterprise and the same shared key. Passphrase Enter a passphrase of 8-63 characters. The default is password. If you used the setup software for installation - Cisco X2000 | User Manual - Page 22
Linksys X2000/X3000 RADIUS Server Enter the IP address of the RADIUS server. RADIUS Port Enter the port number of the RADIUS server. The default is 1812. Shared Key Enter the key shared between the router and the server. WEP WEP is a basic encryption method, which is not as secure as WPA. Note If - Cisco X2000 | User Manual - Page 23
is guest. If you used the setup software for installation, then the default is changed to a unique password. Change Click this option to change the Guest Password. The Change Guest Password screen appears. Wireless > Guest Access The Guest Access feature allows you to provide guests visiting - Cisco X2000 | User Manual - Page 24
Linksys X2000/X3000 Guest Instructions When a guest wants Internet access in your home, provide these instructions: 1. On the guest computer, connect to the wireless guest network named on the Guest Access screen. 2. Open a web browser. 3. On the login screen, enter the password displayed on the - Cisco X2000 | User Manual - Page 25
(the default IP address is 192.168.1.1). When prompted, complete the User name and Password fields (the default user name and password is admin). Click the appropriate tab to change the settings You cannot use the DSL service to connect manually to the Internet. After you have installed the router - Cisco X2000 | User Manual - Page 26
-router to a cable modem. You want to access the browser-based utility from Cisco Connect. To enter the browser-based utility from Cisco Connect, follow these steps: 1. Open Cisco Connect. 2. On the main menu, click Router settings. 3. Click Advanced settings. 4. Write down the username and password - Cisco X2000 | User Manual - Page 27
see the CD that came with your modem router or go to Linksys.com/support. Specifications are subject to change without notice. Maximum performance derived from IEEE Standard 802.11 specifications. Actual performance can vary, including lower wireless network capacity, data throughput rate, range and - Cisco X2000 | User Manual - Page 28
see the CD that came with your modem router or go to Linksys.com/support. Specifications are subject to change without notice. Maximum performance derived from IEEE Standard 802.11 specifications. Actual performance can vary, including lower wireless network capacity, data throughput rate, range and - Cisco X2000 | User Manual - Page 29
( Wireless Guest Access 50 . . . 50 ( Guest Access 51 31 X2000 31 32 32 32 33 X3000 33 34 34 34 35 36 37 37 Cisco Connect 38 Cisco Connect - Cisco X2000 | User Manual - Page 30
Linksys X2000/X3000 52 X2000/X3000 54 X2000 55 X3000 30 - Cisco X2000 | User Manual - Page 31
Linksys X2000/X3000 Ethernet Wi-Fi Protected Setup Wi-Fi Protected Setup Wi-Fi Protected .Setup Wi-Fi Protected Setup Wi-Fi Protected Setup Wi-Fi Protected Setup WAN ADSL Power X2000 31 - Cisco X2000 | User Manual - Page 32
Linksys X2000/X3000 175.56 2.5-3.0مم 4-5مم 1-1.5مم Cisco 1 1 2 2 175 3 3 3 4 4 5 5 -DSL DSL ADSL LAN/Ethernet Ethernet Ethernet Ethernet Ethernet ( Power Power Switch I O (-Reset Reset - Cisco X2000 | User Manual - Page 33
Linksys X2000/X3000 Ethernet Wi-Fi Protected Setup Wi-Fi Protected Setup Wi-Fi Protected Setup Wi-Fi Protected Setup Wi-Fi Protected Setup Wi-Fi Protected Setup WAN ADSL Power X3000 33 - Cisco X2000 | User Manual - Page 34
Linksys X2000/X3000 175.56 2.5-3.0مم 4-5مم 1-1.5مم Cisco 1 1 2 2 175 3 3 3 4 4 5 5 -DSL DSL ADSL LAN/Ethernet Ethernet Ethernet Ethernet Ethernet ( Power USB USB Power Switch I O (-Reset - Cisco X2000 | User Manual - Page 35
up your Linksys X2000/X3000 Linksys X2000/X3000 5 Modem router 4 a a .b b DSL Router only 4 a a b b Cable 1 DVD 2 Set up your Linksys Router Linksys AutoPlay DVD/CD-RW Drive (E:) Linksys Router Setup Always do this for software and games - Cisco X2000 | User Manual - Page 36
Linksys X2000/X3000 .b b 7 منك ،4 اخت6 .a a DSL 36 - Cisco X2000 | User Manual - Page 37
Linksys X2000/X3000 6 7 Ethernet 1 2 Ethernet LAN/Ethernet 3 1 2 Ethernet Ethernet Ethernet 3 DSL 4 ADSL 5 37 - Cisco X2000 | User Manual - Page 38
Linksys X2000/X3000 Cisco Connect Cisco Connect Cisco Connect Cisco Connect :Windows Start All Programs Cisco Connect :Mac Go Applications Cisco Connect Cisco Connect 4 5 Ethernet 38 - Cisco X2000 | User Manual - Page 39
Change Password Change ( Update or create key USB ( Register now to receive special offers and updates Cisco Cisco Add device Change 1 guest 2 3 Login 4 Change Change Router settings - Cisco X2000 | User Manual - Page 40
Linksys X2000/X3000 CD-ROM 1 IP 192.168.1.1 Address Enter Windows Address Windows 7 ( Router details Router details Model name Model number Serial number Firmware version Operating system Software version Connection type WAN WANو ( IP address - Cisco X2000 | User Manual - Page 41
Linksys X2000/X3000 Help ( Setup Basic Setup Basic Setup ADSL ADSL 2 User name admin 3 admin Cisco Connect .4 4 OK Setup Wireless Security Storage Access Restrictions Applications & Gaming Administration Status Setup Basic Setup - Cisco X2000 | User Manual - Page 42
Linksys X2000/X3000 ( Internet Connection Type RFC 2684 Br•idged RFC 2684 R•outed IPoA RFC 2516 P• PPoE RFC 2364 P• PPoA DSL C.V RFC 2684 Bridged P .I IP IP RFC 2684 Routed IP IPoA IPoA( IP ATM IP RFC 2516 PPPoE DSL Ethernet( PPoE )P - Cisco X2000 | User Manual - Page 43
Linksys X2000/X3000 ( Internet Setup Internet Setup ISP ( Internet Connection Type Automatic Configuration -•DHCP DHCP - • Sta• tic IP ( IP P• PPoE Ethernet PPTP L2TP 2 Telstra•Cable Telstra ( Automatic Configuration - DHCP DHCP Internet Connection Type - Cisco X2000 | User Manual - Page 44
( PPTP PPTP DHCP IP Obtain an IP Address Automatically IP IP Specify an IP Address IP L2TP 2 L2TP( 2 Telstra Cable Telstra Telstra Cable Telstra IP ( Wireless Basic Wireless Settings Wi-Fi Wi-Fi Wi-Fi Wi-Fi ( Configuration View Manual 44 - Cisco X2000 | User Manual - Page 45
Setup Light Activity Wi-Fi Cisco Wi-Fi Wi-Fi Wi-Fi • ( Wireless-N O•nly N N 2.4 Wireless-N Only N Disab•led B- G N 2.4 Disabled Mixed Network Name SSID SSID SSID 32 Ciscoxxxxx( xxxxx Administration Factory Defaults ( Channel - Cisco X2000 | User Manual - Page 46
Linksys X2000/X3000 1قم PIN Setup Wi-Fi Protected i-Fi )W 2 Register Wi-Fi Protected Setup Wi-Fi 3 OK Wi-Fi Protected Setup i-Fi )W ( Enter Router PIN on Client Device PIN PIN 1 PIN Wi-Fi Protected Setup Wi-Fi 2 OK Wi-Fi Protected Setup i-Fi )W - Cisco X2000 | User Manual - Page 47
Linksys X2000/X3000 ( WPA2/WPA Mixed Mode WPA2/WPA WPA2/WPA Mixed-Mode WPA2/WPA ( Passphrase 63-8 WPA2 WPA2 Personal( WPA2 WPA2 ( Passphrase 63-8 WPA2 :WPA WPA2 Personal( WPA2 WPA2/WPA Mixed Mode WPA2/WPA WPA - Cisco X2000 | User Manual - Page 48
Linksys X2000/X3000 ( RADIUS Port RADIUS RADIUS 1812 ( Shared Key WPA2 Enterprise ( WPA2 WPA2 RADIUS RADIUS WPA2 Enterprise( WPA2 PA2 EnterpriseWPA2( W ( RADIUS Server RADIUS IP RADIUS ( RADIUS Port RADIUS RADIUS 1812 ( Shared Key WPA - Cisco X2000 | User Manual - Page 49
Linksys X2000/X3000 ( Passphrase WEP Generate ( Key 4-1 4-1 WEP ( TX Key TX 1 RADIUS WEP RADIUS RADIUS RADIUS RADIUS ( RADIUS Server RADIUS IP WEP WPA WEP WEP ( RADIUS Server RADIUS IP RADIUS ( RADIUS Port RADIUS RADIUS 1812 ( - Cisco X2000 | User Manual - Page 50
Linksys X2000/X3000 ( Wireless Guest Access Guest Access Guest Access ( Encryption WEP 10( 10 hex WEP ( TX Key TX 1 Disabled ( Guest Access ( Allow Guest Access yes no ( Guest Network Name guest ( Guest Password guest 50 - Cisco X2000 | User Manual - Page 51
Linksys X2000/X3000 ( Change Change Guest Password ( Change Guest Password Enter a new guest network pas1sword 1 4 32 2 Change Guest Access Total Guests Allowed لـ 5 ( SSID Broadcast SSID SSID SSID Enabled SSID Disabled 1 Guest Access 2 - Cisco X2000 | User Manual - Page 52
Linksys X2000/X3000 SSID Cisco Connect Internet Explorer Firefox) IP IP 192.168.1.1 admin DSL ISP Internet Explorer .1 1 2 2 Tools Internet Options .3 3 Connections 4 Never dial a connection4 .5 5 OK X2000/X3000 - Cisco X2000 | User Manual - Page 53
ويب Linksys.com/support ADSL Cisco Connect Cisco Connect .1 Cisco Connect1 2 2 Router settings 3 3 Advanced settings .4 4 Copy Password 5 5 OK 1 Cisco Connect1 .2 2 Router Settings .3 3 Password 53 - Cisco X2000 | User Manual - Page 54
UL, CB Wi-Fi (802.11b/g/n), WPA™, WPA2™, WMM ™Wi-Fi Protected Setup 0 to 40°C -20 to 70°C 10 to 85% Noncondensing 5 to 90% Noncondensing Linksys.com/support IEEE 802.11 X2000 WLAN: 802.11n, 802.11g, 802.11b Ethernet: 802.3, 802.3u - Cisco X2000 | User Manual - Page 55
Linksys X2000/X3000 160 x 202 x 34 335g 12VDC, 1,5A FCC, CE, Telepermit, K.21, UL, CB Wi-Fi (802.11b/g/n), WPA™, WPA2™, WMM ™Wi-Fi Protected Setup 0 to 40°C -20 to 70°C 10 to 85% Noncondensing 5 to 90% Noncondensing Linksys.com/support IEEE 802.11 - Cisco X2000 | User Manual - Page 56
mural 60 Installation Configuration automatique du modem routeur 61 Configuration manuelle du modem routeur 62 Connexion de votre modem routeur 63 Configuration du modem routeur en tant que routeur seulement 63 Comment utiliser Cisco Connect Comment accéder à Cisco Connect 64 Menu - Cisco X2000 | User Manual - Page 57
Linksys X2000/X3000 Vue d'ensemble du produit X2000 Partie supérieure Vue d'ensemble du produit Ethernet Si un voyant est allumé, cela indique que le modem routeur est connecté à un périphérique sur le port correspondant. Bouton Wi-Fi Protected Setup™ (configuration de l'accès Wi-Fi protégé) - Cisco X2000 | User Manual - Page 58
Linksys X2000/X3000 Vue d'ensemble du produit Partie arrière DSL - Permet de brancher la ligne ADSL. Cable (Câble) - Afin d'utiliser le modem routeur en tant que routeur uniquement, branchez un câble réseau sur ce port et sur le port réseau local/Ethernet d'un autre modem Remarque Cisco ne installer - Cisco X2000 | User Manual - Page 59
Linksys X2000/X3000 X3000 Partie supérieure Vue d'ensemble du produit Ethernet Si un voyant est allumé, cela indique que le modem routeur est connecté à un périphérique sur le port correspondant. Bouton Wi-Fi Protected Setup™ (configuration de l'accès Wi-Fi protégé) Appuyez sur ce bouton pour que - Cisco X2000 | User Manual - Page 60
Linksys X2000 ) - Afin d'utiliser le modem routeur en tant que routeur uniquement Cisco ne peut être tenue responsable des dommages causés par l'utilisation de matériel de montage mural mal fixé. Procédez comme suit : 1. Choisissez l'endroit voulu pour installer bien en place. Reset (Réinitialisation) - Ce - Cisco X2000 | User Manual - Page 61
Linksys X2000/X3000 Installation Configuration automatique du modem routeur 1. Insérez le CD dans votre lecteur CD ou DVD. 2. Cliquez sur Set up your Linksys Router (Installer votre routeur Linksys). AutoPlay DVD/CD-RW Drive (E:) Linksys Router Setup Always do this for software and games: - Cisco X2000 | User Manual - Page 62
X2000/X3000 Si vous avez choisi Router only (Routeur seulement) à l'étape 4 : a. Branchez le câble d'alimentation, ensuite mettez le routeur sous tension à l'aide du bouton d'alimentation. b. Reliez le port Cable (Câble) à l'arrière de votre routeur au modem par le biais du câble bleu. Installation - Cisco X2000 | User Manual - Page 63
. Si ce n'est pas le cas, assurez-vous que le modem routeur est sous tension et que les câbles sont correctement connectés. Configuration du modem routeur en tant que routeur seulement Remarque Exécutez le CD-ROM d'installation pour installer le modem routeur. Si vous n'êtes pas en mesure d'exécuter - Cisco X2000 | User Manual - Page 64
Linksys X2000/X3000 3. Connectez une extrémité du cordon de l'adaptateur d'alimentation au port Power (Alimentation) et l'autre extrémité à la prise électrique. 4. Mettez sous tension l'ordinateur que vous utiliserez pour configurer le modem routeur. 5. Les voyants Power (Alimentation), Wireless (ré - Cisco X2000 | User Manual - Page 65
ètres. Après, suivre les instructions affichées. Comment utiliser Cisco Connect Menu principal - Paramètres du routeur Utilisez cette option pour personnaliser les paramètres du routeur. 1. Pour changer les paramètres, cliquez sur Change (Modifier). La page Router settings (Paramètres du routeur - Cisco X2000 | User Manual - Page 66
Firmware version (Version du micrologiciel), Operating system (Système d'exploitation), Software version (Version logicielle), Connection type (WAN) (Type de connexion [réseau étendu]), IP address (LAN) (Adresse IP [réseau local]), IP address (WAN) (Adresse IP [réseau étendu]) et Computer IP address - Cisco X2000 | User Manual - Page 67
champ Password (Mot de passe), entrez le mot de passe créé par le logiciel d'installation. Si vous n'avez pas exécuté le logiciel d'installation, entrez le mot de passe par défaut, soit admin. Remarque Vous pouvez aussi accéder à l'utilitaire Web en utilisant le logiciel Cisco Connect. 4. Cliquez - Cisco X2000 | User Manual - Page 68
following IP address (Utiliser l'adresse IP suivante). Configuration avancée RFC2684 Routed (Routé) Avec cette méthode, vous devez utiliser une adresse IP permanente pour vous connecter à Internet. IPoA IPoA (IP over ATM) (IP sur ATM) utilise une adresse IP fixe. RFC 2516 PPPoE Certains services - Cisco X2000 | User Manual - Page 69
) La section Internet Setup (Configuration Internet) permet de configurer le routeur en fonction du type de connexion Internet utilisée. La plupart des données requises peuvent vous être transmises par votre fournisseur d'accès Internet (FAI). Configuration avancée Internet Connection Type (Type de - Cisco X2000 | User Manual - Page 70
Telstra Cable (Câble Telstra) Le service Telstra est utilisé généralement en Australie. Network Setup (Configuration du réseau) La section Network Setup (Configuration du réseau) permet de configurer les paramètres IP de votre réseau local. Wireless > Basic Wireless Settings (Sans fil > Paramètres - Cisco X2000 | User Manual - Page 71
de configuration pour installer le routeur, le nom de réseau par défaut est remplacé par un nom facile à mémoriser. Remarque Si vous rétablissez les paramètres d'usine du routeur (en appuyant sur le bouton Reset [Réinitialisation] ou en utilisant l'écran Administration > Factory Defaults [Param - Cisco X2000 | User Manual - Page 72
Linksys X2000/X3000 Activité du voyant de la configuration protégée par Wi-Fi •• Le logo Cisco sur la partie supérieure du routeur sert de voyant à la configuration protégée par Wi-Fi. •• Lorsque la configuration protégée par Wi-Fi est active, le voyant clignote lentement. Une fois la configuration - Cisco X2000 | User Manual - Page 73
réseau sans fil DOIVENT utiliser ce mode et la même phrase de vérification. Passphrase (Phrase de vérification) Saisissez une phrase de vérification de 8 à 63 caractères. La valeur par défaut est password. Si vous avez utilisé le logiciel de configuration pour installer le routeur, la valeur par - Cisco X2000 | User Manual - Page 74
password. Si vous avez utilisé le logiciel de configuration pour installer le routeur, la valeur par défaut est remplacée par une phrase de vérification unique. WPA2/WPA Enterprise Mixed Mode (Mode ce mode et la même clé partagée. RADIUS Server (Serveur RADIUS) Entrez l'adresse IP du serveur - Cisco X2000 | User Manual - Page 75
sans fil DOIVENT utiliser ce mode et la même clé partagée. RADIUS Server (Serveur RADIUS) Entrez l'adresse IP du serveur RADIUS. RADIUS mode WEP comme mode de sécurité, tous les périphériques de votre réseau sans fil DOIVENT utiliser ce mode et la même clé de cryptage et partagée. Configuration - Cisco X2000 | User Manual - Page 76
mode et la même clé de cryptage et partagée WEP. Configuration avancée Disabled (Désactivé) Si vous désactivez la sécurité sans fil, un message apparaîtra lorsque vous essaierez de vous connecter l'adresse IP du serveur Wireless > Guest Access (Sans fil > Accès d'invité) La fonction Guest Access - Cisco X2000 | User Manual - Page 77
Linksys X2000/X3000 Accès d'invité Allow Guest Access Password (Modifier le mot de passe d'invité) apparaît. Configuration avancée Instructions pour les invités Lorsqu'un de vos invités désire avoir accès à Internet de chez vous, il doit suivre ces instructions : 1. Sur son ordinateur, se connecter - Cisco X2000 | User Manual - Page 78
champs User name (nom d'utilisateur) et Password (Mot de passe) (le nom d'utilisateur et le mot de passe par défaut sont admin). Cliquez sur l'onglet approprié pour modifier les paramètres Vous ne pouvez pas utiliser le service DSL pour vous connecter manuellement à Internet. Une fois installé, le - Cisco X2000 | User Manual - Page 79
de passe d'ouverture de session de l'utilitaire Web‑. Pour afficher ce mot de passe : 1. Ouvrez Cisco Connect. 2. Dans le menu principal, cliquez sur Router settings (Paramètres du routeur). 3. Le champ Password (Mot de passe) est affiché dans la partie gauche de l'écran. Dans Windows XP, le routeur - Cisco X2000 | User Manual - Page 80
Reset (Réinitialisation), Wi-Fi Protected Setup™ (Configuration protégée par Wi-Fi) Power (Alimentation), Ethernet (1-3), Wi-Fi Protected Setup (Configuration protégée par Wi-Fi), Wireless le CD fourni avec votre modem routeur ou rendez-vous sur Linksys.com/support. Les spécifications peuvent changer - Cisco X2000 | User Manual - Page 81
ADSL2), G.992.5 (ADSL2+) pour les annexes A, B, M et L, U-R2 pour l'annexe B USB 2.0 DSL, Cable (Câble), Gigabit (10/100/1 000) Ethernet (1-4), Power (Alimentation), USB Alimentation, Reset (Réinitialisation), Wi-Fi Protected Setup™ (Configuration modem routeur ou rendez-vous sur Linksys.com/support - Cisco X2000 | User Manual - Page 82
86 Wandmontage 86 Installation Automatisches Einrichten Ihres Modem-Routers 87 Manuelles Einrichten Ihres Modem-Routers 88 Anschließen Ihres Modem-Routers 89 Einrichten des Modem-Routers ausschließlich als Router 89 Verwendung von Cisco Connect Zugreifen auf Cisco Connect 90 Hauptmen - Cisco X2000 | User Manual - Page 83
Linksys X2000/X3000 Produktübersicht X2000 Vorderseite Produktübersicht Ethernet Die betreffende LED leuchtet durchgängig, wenn der Router über diesen Port mit einem Gerät verbunden ist. Wi-Fi Protected Setup-Taste Drücken Sie diese Taste, um nach Geräten zu suchen, die von Wi-Fi Protected Setup™ - Cisco X2000 | User Manual - Page 84
zurückgesetzt werden. Halten Sie entweder die Reset-Taste etwa fünf Sekunden lang gedrückt, oder stellen Sie die Standardeinstellungen im browserbasierten Dienstprogramm des Routers unter Administration (Verwaltung) > Factory Defaults (Werkseinstellungen) wieder her. 4-5 mm 1-1,5 mm HINWEIS Cicso - Cisco X2000 | User Manual - Page 85
Linksys X2000/X3000 X3000 Vorderseite Produktübersicht Ethernet Die betreffende LED leuchtet durchgängig, wenn der Router über diesen Port mit einem Gerät verbunden ist. Wi-Fi Protected Setup-Taste Drücken Sie diese Taste, um nach Geräten zu suchen, die von Wi-Fi Protected Setup™ unterstützt - Cisco X2000 | User Manual - Page 86
zurückgesetzt werden. Halten Sie entweder die Reset-Taste etwa fünf Sekunden lang gedrückt, oder stellen Sie die Standardeinstellungen im browserbasierten Dienstprogramm des Routers unter Administration (Verwaltung) > Factory Defaults (Werkseinstellungen) wieder her. 2. Bohren Sie zwei Löcher - Cisco X2000 | User Manual - Page 87
Linksys X2000/X3000 Installation Automatisches Einrichten Ihres Modem-Routers 1. Legen Sie die CD in das CD- oder DVD-Laufwerk ein. 2. Klicken Sie auf Set up your Linksys Router (Ihren Linksys Router einrichten). AutoPlay DVD/CD-RW Drive (E:) Linksys Router Setup Always do this for software and - Cisco X2000 | User Manual - Page 88
Linksys X2000/X3000 Installation b. Wählen Sie Ihre Internetverbindung, weitere Interneteinstellungen und statische Netzwerkeinstellungen (falls erforderlich) aus. Diese Informationen sollten Sie von Ihrem Internetdienstanbieter (ISP) erhalten. 6. Wenn Sie in Schritt 4 Modem-Router auswählen, - Cisco X2000 | User Manual - Page 89
Linksys X2000/X3000 Anschließen Ihres Modem-Routers So schließen Sie Ihren Modem-Router an: 1. Schalten Sie alle Netzwerkgeräte einschließlich Computer und Modem- Router aus. Wenn Sie ein Modem verwenden, entfernen Sie es jetzt, da der Modem-Router es ersetzt. 2. Schließen Sie ein Ende des - Cisco X2000 | User Manual - Page 90
Aus-, Wireless- und Ethernet-LEDs (je eine für jeden angeschlossenen Computer) sollten aufleuchten. Ist dies nicht der Fall, vergewissern Sie sich, dass der Modem-Router eingeschaltet ist und alle Kabel fest angeschlossen sind. Verwendung von Cisco Connect Verwendung von Cisco Connect Cisco Connect - Cisco X2000 | User Manual - Page 91
Bildschirm. Verwendung von Cisco Connect Hauptmenü - Routereinstellungen Mit dieser Option können Sie die Routereinstellungen benutzerdefiniert festlegen. Klicken Sie auf Change (Ändern), um Einstellungen zu ändern. Das Fenster Router Settings (Router-Einstellungen) wird angezeigt. Personalisieren - Cisco X2000 | User Manual - Page 92
Linksys X2000/X3000 Ein/Aus-Behalten Sie die Standardeinstellung Ein bei, damit die LEDs auf dem Router eingeschaltet werden. Easy Setup Key Update or create key (Schlüssel aktualisieren oder erstellen): Beim Easy Setup Key handelt es sich um ein USB-Flash-Laufwerk, das die Wireless-Einstellungen - Cisco X2000 | User Manual - Page 93
Linksys X2000/X3000 2. Geben Sie im Feld User name (Benutzername) admin ein. 3. Geben Sie dann das Passwort ein, das beim Einrichten der Software erstellt wurde. (Wenn Sie die Installations-Software nicht ausgeführt haben, verwenden Sie das Standardpasswort admin. Sie können im Fenster - Cisco X2000 | User Manual - Page 94
Linksys X2000/X3000 Einrichtung > Grundlegende Einrichtung Im ersten geöffneten Fenster wird die Registerkarte Basic Setup (Grundlegende Einrichtung) angezeigt. Hier können Sie die allgemeinen Einstellungen des Routers ändern. Auto/ADSL mode Im ADSL-Modus (Standard) müssen die folgenden Felder - Cisco X2000 | User Manual - Page 95
Linksys X2000/X3000 RFC2364 PPPoA Einige ISPs mit DSL-Option verwenden PPPoA (Point-to-Point Protocol over ATM) zur Herstellung von Internetverbindungen. Bei Verwendung von PPPoA wird Ihre IP-Adresse automatisch bereitgestellt. Netzwerkeinrichtung Im Bereich Network Setup (Netzwerkeinrichtung) - Cisco X2000 | User Manual - Page 96
unterstützen, können Sie Wi-Fi Protected Setup verwenden. Configuration View (Konfigurationsansicht): Wählen Sie zur manuellen Konfiguration des Wireless-Netzwerks die Option Manual (Manuell). Fahren Sie im Bereich Wireless Configuration (Manual) (Wireless-Konfiguration (Manuell)) fort. Wenn Sie Wi - Cisco X2000 | User Manual - Page 97
Sie die Werkseinstellungen des Routers wieder herstellen (über das Fenster Administration (Verwaltung) > Factory Defaults (Werkseinstellungen) oder durch Drücken der Reset-Taste), wird der Netzwerkname auf seinen Standardwert zurückgesetzt, und alle Geräte in Ihrem Wireless-Netzwerk müssen erneut - Cisco X2000 | User Manual - Page 98
Anweisungen für jedes Clientgerät, das Wi-Fi Protected Setup unterstützt Aktivität des Wi-Fi Protected Setup-Lichts •• Das Cisco-Logo an der oberen Gehäusekante des Routers dient als Indikator für Wi-Fi Protected Setup. •• Ist der Wi-Fi Protected Setup-Prozess aktiv, blinkt das Licht langsam. Wenn - Cisco X2000 | User Manual - Page 99
WPA/WPA2 Mixed Mode (WPA/WPA2-Gemischt) (Standard), WPA2 Personal (WPA2-Personal), WPA Personal (WPA-Personal), WEP und RADIUS. (WPA steht für Wi-Fi Protected Access. WEP ist die Abkürzung für Wireless Equivalent Privacy. RADIUS steht für Remote Authentication Dial-In User Service.) HINWEIS Um mehr - Cisco X2000 | User Manual - Page 100
verwenden. Passphrase: Geben Sie eine Passphrase mit 8 bis 63 Zeichen ein. Der Standardwert lautet password. Die Installations-Software, mit der Sie Ihren Router installieren und Ihr Wireless-Netzwerk einrichten, ändert die StandardPassphrase. Passphrase: Geben Sie eine Passphrase mit 8 bis 63 - Cisco X2000 | User Manual - Page 101
Linksys X2000/X3000 Shared Key (Gemeinsamer Schlüssel) Geben Sie den Schlüssel ein, der vom Router und von dem zugehörigen ät in Ihrem Wireless-Netzwerk WPA Enterprise (WPA-Enterprise) und denselben gemeinsamen Schlüssel verwenden. RADIUS Server (RADIUS-Server) Geben Sie die IP-Adresse des RADIUS - Cisco X2000 | User Manual - Page 102
Linksys X2000/X3000 WEP WEP ist eine einfache Verschlüsselungsmethode, die nicht so sicher wie WPA ist. HINWEIS Wenn Sie WEP als Sicherheitsmodus auswählen, MUSS jedes Gerät in Ihrem Wireless -Server): Geben Sie die IP-Adresse des RADIUSServers ein. üssel ein, der vom Router und von dem zugehörigen - Cisco X2000 | User Manual - Page 103
(Name des Gastnetzwerks) Der Standardname ist der Name Ihres Wireless-Netzwerks, gefolgt von der Ergänzung -guest. Guest Password (Gastpasswort) Das Standardpasswort lautet guest. Wenn Sie zur Installation die Setup-Software verwenden, wird das Standardpasswort in ein eindeutiges Passwort geändert - Cisco X2000 | User Manual - Page 104
Linksys X2000/X3000 Gastpasswort ändern •• Enter a new guest password (Geben Sie ein neues Gastpasswort ein) Geben Sie ein Passwort von 4 bis 32 Zeichen ein. Klicken Sie dann auf Change (Ändern), um das neue Passwort zu speichern und wieder zum Fenster Guest Access (Gastzugriff ) zu gelangen. Total - Cisco X2000 | User Manual - Page 105
ändern. Wireless-Netzwerkeinstellungen können mit Cisco Connect geändert werden. Sie müssen die erweiterten Einstellungen des Modem-Routers ändern. Öffnen Sie den Web-Browser (z. B. Internet Explorer oder Firefox), und geben Sie die IP-Adresse des Modem-Routers in das Adressfeld ein. (Die StandardIP - Cisco X2000 | User Manual - Page 106
ltig. Ihr Passwort für die Wireless-Sicherheit dient auch als Anmeldepasswort für das browserbasierte Dienstprogramm. So zeigen Sie dieses Passwort an: 1. Öffnen Sie Cisco Connect. 2. Klicken Sie im Hauptmenü auf Router settings (Routereinstellungen). 3. Das Password (Passwort) wird links im Fenster - Cisco X2000 | User Manual - Page 107
90 % (nicht kondensierend) HINWEIS Zulassungs-, Garantie- und Sicherheitsinformationen finden Sie auf der im Lieferumfang Ihres Modem-Routers erhaltenen CD oder unter Linksys.com/support. Technische Änderungen vorbehalten. Optimale Leistung dank der Spezifikationen nach dem IEEEStandard 802.11. Die - Cisco X2000 | User Manual - Page 108
90 % (nicht kondensierend) HINWEIS Zulassungs-, Garantie- und Sicherheitsinformationen finden Sie auf der im Lieferumfang Ihres Modem-Routers erhaltenen CD oder unter Linksys.com/support. Technische Änderungen vorbehalten. Optimale Leistung dank der Spezifikationen nach dem IEEEStandard 802.11. Die - Cisco X2000 | User Manual - Page 109
la pared 113 Instalación Configuración automática del router módem 114 Configuración manual del router módem 115 Conecte el router módem 116 Configure el router módem solo como router 116 Cómo utilizar Cisco Connect Cómo acceder a Cisco Connect 117 Menú principal 117 Menú principal - Cisco X2000 | User Manual - Page 110
Linksys X2000/X3000 Descripción del producto X2000 Parte superior Descripción del producto Ethernet La luz está encendida de forma continua cuando el router está conectado a un dispositivo mediante ese puerto. Botón Wi-Fi Protected Setup™ Presione este botón para que Wi-Fi Protected Setup™ busque - Cisco X2000 | User Manual - Page 111
Linksys X2000/X3000 Descripción del producto Parte posterior DSL-El puerto DSL se conecta a la línea ADSL. Cable-para usar el módem router solo como router dos tornillos para montar el router. Piezas de montaje recomendadas 2,5-3,0 mm 4-5 mm 1-1,5 mm NotA Cisco no se hace responsable de - Cisco X2000 | User Manual - Page 112
Linksys X2000/X3000 X3000 Parte superior Descripción del producto Ethernet La luz está encendida de forma continua cuando el router está conectado a un dispositivo mediante ese puerto. Botón Wi-Fi Protected Setup™ Presione este botón para que Wi-Fi Protected Setup™ busque a su dispositivo. La luz - Cisco X2000 | User Manual - Page 113
Linksys X2000/X3000 Descripción del producto Parte posterior Colocación en la pared El router tiene dos ranuras en el panel inferior para el montaje en pared. La distancia entre las ranuras es de 175,56 mm. Se necesitan dos tornillos para montar el router. Piezas de montaje recomendadas 2,5-3,0 - Cisco X2000 | User Manual - Page 114
(E:) Linksys Router Setup Always do this for software and games: AutoPlay DVD/CD-RW Drive (E:) Linksys Router Setup Install or run program Always do this for software and games: Install or run program Set up your Linksys Router Published by Cisco Consumer Products LLC Set up your Linksys Router - Cisco X2000 | User Manual - Page 115
Linksys X2000/X3000 Instalación b. Seleccione su tipo de conexión a Internet, otros parámetros de Internet y parámetros estáticos (si es necesario). Toda esta información se debería poder obtener del ISP. 6. Si selecciona Modem router (Módem router) en el paso 4, se le solicitará que introduzca la - Cisco X2000 | User Manual - Page 116
iluminarse las luces Power (Alimentación), Wireless (Inalámbrico) y Ethernet (una por cada ordenador conectado). Si esto no ocurre, asegúrese de que el router módem está encendido y de que los cables están conectados correctamente. Configure el router módem solo como router NotA Ejecute el CD-ROM de - Cisco X2000 | User Manual - Page 117
(Alimentación), Wireless (Inalámbrico) y Ethernet (una por cada ordenador conectado). Si esto no ocurre, asegúrese de que el router módem está encendido y de que los cables están conectados correctamente. Cómo utilizar Cisco Connect Cómo utilizar Cisco Connect Cisco Connect permite administrar - Cisco X2000 | User Manual - Page 118
hacer clic en Login (Iniciar sesión). 4. Para desactivar el acceso de invitado o cambiar los parámetros, haga clic en Change (Cambiar). A continuación, siga las instrucciones que aparecen en pantalla. Cómo utilizar Cisco Connect Menú principal - Router Settings (Parámetros del router) Utilice esta - Cisco X2000 | User Manual - Page 119
version (Versión del firmware), Operating system (Sistema operativo), Software version (Versión de software), Connection type (WAN) (Tipo de conexión [WAN]), IP address (LAN) (Dirección IP [LAN]), IP address (WAN) (Dirección IP [WAN]) y Computer IP address (Dirección IP del. ordenador). (WAN - Cisco X2000 | User Manual - Page 120
Linksys X2000/X3000 3. En el campo User name (Nombre de usuario), escriba admin. 4. A continuación, introduzca la contraseña creada con el software de configuración. (Si no ha ejecutado el software de configuración, utilice la contraseña predeterminada, admin. NotA También puede acceder a la - Cisco X2000 | User Manual - Page 121
(Configuración de Internet) En la sección Internet Setup (Configuración de Internet) se configura el router para la conexión a Internet. La mayor parte de esta información se puede obtener del proveedor de servicios de Internet (ISP). Internet Connection Type (Tipo de conexión a Internet) Seleccione - Cisco X2000 | User Manual - Page 122
Configuración avanzada Internet Connection Type (Tipo de conexión a Internet) Seleccione el tipo de conexión a Internet que proporcione el ISP en el menú desplegable. Los tipos disponibles son: •• Automatic Configuration - DHCP (Configuración automática - DHCP) •• Static IP (IP estática) •• PPPoE - Cisco X2000 | User Manual - Page 123
). Para utilizar la configuración Wi-Fi protegida, seleccione Wi-Fi Protected Setup (Configuración Wi-Fi protegida). Configuración avanzada Configuración manual Configure la red inalámbrica en esta pantalla. Network Mode (Modo de red) En la mayoría de las configuraciones de red, se debe dejar - Cisco X2000 | User Manual - Page 124
por otro nombre más fácil de recordar. NotA Si restablece los parámetros predeterminados de fábrica del router (pulsando el botón Reset [Reinicio] o mediante la pantalla Administration > Factory Defaults [Administración > Parámetros predeterminados de fábrica]), el nombre de red recuperará su valor - Cisco X2000 | User Manual - Page 125
Linksys X2000/X3000 Actividad de la luz de configuración Wi-Fi protegida •• El logotipo de Cisco en el panel superior del router de la pantalla Wi-Fi Protected Setup (Configuración Wi-Fi protegida) del router, O BIEN mantenga pulsado durante un configure los dispositivos cliente de forma manual. 125 - Cisco X2000 | User Manual - Page 126
Linksys X2000/X3000 Wireless > Wireless Security (Inalámbrico > Seguridad inalámbrica) Los parámetros de seguridad inalámbrica configuran la seguridad de las redes inalámbricas. El router es compatible con las siguientes opciones de seguridad inalámbrica: WPA/WPA2 Mixed Mode (Modo mixto WPA/WPA2), - Cisco X2000 | User Manual - Page 127
Linksys X2000/X3000 Passphrase (Frase de paso) Introduzca una frase de paso de entre 8 y 63 caracteres. La predeterminada es password. El software de configuración que utiliza para instalar el router Server (Servidor RADIUS) Introduzca la dirección IP del servidor RADIUS. RADIUS Port (Puerto RADIUS - Cisco X2000 | User Manual - Page 128
Linksys X2000/X3000 WPA Enterprise Esta opción permite el uso de WPA junto con un servidor RADIUS. (Sólo se debe utilizar si hay un servidor RADIUS conectado al router RADIUS) Introduzca la dirección IP del servidor RADIUS. RADIUS introduzca las claves WEP de forma manual. TX Key (Clave de transmisi - Cisco X2000 | User Manual - Page 129
Linksys X2000/X3000 RADIUS Esta opción permite el uso de WEP junto con un servidor RADIUS. (Sólo se debe utilizar si hay un servidor RADIUS conectado al router cualquier momento. RADIUS Server (Servidor RADIUS) Introduzca la dirección IP del servidor RADIUS. RADIUS Port (Puerto RADIUS) Introduzca el - Cisco X2000 | User Manual - Page 130
Linksys X2000/X3000 Wireless > Guest Access (Inalámbrico > Acceso de invitado) La función Guest Access Password (Contraseña de invitado) El parámetro predeterminado es guest (invitado). Si ha utilizado el software de la red inalámbrica) que difunde el router. Para difundir el SSID de la red para - Cisco X2000 | User Manual - Page 131
Linksys X2000/X3000 Instrucciones para invitados Cuando un invitado desee acceder a Internet en su casa, proporciónele estas instrucciones: 1. En el ordenador invitado, conéctese a la red para invitado inalámbrica en la pantalla Guest Access (Acceso de invitado). 2. Abrir el explorador Web. 3. En la - Cisco X2000 | User Manual - Page 132
metros del router. Los parámetros de la red inalámbrica se pueden cambiar con Cisco Connect. Debe IP del dispositivo en el campo de dirección (la predeterminada es 192.168.1.1). Cuando el sistema se lo solicite, complete los campos User name (Nombre de usuario) y Password (Contraseña) (admin - Cisco X2000 | User Manual - Page 133
también es la contraseña de inicio de sesión de la utilidad basada en explorador. Para ver esta contraseña: 1. Abra Cisco Connect. 2. En el menú principal, haga clic en Router settings (Parámetros del router). 3. La contraseña aparece en el lado izquierdo de la pantalla. Si utiliza Windows XP, el - Cisco X2000 | User Manual - Page 134
ADSL2), G.992.5 (ADSL2+) para anexos A, B, M, L, U-R2 para anexo B Puertos DSL, Cable, Ethernet (1-3), energía Botones Encendido y apagado, reinicio, Wi-Fi Protected Setup , consulte el CD incluido con el router módem o visite Linksys.com/support. Las especificaciones pueden cambiar sin previo - Cisco X2000 | User Manual - Page 135
ADSL2), G.992.5 (ADSL2+) para anexos A, B, M, L, U-R2 para anexo B USB 2.0 Puertos DSL, Cable, Ethernet (1-3), energía Botones Encendido y apagado, reinicio, Wi-Fi Protected Setup consulte el CD incluido con el router módem o visite Linksys.com/support. Las especificaciones pueden cambiar sin - Cisco X2000 | User Manual - Page 136
Montage mural 140 Installation Configuration automatique de votre modem routeur 141 Configuration manuelle de votre modem routeur 142 Connexion de votre modem routeur 143 Configuration de votre modem routeur 143 Comment utiliser Cisco Connect Comment accéder à Cisco Connect 144 Menu - Cisco X2000 | User Manual - Page 137
Linksys X2000/X3000 Présentation du produit X2000 Panneau avant Présentation du produit Ethernet Le voyant est allumé en permanence quand le routeur est connecté à un périphérique via le port concerné. Bouton Wi-Fi Protected Setup™ appuyez sur ce bouton pour que l'option de configuration protégée - Cisco X2000 | User Manual - Page 138
Linksys X2000 modem supplémentaire à l'aide d'un câble réseau. Ethernet : ces ports Ethernet connectent le modem mm REMARQUE Cisco n'est pas Reset (Réinitialisation) et le maintenir enfoncé environ cinq secondes, ou restaurer les paramètres d'usine à partir de l'écran Administration > Factory Defaults - Cisco X2000 | User Manual - Page 139
Linksys X2000/X3000 X3000 Panneau avant Présentation du produit Ethernet Le voyant est allumé en permanence quand le routeur est connecté à un périphérique via le port concerné. Bouton Wi-Fi Protected Setup™ appuyez sur ce bouton pour que l'option de configuration protégée par Wi-Fi recherche vos - Cisco X2000 | User Manual - Page 140
Linksys X2000 Ethernet d'un modem supplémentaire à l'aide d'un câble réseau. Ethernet : ces ports Ethernet connectent le modem routeur aux Reset (Réinitialisation) et le maintenir enfoncé environ cinq secondes, ou restaurer les paramètres d'usine à partir de l'écran Administration > Factory Defaults - Cisco X2000 | User Manual - Page 141
Linksys X2000/X3000 Installation Configuration automatique de votre modem routeur 1. Insérez le CD dans votre lecteur CD ou DVD. 2. Cliquez sur Set up your Linksys Router (Configurer votre routeur Linksys). AutoPlay DVD/CD-RW Drive (E:) Linksys Router Setup Always do this for software and games - Cisco X2000 | User Manual - Page 142
Linksys X2000/X3000 Installation b. Sélectionnez votre type de connexion Internet, les autres paramètres Internet et les paramètres statiques (si nécessaire). Toutes ces informations doivent vous être fournies par votre FAI. 6. Si vous sélectionnez Modem routeur au cours de l'étape 4, vous serez - Cisco X2000 | User Manual - Page 143
(Alimentation), Wireless (Sans fil) et Ethernet (un voyant par ordinateur connecté) doivent s'allumer. Si ce n'est pas le cas, vérifiez que le modem routeur est sous tension et que les câbles sont solidement connectés. Configuration de votre modem routeur REMARQUE Pour installer le modem routeur, ex - Cisco X2000 | User Manual - Page 144
Linksys X2000/X3000 4. Mettez sous tension l'ordinateur à utiliser pour configurer le modem routeur. 5. Les voyants Power (Alimentation), Wireless (Sans fil) et Ethernet (un voyant par ordinateur connecté) doivent s'allumer. Si ce n'est pas le cas, vérifiez que le modem routeur est sous tension et - Cisco X2000 | User Manual - Page 145
) s'affiche. Comment utiliser Cisco Connect Personnalisation Router name (Nom du routeur) : le nom du routeur est affiché, c'est aussi le nom de votre réseau sans fil. Pour le modifier, cliquez sur Change (Modifier). Suivez ensuite les instructions affichées à l'écran.. Password (Mot de passe - Cisco X2000 | User Manual - Page 146
Numéro de série), Firmware version (Version du micrologiciel), Operating system (Système d'exploitation), Software version (Version du logiciel), Connection type (Type de connexion) WAN, IP address (Adresse IP) LAN, IP address (Adresse IP) WAN et Computer IP address (Adresse IP de l'ordinateur). WAN - Cisco X2000 | User Manual - Page 147
de passe créé à l'aide du logiciel d'installation. (Si vous n'avez pas exécuté le logiciel de configuration, utilisez le mot de passe par défaut, admin. REMARQUE L'utilitaire basé sur le navigateur Web est également accessible via Cisco Connect. 4. Cliquez sur OK pour continuer. Accès à l'utilitaire - Cisco X2000 | User Manual - Page 148
permanente pour vous connecter à Internet. IPoA Configuration avancée IPoA (IP over ATM) utilise une adresse IP fixe. Lorsque cette option est sélectionnée. RFC 2516 PPPoE Certains fournisseurs d'accès à Internet DSL utilisent le protocole PPPoE (Pointto-Point Protocol over Ethernet) pour établir - Cisco X2000 | User Manual - Page 149
Linksys X2000/X3000 Mode Ethernet Si vous sélectionnez le mode Ethernet (routeur uniquement), les champs IP permanente pour vous connecter à Internet, sélectionnez l'option Static IP (Adresse IP statique). PPPoE Certains fournisseurs d'accès à Internet DSL utilisent le protocole PPPoE (Pointto-Point - Cisco X2000 | User Manual - Page 150
X2000/X3000 PPTP Le protocole PPTP (Point-to-Point Tunneling Protocol) est un service appliqué uniquement dans le cadre de connexions intra-européennes. Si votre FAI prend en charge le protocole DHCP ou si vous vous connectez au moyen d'une adresse IP dynamique, sélectionnez Obtain an IP Address - Cisco X2000 | User Manual - Page 151
é pour installer le routeur et configurer le réseau sans fil remplace le nom de réseau par défaut par un nom facile à mémoriser. REMARQUE Si vous restaurez les paramètres d'usine du routeur (en appuyant sur le bouton Reset (Réinitialisation) ou à partir de l'écran Administration > Factory Defaults - Cisco X2000 | User Manual - Page 152
Wi-Fi Protected Setup du routeur. c. Après la configuration du périphérique client, cliquez sur OK sur l'écran Wi-Fi Protected Setup du routeur. Reportez-vous ensuite au guide de l'utilisateur de votre périphérique client pour obtenir des instructions supplémentaires. •• Enter the Router's PIN on - Cisco X2000 | User Manual - Page 153
à 63 caractères. La valeur par défaut est password. Le logiciel utilisé pour installer le routeur et configurer le réseau sans fil modifie la phrase de passe par défaut. WPA2 personnel REMARQUE Si vous sélectionnez le mode WPA2 personnel comme mode de sécurité, tous les périphériques de votre réseau - Cisco X2000 | User Manual - Page 154
Linksys X2000/X3000 Passphrase (Phrase de passe) : saisissez une phrase de passe composée de 8 à 63 caractères. La valeur par défaut est password. Le logiciel utilisé pour installer le routeur et configurer est connecté au routeur.) REMARQUE Si vous sélectionnez le mode WPA2 entreprise comme mode de - Cisco X2000 | User Manual - Page 155
doit être utilisée que lorsqu'un serveur RADIUS est connecté au routeur.) REMARQUE Si vous sélectionnez le mode WPA entreprise comme mode de sécurité, tous les périphériques de votre réseau sans fil DOIVENT utiliser ce mode et la même clé partagée. Configuration avancée WEP Le système WEP est une - Cisco X2000 | User Manual - Page 156
mode et la même clé de cryptage et partagée WEP. Configuration avancée Désactivé Si vous désactivez la sécurité sans fil, un message apparaîtra dès lors que vous essaierez de vous connecter . RADIUS Server (Serveur RADIUS) : saisissez l'adresse IP du serveur RADIUS. RADIUS Port (Port RADIUS) : - Cisco X2000 | User Manual - Page 157
seau invité) : par défaut, il s'agit du nom du réseau sans fil suivi de -guest. Guest Password (Mot de passe invité) : le mot de passe par défaut est guest. Si vous avez utilisé l'assistant de configuration pour l'installation, la valeur par défaut est modifiée ; il s'agit d'un mot de passe unique - Cisco X2000 | User Manual - Page 158
utilisateur et le mot de passe par défaut sont admin). Cliquez sur l'onglet approprié pour modifier les paramètres. Le service DSL ne permet pas de se connecter manuellement à Internet. Une fois installé, le routeur se connecte automatiquement au réseau de votre fournisseur d'accès à Internet (FAI - Cisco X2000 | User Manual - Page 159
passe de connexion à l'utilitaire basé sur le navigateur Web. Pour afficher ce mot de passe : 1. Ouvrez Cisco Connect. 2. Dans le menu principal, cliquez sur Router settings (Paramètres du routeur). 3. Le champ Password (Mot de passe) est affiché dans la partie gauche de l'écran. Sur Windows XP, le - Cisco X2000 | User Manual - Page 160
Reset (Réinitialisation), Wi-Fi Protected Setup™ (Configuration protégée par Wi-Fi) Voyants Power (Alimentation), Ethernet (1-3), Wi-Fi Protected Setup, Wireless curité, consultez le CD fourni avec votre modem routeur ou rendez-vous sur Linksys.com/support. Les spécifications peuvent être modifiées - Cisco X2000 | User Manual - Page 161
ADSL2), G.992.5 (ADSL2+) pour les annexes A, B, M, L, U-R2 pour l'annexe B USB 2.0 Ports DSL, Cable, Ethernet (1-3), Power (Alimentation) Boutons On/Off (Alimentation), Reset (Réinitialisation), Wi-Fi Protected Setup™ (Configuration votre modem routeur ou rendez-vous sur Linksys.com/support. Les - Cisco X2000 | User Manual - Page 162
166 Installazione Installazione automatica del modem router 167 Installazione manuale del modem router 168 Collegare il modem router 169 Configurazione del modem router per la sola funzione di router 169 Utilizzo di Cisco Connect Come accedere a Cisco Connect 170 Menu principale 170 - Cisco X2000 | User Manual - Page 163
Linksys X2000/X3000 Panoramica del prodotto X2000 Parte superiore Panoramica del prodotto Ethernet Quando sono accesi indicano che il Modem Router è connesso a un dispositivo mediante la porta corrispondente. Pulsante Wi-Fi Protected Setup™ Premere questo pulsante se si desidera che Wi-Fi - Cisco X2000 | User Manual - Page 164
Linksys X2000/X3000 Panoramica del prodotto Retro DSL-La porta DSL si collega alla linea ADSL. Cavo-per utilizzare il modem router con la sola funzione di router, usare un cavo di rete per collegare questa porta alla porta LAN/Ethernet di un modem separato. Ethernet-utilizzando i cavi Ethernet ( - Cisco X2000 | User Manual - Page 165
Linksys X2000/X3000 X3000 Parte superiore Panoramica del prodotto Ethernet Quando sono accesi indicano che il Modem Router è connesso a un dispositivo mediante la porta corrispondente. Pulsante Wi-Fi Protected Setup™ Premere questo pulsante se si desidera che Wi-Fi Protected Setup™ effettui la - Cisco X2000 | User Manual - Page 166
Linksys X2000/X3000 Panoramica del prodotto Retro DSL-La porta DSL si collega alla linea ADSL. Cavo-per utilizzare il modem router con la sola funzione di router, usare un cavo di rete per collegare questa porta alla porta LAN/Ethernet di un modem separato. Ethernet-utilizzando i cavi Ethernet ( - Cisco X2000 | User Manual - Page 167
del modem router 1. Inserire il CD nell'unità CD-ROM o DVD. 2. Fare clic su Set up your Linksys Router (Installazione del router Linksys). AutoPlay DVD/CD-RW Drive (E:) Linksys Router Setup Always do this for software and games: AutoPlay DVD/CD-RW Drive (E:) Linksys Router Setup Install or - Cisco X2000 | User Manual - Page 168
Linksys X2000/X3000 Installazione b. Selezionare il proprio tipo di connessione Internet, le altre impostazioni Internet e le impostazioni statiche (se necessario). Tutte queste informazioni devono essere fornite dal provider di servizi Internet. 6. Se si è scelto Modem router nel passaggio 4, - Cisco X2000 | User Manual - Page 169
Linksys X2000/X3000 Collegare il modem router Per collegare il modem router: 1. Spegnere tutti i dispositivi di rete, inclusi i computer e il Modem Router. Se si utilizza un modem, scollegarlo poiché verrà sostituito dal Modem Router Modem Router. Installazione 7. I LED per Alimentazione, Wireless - Cisco X2000 | User Manual - Page 170
il Modem Router. 5. I LED per Alimentazione, Wireless ed Ethernet (uno per ciascun computer collegato) si accendono. Se ciò non avviene, controllare che il Modem Router sia acceso e che i cavi siano collegati correttamente. Utilizzo di Cisco Connect Utilizzo di Cisco Connect Cisco Connect offre - Cisco X2000 | User Manual - Page 171
la password della rete ospite. Quindi, fare clic su Login (Accesso). 4. Per disattivare l'accesso ospite o modificare le impostazioni, fare clic su Change (Modifica). Seguire le istruzioni visualizzate sullo schermo. Utilizzo di Cisco Connect Menu principale - Impostazioni del router Utilizzare - Cisco X2000 | User Manual - Page 172
Dettagli router), contenente Model name (Nome modello), Model number (Numero modello), Serial number (Numero di serie), Firmware version (Versione firmware), Operating system (Sistema operativo), Software version (Versione software), Connection type (WAN) (Tipo di connessione (WAN)), IP address (LAN - Cisco X2000 | User Manual - Page 173
Linksys X2000/X3000 3. Quindi, immettere la password creata con il software di installazione (se il software di installazione non è stato eseguito, utilizzare la password predefinita admin). NOTA è possibile anche accedere all'utilità basata sul browser‑tramite Cisco Connect. 4. Fare clic su OK per - Cisco X2000 | User Manual - Page 174
PPPoA Bridged Mode Only In questa modalità, è disponibile solo la funzione modem DSL e tutte le funzioni gateway sono disattivate. Se selezionata, è necessario immettere solo i dati relativi a Impostazioni VC. RFC 2684 Bridged Se selezionata, inserire i dati corretti per Impostazioni IP. Selezionare - Cisco X2000 | User Manual - Page 175
Service Provider, provider di servizi Internet). Internet Connection Type (Tipo di connessione Internet) Nel menu a discesa, scegliere il tipo di connessione fornito dal proprio ISP. I tipi disponibili sono: •• Automatic Configuration - DHCP (Configurazione automatica - DHCP) •• Static IP (IP - Cisco X2000 | User Manual - Page 176
che supportano la funzione Wi-Fi Protected Setup, è possibile utilizzare questa funzione. Configuration View (Vista configurazione) Per configurare manualmente le reti wireless, selezionare Manual (Manuale). Passare alla sezione Configurazione wireless (manuale). Per utilizzare la funzione Wi-Fi - Cisco X2000 | User Manual - Page 177
la rete wireless modifica il nome di rete predefinito in un nome semplice da ricordare. NOTA se vengono ripristinate le impostazioni predefinite del router, premendo il pulsante di ripristino o accedendo alla schermata Administration (Amministrazione) > Factory Defaults (Impostazioni predefinite - Cisco X2000 | User Manual - Page 178
client che supporta la configurazione Wi-Fi Protected Setup. Attività della spia di Wi-Fi Protected Setup •• Il logo Cisco nel riquadro superiore del router funziona come spia di Wi-Fi Protected Setup. •• Mentre Wi-Fi Protected Setup è attivo, la spia lampeggia lentamente. Al termine della - Cisco X2000 | User Manual - Page 179
di configurare la protezione della rete wireless. Il router supporta le seguenti opzioni di protezione wireless: WPA/WPA2 Mixed Mode (Modalità mista WPA/WPA2) (predefinita), WPA2 Personal, WPA Personal, WEP e RADIUS (WPA2 è l'acronimo di Wi-Fi Protected Access. WEP è l'acronimo di Wired Equivalent - Cisco X2000 | User Manual - Page 180
numero di caratteri compreso tra 8 e 63. L'impostazione predefinita è password. Il software di installazione utilizzato per installare il router e per configurare la rete wireless modifica la passphrase predefinita. WPA2/WPA Enterprise Mixed Mode (Modalità mista WPA2/ WPA Enterprise) Questa opzione - Cisco X2000 | User Manual - Page 181
Linksys X2000/X3000 Shared Key (Chiave condivisa): immettere la chiave condivisa tra il router e il server. WPA2 Enterprise Questa opzione fornisce il metodo WPA2 utilizzato con un server RADIUS. Utilizzarla solo quando un server RADIUS è collegato al router. NOTA se viene selezionata l'opzione WPA2 - Cisco X2000 | User Manual - Page 182
Linksys X2000/X3000 WEP WEP è un metodo di cifratura di base meno sicuro di WPA. NOTA se viene selezionata l'opzione WEP come modalità di protezione, ciascun dispositivo della rete wireless ): immettere l'indirizzo IP del server RADIUS. la chiave condivisa tra il router e il server. Encryption ( - Cisco X2000 | User Manual - Page 183
Linksys X2000/X3000 TX Key (Chiave TX): selezionare una chiave TX da utilizzare. L'impostazione predefinita è 1. Disabled (Disattivato) Se si sceglie di disattivare la protezione wireless, l'utente verrà informato che la protezione wireless Guest Access (Accesso ospite) Allow Guest Access (Consenti - Cisco X2000 | User Manual - Page 184
computer ospite alla rete ospite wireless denominata nella schermata Guest Access (Accesso ospite). 2. Aprire un browser Web. 3. Nella schermata di accesso, immettere la password visualizzata nella schermata Guest Access (Accesso ospite). 4. Fare clic su Login (Accesso). Configurazione avanzata 184 - Cisco X2000 | User Manual - Page 185
le impostazioni sul router. È possibile modificare le impostazioni di rete wireless tramite Cisco Connect. È necessario modificare le impostazioni di base sul Modem Router. Aprire il browser Web (ad esempio, Internet Explorer o Firefox) e immettere l'indirizzo IP del Modem Router nel campo dell - Cisco X2000 | User Manual - Page 186
à basata sul browser. La password di protezione wireless consente anche di accedere all'utilità basata sul browser. Per visualizzare questa password: 1. Aprire Cisco Connect. 2. Dal menu principale, fare clic su Router Settings (Impostazioni del router). 3. La password viene visualizzata a sinistra - Cisco X2000 | User Manual - Page 187
la garanzia e la sicurezza, consultare il CD fornito con il modem router oppure visitare il sito Linksys.com/support. Le specifiche sono soggette a modifiche senza preavviso. Le prestazioni ottimali indicate per la connettività wireless si basano sulle specifiche IEEE Standard 802.11. Le prestazioni - Cisco X2000 | User Manual - Page 188
la garanzia e la sicurezza, consultare il CD fornito con il modem router oppure visitare il sito Linksys.com/support. Le specifiche sono soggette a modifiche senza preavviso. Le prestazioni ottimali indicate per la connettività wireless si basano sulle specifiche IEEE Standard 802.11. Le prestazioni - Cisco X2000 | User Manual - Page 189
194 Uw modemrouter handmatig instellen 195 Uw modemrouter verbinden 196 Uw modemrouter alleen als router instellen 196 Cisco Connect gebruiken Toegang tot Cisco Connect 197 Hoofdmenu 197 Hoofdmenu - Computers en apparaten 198 Hoofdmenu - Ouderlijk toezicht 198 Hoofdmenu - Gasttoegang - Cisco X2000 | User Manual - Page 190
is opgetreden. De LED brandt niet wanneer Wi-Fi Protected Setup™ niet actief is. Wireless (Draadloos) De LED Wireless (Draadloos) gaat branden als er een draadloze verbinding tot stand is gebracht. Het LED-lampje knippert wanneer de router gegevens verzendt of ontvangt via het netwerk. WAN Gaat - Cisco X2000 | User Manual - Page 191
Linksys X2000/X3000 Productoverzicht Achterkant DSL-De DSL-poort is aangesloten op de ADSL-lijn. Kabel-als u de modemrouter alleen als router wilt gebruiken, gebruik dan een netwerkkabel om deze poort aan te sluiten op de LAN/Ethernet-poort van een apart modem. Ethernet-via Ethernetkabels (ook wel - Cisco X2000 | User Manual - Page 192
is opgetreden. De LED brandt niet wanneer Wi-Fi Protected Setup™ niet actief is. Wireless (Draadloos) De LED Wireless (Draadloos) gaat branden als er een draadloze verbinding tot stand is gebracht. Het LED-lampje knippert wanneer de router gegevens verzendt of ontvangt via het netwerk. WAN Gaat - Cisco X2000 | User Manual - Page 193
Linksys X2000/X3000 Productoverzicht Achterkant Wandmontage Het onderpaneel van de router beschikt over twee sleuven voor wandmontage. De afstand tussen de sleuven is 175,56 mm. Er zijn twee schroeven nodig om de router te bevestigen. Aanbevolen bevestigingsmaterialen 2,5-3,0 mm DSL-De DSL-poort - Cisco X2000 | User Manual - Page 194
(E:) Linksys Router Setup Always do this for software and games: AutoPlay DVD/CD-RW Drive (E:) Linksys Router Setup Install or run program Always do this for software and games: Install or run program Set up your Linksys Router Published by Cisco Consumer Products LLC Set up your Linksys Router - Cisco X2000 | User Manual - Page 195
Linksys X2000/X3000 Installatie b. Selecteer het type internetverbinding, andere internetinstellingen en vaste instellingen (indien vereist). Al deze gegevens zouden beschikbaar moeten zijn bij uw internetprovider. 6. Als u Modem router handmatig instellen OPMERKING Installeer de modemrouter door - Cisco X2000 | User Manual - Page 196
Linksys X2000/X3000 Uw modemrouter verbinden Uw modemrouter verbinden: 1. Schakel al uw netwerkapparaten uit, inclusief de computer(s) en de modemrouter. Als u momenteel een modem gebruikt, koppelt u deze nu los; de modemrouter vervangt uw modem ADSL-service of router instellen OPMERKING Installeer - Cisco X2000 | User Manual - Page 197
Linksys X2000/X3000 4. Zet de computer aan die u wilt gebruiken om de modemrouter te configureren. . Cisco Connect gebruiken Cisco Connect gebruiken Cisco Connect biedt een eenvoudige manier om uw router en netwerk te beheren. Met Cisco Connect kunt u computers of apparaten aansluiten op de router, - Cisco X2000 | User Manual - Page 198
Cisco Connect gebruiken Hoofdmenu - Routerinstellingen Gebruik deze optie om de instellingen van de router aan te passen aan uw wensen. Om instellingen te wijzigen klikt u op Change (Wijzigen). Het scherm Router settings (Routerinstellingen wordt weergegeven. Personaliseren Router name (Naam router - Cisco X2000 | User Manual - Page 199
Router details (Routergegevens) wordt weergegeven met Model name (Modelnaam), Model number (Modelnummer), Serial number (Serienummer), Firmware version (Firmwareversie), Operating system (Besturingssysteem), Software version (Softwareversie), Connection type (WAN) (Verbindingstype (WAN)), IP address - Cisco X2000 | User Manual - Page 200
Linksys X2000/X3000 3. Voer nu het wachtwoord in dat met de installatiesoftware is gemaakt. (Als u de installatiesoftware niet hebt uitgevoerd, gebruikt u het standaardwachtwoord admin. OPMERKING U kunt het browsergebaseerde ‑hulpprogramma ook openen via Cisco Connect. 4. Klik op OK om verder te - Cisco X2000 | User Manual - Page 201
Linksys X2000/X3000 Setup (Instellingen) > Basic Setup (Basisinstellingen) Het eerste scherm dat wordt weergegeven, is het scherm Basic Setup (Basisinstellingen). Hier kunt u de algemene instellingen van de router Geavanceerde configuratie Klik op Save Settings (Instellingen opslaan) om de - Cisco X2000 | User Manual - Page 202
u PPPoA gebruikt, wordt uw IP-adres automatisch verschaft. Netwerkinstellingen In het onderdeel Network Setup (Netwerkinstellingen) configureert u de IPinstellingen voor uw lokale netwerk. Geavanceerde configuratie Ethernet-modus Als u de Ethernet-modus (alleen router) selecteert, zijn de volgende - Cisco X2000 | User Manual - Page 203
Linksys X2000/X3000 Internetinstellingen In het gedeelte Internet Setup (Internetinstellingen) kunt u de router configureren voor uw u Specify an IP Address (Een IP-adres opgeven). Configureer daarna het volgende: L2TP Layer 2 Tunneling Protocol (L2TP) is een service die alleen van toepassing - Cisco X2000 | User Manual - Page 204
Linksys X2000/X3000 Wireless (WLAN) > Basic Wireless Settings (Standaardinstellingen de router te configureren: handmatig en met Wi-Fi Protected Setup. Wi-Fi Protected Setup is Setup ondersteunen, kunt u Wi-Fi Protected Setup gebruiken. Configuration View (Configuratieweergave) Selecteer Manual - Cisco X2000 | User Manual - Page 205
Linksys X2000/X3000 Network Name (SSID) (Netwerknaam (SSID)) De Service Set Identifier (SSID) is de netwerknaam die door Als u de fabrieksinstellingen van de router herstelt (door de knop Reset in te drukken of het scherm Administration > Factory Defaults (Administratie > Fabrieksinstellingen) te - Cisco X2000 | User Manual - Page 206
Linksys X2000/X3000 •• Knop Wi-Fi Protected Setup Gebruik deze methode als uw apparaat een knop voor Wi-Fi Protected Setup heeft. OPMERKING Configureer niet meer dan één clientapparaat tegelijk. a. Klik of druk op de knop Wi-Fi Protected Setup op het clientapparaat. b. Klik op de knop Wi‑Fi - Cisco X2000 | User Manual - Page 207
/WPA Mixed Mode (WPA2/WPA gemengde modus) als beveiligingsmodus selecteert, MOET elk apparaat in uw draadloze netwerk dezelfde wachtzin gebruiken. Passphrase (Wachtzin) Voer een wachtzin in van 8 tot 63 tekens. Standaard is dit password. De installatiesoftware waarmee u de router installeert en - Cisco X2000 | User Manual - Page 208
password. De installatiesoftware waarmee u de router installeert en het draadloze netwerk configureert, verandert de standaardwachtzin. WPA2/WPA Enterprise Mixed Mode gedeelde sleutel gebruiken. RADIUS Server (RADIUS-server) Voer het IP-adres van de RADIUS-server in. RADIUS Port (RADIUS-poort - Cisco X2000 | User Manual - Page 209
Linksys X2000/X3000 WPA Enterprise Met deze optie wordt WPA gebruikt in combinatie met een RADIUS-server. (U kunt deze optie dan ook alleen gebruiken als een RADIUS-server met de router sleutel gebruiken. RADIUS Server (RADIUS-server) Voer het IP-adres van de RADIUS-server in. RADIUS Port (RADIUS - Cisco X2000 | User Manual - Page 210
Linksys X2000/X3000 RADIUS Met deze optie wordt WEP gebruikt in combinatie met een RADIUS-server. (U kunt deze optie dan ook alleen gebruiken als een RADIUS-server met de router uw draadloze netwerk. RADIUS Server (RADIUS-server) Voer het IP-adres van de RADIUS-server in. RADIUS Port (RADIUS-poort - Cisco X2000 | User Manual - Page 211
Linksys X2000/X3000 Wireless (WLAN) > Guest Access ( Password (Gastwachtwoord wijzigen) wordt weergegeven. Change Guest Password (Gastwachtwoord wijzigen) •• Enter a new guest password SSID-broadcast (naam van het draadloze netwerk) van de router gedetecteerd. Als u de SSID van het gastnetwerk wilt - Cisco X2000 | User Manual - Page 212
Linksys X2000/X3000 Instructies voor gasten Geef een gast die internettoegang wil hebben in uw huis de volgende instructies: 1. Maak op de gastcomputer verbinding met het draadloze netwerk dat wordt genoemd op het scherm Guest Access (Gasttoegang). 2. Open een webbrowser. 3. Voer op het - Cisco X2000 | User Manual - Page 213
User name (Gebruikersnaam) en Password (Wachtwoord) in (standaard wordt admin gebruikt voor zowel de gebruikersnaam als het wachtwoord). Klik op het gewenste tabblad om de instellingen te wijzigen. U kunt de DSL-service niet gebruiken om handmatig verbinding te maken met internet. Nadat u de router - Cisco X2000 | User Manual - Page 214
Geef dit wachtwoord als volgt weer: 1. Open Cisco Connect. 2. Klik in het hoofdmenu op Router Settings (Routerinstellingen). 3. Het Password (Wachtwoord) wordt weergegeven op de linkerkant van het vragen niet zijn behandeld in deze bijlage, raadpleeg dan de website op www.linksys.com/support. 214 - Cisco X2000 | User Manual - Page 215
ADSL2), G.992.5 (ADSL2+) voor Annex A, B, M, L, U-R2 voor Annex B Poorten DSL, Cable, Ethernet (1-3), Power (Voeding) Knoppen On/Off (Aan-uitknop), Reset (Opnieuw instellen), Wi-Fi Protected Setup™ LED' s Power (Voeding), Ethernet (1-3), Wi-Fi Protected Setup, Wireless op Linksys.com/support. - Cisco X2000 | User Manual - Page 216
.3 (ADSL2), G.992.5 (ADSL2+) voor Annex A, B, M, L, U-R2 voor Annex B USB 2.0 Poorten DSL, Cable, Ethernet (1-3), Power (Voeding) Knoppen On/Off (Aan-uitknop), Reset (Opnieuw instellen), Wi-Fi Protected Setup™ LED' s Power (Voeding), Ethernet (1-4), Wi-Fi Protected Setup, Wireless (Draadloos - Cisco X2000 | User Manual - Page 217
Cisco Connect Jak uruchomić program Cisco Connect 225 Menu główne 225 Menu główne - Computers and Devices (Komputery i urządzenia) 225 Menu główne - Parental Controls (Kontrola rodzicielska) 225 Menu główne - Guest Access (Dostęp gościa) 225 Menu główne - Router Settings (Ustawienia - Cisco X2000 | User Manual - Page 218
Linksys X2000/X3000 Opis produktu X2000 Góra Opis produktu Ethernet Jeśli dioda świeci światłem ciągłym, modemo-router został skutecznie pi błąd. Dioda LED jest wyłączona, gdy połączenie Wi-Fi Protected Setup™ jest bezczynne. Połączenie bezprzewodowe Dioda LED połączenia bezprzewodowego zapala si - Cisco X2000 | User Manual - Page 219
Linksys X2000/X3000 router. Naciśnij część O włącznika, aby wyłączyć router. (przycisk niedostępny w modelach przeznaczonych na rynek amerykański) Panel dolny Reset przy montażu 2,5-3,0 mm 4-5 mm 1-1,5 mm UWAGA Firma Cisco nie odpowiada za uszkodzenia wynikające z nieprawidłowego zamocowania sprz - Cisco X2000 | User Manual - Page 220
Linksys X2000/X3000 X3000 Góra Opis produktu Ethernet Jeśli dioda świeci światłem ciągłym, modemo-router został skutecznie podłączony ąpi błąd. Dioda LED jest wyłączona, gdy połączenie Wi-Fi Protected Setup™ jest bezczynne. Połączenie bezprzewodowe Dioda LED połączenia bezprzewodowego zapala się, - Cisco X2000 | User Manual - Page 221
Linksys X2000 router. Naciśnij część O włącznika, aby wyłączyć router. (przycisk niedostępny w modelach przeznaczonych na rynek amerykański) UWAGA Firma Cisco nad wkrętami i przesuń router tak, aby wkręty wpasowały się dokładnie w szczeliny. Panel dolny Reset-Ten przycisk umożliwia przywrócenie - Cisco X2000 | User Manual - Page 222
(E:) Linksys Router Setup Always do this for software and games: AutoPlay DVD/CD-RW Drive (E:) Linksys Router Setup Install or run program Always do this for software and games: Install or run program Set up your Linksys Router Published by Cisco Consumer Products LLC Set up your Linksys Router - Cisco X2000 | User Manual - Page 223
Linksys X2000/X3000 Instalacja b. Wybierz rodzaj połączenia internetowego, inne ustawienia Internetowe oraz ustawienia statyczne (jeśli konieczne). Wszystkie te informacje powinien dostarczyć dostawca usług internetowych. 6. Jeżeli w kroku 4 wybierzesz opcję Modem router (Modemo-router), konieczne - Cisco X2000 | User Manual - Page 224
Linksys X2000/X3000 UWAGA Skontaktuj się z dostawcą usług internetowych, by dowiedzieć się, modemo-routera jest włączone i czy kable są prawidłowo podłączone. Skonfiguruj modemo-router jako router UWAGA Aby zainstalować modemo-router, uruchom płytę instalacyjną CD-ROM. Jeżeli nie możesz uruchomić pł - Cisco X2000 | User Manual - Page 225
Linksys X2000/X3000 Jak używać programu Cisco Connect Program Cisco Connect ułatwia zarządzanie routerem i siecią. Korzystając z programu Cisco Connect, można podłączyć komputery i inne urządzenia do routera, utworzyć sieć gościnną dla osób odwiedzających Twój dom oraz zmienić ustawienia routera. Mo - Cisco X2000 | User Manual - Page 226
Linksys X2000/X3000 Aby zmienić ustawienia, kliknij Zmień. Zostanie wyświetlony ekran Router Settings (Ustawienia routera). Personalizacja Router domyślne, on. Jak używać programu Cisco Connect Easy Setup Key (Klucz łatwej konfiguracji) Update or create key (Aktualizacja i tworzenie klucza) Klucz - Cisco X2000 | User Manual - Page 227
ło użyte, należy użyć domyślnego hasła admin. UWAGA Dostęp do narzędzia WWW można także uzyskać z poziomu programu Cisco Connect. UWAGA Aby dowiedzieć się więcej o dowolnym polu, kliknij Pomoc po prawej stronie ekranu. Setup > Basic Setup (Konfiguracja > Konfiguracja podstawowa) Jako pierwszy jest - Cisco X2000 | User Manual - Page 228
Linksys X2000 Settings (Zapisz ustawienia). W przeciwnym razie kliknij przycisk Cancel Changes (Anuluj zmiany). Ustawienia Internetu Sekcja Internet Setup Tylko tryb mostu •• RFC 2684 Bridged •• RFC 2684 Routed •• IPoA •• Point-to-Point Protocol over Ethernet). W przypadku korzystania z PPPoE adres IP - Cisco X2000 | User Manual - Page 229
Linksys X2000/X3000 Tryb Ethernet Jeżeli wybierzesz tryb Ethernet (tylko router), dostępne będą następujące pola: Język Select your Automatic Configuration - DHCP (Automatyczna konfiguracja - DHCP) •• Static IP (Statyczny adres IP) •• PPPoE •• PPTP •• L2TP •• Telstra Cable Automatic Configuration - Cisco X2000 | User Manual - Page 230
zaawansowana Manual Setup (Konfiguracja ręczna) Na tym ekranie można skonfigurować sieć bezprzewodową. Network Mode (Tryb sieciowy) w przypadku większości konfiguracji sieciowych należy pozostawić to ustawienie jako Mixed (Mieszane). Jest to ustawienie domyślne. Wireless Settings (Ustawienia - Cisco X2000 | User Manual - Page 231
Wireless-B, Wireless-G i Wireless-N (2,4 GHz), zaznacz opcję Disabled (Wył.). UWAGA Jeśli nie masz pewności, który tryb wybrać, pozostaw ustawienie domyślne, Mixed (Mieszany). Network Name (SSID) (Nazwa sieci (SSID)) SSID (Service Set ekranu Administration > Factory Defaults (Administracja > Domy - Cisco X2000 | User Manual - Page 232
. Router obsługuje następujące opcje zabezpieczeń sieci bezprzewodowej: tryb mieszany WPA/WPA2 (ustawienie domyślne), WPA2 Personal, WPA Personal, WEP i RADIUS. (WPA oznacza Wi-Fi Protected Access. WEP oznacza Wired Equivalent Privacy. RADIUS oznacza Remote Authentication Dial-In User Service - Cisco X2000 | User Manual - Page 233
Linksys X2000/X3000 Opcje osobiste Opcja zabezpieczeń WPA2 Personal WPA2/WPA Mixed Mode Wireless password. Oprogramowanie instalacyjne, które jest używane do zainstalowania routera i skonfigurowania sieci bezprzewodowej, zmienia domyślne hasło. WPA2 Personal UWAGA Jeśli dla opcji Security Mode - Cisco X2000 | User Manual - Page 234
Linksys X2000/X3000 WPA Personal UWAGA Jeśli dla opcji Security Mode lne to password. Oprogramowanie Mode (Tryb mieszany WPA2/ WPA Enterprise), wszystkie urządzenia w sieci bezprzewodowej MUSZĄ używać WPA2/WPA i tego samego klucza wspólnego. RADIUS Server (Serwer RADIUS) Wprowadź adres IP - Cisco X2000 | User Manual - Page 235
Linksys X2000/X3000 RADIUS Port (Port RADIUS) Wprowadź numer portu serwera RADIUS. transmisji, który będzie używany. Wartość domyślna to 1. RADIUS Server (Serwer RADIUS) Wprowadź adres IP serwera RADIUS. RADIUS Port (Port RADIUS) Wprowadź numer portu serwera RADIUS. Wartość domyślna to 1812. Shared - Cisco X2000 | User Manual - Page 236
Linksys X2000/ gościa. Pojawi się ekran Change Guest Password (Zmiana hasła gościa). Wireless > Guest Access (Sieć bezprzewodowa > Dostęp gościa) Funkcja łączyć, będą wykrywać rozgłaszanie SSID (nazwy sieci bezprzewodowej) przez router. Aby rozgłaszać nazwę SSID sieci gościnnej, zachowaj ustawienie - Cisco X2000 | User Manual - Page 237
Linksys X2000/X3000 Instrukcje dla gości Kiedy gość chce uzyskać dostęp do Internetu w Twoim domu, należy przekazać mu następujące instrukcje: 1. Na komputerze gościa połącz się z bezprzewodową siecią gościnną o nazwie podanej na ekranie Guest Access (Dostęp gościa). 2. Uruchom przeglądarkę - Cisco X2000 | User Manual - Page 238
Linksys X2000/X3000 Rozwiązywanie problemów X2000/X3000 Komputer nie może nawiązać połączenia z Internetem. Wykonuj następujące instrukcje do czasu, aż komputer nawiąże połączenie z Internetem: •• Upewnij się, że modemo-router ć za pomocą programu Cisco Connect. Konieczna jest zmiana zaawansowanych - Cisco X2000 | User Manual - Page 239
ść płytę instalacyjną CD w napędzie komputera. Kliknij opcję Set up your Linksys Router (Skonfiguruj router Linksys) i postępuj zgodnie z instrukcjami wyświetlanymi na ekranie. Próbujesz uzyskać dostęp do narzędzia WWW z poziomu programu Cisco Connect. Aby przejść do narzędzia WWW z poziomu programu - Cisco X2000 | User Manual - Page 240
ADSL2), G.992.5 (ADSL2+) dla Annex A, B, M, L, U-R2 dla Annex B Porty DSL, Cable, Ethernet (1-3), Power (zasilanie) Przyciski On/Off (zasilanie), Reset (Resetowanie), Wi-Fi Protected Setup™ Diody LED Power (Zasilanie), Ethernet (1-3), Wi-Fi Protected Setup, Wireless stronie Linksys.com/support. - Cisco X2000 | User Manual - Page 241
ADSL2), G.992.5 (ADSL2+) dla Annex A, B, M, L, U-R2 dla Annex B USB 2.0 Porty DSL, Cable, Ethernet (1-3), Power (zasilanie) Przyciski On/Off (zasilanie), Reset (Resetowanie), Wi-Fi Protected Setup wraz z modemo-routerem albo na stronie Linksys.com/support. Dane techniczne mogą ulec zmianie bez - Cisco X2000 | User Manual - Page 242
som enbart router 249 Använda Cisco Connect Starta Cisco Connect 250 Huvudmeny 250 Huvudmeny - Computers and Devices (datorer och enheter) 250 Huvudmeny - Parental Controls (föräldrakontroll) 250 Huvudmeny - Guest Access (gäståtkomst) 250 Huvudmeny - Router Settings (routerinställningar - Cisco X2000 | User Manual - Page 243
Linksys X2000/X3000 Produktöversikt X2000 Ovansida Produktöversikt Ethernet Lysdioden lyser med fast sken när routern är ansluten till en enhet via motsvarande port. Knappen Wi-Fi Protected Setup Om du trycker på den här knappen söker Wi-Fi Protected Setup™ efter din trådlösa enhet med funktioner - Cisco X2000 | User Manual - Page 244
i uttagen. Reset (återställ)-Du kan återställa routerns fabriksinställningar på två sätt. Antingen trycker du på återställningsknappen och håller den intryckt i ca fem sekunder, eller så kan du återställa standardinställningarna på skärmen Administration > Factory Defaults (fabriksinställningar - Cisco X2000 | User Manual - Page 245
Linksys X2000/X3000 X3000 Ovansida Produktöversikt Ethernet Lysdioden lyser med fast sken när routern är ansluten till en enhet via motsvarande port. Knappen Wi-Fi Protected Setup Om du trycker på den här knappen söker Wi-Fi Protected Setup™ efter din trådlösa enhet med funktioner för Wi-Fi - Cisco X2000 | User Manual - Page 246
Linksys X2000 router använder du en nätverkskabel till att ansluta den här porten till ett separat modems tillgänglig på nordamerikanska modeller.) Undersida Reset (återställ) Du kan återställa Factory Defaults (fabriksinställningar) i routerns webbläsarbaserade verktyg. 4-5 mm 1-1.5 mm Obs! Cisco - Cisco X2000 | User Manual - Page 247
(E:) Linksys Router Setup Always do this for software and games: AutoPlay DVD/CD-RW Drive (E:) Linksys Router Setup Install or run program Always do this for software and games: Install or run program Set up your Linksys Router Published by Cisco Consumer Products LLC Set up your Linksys Router - Cisco X2000 | User Manual - Page 248
Linksys X2000/X3000 Installation b. Ange din typ av Internet-anslutning, övriga Internet-inställningar ra installations-cd:n följer du stegen nedan. Ansluta modemroutern Så här ansluter du modemroutern: 1. Stäng av alla dina nätverksenheter, även datorn och modemroutern. Om du använder ett modem - Cisco X2000 | User Manual - Page 249
Linksys X2000/X3000 3. Upprepa steg 2 för varje ytterligare dator och enhet som du vill ordentligt anslutna. Konfigurera modemroutern som enbart router Obs! Om du inte kan köra installations-cd:n följer du stegen nedan. Så här konfigurerar du modemroutern som router: 1. Anslut den ena änden på - Cisco X2000 | User Manual - Page 250
Linksys X2000/X3000 Använda Cisco Connect Cisco Connect är ett verktyg som du använder till att enkelt hantera både router och nätverk. Med hjälp av Cisco Connect kan du ansluta datorer eller enheter till routern, skapa ett gästnätverk för besökare i hemmet och ändra routerns inställningar. Du kan ä - Cisco X2000 | User Manual - Page 251
Serial number (serienummer), Firmware version (version av fast programvara), Operating system (operativsystem), Software version (programvaruversion), Connection type (WAN, anslutningstyp), IP address (LAN, IP-adress), IP address (WAN, IP-adress) och Computer IP address (datorns IP-adress). (WAN st - Cisco X2000 | User Manual - Page 252
Linksys X2000/X3000 Obs! Du kan även använda det webbläsarbaserade verktyget via Cisco Connect. 4. Fortsätt genom att klicka på OK. i: Det här är de övre flikarna: Setup (Konfiguration ), Wireless (Trådlöst), Security (Säkerhet), Access Restrictions (Åtkomstbegränsningar), Applications & Gaming ( - Cisco X2000 | User Manual - Page 253
Linksys X2000/X3000 Internet Setup (internetinställningar) Under Internet Setup (internetinställningar) konfigurerar du routern för din internetanslutning. Det mesta av denna information kan du få av din internetleverantör. Internet Connection Type (internetanslutningstyp) Välj den - Cisco X2000 | User Manual - Page 254
är en tjänst som bara används för anslutningar i Australien. Network Setup (nätverksinställningar) I avsnittet Network Setup (nätverksinställningar) konfigurerar du IP-inställningar för ditt lokala nätverk. Wireless > Basic Wireless Settings (trådlöst > grundläggande trådlösa inställningar) Obs - Cisco X2000 | User Manual - Page 255
Linksys X2000/X3000 Configuration View (konfigurationsvy) Om du vill konfigurera det trådlösa nätverket manuellt väljer du Manual (manuellt). Gå vidare till avsnittet Trådlös konfigurering (manuell). Om du vill använda Wi-Fi Protected Setup markerar du Wi-Fi Protected Setup. Trådlös konfigurering ( - Cisco X2000 | User Manual - Page 256
Linksys X2000/X3000 Channel (kanal) Välj kanal från listrutan för Wireless-B-, Wireless-G- och Wireless Setup •• Logotypen Cisco på routerns ovansida fungerar som indikeringslampa vid Wi-Fi Protected Setup -Fi Protected Setup inom två minuter. •• Enter the client device's PIN on the Router (ange PIN - Cisco X2000 | User Manual - Page 257
alternativ för trådlös säkerhet: WPA/ WPA2 Mixed Mode (blandat läge, standardvärdet), WPA2 Personal, WPA Personal, WEP och RADIUS. (WPA står för Wi-Fi Protected Access. WEP står för Wireless Equivalent Privacy. RADIUS står för Remote Authentication Dial-In User Service.) Obs! Om du vill veta mer om - Cisco X2000 | User Manual - Page 258
) Ange ett lösenord bestående av 8-63 tecken. Standardvärdet är password. Du kan ändra standardlösenordet i installationsprogrammet du använder för din router och det trådlösa nätverket. RADIUS Server (RADIUS-server) Ange IP-adressen för RADIUS-servern. RADIUS Port (RADIUS-port) Ange portnumret - Cisco X2000 | User Manual - Page 259
Linksys X2000/X3000 WPA2 - företag Med det här alternativet används WPA2 tillsammans nätverk använda WEP och dessutom samma kryptering och delad nyckel. RADIUS Server (RADIUS-server) Ange IP-adressen för RADIUS-servern. RADIUS Port (RADIUS-port) Ange portnumret för RADIUS-servern. Standardvärdet är - Cisco X2000 | User Manual - Page 260
Linksys X2000/X3000 du vill använda). Standardvärdet är 1. Klicka på Save Settings (spara inställningar) om du vill genomföra ändringarna eller samma kryptering och delad nyckel. RADIUS Server (RADIUS-server) Ange IP-adressen för RADIUS-servern. RADIUS Port (RADIUS-port) Ange portnumret för - Cisco X2000 | User Manual - Page 261
Linksys X2000/X3000 Trådlöst > Gäståtkomst Med funktionen Guest Access sida. Gäståtkomst Allow Guest Access (Tillåt gäståtkomst) Om Guest Password (Gästl Password (Ändra gästlösenordet) öppnas. Ändra gästlösenordet •• Enter a new guest network password finns på skärmen Guest Access (Gäståtkomst). 2. Ö - Cisco X2000 | User Manual - Page 262
Linksys X2000/X3000 Felsökning X2000 sa nätverksinställningarna kan ändras med hjälp av Cisco Connect. Du behöver ändra de avancerade inställningarna IP-adressen är 192.168.1.1). När du uppmanas till det fyller du i fälten för användarnamn och lösenord (standardanvändarnamnet och lösenordet är admin - Cisco X2000 | User Manual - Page 263
Linksys X2000/X3000 DSL-kabelns kontakt passar inte i routerns internetport. En koaxialkabel kan endast ansluta till ett kabelmodem. Modemroutern fungerar som ett modem : 1. Öppna Cisco Connect. 2. Klicka på Router Settings (routerinställningar) på huvudmenyn. 3. Password (lösenord) visas till - Cisco X2000 | User Manual - Page 264
ADSL2), G.992.5 (ADSL2+) för Annex A, B, M, L, U-R2 för Annex B Portar DSL, kabel, Ethernet (1-3), Ström Knappar På/av, Reset (Återställ), Wi-Fi Protected Setup™ (WPS) Lysdioder Power, Ethernet (1-3), Wi-Fi Protected Setup, Wireless , samt på Linksys. com/support. Specifikationer kan - Cisco X2000 | User Manual - Page 265
ADSL2), G.992.5 (ADSL2+) för Annex A, B, M, L, U-R2 för Annex B USB 2.0 Portar DSL, kabel, Ethernet (1-3), Ström Knappar På/av, Reset (Återställ), Wi-Fi Protected Setup cdskivan som kom tillsammans med modemroutern, samt på Linksys. com/support. Specifikationer kan ändras utan föregående - Cisco X2000 | User Manual - Page 266
Linksys X2000/X3000 X2000 267 267 268 268 268 X3000 269 269 270 270 270 271 272 272 273 Cisco Connect Cisco Connect 274 274 274 Parental Controls 274 Guest Access 274 275 275 Easy Setup - Cisco X2000 | User Manual - Page 267
Linksys X2000/X3000 X2000 LED Wi-Fi Protected Setup Wi-Fi Protected Setup Wi-Fi Protected Setup Wi-Fi Protected Setup™ ไฟ LED Wi-Fi Protected Setup LED WiFi Protected Setup LED Wi-Fi Protected Setup LED WAN ADSL LED LED LED 267 - Cisco X2000 | User Manual - Page 268
Linksys X2000/X3000 DSL ADSL LAN Power Power I O Reset Reset Administration Factory Defaults 175.56 2.5-3.0 มม. 4-5 มม. 1-1.5 มม. Cisco 1 2 175 มม. 3 3 มม. 4 5 100 175 mm 268 - Cisco X2000 | User Manual - Page 269
Linksys X2000/X3000 X3000 LED Wi-Fi Protected Setup Wi-Fi Protected Setup Wi-Fi Protected Setup Wi-Fi Protected Setup™ ไฟ LED Wi-Fi Protected Setup LED WiFi Protected Setup LED Wi-Fi Protected Setup LED WAN ADSL LED LED LED 269 - Cisco X2000 | User Manual - Page 270
Linksys X2000/X3000 175.56 2.5-3.0 มม. DSL ADSL LAN USB USB Power Power I O 4-5 มม. 1-1.5 มม. Cisco 6 7 175 มม. 8 3 มม. 9 10 Reset Reset Administration Factory Defaults 100 175 mm 270 - Cisco X2000 | User Manual - Page 271
(E:) Linksys Router Setup Always do this for software and games: AutoPlay DVD/CD-RW Drive (E:) Linksys Router Setup Install or run program Always do this for software and games: Install or run program Set up your Linksys Router Published by Cisco Consumer Products LLC Set up your Linksys Router - Cisco X2000 | User Manual - Page 272
Linksys X2000/X3000 b ISP 6 4 ISP a ISP DSL ท่ี ISP 7 1 2 2 272 - Cisco X2000 | User Manual - Page 273
Linksys X2000/X3000 3 DSL 4 ADSL ISP ISP 5 1 2 LAN 3 6 7. ไฟ LED 4 5. ไฟ LED 273 - Cisco X2000 | User Manual - Page 274
Linksys X2000/X3000 Cisco Connect Cisco Connect Cisco Connect Guest Cisco Connect Windows Cisco Connect Mac Go > Applications > Cisco Connect Cisco Connect Cisco Connect Add device Add device Parental Controls 5 Change Guest Access Guest Guest Guest Guest - Cisco X2000 | User Manual - Page 275
Linksys X2000/X3000 Change Change Router settings Router name Change Password Change On/Off On Easy Setup Key Update or create key Easy Setup Key USB Easy Setup Key Register now to receive special offers and updates Cisco Cisco Cisco Connect Router details - Cisco X2000 | User Manual - Page 276
Linksys X2000/X3000 Help 1 IP 192.168.1.1 Address Enter Windows Address Device Name Windows 7 3 admin Administration Management Cisco Connect 4 OK Setup Wireless Security Storage Access Restrictions Applications & Gaming Administration - Cisco X2000 | User Manual - Page 277
X2000/X3000 Setup Basic Setup Basic Setup Auto/ADSL ADSL ภาษา Internet Setup ISP ISP Bridge Mode •• RFC 2684 Bridged •• RFC2684 Routed •• IPoA •• RFC 2516 PPPoE •• RFC2364 PPPoA Bridge Mode DSL VC Settings RFC 2684 Bridged IP Settings Obtain an IP address - Cisco X2000 | User Manual - Page 278
Linksys X2000/X3000 RFC2364 PPPoA บาง ISP DSL PPPoA (Point-to-Point Protocol over ATM PPPoA IP IP Ethernet ภาษา Internet Setup ISP ISP •• Automatic Configuration DHCP •• Static IP (IP PPPoE •• PPTP •• L2TP •• Telstra Cable DHCP Automatic - Cisco X2000 | User Manual - Page 279
Telstra Cable IP Help Wi-Fi Protected Wi-Fi) Wi-Fi Protected Setup Wi-Fi Wi-Fi Wi-Fi Configuration View Manual Wi-Fi Wi-Fi Protected Setup Wi-Fi) Network Mode Mixed Network Mode 2.4 GHz Mixed Wireless-B, Wireless-G และ Wireless-N (2.4 GHz Mixed - Cisco X2000 | User Manual - Page 280
Wireless-N Only (Wireless-N •• Disabled Wireless-B, Wireless-G และ Wireless-N (2.4 GHz Disabled Mixed (ผสม) Network Name (SSID SSID)) Service Set Identifier (SSID 32 Ciscoxxxxx (xxxxx Reset Administration > Factory Defaults Channel Width Wireless-B, Wireless-G และ Wireless - Cisco X2000 | User Manual - Page 281
PIN Wi-Fi Protected Setup b OK Wi-Fi Protected Setup SSID Wi-Fi Protected Setup WPA/WPA2 Mixed Mode WPA2 Personal, WPA Personal, WEP และ RADIUS (WPA Wi-Fi Protected Access, WEP Wireless Equivalent Privacy, RADIUS Remote Authentication Dial-In User Service) Help 281 - Cisco X2000 | User Manual - Page 282
RADIUS WPA2 WPA RADIUS WPA2 Enterprise WPA2/WPA Enterprise Mixed Mode WPA Enterprise RADIUS WPA2 WPA WPA2 WPA2 Disabled WPA2/WPA Mixed Mode WPA2/WPA Mixed Mode Passphrase 8-63 password WPA2 Personal WPA2 Personal WPA2 Personal Passphrase 8-63 - Cisco X2000 | User Manual - Page 283
Linksys X2000/X3000 WPA Personal WPA Personal WPA Personal Passphrase 8-63 password WPA2/WPA Enterprise Mixed Mode WPA2/WPA RADIUS RADIUS WPA2/WPA Enterprise Mixed Mode WPA2/WPA Enterprise WPA2 Enterprise WPA2 RADIUS RADIUS WPA2 Enterprise WPA2 Enterprise - Cisco X2000 | User Manual - Page 284
Linksys X2000/X3000 WPA Enterprise WPA RADIUS RADIUS WPA Enterprise WPA Enterprise WEP WEP WPA WEP WEP RADIUS Server RADIUS IP RADIUS RADIUS Port RADIUS RADIUS 1812 Shared Key Encryption WEP 64 bits 10 hex digits (64 บิต 10 128 bits 26 hex digits (128 บิต 26 - Cisco X2000 | User Manual - Page 285
IP RADIUS RADIUS Port RADIUS RADIUS 1812 Shared Key Encryption WEP 64 bits 10 hex digits (64 บิต 10 128 bits 26 hex digits (128 บิต 26 64 bits 10 hex digits (64 บิต 10 Passphrase WEP Generate Key 1-4 1-4 WEP TX Key TX TX (Transmit 1 Wireless Guest Access Guest) Guest Access - Cisco X2000 | User Manual - Page 286
Linksys X2000/X3000 Guest Access Guest) Allow Guest Access Guest Guest yes no Guest Network Name Guest guest Guest Password Guest guest Change Change Guest Password Guest Change Guest Password Guest) •• Enter a new guest password Guest 4-32 Change Guest Access Total Guests - Cisco X2000 | User Manual - Page 287
Linksys X2000/X3000 X2000/X3000 LED LED a b LEDs DSL LED 1-3 DSL ADSL Internet Explorer 1 2 3 4 IP Windows Internet Protocol (TCP/IP IP SSID Cisco Connect Internet Explorer Firefox IP IP 192.168.1.1 admin DSL ISP - Cisco X2000 | User Manual - Page 288
Linksys X2000/X3000 Coax coax ADSL Cisco Connect Cisco Connect 1 Cisco Connect 2 Router settings 3 Advanced settings 4 Copy password 5 OK 1 Cisco Connect 2 Router Settings 3 ใน Windows Vista USB workgroup ใน Windows Vista 1 3) 2 Storage 3 - Cisco X2000 | User Manual - Page 289
Linksys X2000/X3000 X2000 WLAN: 802.11n, 802.11g, 802.11b 802.3, 802.3u, 802.3ab ADSL: T1.413i2, G.992.1 (G.DMT), G.992.2 (G.Lite), G.992.3 (ADSL2), G.992.5 (ADSL2 Annex A, B, M, L, U-R2 Annex B USB 2.0 DSL 1-3 ปมุ่ Wi-Fi Protected Setup WEP MAC Address SPI Windows - Cisco X2000 | User Manual - Page 290
Linksys X2000/X3000 X3000 WLAN: 802.11n, 802.11g, 802.11b 802.3, 802.3u, 802.3ab ADSL: T1.413i2, G.992.1 (G.DMT), G.992.2 (G.Lite), G.992.3 (ADSL2), G.992.5 (ADSL2 Annex A, B, M, L, U-R2 Annex B DSL 1-3 ปมุ่ Wi-Fi Protected Setup™ ไฟ LED 1-3), Wi-Fi Protected Setup Address - Cisco X2000 | User Manual - Page 291
linksys.com/support Cisco, the Cisco logo, and Linksys are trademarks or registered trademarks of Cisco and/or its affiliates in the United States and other countries. A listing of Cisco's trademarks can be found at www.cisco.com/go/trademarks. All other trademarks mentioned in this document are
-
 1
1 -
 2
2 -
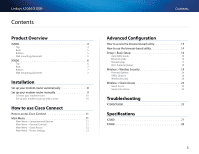 3
3 -
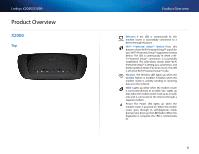 4
4 -
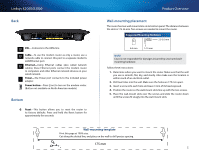 5
5 -
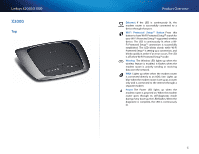 6
6 -
 7
7 -
8
-
9
-
10
-
11
-
12
-
13
-
14
-
15
-
16
-
17
-
18
-
19
-
20
-
21
-
22
-
23
-
24
-
25
-
26
-
27
-
28
-
29
-
30
-
31
-
32
-
33
-
34
-
35
-
36
-
37
-
38
-
39
-
40
-
41
-
42
-
43
-
44
-
45
-
46
-
47
-
48
-
49
-
50
-
51
-
52
-
53
-
54
-
55
-
56
-
57
-
58
-
59
-
60
-
61
-
62
-
63
-
64
-
65
-
66
-
67
-
68
-
69
-
70
-
71
-
72
-
73
-
74
-
75
-
76
-
77
-
78
-
79
-
80
-
81
-
82
-
83
-
84
-
85
-
86
-
87
-
88
-
89
-
90
-
91
-
92
-
93
-
94
-
95
-
96
-
97
-
98
-
99
-
100
-
101
-
102
-
103
-
104
-
105
-
106
-
107
-
108
-
109
-
110
-
111
-
112
-
113
-
114
-
115
-
116
-
117
-
118
-
119
-
120
-
121
-
122
-
123
-
124
-
125
-
126
-
127
-
128
-
129
-
130
-
131
-
132
-
133
-
134
-
135
-
136
-
137
-
138
-
139
-
140
-
141
-
142
-
143
-
144
-
145
-
146
-
147
-
148
-
149
-
150
-
151
-
152
-
153
-
154
-
155
-
156
-
157
-
158
-
159
-
160
-
161
-
162
-
163
-
164
-
165
-
166
-
167
-
168
-
169
-
170
-
171
-
172
-
173
-
174
-
175
-
176
-
177
-
178
-
179
-
180
-
181
-
182
-
183
-
184
-
185
-
186
-
187
-
188
-
189
-
190
-
191
-
192
-
193
-
194
-
195
-
196
-
197
-
198
-
199
-
200
-
201
-
202
-
203
-
204
-
205
-
206
-
207
-
208
-
209
-
210
-
211
-
212
-
213
-
214
-
215
-
216
-
217
-
218
-
219
-
220
-
221
-
222
-
223
-
224
-
225
-
226
-
227
-
228
-
229
-
230
-
231
-
232
-
233
-
234
-
235
-
236
-
237
-
238
-
239
-
240
-
241
-
242
-
243
-
244
-
245
-
246
-
247
-
248
-
249
-
250
-
251
-
252
-
253
-
254
-
255
-
256
-
257
-
258
-
259
-
260
-
261
-
262
-
263
-
264
-
265
-
266
-
267
-
268
-
269
-
270
-
271
-
272
-
273
-
274
-
275
-
276
-
277
-
278
-
279
-
280
-
281
-
282
-
283
-
284
-
285
-
286
-
287
-
288
-
289
-
290
-
291
 |
 |
Linksys X2000/X3000
User Guide
User Guide
ستخدم
±
ال
²
لي
³
Guide de l’utilisateur
Benutzerhandbuch
Guía del usuario
Guide de l’utilisateur
EN
AR
DE
ES
FR
IT
NL
PL
SE
TH
CA
Guida per l’utente
Gebruikershandleiding
Podręcznik użytkownika
Användarhandbok
คู่มื
อผู้
ใช้
User Guide
3
مدختسملا ليلد
29
Guide de L’utilisateur 56
Benutzerhandbuch
82
Guía del usuario
109
Guide de l’utilisateur 136
Guida per l’utente
162
Gebruikershandleiding
189
Podręcznik użytkownika
217
Användarhandbok
242
คู ่
มื
อผู ้
ใช้
266