Compaq Armada m300 Compaq Armada M300 Series of Personal Computers Maintenance
Compaq Armada m300 - Notebook PC Manual
 |
View all Compaq Armada m300 manuals
Add to My Manuals
Save this manual to your list of manuals |
Compaq Armada m300 manual content summary:
- Compaq Armada m300 | Compaq Armada M300 Series of Personal Computers Maintenance - Page 1
Compaq Armada M300 Series of Personal Computers Maintenance and Service Guide - Compaq Armada m300 | Compaq Armada M300 Series of Personal Computers Maintenance - Page 2
need it)? o Yes o No If not, please explain: Are sufficient quantities of the Maintenance and Service Guide available? o Yes o No If not, please explain: Additional Documentation Comments: Name: Job Title: Address: City: State: Phone: Company: Zip: Armada M300 Series of Personal Computers - Compaq Armada m300 | Compaq Armada M300 Series of Personal Computers Maintenance - Page 3
2000 Compaq Computer Corporation. COMPAQ, the Compaq logo, and ARMADA Registered in U. S. Patent and Trademark Office Microsoft, Windows, Windows NT, a further or additional warranty. MAINTENANCE AND SERVICE GUIDE Compaq Armada M300 Series of Personal Computers Second Edition February 2000 - Compaq Armada m300 | Compaq Armada M300 Series of Personal Computers Maintenance - Page 4
2.2 Clearing Passwords...2-3 2.3 Power-On Self-Test (POST)...2-3 2.4 POST Error Messages...2-4 2.5 Compaq Utilities ...2-6 2.6 Troubleshooting Without Diagnostics 2-12 Before Replacing Parts...2-12 Obtaining Update Information with Info messenger 2-12 Checklist for Solving Problems 2-13 chapter - Compaq Armada m300 | Compaq Armada M300 Series of Personal Computers Maintenance - Page 5
Disconnecting the Computer ...5-4 5.5 Preparing the Computer for Disassembly 5-5 5.6 Battery Packs...5-6 Removing the Battery Pack...5-6 Replacing the Battery Pack ...5-7 5.7 Hard Drives ...5-8 Removing a Hard Drive ...5-8 Inserting a Hard Drive...5-9 5.8 PC Cards ...5-10 Removing a PC Card...5-11 - Compaq Armada m300 | Compaq Armada M300 Series of Personal Computers Maintenance - Page 6
...6-5 6.7 DVD-ROM Drive ...6-6 6.8 System Interrupts ...6-7 6.9 System DMA...6-7 6.10 System I/O Addresses...6-8 6.11 System Memory Map...6-9 appendix A CONNECTOR PIN ASSIGNMENTS ...A-1 appendix B POWER CORD SET REQUIREMENTS ...B-1 INDEX ...I-1 ContentsArmada M300 Maintenance and Service Guide v - Compaq Armada m300 | Compaq Armada M300 Series of Personal Computers Maintenance - Page 7
preface USING THIS GUIDE This Maintenance and Service Guide is a troubleshooting reference that can be used when servicing the Compaq Armada M300 Series of Personal Computers. Compaq Computer Corporation reserves the right to make changes to the Compaq Armada M300 Series of Personal Computers - Compaq Armada m300 | Compaq Armada M300 Series of Personal Computers Maintenance - Page 8
information for the computer: s Compaq Armada M300 Series of Personal Computers documentation set s Microsoft Operating System Manual s Compaq Service Training Guides s Compaq Service Advisories and Bulletins s Compaq QuickFind s Compaq Service Quick Reference Guide s Compaq Internet site at http - Compaq Armada m300 | Compaq Armada M300 Series of Personal Computers Maintenance - Page 9
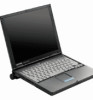
on configuration). It allows users high mobility, provides a full set of system ports, and when paired with the optional Mobile Expansion Unit (MEU), transforms into a full-function portable with enterprise docking capability. Figure 1-1. Compaq Armada M300 Personal Computer Product Description - Compaq Armada m300 | Compaq Armada M300 Series of Personal Computers Maintenance - Page 10
is composed of a group of characters that define each model's features. Table 1-1 Models and Model Naming Convention Compaq Armada M300 Series of Personal Computers Key A M3 P3 500 T 1 X 12 0 M 128 58 N S F 12 Key 1 2 3 4 5-6 7-9 10 11 12 13-14 15 16 17-19 20-21 22 23 24 3 4 5-6 7-9 Description - Compaq Armada m300 | Compaq Armada M300 Series of Personal Computers Maintenance - Page 11
Table 1-2 Models and Model Naming Convention Compaq Armada M700 Series of Personal Computers 1 2 3 4 5-6 AM3 P3 -XX6 333 T 1 S 4 0 O 64 95 333 T 1 S 4 0 0 64 98 333 T 1 S 4 0 0 64 N4 333 T 1 S 4 0 M 64 95 333 T 1 S 4 0 M 64 98 333 T 1 S 4 0 M 64 N4 P 107061-XX2 P 107062-XX4 P 107067-XX6 - Compaq Armada m300 | Compaq Armada M300 Series of Personal Computers Maintenance - Page 12
Li-Ion battery or secondary 6.4-GB hard drive s Additional ports: parallel, serial, audio in/out, VGA, USB, PS/2 (2), AC power in, CPU connector, docking connector s Stereo speakers providing Compaq PremierSound 16-bit stereo sound s Robust, common enterprise docking solution * End user must make - Compaq Armada m300 | Compaq Armada M300 Series of Personal Computers Maintenance - Page 13
number of Compaq computers, monitors, hard drives, battery packs, memory boards, processor speeds, and operating systems s Asset tag s System board and ROM revision levels s BIOS settings s Diagnostic information-Diagnostics for Windows includes information on hard drives, ports, video, sound, and - Compaq Armada m300 | Compaq Armada M300 Series of Personal Computers Maintenance - Page 14
DriveLock-prevents unauthorized access to hard drives. s Device disabling-prevents unauthorized data transfer through modems, serial ports, parallel ports, and infrared ports on the computer and an optional docking station. s QuickLock/QuickBlank-locks the keyboard and clears the screen. s Ownership - Compaq Armada m300 | Compaq Armada M300 Series of Personal Computers Maintenance - Page 15
Web site at www.compaq.com/support/ portables. Managing Power The computer comes with a collection of power management features that allow battery operating time to be extended and power to be conserved. Use power management to monitor most computer components such as the hard drive, processor, and - Compaq Armada m300 | Compaq Armada M300 Series of Personal Computers Maintenance - Page 16
1.2 Computer External Components The external components on the top of the computer are shown in Figure 1-2 and described in Table 1-2. Figure 1-2. Top Components 1-8 Product Description - Compaq Armada m300 | Compaq Armada M300 Series of Personal Computers Maintenance - Page 17
Hard drive light 6 Diskette drive light 7 Internal microphone 8 Suspend button 9 Windows application key 10 Battery light 11 Power/suspend . Displays Windows Start menu. *In Windows 98 the term Standby replaces the term Suspend. In Windows 98 the term sleep button replaces the term - Compaq Armada m300 | Compaq Armada M300 Series of Personal Computers Maintenance - Page 18
Table 1-3. Figure 1-3. Left Side Components Item 1 2 3 4 5 6 ! Table 1-4 Left Side Components Component Function RJ-45 jack* Power connector Power button Vents Security cable slot Hard drive bay Connects the network cable. NOTE: A network cable is included with network models. Internal modem - Compaq Armada m300 | Compaq Armada M300 Series of Personal Computers Maintenance - Page 19
in Figure 1-4 and are described in Table 1-4. Figure 1-4. Right Side Components Table 1-5 Right Side Components Item Component Function 1 PC Card slot Supports 32-bit (CardBus) and 16-bit PC Cards. 2 Air intake vents Cool internal components. 3 Air exhaust vents Cool internal components - Compaq Armada m300 | Compaq Armada M300 Series of Personal Computers Maintenance - Page 20
latch 2 Stereo speaker/headphone jack 3 Microphone jack 4 Power/suspend light 5 Battery light Opens the computer. Connects stereo speakers, headphones, or headset audio. Connects a single sound channel microphone. On: Power is turned on. Off: Power is turned off. Blinking: Computer is in Suspend - Compaq Armada m300 | Compaq Armada M300 Series of Personal Computers Maintenance - Page 21
4 External monitor connector 5 Infrared port 6 Battery pack Connects USB devices Connects a serial device Connects a parallel device Connects an external monitor, overhead projector, or TV adapter. Links to another IrDA-compliant device for wireless communication. Provides power to the - Compaq Armada m300 | Compaq Armada M300 Series of Personal Computers Maintenance - Page 22
4 Fan 5 Speaker 6 Modem compartment 7 docking connector 8 Hard drive security screw 9 Hard drive bezel Release the primary battery pack. Provides battery power to automatically display the date and time. Numerical identification for the computer. Cools the computer. Produces sound - Compaq Armada m300 | Compaq Armada M300 Series of Personal Computers Maintenance - Page 23
catalog and Chapter 5 for removal and replacement procedures. System Board The system board provides the following device connections: s Memory expansion board s Hard drive s Display s Keyboard/Touchpad pointing device s Audio s Pentium II/Celeron processor s Fan s PC Cards s Modem The computer is - Compaq Armada m300 | Compaq Armada M300 Series of Personal Computers Maintenance - Page 24
steps when beginning the troubleshooting process: 1. Complete the preliminary steps listed in Section 2.1. 2. Run the Power-On Self-Test (POST) as described in Section 2.3. 3. Run Computer Setup as described in Section 2.5. 4. If you are unable to run POST or if the problem persists after running - Compaq Armada m300 | Compaq Armada M300 Series of Personal Computers Maintenance - Page 25
the problem by running POST with and without the external device connected. 8. Use Compaq Utilities and loopback plugs in the serial and parallel connectors if you plan to test these ports. Follow these steps to run Compaq Utilities: a. If you are running Compaq Utilities from the hard drive, turn - Compaq Armada m300 | Compaq Armada M300 Series of Personal Computers Maintenance - Page 26
on the computer. If POST does not detect any errors, the computer beeps once or twice to indicate that POST has run successfully. The computer boots from the hard drive or from a bootable diskette if one is installed in the diskette drive. Troubleshooting 2-3 - Compaq Armada m300 | Compaq Armada M300 Series of Personal Computers Maintenance - Page 27
. CMOS RAM has lost power. Run Computer Setup to reinitialize CMOS-RAM. The diskette drive controller failed to respond to the recalibrate command. If there is no diskette drive in the system, run Computer Setup to properly configure the CMOS-RAM to show no diskette drive present. If the problem - Compaq Armada m300 | Compaq Armada M300 Series of Personal Computers Maintenance - Page 28
time clock have been corrupted, possibly by a power loss. 1. Run Computer Setup. 2. If problems persists, replace system board. A failure or an error occurred 1. Run ScanDisk. when trying to access the hard 2. Check disk in DOS and drive. Windows 95. Fatal errors emit a beep and may display - Compaq Armada m300 | Compaq Armada M300 Series of Personal Computers Maintenance - Page 29
Graphics adapter is faulty. 8 S-S-L-P-S-S-L-P Internal RAM is faulty. NOTE: S = Short, L = Long, P = Pause Recommended Action Replace system board. Replace memory board or system board if memory on system board is faulty. 2.5 Compaq Utilities Compaq Utilities contain several functions that - Compaq Armada m300 | Compaq Armada M300 Series of Personal Computers Maintenance - Page 30
drivers are installed. Diagnostics for Windows is NOT a configuration tool and might only test devices that are properly configured by the operating system. NOTE: It is not necessary to configure a device connected to a USB connector on the computer or an optional docking base. Using Computer Setup - Compaq Armada m300 | Compaq Armada M300 Series of Personal Computers Maintenance - Page 31
and exit Security Menu Begin here Setup password Power-On password Password options DriveLock passwords Device security System IDs To do this I View identification information about the computer, docking base, and battery packs. I View specification information about the processor, memory and cache - Compaq Armada m300 | Compaq Armada M300 Series of Personal Computers Maintenance - Page 32
at startup. I Enable/disable USB legacy support for one USB mouse and one USB keyboard. (When USB legacy support is enabled, the keyboard and mouse work without a loaded USB driver.) I Set an optional external monitor or overhead projector connected to a video card in a docking base as the primary - Compaq Armada m300 | Compaq Armada M300 Series of Personal Computers Maintenance - Page 33
As. 5. To exit, select the File menuÆExit. Factory Default Settings NOTE: Default settings that do not apply to the computer will appear in gray. Enable POST Memory Test Keyboard Num Lock Hard drive boot sequence 1 2 3 4 Boot display Language Table 2-4 Initialization Checked (enabled) Unchecked - Compaq Armada m300 | Compaq Armada M300 Series of Personal Computers Maintenance - Page 34
Parallel Port Disable PC Card Slots Setup Password Power-On Password Diskette Drives Disable Diskette Drives Disable Diskette Boot Table 2-5 Ports 3F8, IRQ4 2F8, IRQ9 378, IRQ7 300, IRQ11 Table 2-6 Power Checked (enabled) Unchecked (not connected) While operating on battery power High Suspend Time - Compaq Armada m300 | Compaq Armada M300 Series of Personal Computers Maintenance - Page 35
to avoid a misdiagnosis. Before Replacing Parts When troubleshooting a problem, check the following items for possible solutions before replacing parts: I Verify that cables are connected properly to the suspected defective parts. I Verify that all required device drivers are installed. I Verify - Compaq Armada m300 | Compaq Armada M300 Series of Personal Computers Maintenance - Page 36
fully charged battery pack installed? I Are all cables connected properly and securely? I Did the diskette drive contain a nonbootable diskette when you turned on the computer? I Are all the needed device drivers installed? I Are printer drivers installed for each application? If the problem appears - Compaq Armada m300 | Compaq Armada M300 Series of Personal Computers Maintenance - Page 37
No sound from Windows taskbar. Table 2-9 Solving Battery/Battery Gauge Problems Problem Possible Cause Solution Computer is beeping and battery Battery pack charge is low. power light is blinking I Charge the battery pack by connecting to an external power source. I Replace the battery - Compaq Armada m300 | Compaq Armada M300 Series of Personal Computers Maintenance - Page 38
set every The Real Time Clock battery has I Restore power, then turn on the time computer is turned on. reached the end of its useful life. computer with the power switch I Replace the Real Time Clock battery. Battery gauge seems inaccurate. The battery pack may need calibration. Recalibrate - Compaq Armada m300 | Compaq Armada M300 Series of Personal Computers Maintenance - Page 39
reinsert it. Table 2-11 Solving Diskette Drive/SuperDisk LS-120 Drive Problems Problem Possible Cause Solution Drive cannot write to a diskette. Diskette is not formatted. Format the diskette: If you are using Windows 95 or Windows 98: 1. From the Windows desktop, select My Computer. 2. Select - Compaq Armada m300 | Compaq Armada M300 Series of Personal Computers Maintenance - Page 40
in Enable diskette bootability in Computer Setup. Computer Setup, Security menu. Table 2-12 Solving Hard Drive Problems Possible Cause Solution Hard drive entered low power state due to timeout and is now exiting from it. Wait for the system to restore the previously saved data to its - Compaq Armada m300 | Compaq Armada M300 Series of Personal Computers Maintenance - Page 41
transmit data. Table 2-13 Solving Infrared Problems Possible Cause Solution The appropriate software is not same Your Compaq computer uses the communications protocol. Check the IrDA communications protocol. manufacturer’s instructions for connecting apart. Continued 2-18 Troubleshooting - Compaq Armada m300 | Compaq Armada M300 Series of Personal Computers Maintenance - Page 42
Table 2-14 Solving Keyboard Problems Possible Cause Solution A screen timeout has been initiated.. Press any key to refresh the screen. QuickLock/QuickBlank has been initiated To enable the keyboard and return your information to the screen, enter your power-on password. LCD has been disabled - Compaq Armada m300 | Compaq Armada M300 Series of Personal Computers Maintenance - Page 43
too low. Phone service is not connected to the telephone wall jack. The modem is not responding to commands from the computer keyboard. Solution I Make HyperTerminal, then go to Terminal Mode. 2. Type AT and press the Enter key. If the modem displays OK, the modem and computer are working together. - Compaq Armada m300 | Compaq Armada M300 Series of Personal Computers Maintenance - Page 44
Service Provider (ISP) who supports V.90 or K56flex protocols, go to the Compaq Web site at www.compaq press Enter. NOTE driver is not PCMCIA compliant. Adjust the volume control on the computer. Check the list of PC Cards tested successfully in Compaq PC Card platforms. Continued Troubleshooting - Compaq Armada m300 | Compaq Armada M300 Series of Personal Computers Maintenance - Page 45
not supported. Storage cards, such as SRAM, do not work in the expansion base. Solution Before a new PC Card can be used, it may be necessary to perform an initial setup procedure. Follow the PC Card manufacturer's instructions for formatting a hard drive card or installing PC Card-specific drivers - Compaq Armada m300 | Compaq Armada M300 Series of Personal Computers Maintenance - Page 46
a critical low battery condition. I Charge the battery pack. I Replace the battery pack. I Connect the computer to an external power source. The computer initiated Hibernation after a user-defined timeout expired. Turn on the computer. Table 2-18 Solving Screen Problems Problem Possible Cause - Compaq Armada m300 | Compaq Armada M300 Series of Personal Computers Maintenance - Page 47
During startup, only two tiers are supported by the USB port. These tiers can include no more than two hubs on the first tier and no more than one keyboard and one pointing device on the first or second tier. Use the external device only after Windows 95 or Windows 98 has loaded. Reduce the number - Compaq Armada m300 | Compaq Armada M300 Series of Personal Computers Maintenance - Page 48
ILLUSTRATED PARTS CATALOG This chapter provides an illustrated parts breakdown and a reference for spare part numbers for components of the Compaq Armada M300. 3.1 Serial Number Location When ordering parts or requesting information, provide the computer serial number and model number located on the - Compaq Armada m300 | Compaq Armada M300 Series of Personal Computers Maintenance - Page 49
3.2 Computer Major System Components Figure 3-2. Major System Components 3-2 Illustrated Parts Catalog - Compaq Armada m300 | Compaq Armada M300 Series of Personal Computers Maintenance - Page 50
-XXX only) 11.3-inch, SVGA, CTFT 171969-001 178654-001 Keyboard Belgian -181 Italian -061 Brazilian -201 International -003 Danish -081 -001 Hard drive 12.0 GB 6.4 GB 4.3 GB 171971-001 136246-001 136245-001 PC Card Assembly 140384-001 Battery pack, Li-ion High capacity battery pack - Compaq Armada m300 | Compaq Armada M300 Series of Personal Computers Maintenance - Page 51
lens 3 RTC (Real Time Clock) battery 4 RTC (Real Time Clock) battery cover 5 Front rubber feet 6 Display screw covers 7 PC Card door 8 PC Card door spring 9 Switch cover 10 Docking bay doors 11 Docking bay door springs 12 Modem cover 13 Power button 14 Modem card dummy - Compaq Armada m300 | Compaq Armada M300 Series of Personal Computers Maintenance - Page 52
Figure 3-4. Mass Storage Devices Table 3-3 Spare Parts: Mass Storage Devices Item 1 2 3 * * * Description Hard drive 12.0 GB 6.4 GB 4.3 GB External diskette drive, 1.44-megabyte, 3.5 inch/8.89 cm External diskette drive cable 4X DVD-ROM drive (for use with Mobile Expansion Unit) SuperDisk LS-120 - Compaq Armada m300 | Compaq Armada M300 Series of Personal Computers Maintenance - Page 53
(not illustrated) Description Spare Part Number Mobile Expansion Unit 140382-001 Armada M300 Maintenance & Service Guide 158340-001 PC Card modem 105993-001 Battery Charger 277734-001 AC Power Cord Australian 246959-011 Danish 246959-081 European/Middle Eastern/African Italian - Compaq Armada m300 | Compaq Armada M300 Series of Personal Computers Maintenance - Page 54
the removal and replacement procedures: s Magnetic Torx T-8 screwdriver (for all screws unless otherwise specified) s 9/32-inch socket for bushing guides 4.2 Service Considerations Listed below are some of the considerations that you should keep in mind during disassembly and assembly procedures - Compaq Armada m300 | Compaq Armada M300 Series of Personal Computers Maintenance - Page 55
or replaced. Handle flex cables with extreme care; they tear easily. CAUTION: When servicing the drive into a drive bay. s Avoid exposing a hard drive to products that have magnetic fields such as monitors or speakers. s Avoid exposing a drive to temperature extremes or to liquids. s If a drive - Compaq Armada m300 | Compaq Armada M300 Series of Personal Computers Maintenance - Page 56
many integrated circuits provide some protection, but in many cases the discharge contains enough power to alter device parameters or melt silicon junctions. A sudden discharge of static electricity possible, use an ionizer to dissipate electric charges. Removal and Replacement Preliminaries 4-3 - Compaq Armada m300 | Compaq Armada M300 Series of Personal Computers Maintenance - Page 57
grounded work surface and use properly grounded tools and equipment. s Use field service tools, such as cutters, screwdrivers, and vacuums that are conductive. s pins, leads, or circuitry. s Turn off power and input signals before inserting or removing connectors or test equipment. 4-4 Removal - Compaq Armada m300 | Compaq Armada M300 Series of Personal Computers Maintenance - Page 58
Foot straps (heel, toe, or boot straps) can be used at standing workstations and are compatible with most types of shoes or boots. On conductive floors or dissipative s Static-dissipative table or floor mats with hard tie to ground s Field service kits s Static awareness labels s Material-handling - Compaq Armada m300 | Compaq Armada M300 Series of Personal Computers Maintenance - Page 59
plastic Carbon-loaded plastic Metallized laminate Table 4-2 Static-Shielding Materials Use Voltage Protection Level Bags 1,500 V Floor mats 7,500 V Floor mats 15,000 V 4-6 Removal and Replacement Preliminaries - Compaq Armada m300 | Compaq Armada M300 Series of Personal Computers Maintenance - Page 60
AND REPLACEMENT PROCEDURES 5.1 Serial Number The computer serial number should be reported to Compaq when requesting information or ordering spare parts. The serial number is located on the bottom of the computer (Figure 5-1). Figure 5-1. Serial Number Location Removal and Replacement Procedures - Compaq Armada m300 | Compaq Armada M300 Series of Personal Computers Maintenance - Page 61
for Disassembly 5.6 Battery Packs Removing the Battery Pack Replacing the Battery Pack 5.7 Hard Drives Removing a Hard Drive Inserting a Hard Drive 5.8 PC Cards Removing a PC Card Inserting a PC Card 5.9 Modem or Modem/NIC Card 5.10 Real Time Clock Battery 5.11 Keyboard 5.12 Memory Expansion - Compaq Armada m300 | Compaq Armada M300 Series of Personal Computers Maintenance - Page 62
disconnect all external devices connected to the computer. 4. On the mobile expansion unit, press the docking release button – to release the expansion unit from the computer (Figure 5-3). 5. Lift the rear the Computer from the Mobile Expansion Unit Removal and Replacement Procedures 5-3 - Compaq Armada m300 | Compaq Armada M300 Series of Personal Computers Maintenance - Page 63
the Computer 1. Disconnect the AC power cord from the AC adapter – (Figure 5-4). 2. Unplug the power cord from the electrical outlet —. 3. Disconnect the AC adapter from the power connector on the left side of computer ˜. Figure 5-4. Disconnecting the Computer 5-4 Removal and Replacement Procedures - Compaq Armada m300 | Compaq Armada M300 Series of Personal Computers Maintenance - Page 64
5.6). CAUTION: Failure to disconnect the AC Adapter from the computer and to remove the battery pack before removing and installing internal components can damage the equipment. 5. Remove the hard drive (Section 5.7). 6. Remove all PC Cards (Section 5.8). Removal and Replacement Procedures 5-5 - Compaq Armada m300 | Compaq Armada M300 Series of Personal Computers Maintenance - Page 65
WARNING: To reduce the risk of injury or damage to the battery pack, do not crush, puncture, or incinerate the battery pack or short the metal contacts. Do not attempt to open or service the battery pack. Removing the Battery Pack 1. Shut down the computer. 2. Turn the computer upside down. 3. Tilt - Compaq Armada m300 | Compaq Armada M300 Series of Personal Computers Maintenance - Page 66
2. Push the battery pack onto the computer until the contacts connect –, and rotate the battery pack 90 degrees toward the back of the computer — (Figure 5-6). 3. Slide the two battery latches out (away from each other) ˜. Figure 5-6. Replacing the Battery Pack Removal and Replacement Procedures 5-7 - Compaq Armada m300 | Compaq Armada M300 Series of Personal Computers Maintenance - Page 67
hard drive, back up all information on the hard drive. 1. Shut down the computer. 2. Turn the computer upside down. 3. Remove the hard drive screw – (Figure 5-7). 4. Pull up on the front bezel —. 5. Slide the hard drive out of the bay ˜. Figure 5-7. Removing a Hard Drive 5-8 Removal and Replacement - Compaq Armada m300 | Compaq Armada M300 Series of Personal Computers Maintenance - Page 68
2. Turn the computer upside down. 3. Pull the bottom half of the bezel down. 4. Slide the hard drive into the bay until the connector is seated – (Figure 5-8). 5. Push the front bezel down —. 6. Insert the hard drive screw ˜. Figure 5-8. Inserting a Hard Drive Removal and Replacement Procedures 5-9 - Compaq Armada m300 | Compaq Armada M300 Series of Personal Computers Maintenance - Page 69
used and with the kind of PC Card being removed. In Windows 95 or Windows 98- s If you insert a PC Card while the computer is on the system, the PC Card icon displays on the taskbar. In Windows NT 4.0 with CardWare from Compaq- s If you insert a PC Card while the computer is Replacement Procedures - Compaq Armada m300 | Compaq Armada M300 Series of Personal Computers Maintenance - Page 70
Windows 98-If the computer is on, stop the PC Card before you remove it. To stop a PC Card, select the PC Card icon in the taskbar, then select the PC Card you want to stop. A message displays when the PC Card can be safely removed. s In Windows NT 4.0 with CardWare provided by Compaq - Compaq Armada m300 | Compaq Armada M300 Series of Personal Computers Maintenance - Page 71
facing the computer and the label side up, insert the PC Card in the slot, aligning the card on the two guide rails inside the PC Card slot (Figure 5-10). 2. Gently push the card into the slot until the card is seated. Figure 5-10. Inserting a PC Card 5-12 Removal and Replacement Procedures - Compaq Armada m300 | Compaq Armada M300 Series of Personal Computers Maintenance - Page 72
5.9 Modem or Modem/NIC Card 1. Prepare the computer for disassembly (Section 5.5). 2. If attached, disconnect the RJ-11 and RJ-45 cables from the computer. 3. Turn the computer —. 6. Remove the cover ˜. Figure 5-11. Removing the Modem or Modem/NIC Card Cover Removal and Replacement Procedures 5-13 - Compaq Armada m300 | Compaq Armada M300 Series of Personal Computers Maintenance - Page 73
card. Figure 5-12. Removing the Modem or Modem/NIC Card Reverse the above procedure to install the modem or modem/NIC card. 5-14 Removal and Replacement Procedures - Compaq Armada m300 | Compaq Armada M300 Series of Personal Computers Maintenance - Page 74
5.10 Real Time Clock (RTC) Battery 1. Prepare the computer for disassembly (Section 5.5). 2. Turn the computer upside down with the rear panel facing forward. 3. Remove the RTC battery cover by lifting it at the indentation – (Figure 5-13). 4. Remove the battery from the base enclosure —. 5. Use the - Compaq Armada m300 | Compaq Armada M300 Series of Personal Computers Maintenance - Page 75
5.11 Keyboard 1. Prepare the computer for disassembly (Section 5.5). 2. Press down on each of the three release tabs – along the top edge of the keyboard (Figure 5-14). 3. Swing the top edge of the keyboard up and forward —. Figure 5-14. Releasing the Keyboard 5-16 Removal and Replacement Procedures - Compaq Armada m300 | Compaq Armada M300 Series of Personal Computers Maintenance - Page 76
release the keyboard cable from the ZIF connector – (Figure 5-15). 5. Use the connector removal tool to disconnect the keyboard cable —. 6. Remove the keyboard. Figure 5-15. Disconnecting the Keyboard Cable Reverse the above procedure to install the keyboard. Removal and Replacement Procedures 5-17 - Compaq Armada m300 | Compaq Armada M300 Series of Personal Computers Maintenance - Page 77
WARNING: Failure to unplug the power cord and to remove the battery pack before installing a memory expansion board can damage the only one memory expansion slot in the computer. Before upgrading memory, you must remove the memory board that came with the computer. 1. To remove the memory board, - Compaq Armada m300 | Compaq Armada M300 Series of Personal Computers Maintenance - Page 78
17). NOTE: All memory expansion boards supported by the computer are keyed (notched) to ensure correct positioning. 2. Push the memory expansion board down until the plastic retention clips — snap into place. 3. Replace the memory insulator, if applicable. 4. Replace the keyboard by gently pressing - Compaq Armada m300 | Compaq Armada M300 Series of Personal Computers Maintenance - Page 79
5.13 Switch Cover 1. Prepare the computer for disassembly (Section 5.5). 2. Remove the keyboard (Section 5.11). 3. Position the computer so the rear panel faces forward. 4. Remove the two screws from the rear panel of the computer that secure the - Compaq Armada m300 | Compaq Armada M300 Series of Personal Computers Maintenance - Page 80
as it will open. 7. Swing the back edge of the switch cover forward – (Figure 5-19). 8. When the switch cover disengages from the base assembly, remove the cover —. Figure 5-19. Removing the Switch Cover Reverse the above procedure to install the switch cover. Removal and Replacement Procedures 5-21 - Compaq Armada m300 | Compaq Armada M300 Series of Personal Computers Maintenance - Page 81
5.14 Display Assembly 1. Prepare the computer for disassembly (Section 5.5). 2. Remove the keyboard (Section 5.11). 3. Remove the switch cover screws are removed, the display assembly is unsupported. Make sure to support the display assembly when removing these screws. 8. Remove the display assembly - Compaq Armada m300 | Compaq Armada M300 Series of Personal Computers Maintenance - Page 82
power button and infrared lens are easily dislodged when the top cover is removed. Make note of their location and orientation before removing the top cover. 1. Prepare the computer for disassembly (Figure 5.5). 2. Remove the keyboard the Top Cover Screws Removal and Replacement Procedures 5-23 - Compaq Armada m300 | Compaq Armada M300 Series of Personal Computers Maintenance - Page 83
base assembly ˜. 11. Remove the top cover. . Figure 5-22. Removing the Top Cover Reverse the above procedure to install the top cover. Make sure the power switch and infrared lens are replaced in their appropriate locations before attempting to install the top cover. 5-24 Removal and - Compaq Armada m300 | Compaq Armada M300 Series of Personal Computers Maintenance - Page 84
connectors on the right side of the voltage converter board. 1. Prepare the computer for disassembly (Section 5.5). 2. Remove the keyboard (Section 5.11). 3. Remove the switch cover (Section 5.13). 4. Remove the display of the board to the system board first. Removal and Replacement Procedures 5-25 - Compaq Armada m300 | Compaq Armada M300 Series of Personal Computers Maintenance - Page 85
5.17 Modem Connector Board 1. Prepare the computer for disassembly (Section 5.5). 2. Remove the modem or modem/NIC card (Section 5.9). 3. Remove the keyboard (Section 5.11). 4. Remove the switch cover (Section procedure to install the modem connector board. 5-26 Removal and Replacement Procedures - Compaq Armada m300 | Compaq Armada M300 Series of Personal Computers Maintenance - Page 86
NOTE: When installing the modem connector board, make sure the fan cable is routed between the connector and the modem connector area (Figure 5-25). Do not route the cable next to the heat sink. Figure 5-25. Routing the Fan Cable Removal and Replacement Procedures 5-27 - Compaq Armada m300 | Compaq Armada M300 Series of Personal Computers Maintenance - Page 87
of the location of these screws. 1. Prepare the computer for disassembly (Section 5.5). 2. Remove the modem or modem/NIC card (Section 5.9). 3. Remove the keyboard (Section 5.11). 4. Remove the switch cover (Section 5.13 route the cables near the heat sink. 5-28 Removal and Replacement Procedures - Compaq Armada m300 | Compaq Armada M300 Series of Personal Computers Maintenance - Page 88
. 1. Prepare the computer for disassembly (Section 5.5). 2. Remove the RTC battery (Section 5.10). 3. Remove the keyboard (Section 5.11). 4. Remove . Use the connector removal tool to disconnect the left battery terminal cable –, right battery cable —, fan cable ˜, LED cable ™, and speaker cable š ( - Compaq Armada m300 | Compaq Armada M300 Series of Personal Computers Maintenance - Page 89
the base enclosure – (Figure 5-28). 12. Remove the silver screw from the heat sink —. 13. Remove the black screws from around the fan ˜, around the USB port ˜, and around the battery cable in the upper left of the board ˜. 14. Lift up the rear edge of the system board. 15. Remove the system - Compaq Armada m300 | Compaq Armada M300 Series of Personal Computers Maintenance - Page 90
6 chapter SPECIFICATIONS 6.1 Physical and Environmental Dimensions Height Depth Width Weight Standalone (Battery) Power Requirements Nominal operating voltage (Li-Ion) Nominal Operating Voltage (NiMH) Maximum Operating Power Peak Operating Power AC Adapter Weight Power Supply (Input) Operating - Compaq Armada m300 | Compaq Armada M300 Series of Personal Computers Maintenance - Page 91
150 nit AC only/80 on battery Pixel Resolution Pitch Format Configuration Backlight Character Display Total Power Consumption Refresh 800 x 600 RGB 150 nit AC only/80 on battery Pixel Resolution Pitch Format Configuration Backlight Character Display Total Power Consumption Refresh 1024 x 768 RGB - Compaq Armada m300 | Compaq Armada M300 Series of Personal Computers Maintenance - Page 92
6.3 Hard Drive Table 6-4 Hard Drives 4.3 GB 6.4 GB 12.0 GB User capacity per drive 4.3 GB 6.4 GB 12.0 GB Drive type 65 65 65 Drive height (with drive frame) Drive width .5 inches / 12.5 mm .5 inches / 12.5 mm .5 maximum) 33.3 MB/second 33.3 MB/second 33.3 MB/second Specifications 6-3 - Compaq Armada m300 | Compaq Armada M300 Series of Personal Computers Maintenance - Page 93
Latency Average Table 6-6 Diskette Drive 3.5 in (8.87 cm) On drive 0.55 in (1.40 cm) 512 18 (1.44 MB)/15 (1.2 MB) 9 80 (1.44 MB)/80 (1.2 MB) 80 2 3 ms/6 ms 94 ms/174 ms 15 ms 100 ms 6.5 Li-Ion Battery Operating Nonoperating Table 6-7 Computer Battery Pack U.S. 0.9 in 10.47 - Compaq Armada m300 | Compaq Armada M300 Series of Personal Computers Maintenance - Page 94
2, 12 cm 8 cm Table 6-8 CD-ROM Drive CD-ROM (Mode 1, 2, and 3) CD-XA ready (Mode 2, Form 1 and 2) CD-I ready (Mode 2, Form 1 and Form 2) CD-R (read only) CD Plus Photo CD (single/multisession) CD Extra Video CD CD-WO 16.6 MB/sec < 8.3 seconds < 4.0 seconds 550 MB 640 MB 180 MB Specifications 6-5 - Compaq Armada m300 | Compaq Armada M300 Series of Personal Computers Maintenance - Page 95
6.7 DVD-ROM Drive Table 6-9 DVD-ROM Specifications Applicable Disc Center Hole Diameter Disc Diameter DVD-5, DVD-9, DVD-10 CD-ROM mode 1, mode 2 CD-Digital Audio CD-XA mode 2 (Form 1, Form 2) CD-I mode 2 (Form 1 and Form 2) CD-I Ready CD-Bridge CD-R Photo CD (single/multisession) .59 in./15 mm 12 - Compaq Armada m300 | Compaq Armada M300 Series of Personal Computers Maintenance - Page 96
Audio (default)* IRQ6 Diskette drive IRQ7 Parallel IRQ8 RTC IRQ9 Coprocessor (Not available to any peripheral) IRQ14 IDE Interface (Hard Disk) Notes: PCMCIA cards may assert IRQ3, IRQ4, Alternate = DMA0, DMA3, None) DMA2 Diskette Drive DMA3 ECP Parallel Port LPT1 (Default; Alternate = - Compaq Armada m300 | Compaq Armada M300 Series of Personal Computers Maintenance - Page 97
Unused 87334 "Super IO" configuration for CPU Counter/Timer Registers Unused Keyboard Controller Port B Unused Keyboard Controller Unused NMI Enable/Real Time Clock Unused DMA Page Registers Unused in ESS1688) Unused Entertainment Audio Unused Unused Unused Unused Continued 6-8 Specifications - Compaq Armada m300 | Compaq Armada M300 Series of Personal Computers Maintenance - Page 98
- 000E7FFF Unused 000E8000 - 000FFFFF System BIOS 00100000 - 00FFFFFF Extended Memory 01000000 - 047FFFFF Super Extended Memory 04800000 - 07FFFFFF Unused 08000000 - 080FFFFF Video Memory (Direct Access) 08200000 - FFFEFFFF Unused FFFF0000 - FFFFFFFF System BIOS Specifications 6-9 - Compaq Armada m300 | Compaq Armada M300 Series of Personal Computers Maintenance - Page 99
2-11 power, 2-11 security, 2-11 design overview, 1-15 device options, 2-9 security, 2-8 diagnostics, 2-7 dimensions computer, 6-1 disassembly reference chart, 5-2 disconnecting computer, 5-4 disconnecting the computer from the mobile expansion unit, 5-3 diskette drive specifications, 6-3 drive light - Compaq Armada m300 | Compaq Armada M300 Series of Personal Computers Maintenance - Page 100
, 1-2 G grounding methods, 1-5 H hard drive, 5-8 bay illustrated, 1-10 bezel illustrated, 1-14 illustrated, 3-2, 3-5 inserting, 5-9 light illustrated, 1-8 removing, 5-8 security screw illustrated, 1-14 spare part number, 3-3, 3-5 specifications, 6-3 I-2 Index hardware updating, 2-12 headphone jack - Compaq Armada m300 | Compaq Armada M300 Series of Personal Computers Maintenance - Page 101
12 updating, 2-12 spare part numbers major components, 3-3 mass storage devices, 3-5 miscellaneous, 3-6 speaker illustrated, 1-14 specifications, 1-1 battery pack, 6-4 CD-ROM drive, 6-4, 6-5 diskette drive, 6-3 display, 6-2 DMA, 6-7 DVD-ROM drive, 6-5 environmental, 1-1 hard drive, 6-3 I/O addresses - Compaq Armada m300 | Compaq Armada M300 Series of Personal Computers Maintenance - Page 102
2-8 interrupts, 6-6 memory map, 6-9 ROM updates, 2-12 T technician notes, vii temperature specifications, 6-1 tool required for service, 1-1 top cover installing, 5-24 removing, 5-23 Touchpad illustrated, 1-9 spare part number, 3-3 transporting precautions, 1-3 troubleshooting, 1-1 checklist, 2-13
-
 1
1 -
 2
2 -
 3
3 -
 4
4 -
 5
5 -
 6
6 -
 7
7 -
8
-
9
-
10
-
11
-
12
-
13
-
14
-
15
-
16
-
17
-
18
-
19
-
20
-
21
-
22
-
23
-
24
-
25
-
26
-
27
-
28
-
29
-
30
-
31
-
32
-
33
-
34
-
35
-
36
-
37
-
38
-
39
-
40
-
41
-
42
-
43
-
44
-
45
-
46
-
47
-
48
-
49
-
50
-
51
-
52
-
53
-
54
-
55
-
56
-
57
-
58
-
59
-
60
-
61
-
62
-
63
-
64
-
65
-
66
-
67
-
68
-
69
-
70
-
71
-
72
-
73
-
74
-
75
-
76
-
77
-
78
-
79
-
80
-
81
-
82
-
83
-
84
-
85
-
86
-
87
-
88
-
89
-
90
-
91
-
92
-
93
-
94
-
95
-
96
-
97
-
98
-
99
-
100
-
101
-
102
 |
 |
Compaq Armada M300
Series of Personal Computers
Maintenance and Service Guide