Craftsman 17540 Operation Manual - Page 18
the blt Is not cutltng
 |
View all Craftsman 17540 manuals
Add to My Manuals
Save this manual to your list of manuals |
Page 18 highlights
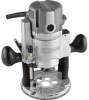
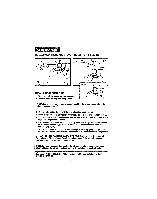
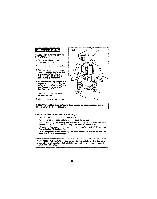
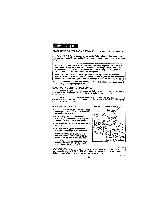
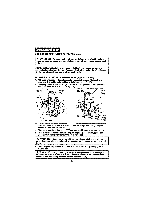
ADJUSTING DEPTH OF CUT the power source when you are assembling parts, making adjustments, Installing or removing toilets / nuts, cutter bite, cleaning or when it is not I in_usWe.ADRisNcoInNnGec:tin"g,'outhreroruotuetrershwoiullldprNevEeVnEt RoctucirdneendtalONstoarrtbinegc,ownnheicchtecdoutold cause serlous personal lnjury_ PLUNGING ACTION (Fig. 6) The plunge base feature slmplffles depth edtuatmentsand allows the cuttingblt to be accurately |owered down Into the workplacefor more preciseset-ups. To tower the catting bit, release the ptunge_lockleverby movingit "Up" to the unlocked posff!on. Apply an even downward preBsura on the plungeaction untilthe bit reaches the desired depth, then move the plunge-locklever "Down"to the locked position. To raise the bitand the plunge eotlon unlockthe plunge took Iever end the bitand plunge action wlti automatically retract from the workplace and return to the raisedposition. Always have the plungeaction In the raisedpositionand locked when the blt Is not cutltng tn the workplace. Fig. 6 S]otCutting 18
-
 1
1 -
2
-
3
-
4
-
5
-
6
-
7
-
8
-
9
-
10
-
11
-
12
-
 13
13 -
 14
14 -
 15
15 -
 16
16 -
 17
17 -
 18
18 -
 19
19 -
 20
20 -
 21
21 -
 22
22 -
 23
23 -
24
-
25
-
26
-
27
-
28
-
29
-
30
-
31
-
32
-
33
-
34
-
35
-
36
-
37
-
38
-
39
-
40
 |
 |
