Craftsman 21914 Operation Manual - Page 20
ON.Makesurespindlerotates
 |
View all Craftsman 21914 manuals
Add to My Manuals
Save this manual to your list of manuals |
Page 20 highlights
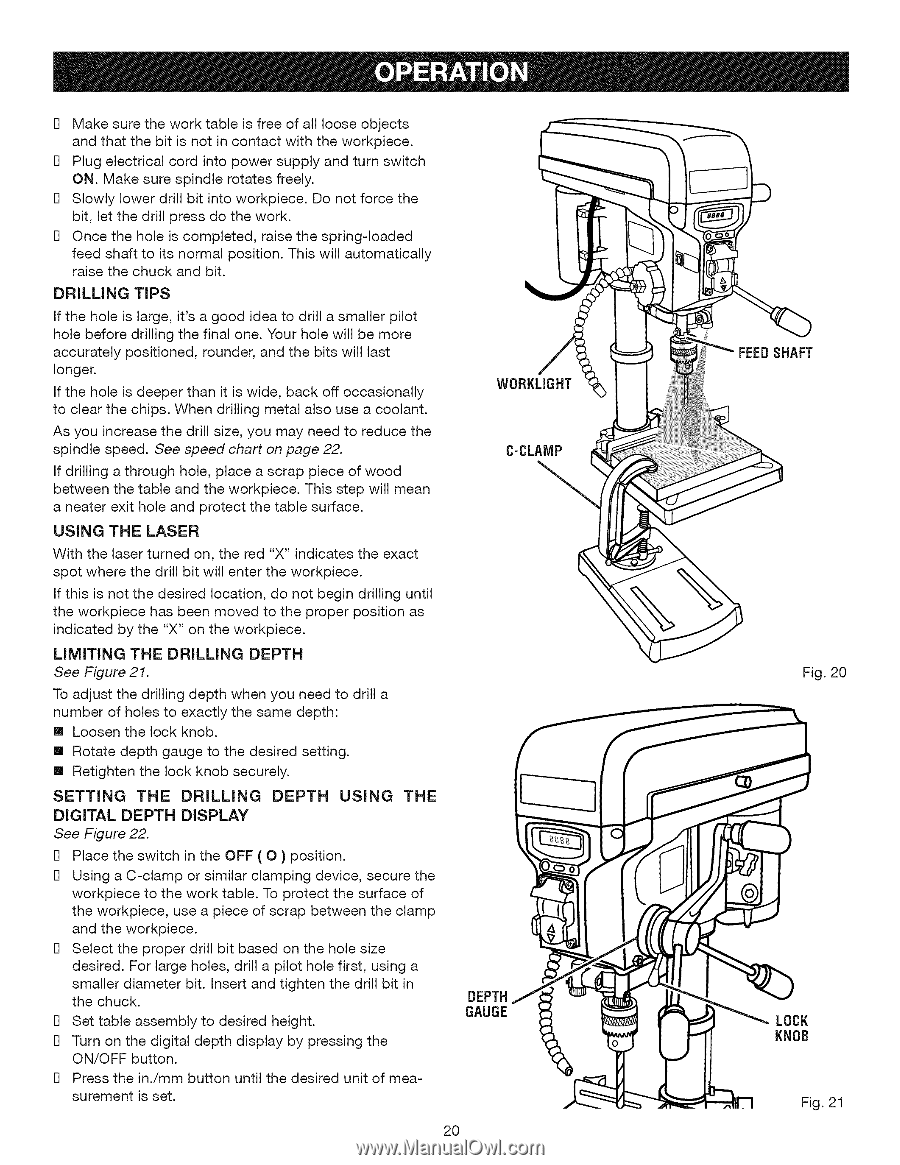
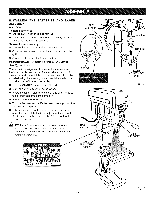
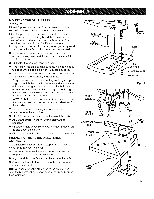
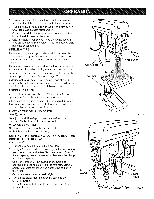
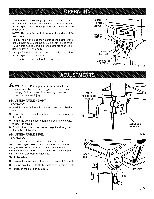
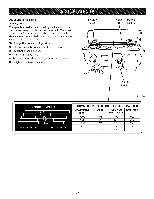
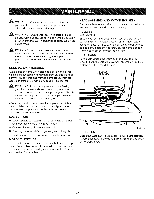
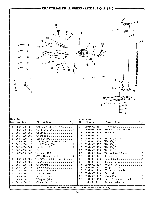
I] Makesuretheworktableisfreeofalllooseobjects andthatthebit is notincontactwiththeworkpiece. I] Plugelectricaclordintopowersupplyandturnswitch ON.Makesurespindlerotatesfreely. I] Slowlylowerdrillbit intoworkpieceD. onotforcethe bit, letthedrillpressdo thework. I] Oncethe holeis completedr,aisethespring-loaded feedshaftto itsnormapl ositionT. hiswillautomatically raisethechuckandbit. DRILLING TIPS If the hole is large, it's a good idea to drill a smaller pilot hole before drilling the final one. Your hole will be more accurately positioned, rounder, and the bits will last longer. If the hole is deeper than it is wide, back off occasionally to clear the chips. When drilling metal also use a coolant. As you increase the drill size, you may need to reduce the spindle speed. See speed chart on page 22. If drilling a through hole, place a scrap piece of wood between the table and the workpiece. This step will mean a neater exit hole and protect the table surface. USING THE LASER With the laser turned on, the red "X" indicates the exact spot where the drill bit will enter the workpiece. If this is not the desired location, do not begin drilling until the workpiece has been moved to the proper position as indicated by the "X" on the workpiece. LIMITING THE DRILLING DEPTH See Figure 21. To adjust the drilling depth when you need to drill a number of holes to exactly the same depth: [] Loosen the lock knob. [] Rotate depth gauge to the desired setting. [] Retighten the lock knob securely. SETTING THE DIGITAL DEPTH See Figure 22. DRILLING DISPLAY DEPTH USING THE Place the switch in the OFF ( O ) position. I] Using a C-clamp or similar clamping device, secure the workpiece to the work table. To protect the surface of the workpiece, use a piece of scrap between the clamp and the workpiece. I] Select the proper drill bit based on the hole size desired. For large holes, drill a pilot hole first, using a smaller diameter bit. Insert and tighten the drill bit in the chuck. I] Set table assembly to desired height. I] Turn on the digital depth display by pressing the ON/OFF button. I] Press the in./mm button until the desired unit of mea- surement is set. WOBKLIGHT C-CLAMP GAUGE DEPTH__-(_ 2O FEEDSHAFT Fig. 20 KNOB LOCK Fig. 21
-
 1
1 -
2
-
3
-
4
-
5
-
6
-
7
-
8
-
9
-
10
-
11
-
12
-
13
-
14
-
 15
15 -
 16
16 -
 17
17 -
 18
18 -
 19
19 -
 20
20 -
 21
21 -
 22
22 -
 23
23 -
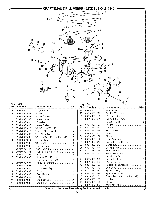 24
24 -
 25
25
 |
 |