D-Link DAP-X2810 User Manual
D-Link DAP-X2810 Manual
 |
View all D-Link DAP-X2810 manuals
Add to My Manuals
Save this manual to your list of manuals |
D-Link DAP-X2810 manual content summary:
- D-Link DAP-X2810 | User Manual - Page 1
NUCLIAS CONNECT DAP-X2810 User Guide 2021 | Business Class Networking V 1.01 - D-Link DAP-X2810 | User Manual - Page 2
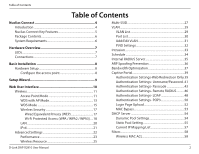
MAC Bypass 53 DHCP Server 54 Dynamic Pool Settings 54 Static Pool Setting 55 Current IP Mapping List 57 Filters 58 Wireless MAC ACL 58 D-Link DAP-X2810 User Manual 2 - D-Link DAP-X2810 | User Manual - Page 3
Date Settings 81 Configuration and System 82 System Settings 83 Help 84 Technical Specifications 85 Antenna Pattern 86 Warranty 88 Power Usage 95 Registration 96 D-Link DAP-X2810 User Manual 3 - D-Link DAP-X2810 | User Manual - Page 4
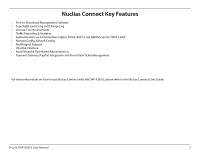
(GUI), a wealth of enhanced AP features, and a setup wizard that supports 11 languages, Nuclias Connect minimizes the hassle of deployment, configuration, and administration , while enabling more advanced Value-Added Services, such as Captive Portal or Wi-Fi Hotspot. D-Link DAP-X2810 User Manual 4 - D-Link DAP-X2810 | User Manual - Page 5
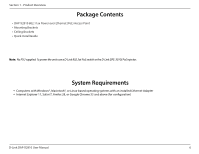
Support • Intuitive Interface • Multi-Tenant & Role-Based Administration • Payment Gateway (PayPal) Integration and Front-Desk Ticket Management For more information on how to use Nuclias Connect with the DAP-X2810, please refer to the Nuclias Connect User Guide. D-Link DAP-X2810 User Manual - D-Link DAP-X2810 | User Manual - Page 6
switch or the D-Link DPE-301GI PoE injector. System Requirements y Computers with Windows®, Macintosh®, or Linux-based operating systems with an installed Ethernet Adapter y Internet Explorer 11, Safari 7, Firefox 28, or Google Chrome 33 and above (for configuration) D-Link DAP-X2810 User Manual 6 - D-Link DAP-X2810 | User Manual - Page 7
-X2810 is working properly. 2 Power Receptor Connect the supplied power adapter. (*Note: no longer used, replaced by PoE) 3 LAN (PoE) Port Connect to a Power over Ethernet (PoE) switch or router via an Ethernet cable. 4 Console Port RJ45 console port for debug D-Link DAP-X2810 User Manual - D-Link DAP-X2810 | User Manual - Page 8
of the following methods: 1. Plug one end of your Ethernet cable into theLAN(PoE) port of the DAP-X2810, and the other end into a port on a 802.3at PoE switch. 2. Purchase a DPE-301GI Web pages. The default login information is: Username: admin Password: admin D-Link DAP-X2810 User Manual 8 - D-Link DAP-X2810 | User Manual - Page 9
use. Then click the Time Zone drop-down menu and select the appropriate time zone. y Setting System Time Manually: From the System Date drop-down menu, select the Year, Month, and Day along with the Hour the configuration and proceed to the main interface menu page. D-Link DAP-X2810 User Manual 9 - D-Link DAP-X2810 | User Manual - Page 10
Section 3 - Configuration Web User Interface The DAP-X2810 supports an elaborate web user interface where the user can configure and monitor the device. Launch a web left menu of the web GUI which contains sections called Basic Settings, Advanced Settings and Status. D-Link DAP-X2810 User Manual 10 - D-Link DAP-X2810 | User Manual - Page 11
Mode: Select Access Point from the drop-down menu. Network Name (SSID): Service Set Identifier (SSID) is the name designated for a specific wireless local area To manually select a channel, set this option to Disable and select a channel from the drop-down menu. D-Link DAP-X2810 User Manual 11 - D-Link DAP-X2810 | User Manual - Page 12
WPA-Enterprise to secure your network with the inclusion of a RADIUS server. • Select 802.1X if your network is using port-based Network Access Control. D-Link DAP-X2810 User Manual 12 - D-Link DAP-X2810 | User Manual - Page 13
AP mode is selected from the drop-down menu. Network Name (SSID): Service Set Identifier (SSID) is the name designated for a specific wireless local area provide the best wireless performance. This feature is not supported in WDS with AP mode. The channel selection Link DAP-X2810 User Manual 13 - D-Link DAP-X2810 | User Manual - Page 14
to communicate the key across the network. • Select WPA-Personal to secure your network using a password and dynamic key changes. No RADIUS server is required. D-Link DAP-X2810 User Manual 14 - D-Link DAP-X2810 | User Manual - Page 15
: WDS is selected from the drop-down menu. Network Name (SSID): Service Set Identifier (SSID) is the name designated for a specific wireless local will provide the best wireless performance. This feature is not supported in WDS mode. Channel: All devices on the network Link DAP-X2810 User Manual 15 - D-Link DAP-X2810 | User Manual - Page 16
to communicate the key across the network. • Select WPA-Personal to secure your network using a password and dynamic key changes. No RADIUS server is required. D-Link DAP-X2810 User Manual 16 - D-Link DAP-X2810 | User Manual - Page 17
consist of the numbers 0-9 and the letters A-F. *ASCII (American Standard Code for Information Interchange) is a code that represents English letters using numbers ranging from 0-127. D-Link DAP-X2810 User Manual 17 - D-Link DAP-X2810 | User Manual - Page 18
key will be valid. The default value of 3600 is recommended. Pass Phrase: When you select WPA-Personal, enter a Pass Phrase in the corresponding field. D-Link DAP-X2810 User Manual 18 - D-Link DAP-X2810 | User Manual - Page 19
port. RADIUS Secret: Enter the shared secret to be used between the radius server and the DAP to authenticate. Accounting Mode: Click the drop-down menu to enable or disable the accounting mode. . Click Configuration > Save and Activate to make changes permanent. D-Link DAP-X2810 User Manual 19 - D-Link DAP-X2810 | User Manual - Page 20
you have a DHCP server in your network, or if you wish to assign a static IP address to the DAP-X2810. When Dynamic IP (DHCP) is selected, the other fields here will be grayed out. Please allow about 2 . This is usually the local IP address of your gateway/router. D-Link DAP-X2810 User Manual 20 - D-Link DAP-X2810 | User Manual - Page 21
address manually. When Auto is selected, the other fields here will be grayed out. IPv6 Address: Enter the LAN IPv6 address used here. Prefix: Enter the LAN subnet prefix length value used here. Default Gateway: Enter the LAN default gateway IPv6 address used here. D-Link DAP-X2810 User Manual 21 - D-Link DAP-X2810 | User Manual - Page 22
, Bandwidth Optimization, Captive Portal, DHCP Server, Filters and Traffic Control . The following pages will explain settings found in the Advanced Settings section in more detail. D-Link DAP-X2810 User Manual 22 - D-Link DAP-X2810 | User Manual - Page 23
turn the wireless function On or Off. Wireless Mode: The different combination of clients that can be supported include Mixed 802.11b/g/n mode, Mixed 802.11b/g mode, 802.11n Only mode, and Mixed 802 the next window for listening to broadcast and multicast messages. D-Link DAP-X2810 User Manual 23 - D-Link DAP-X2810 | User Manual - Page 24
only mode] is selected Multicast Adjust the multicast packet data rate here. The Multicast Bandwidth Control is supported in AP mode, (2.4 GHZ and 5 GHZ) BandwidthControl: and WDS with AP mode, including Multi function if stations number is larger Unicast: than 30. D-Link DAP-X2810 User Manual 24 - D-Link DAP-X2810 | User Manual - Page 25
DAP-X2810 will not allow clients to associate with the AP. User Limit (0 - 128): This function is only available when Connection Limit is enabled. Set the maximum amount of users that are allowed access (0 - 128 users) to the device using the specified wireless band. D-Link DAP-X2810 User Manual - D-Link DAP-X2810 | User Manual - Page 26
: Click the drop-down menu to set the maximum utilization of this access point for service. The DAP-X2810 will not allow any new clients to associate with the AP if the utilization exceeds the To make the updates permanent, click Configuration > Save and Activate. D-Link DAP-X2810 User Manual 26 - D-Link DAP-X2810 | User Manual - Page 27
Section 3 - Configuration Multi-SSID The device supports up to eight multiple Service Set Identifiers. You can set the Primary SSID in the Basic > Wireless section. The improve the user experience for audio and video applications over a Wi-Fi Multimedia): network. D-Link DAP-X2810 User Manual 27 - D-Link DAP-X2810 | User Manual - Page 28
secret. Accounting Mode: Click the drop-down menu to enable or disable the accounting mode. Accounting Server: Enter the IP address of the accounting server. D-Link DAP-X2810 User Manual 28 - D-Link DAP-X2810 | User Manual - Page 29
DAP-X2810 supports VLANs. VLANs can be created with a Name and VID. Mgmt (TCP stack), LAN, Primary/Multiple SSID, and WDS connection can be assigned to VLANs as they are physical ports. Any packet which enters the DAP-X2810 Click the icon to delete the current VLAN. D-Link DAP-X2810 User Manual 29 - D-Link DAP-X2810 | User Manual - Page 30
and internal networks on a Virtual LAN (VLAN), the switch and DHCP server you are using must also support VLANs. As a prerequisite step, configure a port on the switch for handling VLAN tagged packets as : The Port VLAN Identifier is displayed in this column. D-Link DAP-X2810 User Manual 30 - D-Link DAP-X2810 | User Manual - Page 31
Name: Enter the VLAN to add or modify. Save: Click to save the updated configuration. To make the updates permanent, click Configuration > Save and Activate. D-Link DAP-X2810 User Manual 31 - D-Link DAP-X2810 | User Manual - Page 32
and Disable. VLAN Mode: Displays the current VLAN mode. PVID Auto Assign Status: Use the radio button to toggle PVID auto assign status to Enable. D-Link DAP-X2810 User Manual 32 - D-Link DAP-X2810 | User Manual - Page 33
Set as New to manually define the category type for the AP. Alternatively, click the radio button to mark all new access points as valid or rogue. Save: Click to save the updated configuration. To make the updates permanent, click Configuration > Save and Activate. D-Link DAP-X2810 User Manual 33 - D-Link DAP-X2810 | User Manual - Page 34
a day. Start Time: Enter the beginning hour and minute, using a 24-hour clock. End Time: Enter the ending hour and minute, using a 24-hour clock. D-Link DAP-X2810 User Manual 34 - D-Link DAP-X2810 | User Manual - Page 35
Section 3 - Configuration Internal RADIUS Server The DAP-X2810 features a built-in RADIUS server. Once you have finished adding a RADIUS account, click the Save Toggle the drop-down menu between Enable and Disable. RADIUS Account List: Displays the list of users. D-Link DAP-X2810 User Manual 35 - D-Link DAP-X2810 | User Manual - Page 36
entry. Delete: Click to delete the gateway entry. Save: Click to save the updated configuration. To make the updates permanent, click Configuration > Save and Activate. D-Link DAP-X2810 User Manual 36 - D-Link DAP-X2810 | User Manual - Page 37
are: Allocate average BW for each station, Allocate maximum BW for each station, Allocate different BW for 1a/b/g/n stations, and Allocte specific BW for SSID. D-Link DAP-X2810 User Manual 37 - D-Link DAP-X2810 | User Manual - Page 38
entry. Delete: Click to delete the gateway entry. Save: Click to save the updated configuration. To make the updates permanent, click Configuration > Save and Activate. D-Link DAP-X2810 User Manual 38 - D-Link DAP-X2810 | User Manual - Page 39
used in the space provided. Select to Enable or Disable the Captive Portal with its IP interface feature here. Enter the VLAN Group ID here. D-Link DAP-X2810 User Manual 39 - D-Link DAP-X2810 | User Manual - Page 40
selected entry. Delete: Click to delete the entry. Save: Click to save the updated configuration. To make the updates permanent, click Configuration > Save and Activate. D-Link DAP-X2810 User Manual 40 - D-Link DAP-X2810 | User Manual - Page 41
provided. IPIF Status: Select to Enable or Disable the Captive Portal with its IP interface feature here. VLAN Group: Enter the VLAN Group ID here. D-Link DAP-X2810 User Manual 41 - D-Link DAP-X2810 | User Manual - Page 42
entry. Delete: Click to delete the gateway entry. Save: Click to save the updated configuration. To make the updates permanent, click Configuration > Save and Activate. D-Link DAP-X2810 User Manual 42 - D-Link DAP-X2810 | User Manual - Page 43
provided. IPIF Status: Select to Enable or Disable the Captive Portal with its IP interface feature here. VLAN Group: Enter the VLAN Group ID here. D-Link DAP-X2810 User Manual 43 - D-Link DAP-X2810 | User Manual - Page 44
. Year, Month and Day selections can be made. User Limit: Enter the maximum amount of users that can use this passcode at the same time D-Link DAP-X2810 User Manual 44 - D-Link DAP-X2810 | User Manual - Page 45
selected entry. Delete: Click to delete the entry. Save: Click to save the updated configuration. To make the updates permanent, click Configuration > Save and Activate. D-Link DAP-X2810 User Manual 45 - D-Link DAP-X2810 | User Manual - Page 46
provided. IPIF Status: Select to Enable or Disable the Captive Portal with its IP interface feature here. VLAN Group: Enter the VLAN Group ID here. D-Link DAP-X2810 User Manual 46 - D-Link DAP-X2810 | User Manual - Page 47
selected entry. Delete: Click to delete the entry. Save: Click to save the updated configuration. To make the updates permanent, click Configuration > Save and Activate. D-Link DAP-X2810 User Manual 47 - D-Link DAP-X2810 | User Manual - Page 48
a DHCP server in your network, or if you wish to assign a static IP address to the DAP-X2810. When Dynamic IP (DHCP) is selected, the other fields here will be grayed out. Please allow about 2 minutes for the DHCP client to be functional once this selection is made. D-Link DAP-X2810 User Manual 48 - D-Link DAP-X2810 | User Manual - Page 49
selected entry. Delete: Click to delete the entry. Save: Click to save the updated configuration. To make the updates permanent, click Configuration > Save and Activate. D-Link DAP-X2810 User Manual 49 - D-Link DAP-X2810 | User Manual - Page 50
provided. IPIF Status: Select to Enable or Disable the Captive Portal with its IP interface feature here. VLAN Group: Enter the VLAN Group ID here. D-Link DAP-X2810 User Manual 50 - D-Link DAP-X2810 | User Manual - Page 51
selected entry. Delete: Click to delete the entry. Save: Click to save the updated configuration. To make the updates permanent, click Configuration > Save and Activate. D-Link DAP-X2810 User Manual 51 - D-Link DAP-X2810 | User Manual - Page 52
that From Local Hard Drive: will be uploaded is be displayed. Alternatively, the path can be manually entered here. Login Page Style List: Select the wireless band and login style that will be make the updates permanent, click Configuration > Save and Activate. D-Link DAP-X2810 User Manual 52 - D-Link DAP-X2810 | User Manual - Page 53
Section 3 - Configuration MAC Bypass The DAP-X2810 features a wireless MAC Bypass. Once finished editing these settings, click the Save button to let the Click to save the updated configuration. To make the updates permanent, click Configuration > Save and Activate. D-Link DAP-X2810 User Manual 53 - D-Link DAP-X2810 | User Manual - Page 54
Enter the IP address of the gateway on the network. WINS: Specify the Windows Internet Naming Service (WINS) server address for the wireless network. WINS is a system that determines the IP address make the updates permanent, click Configuration > Save and Activate. D-Link DAP-X2810 User Manual 54 - D-Link DAP-X2810 | User Manual - Page 55
new wireless devices to receive IP addresses automatically without the need to manually assign IP addresses. Select Enable to allow the DAP-X2810 to function as a DHCP server. Assigned IP: Use the mask of the IP address specified in the "IP Assigned From" field. D-Link DAP-X2810 User Manual 55 - D-Link DAP-X2810 | User Manual - Page 56
: Specify the Gateway address for the wireless network. WINS: Specify the Windows Internet Naming Service (WINS) server address for the wireless network. WINS is a system that determines the IP To make the updates permanent, click Configuration > Save and Activate. D-Link DAP-X2810 User Manual 56 - D-Link DAP-X2810 | User Manual - Page 57
DHCP-assigned static IP address of the device. Save: Click to save the updated configuration. To make the updates permanent, click Configuration > Save and Activate. D-Link DAP-X2810 User Manual 57 - D-Link DAP-X2810 | User Manual - Page 58
, click Download and to save the ACL list. Save: Click to save the updated configuration. To make the updates permanent, click Configuration > Save and Activate. D-Link DAP-X2810 User Manual 58 - D-Link DAP-X2810 | User Manual - Page 59
to configure a WLAN Partition. WLAN Partition Wireless Band: Displays the current wireless band. Link Integrity: Select Enable or Disable. If the Ethernet connection between the LAN and the AP To make the updates permanent, click Configuration > Save and Activate. D-Link DAP-X2810 User Manual 59 - D-Link DAP-X2810 | User Manual - Page 60
Download and to save the IP filter list. Save: Click to save the updated configuration. To make the updates permanent, click Configuration > Save and Activate. D-Link DAP-X2810 User Manual 60 - D-Link DAP-X2810 | User Manual - Page 61
Bandwidth: The uplink bandwidth in Mbits per second. Click to save the updated configuration. Save: To make the updates permanent, click Configuration > Save and Activate. D-Link DAP-X2810 User Manual 61 - D-Link DAP-X2810 | User Manual - Page 62
- Configuration QoS Quality of Service (QoS) enhances the experience of using a network by prioritizing the traffic of different applications. The DAP-X2810 supports four priority levels. Once the make the updates permanent, click Configuration > Save and Activate. D-Link DAP-X2810 User Manual 62 - D-Link DAP-X2810 | User Manual - Page 63
: Enter the uplink speed in Mbits per second. Save: Click to save the updated configuration. To make the updates permanent, click Configuration > Save and Activate. D-Link DAP-X2810 User Manual 63 - D-Link DAP-X2810 | User Manual - Page 64
can also view statistics about client information, WDS information and more. The following pages will explain settings found in the Status section in more detail. D-Link DAP-X2810 User Manual 64 - D-Link DAP-X2810 | User Manual - Page 65
and wireless parameters, as well as the information regarding CPU and memory utilization. Device Information: This read-only window displays the configuration settings of the DAP-X2810, including the firmware version and the device's MAC address. D-Link DAP-X2810 User Manual 65 - D-Link DAP-X2810 | User Manual - Page 66
client's signal strength. Power Saving Mode: Displays the status of the power-saving feature. System Info: Displays the associated clients'OS information for the network. D-Link DAP-X2810 User Manual 66 - D-Link DAP-X2810 | User Manual - Page 67
to the DAP-X2810. Name: Displays the SSID of the client. MAC: Displays the MAC address of the client. Authentication: Displays the type of authentication being used. Signal: Displays the client's signal strength. Status: Displays the status of the WDS link. D-Link DAP-X2810 User Manual 67 - D-Link DAP-X2810 | User Manual - Page 68
Section 3 - Configuration Channel Analyze Wireless Band: Select either 2.4Ghz or 5GHz. Detect: Click the Detect button to scan. AP List: This will list the transmitting channels and quality. D-Link DAP-X2810 User Manual 68 - D-Link DAP-X2810 | User Manual - Page 69
Section 3 - Configuration Statistics Ethernet Traffic Statistics Displays wired interface network traffic information. Ethernet Traffic Statistics: This page displays transmitted and received count statistics for packets and bytes. D-Link DAP-X2810 User Manual 69 - D-Link DAP-X2810 | User Manual - Page 70
error information for the AP network. WLAN Traffic Statistics: This page displays wireless network statistics for data throughput, transmitted and received frames, and frame errors. D-Link DAP-X2810 User Manual 70 - D-Link DAP-X2810 | User Manual - Page 71
limited to the following items: cold start AP, upgrading firmware, client association with APs, and web login. The web page holds up to 500 logs. D-Link DAP-X2810 User Manual 71 - D-Link DAP-X2810 | User Manual - Page 72
of the syslog server Settings: you would like to send the DAP-X2810 log to. E-mail Notification: Support Simple Mail Transfer Protocol for log schedule and periodical change key. It can not support Gmail SMTP port 465. Please set to Gmail SMTP port 25 or 587. D-Link DAP-X2810 User Manual 72 - D-Link DAP-X2810 | User Manual - Page 73
-down menu to set the email log schedule. Save: Click to save the updated configuration. To make the updates permanent, click Configuration > Save and Activate. D-Link DAP-X2810 User Manual 73 - D-Link DAP-X2810 | User Manual - Page 74
can also view statistics about client information, WDS information and more. The following pages will explain settings found in the maintenance section in more detail. D-Link DAP-X2810 User Manual 74 - D-Link DAP-X2810 | User Manual - Page 75
IP address. IP Range: Enter the IP address range that the administrator will be allowed to log in from and then click the Add button. D-Link DAP-X2810 User Manual 75 - D-Link DAP-X2810 | User Manual - Page 76
the device. The default name is dapx2810. Location: The physical location of the device, e.g. 72nd Floor, D-Link HQ. MDNS Name : The MDNS name of the device. The default MDNS name is dapx2810. Login Settings Set to 1 Min, 3 Mins, 5 Mins, 10 Mins, 15 Mins or Never. D-Link DAP-X2810 User Manual 76 - D-Link DAP-X2810 | User Manual - Page 77
is enabled by default. Uncheck the box to disable DDP control. Country Setting Select a Country: Choose from drop down list country where device is located. D-Link DAP-X2810 User Manual 77 - D-Link DAP-X2810 | User Manual - Page 78
Connect. Note: To save the new configuration settings to the firmware, click Configuration > Save and Activate, otherwise click Discard Changes to delete any setting change. D-Link DAP-X2810 User Manual 78 - D-Link DAP-X2810 | User Manual - Page 79
bugs and allows for new features to be added to this product. Please go to your local D-Link website to see if there is a newer version firmware available. Firmware and SSL You can upload files the certification and click "Open" and "Upload" to complete the upgrade. D-Link DAP-X2810 User Manual 79 - D-Link DAP-X2810 | User Manual - Page 80
to the saved Nuclias Connect Network file you have in your local drive and click "Open" and "Upload" to upload the Nuclias Connect Network file . D-Link DAP-X2810 User Manual 80 - D-Link DAP-X2810 | User Manual - Page 81
Saving Saving: Time. Set the Date and Time Manually: A user can either manually set the time for the AP here, or click the Copy Your Computer's Time Settings button to copy the time from the computer in use (Make sure that the computer's time is set correctly). D-Link DAP-X2810 User Manual 81 - D-Link DAP-X2810 | User Manual - Page 82
from the access point's web configuration. Help allows the user to read more about the given options to configure without the need to consult the manual. The following pages will explain settings found in the configuration and system section in more detail. D-Link DAP-X2810 User Manual 82 - D-Link DAP-X2810 | User Manual - Page 83
or clear the added language pack. Restart the Device: Click Restart to restart the DAP-X2810. Restore to Factory Default Click Restore to restore the DAP-X2810 Settings: back to factory default settings. Clear Language Pack: Click to clear the current language pack. D-Link DAP-X2810 User Manual 83 - D-Link DAP-X2810 | User Manual - Page 84
Section 3 - Configuration Help The help page is useful to view a brief description of a function available on the access point in case the manual is not present. Help: Scroll down the Help page for topics and explanations. D-Link DAP-X2810 User Manual 84 - D-Link DAP-X2810 | User Manual - Page 85
to 5.85 GHz Operating Voltage • 12V/2.5A or 802.3at PoE Antenna Type • Two Dual Band Internal Antennas (2.4Ghz 3.2dBi & 5Ghz 4.3dBi) LEDs • Power/Status D-Link DAP-X2810 User Manual 85 - D-Link DAP-X2810 | User Manual - Page 86
Appendix D - Antenna Pattern Antenna Pattern Orientation 2.4 GHz Wall Mounted X Antenna Pattern H-Plane E-Plane Wall (E-Plane) Z Floor (H-Plane) Y 5 GHz Wall Mounted X Wall (E-Plane) Z Floor (H-Plane) Y D-Link DAP-X2810 User Manual 86 - D-Link DAP-X2810 | User Manual - Page 87
Appendix D - Antenna Pattern Antenna Pattern Orientation 2.4 GHz Ceiling Mounted Ceiling (E-Plane) X H-Plane Z Floor (H-Plane) Y 5 GHz Ceiling Mounted Ceiling (E-Plane) X E-Plane Z Floor (H-Plane) Y D-Link DAP-X2810 User Manual 87 - D-Link DAP-X2810 | User Manual - Page 88
Link at an Authorized D-Link Service Office. The replacement Link upon return to D-Link of the defective Hardware. All Hardware or part thereof that is replaced by D-Link, or for which the purchase price is refunded, shall become the property of D-Link upon replacement or refund. D-Link DAP-X2810 User Manual - D-Link DAP-X2810 | User Manual - Page 89
product) if the product is not registered. • The customer must obtain a Case ID Number from D-Link Technical Support (USA 1-877-453-5465 or Canada 1-800-361-5265), who will attempt to assist the customer in .com/ (USA only) or https://rma.dlink.ca (Canada only). D-Link DAP-X2810 User Manual 89 - D-Link DAP-X2810 | User Manual - Page 90
or services provided by anyone other than D-Link; and Products that have been purchased from inventory clearance or liquidation sales or other sales in which D-Link, the sellers, or the liquidators expressly disclaim their warranty obligation pertaining to the product. D-Link DAP-X2810 User Manual - D-Link DAP-X2810 | User Manual - Page 91
/D-Link Systems, Inc. Other trademarks or registered trademarks are the property of their respective owners. Copyright Statement: No part of this publication or documentation accompanying this product may be reproduced in any form or by any means or used to make any D-Link DAP-X2810 User Manual - D-Link DAP-X2810 | User Manual - Page 92
radiate radio frequency energy and, if not installed and used in accordance with the instructions, may cause harmful interference to radio communications. However, there is no guarantee that interference specified in Part 15E, Section 15.407 of the FCC Rules. D-Link DAP-X2810 User Manual 92 - D-Link DAP-X2810 | User Manual - Page 93
applicable to products purchased outside the United States, please contact the corresponding local D-Link office. This device and it's antennas(s) must not be co-located or produire de brouillage, et (2) l'utilisateur de l'appareil doit accepter tout brouillage D-Link DAP-X2810 User Manual 93 - D-Link DAP-X2810 | User Manual - Page 94
és uniquement pour une utilisation à l'intérieur afin de réduire les risques de brouillage préjudiciable aux systèmes de satellites mobiles utilisant les mêmes canaux. D-Link DAP-X2810 User Manual 94 - D-Link DAP-X2810 | User Manual - Page 95
Appendix F - Power Usage Power Usage This device is an Energy Related Product (ErP) with High Network Availability (HiNA), and automatically switches to a power-saving Network Standby mode within 1 minute of no packets being transmitted. Network Standby: 4.838 watts D-Link DAP-X2810 User Manual 95 - D-Link DAP-X2810 | User Manual - Page 96
Appendix G - Registration Registration Product registration is entirely voluntary and failure to complete or return this form will not diminish your warranty rights. D-Link DAP-X2810 User Manual 96
-
 1
1 -
 2
2 -
 3
3 -
 4
4 -
 5
5 -
 6
6 -
 7
7 -
8
-
9
-
10
-
11
-
12
-
13
-
14
-
15
-
16
-
17
-
18
-
19
-
20
-
21
-
22
-
23
-
24
-
25
-
26
-
27
-
28
-
29
-
30
-
31
-
32
-
33
-
34
-
35
-
36
-
37
-
38
-
39
-
40
-
41
-
42
-
43
-
44
-
45
-
46
-
47
-
48
-
49
-
50
-
51
-
52
-
53
-
54
-
55
-
56
-
57
-
58
-
59
-
60
-
61
-
62
-
63
-
64
-
65
-
66
-
67
-
68
-
69
-
70
-
71
-
72
-
73
-
74
-
75
-
76
-
77
-
78
-
79
-
80
-
81
-
82
-
83
-
84
-
85
-
86
-
87
-
88
-
89
-
90
-
91
-
92
-
93
-
94
-
95
-
96
 |
 |

NUCLIAS CONNECT
DAP-X2810 User Guide
V 1.01
2021
|
Business Class Networking