D-Link DNR-326 User Manual
D-Link DNR-326 Manual
 |
View all D-Link DNR-326 manuals
Add to My Manuals
Save this manual to your list of manuals |
D-Link DNR-326 manual content summary:
- D-Link DNR-326 | User Manual - Page 1
- D-Link DNR-326 | User Manual - Page 2
herein are trademarks or registered trademarks of their respective companies. Copyright © 2011 by D-Link Corporation. All rights reserved. This publication may not be reproduced, in whole or in part, without prior expressed written permission from D-Link Corporation. D-Link DNR-326 User Manual i - D-Link DNR-326 | User Manual - Page 3
Multiple View 51 Playback 52 Record and Playback Settings 55 Search the Recorded Video For Playback 57 Smart Search from the Recorded Video 59 Recorded Video Enhancement 61 Save Video 62 Save Image 63 Print Image 64 Print Setup 64 Backup Recorded Video 65 D-Link DNR-326 User Manual ii - D-Link DNR-326 | User Manual - Page 4
Playback Manager Application 68 Set Connections to the Units 70 Backup and File Manager Application 71 Verification Tool 73 Verify Image / Video 74 Troubleshooting 75 Choose a RAID Level 77 Replacing or Adding a New Hard Drive 79 Technical Specifications 80 D-Link DNR-326 User Manual iii - D-Link DNR-326 | User Manual - Page 5
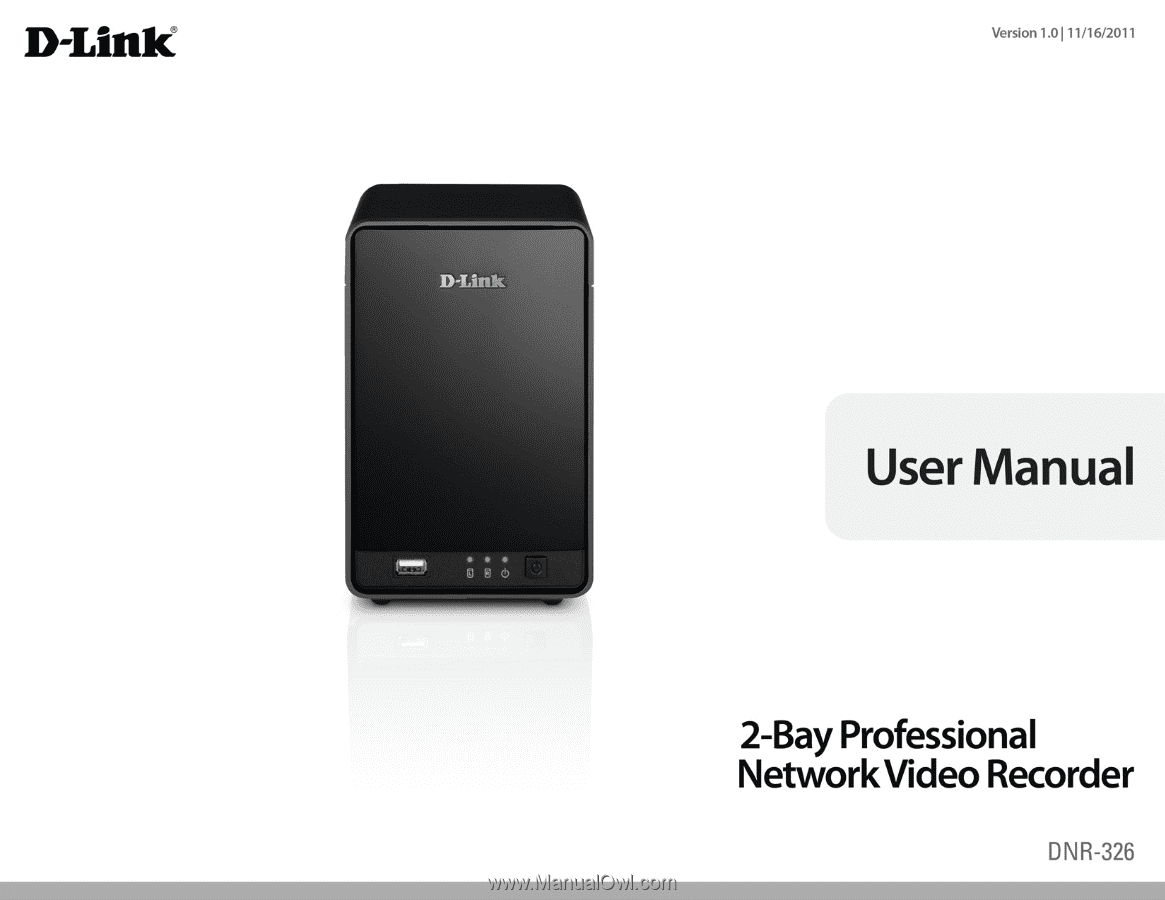
Section 1 - Product Overview Package Contents • D-Link DNR-326 2-Bay Professional Network Video Recorder (NVR) • CAT5 Ethernet Cable • Power Adapter • Cable Holder • Manual and Software on CD • Quick Installation Guide Note: Using a power supply with a different voltage than the one included with - D-Link DNR-326 | User Manual - Page 6
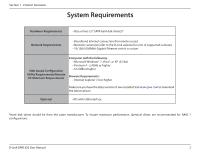
hard disk drive(s)* Network Requirements • Broadband Internet connection (for remote access) • Network camera(s) (refer to the D-Link website for a list of supported cameras) • 10/100 maximum performance, identical drives are recommended for RAID 1 configurations. D-Link DNR-326 User Manual 2 - D-Link DNR-326 | User Manual - Page 7
Section 1 - Product Overview Introduction Congratulations on your purchase of the DNR-326 2-bay Professional NVR. The DNR-326 is a standalone wired Network Video Recorder (NVR) which supports D-Link multi-channel network cameras, as well as those of other top brands, with M-JPEG, MPEG4, or H.264 - D-Link DNR-326 | User Manual - Page 8
recording for vivid video with high clarity. Complete Network Functionality • PPPoE Support: The D-Link NVR utilizes ADSL services. It can connect to the Internet via an ADSL modem over Ethernet. • DDNS Support: Dynamic DNS is a solution for users without a fixed IP address. With DDNS service - D-Link DNR-326 | User Manual - Page 9
is another key configuration feature of the NVR. The NVR can monitor all of the camera triggers from motion detection. One of the most powerful functions is the notification application. The NVR centrally controls the e-mail and recording of all the connected cameras. D-Link DNR-326 User Manual 5 - D-Link DNR-326 | User Manual - Page 10
PC, the NVR can also print the selected still image. • Smart Search: Users can search through footage by setting specific criteria such as motion detection or lost focus. • Four-channel Playback: Four channels of video footage can be played and viewed simultaneously. D-Link DNR-326 User Manual 6 - D-Link DNR-326 | User Manual - Page 11
Power Button Drive LED Power LED COMPONENT Power Button Power LED Drive LED USB Port DESCRIPTION Press once to power on the NVR. Press and hold the button until the LED begins to blink to power down the NVR. Power a drive has failed. USB port for UPS status updates. D-Link DNR-326 User Manual 7 - D-Link DNR-326 | User Manual - Page 12
the device to the local network. The port is equipped with both a LAN LINK (R) and Traffic LED (L) to indicate connectivity and traffic respectively to the local LAN This lock can be used to tie the DNR-326 to the desk to prevent theft. Cables are sold separately. D-Link DNR-326 User Manual 8 - D-Link DNR-326 | User Manual - Page 13
is unlatched, pull it off the device bay. Slide either one or two hard drives into the open hard drive bays of your device. Align the drives with the grooves in the enclosure and insert one or two 3.5" SATA hard drives into the drive bays until they are firmly seated. D-Link DNR-326 User Manual 9 - D-Link DNR-326 | User Manual - Page 14
Section 3 - Installation Once the hard drives are installed, you can reattach the top cover. Use a standard CAT5E Ethernet cable with a RJ-45 connector to connect your NVR to your network. D-Link DNR-326 User Manual 10 - D-Link DNR-326 | User Manual - Page 15
Section 3 - Installation Connect the power adapter to the power receptor on the back of the device. Press the power button located under the faceplate LEDs to turn on the device. D-Link DNR-326 User Manual 11 - D-Link DNR-326 | User Manual - Page 16
) and click OK. When the autorun screen appears, click NVR Search Utility. Step 2: Highlight an available NVR and click Configuration to access the NVR's web User Interface. For more detailed configuration instructions, please refer to the user manual on the CD-ROM. D-Link DNR-326 User Manual 12 - D-Link DNR-326 | User Manual - Page 17
to the NVR IP address, you can use the NVR Search Utility provided on the product CD to locate the device on your network and make any needed changes. Network Video The D-Link NVR Search Utility displays any NVR devices it detects on the Recorder: network. Refresh: Click to refresh the device list - D-Link DNR-326 | User Manual - Page 18
. Note: The computer used to access the NVR web-based configuration manager must be on the same subnet as the NVR. If your network is using a DHCP server and the computer receives IP settings from the DHCP server, the NVR will automatically be in the same subnet. D-Link DNR-326 User Manual 14 - D-Link DNR-326 | User Manual - Page 19
, while JBOD combines both disks into a single volume. See page 37 for more details on using the RAID configurations. Note: Refer to page 34 for instructions on how to change the password of your admin account. D-Link DNR-326 User Manual 15 - D-Link DNR-326 | User Manual - Page 20
ID and password, NVR will add the camera(s) but it will not be able to connect and record. You can change the settings in the NVR Setup page. Click Exit Wizard to finish the auto search. Type admin for the username and leave the password field blank. Click Login D-Link DNR-326 User Manual 16 - D-Link DNR-326 | User Manual - Page 21
Section 3 - Configuration After login, you will be redirected to the NVR web UI: D-Link DNR-326 User Manual 17 - D-Link DNR-326 | User Manual - Page 22
and RAID configuration options. System configuration, backup, and restore functions are also available. • STATUS - Contains system, NVR, and event logs. These categories and their configuration options will be discussed in detail in the following pages of this manual. D-Link DNR-326 User Manual 18 - D-Link DNR-326 | User Manual - Page 23
and messages for event notification. Step 2: Event Setup - Configure event options with various combinations. Events can be triggered in the event of camera motion detection or full hard disk warning. An event action can be configured to send e-mail. D-Link DNR-326 User Manual 19 - D-Link DNR-326 | User Manual - Page 24
you may need to contact your ISP. The connection status will be determined automatically by the system. Enable or disable the DHCP server. If your network DHCP server: doesn't have DHCP server, enable NVR DHCP server for easier local network setup. D-Link DNR-326 User Manual 20 - D-Link DNR-326 | User Manual - Page 25
click Search again if cameras are not immediately displayed. Step 4: Click Add to add the selected camera. Step 5: After clicking Add, the updated information will be displayed in the camera list. Step 6: Repeat steps 2 through 5 to add other cameras onto your list. D-Link DNR-326 User Manual 21 - D-Link DNR-326 | User Manual - Page 26
Auto Detection: If you have already input the camera IP, you may simply click this button to automatically detect camera information (such as the channel, protocol, vendor, and model number). Note: Some cameras will limit the login authority to the administrator only. D-Link DNR-326 User Manual 22 - D-Link DNR-326 | User Manual - Page 27
should be configured via the camera web interface to enable the NVR to receive the trigger message. Step 3: Click the Save Settings button. Note: The system will adjust the frame rate automatically based on the maximum frame rate which that camera can support. D-Link DNR-326 User Manual 23 - D-Link DNR-326 | User Manual - Page 28
setting Maximum Connections in Live Streaming Server settings, 1 connection means that 1 user can connect to 1 camera only. If the maximum number of connections is 16 and if each user connects to 4 cameras, then the maximum number of connected users is 4 and not 16. D-Link DNR-326 User Manual 24 - D-Link DNR-326 | User Manual - Page 29
empty disk space Overwrite: when the disk space is full. This will overwrite the earliest recorded video with the latest video one day at a time. Store Videos by Set the duration to store recorded video clips. After Schedule: the duration, the clips will be purged. D-Link DNR-326 User Manual 25 - D-Link DNR-326 | User Manual - Page 30
Insert: Insert new schedules. Delete: Delete the selected schedule. Configure: Modify the schedule and recording mode setting. Copy: Copy the current Day Schedule to other channel(s); copy the current Week Schedule to other day(s) of a week or to other channel(s). D-Link DNR-326 User Manual 26 - D-Link DNR-326 | User Manual - Page 31
disconnect the camera from the NVR and then re-connect it to update all new changes. • Alternatively users can drag the time bar to change the recording period. The red bar represents the Always Record feature and the blue bar represents the Event Recording feature. D-Link DNR-326 User Manual 27 - D-Link DNR-326 | User Manual - Page 32
Setup Step 1: Select an event below. Hard Disk When the Overwrite function is not enabled, NVR Space Full: will stop recording when HDD full. Step 2: Click the Add button to setup the actions of the event. necessary. Step 4: Repeat step 2 through 3 to add more actions. D-Link DNR-326 User Manual 28 - D-Link DNR-326 | User Manual - Page 33
recorded video of the previous date. Camera: Select the channel(s) to backup. Note: The system backs up recorded video files one by one. If the connection between the unit and FTP server is normal, but there are some FTP problems be resumed so no file would be skipped. D-Link DNR-326 User Manual 29 - D-Link DNR-326 | User Manual - Page 34
. Password: The password to log in to the FTP server. Folder: The folder format is "FolderName", "FolderName/SubFolderName", and so on. Test Backup After setting up all the information, click the Test FTP button and the system will create a folder to FTP. Server: D-Link DNR-326 User Manual 30 - D-Link DNR-326 | User Manual - Page 35
2: Insert the e-mail address of this new contact. Step 3: Click the Add Contact button. Step 4: Click the Save Settings button to save the new contact list. D-Link DNR-326 User Manual 31 - D-Link DNR-326 | User Manual - Page 36
to apply the settings. NTP Server: Select or enter an NTP Server here. An NTP Server is a server on the Internet that maintains time. The NVR will contact the server you entered and receive the correct time. Click Save Settings after entering an NTP Server. D-Link DNR-326 User Manual 32 - D-Link DNR-326 | User Manual - Page 37
Setting a password after the first login is strongly recommended. If the administrator password is lost, you may hold the reset button on the rear panel of the device to reset the NVR to factory defaults. Please note this will erase all the previously saved settings. D-Link DNR-326 User Manual 33 - D-Link DNR-326 | User Manual - Page 38
the password of the user. Type the password again to confirm. Step 3: Click the Finish button to save. Click Exit to abort. Delete A User Step 1: Select the user name you want to delete and click Delete button. Step 2: In the confirmation box, click the OK button. D-Link DNR-326 User Manual 34 - D-Link DNR-326 | User Manual - Page 39
and Playback pages, the NVR will keep track of the idle time when there is no action taken by the user. After a certain period of time, it will then force the user to log out and request the user to log in again for security concerns. Change the idle time period here. D-Link DNR-326 User Manual 35 - D-Link DNR-326 | User Manual - Page 40
firmware update must be saved on the local hard drive of your computer. Click the Browse button to search the local hard drive for the firmware update file. Click Apply to upgrade. You can check for firmware updates on the D-Link Support Page at http://support.dlink.com. D-Link DNR-326 User Manual - D-Link DNR-326 | User Manual - Page 41
about the installed HDD will then be displayed. Step 2: Click Next to select a new RAID configuration. Note: All data will be lost during this process. D-Link DNR-326 User Manual 37 - D-Link DNR-326 | User Manual - Page 42
is available as a File (Samba) Server. Use the NVR Search utility to mount the File Server to your Windows system manually rebuild by clicking the Rebuild button in the RAID Configuration section. Note: Rebuilding the volume will erase all data on the newly inserted drive. D-Link DNR-326 User Manual - D-Link DNR-326 | User Manual - Page 43
that key in all three fields. Password or Enter the password or key provided by your Key: service provider. Verify Password or Re-type the password or key provided by your Key: service provider. Status: Displays the current status of connection to the DDNS server. D-Link DNR-326 User Manual 39 - D-Link DNR-326 | User Manual - Page 44
or bitrate setting in the camera web GUI accordingly. Disk Status: Shows the hard drive space and estimated remaining recording time status. Note: The recording time information is estimated by current bit rate. This may change each time a user refreshes this page. D-Link DNR-326 User Manual 40 - D-Link DNR-326 | User Manual - Page 45
the local network settings of the NVR. Information: Device Displays the device name and current temperature Information: of the NVR. Hard Drive Displays the hard drive information, including the Information: disk mode, total size, used and remaining drive space. D-Link DNR-326 User Manual 41 - D-Link DNR-326 | User Manual - Page 46
System Log This page displays the system event list of your NVR. The System Log is different from the NVR Log as it includes the following items: 1. User login/logout 2. Modify/delete account 3. System restart 4. System reset to default 5. System firmware update D-Link DNR-326 User Manual 42 - D-Link DNR-326 | User Manual - Page 47
NVR Log The NVR Log displays the event log information for your NVR device. NVR Log: Displays the NVR log information such as stop recording or NVR system start. NVR Event Displays the event log information such as Log: motion detection or lost camera connection. D-Link DNR-326 User Manual - D-Link DNR-326 | User Manual - Page 48
Section 3 - Configuration Support The NVR Help page provides a list of support topics. D-Link DNR-326 User Manual 44 - D-Link DNR-326 | User Manual - Page 49
on the video and select the snapshot function to capture a specific video image immediately. 6. Right clicking on the video will show the option to Toggle to Full Screen. Press the ESC button on the keyboard to return to normal display. Drag and Drop or double click D-Link DNR-326 User Manual 45 - D-Link DNR-326 | User Manual - Page 50
PTZ camera control panel to adjust the camera's view. This is only available with Control: cameras that support the PTZ function. Zoom: Click the + or - button to zoom in or zoom out. This option is only available with cameras that support the optical zoom function. D-Link DNR-326 User Manual 46 - D-Link DNR-326 | User Manual - Page 51
button to play/stop/disconnect a particular channel. Information Display Display video information including camera name, video status, and bit rate for a selected channel. Window: Manual Record: Click to start recording immediately. Click again to stop recording. D-Link DNR-326 User Manual 47 - D-Link DNR-326 | User Manual - Page 52
camera OSD option. 2. Set the foreground and background settings of the OSD. 3. Select which kinds of information will be displayed on the screen. 4. Click the Apply button to preview the result. 5. Click the Default button to back to the default settings if necessary. D-Link DNR-326 User Manual - D-Link DNR-326 | User Manual - Page 53
crystal ball with recording status on monitor display. 2. Check Show camera event to display the words of detected camera events on the correspondent screen. 3. Check Popup system event to pop up system event message dialog as a warning when a system event occurred. D-Link DNR-326 User Manual 49 - D-Link DNR-326 | User Manual - Page 54
can choose the function from the drop-down menu for the button of the joystick. Parameter: Choose the preset point from the drop-down menu. Default: Click to go back to default settings. Import: Click to import the settings. Export: Click to export the settings. D-Link DNR-326 User Manual 50 - D-Link DNR-326 | User Manual - Page 55
PTZ, users are able to enlarge different spots and view them in different channels while recording the whole view. Connect/ Click to connect or disconnect the designated camera. Disconnect: Connect All/ Click to connect or disconnect all cameras. Disconnect All: D-Link DNR-326 User Manual 51 - D-Link DNR-326 | User Manual - Page 56
the Open Record button. Step 4: The Record Display Window will show information about the available video clips. Select the date you would like to find the video records. Step 5: Highlight the video records that you would like to review. Step 6: Click the OK button. D-Link DNR-326 User Manual 52 - D-Link DNR-326 | User Manual - Page 57
the keyboard to return to normal display. Information Display video date and time, cue in/ out points, time and speed. Window: Audio Volume Adjust the sound level. Control : Digital Zoom: Click the icon to digitally zoom in or out. Every camera can use this function. D-Link DNR-326 User Manual 53 - D-Link DNR-326 | User Manual - Page 58
/Reverse Play/Stop/Pause: Select a camera/video and click this button to play/stop Video. Step Forward/Reverse: Click to pause the playback and move to next frame or last frame. Fast Forward/Reverse: Click to pause the playback and move to next minute or last minute. D-Link DNR-326 User Manual - D-Link DNR-326 | User Manual - Page 59
where motion mode: is recorded. Next Interval: Set the interval for the video to go forward when you click the Forward button on the control panel. Previous Interval: Set the interval for the video to go back when you click the Reverse button on the control panel. D-Link DNR-326 User Manual 55 - D-Link DNR-326 | User Manual - Page 60
, the system will autmatically save the image accordingly when the image file: you click the Save Image button in the control panel. Miscellaneous Check Synchronize video frames to avoid the tearing problem occurring in video display while increasing the CPU loading. D-Link DNR-326 User Manual 56 - D-Link DNR-326 | User Manual - Page 61
Show Records Time Table Record Display Window: Display the available recorded video records. Date Time Period: Select the start and end points that indicate the time period you would like to view. Video Preview: Check the Enable Preview option to view the selected video. D-Link DNR-326 User Manual - D-Link DNR-326 | User Manual - Page 62
cameras you would like to play back. Step 6: Click the OK button to begin playback. Note: The Record Display Window can be shown in (a) calendar view or (b) list control view. To modify the settings of the record display window, click the Setting button at the right of the page. D-Link DNR-326 User - D-Link DNR-326 | User Manual - Page 63
will only be triggered when the movement lasts for a longer period of time. 4. Select the Stop when found option. If unchecked, the search tool will list all the events it found, instead of stopping at the moment the event was found. 5. Click the Search button. D-Link DNR-326 User Manual 59 - D-Link DNR-326 | User Manual - Page 64
, the search tool will list all the events it found, instead of stopping at the moment the event found. 5. Click the Search button. Lose Focus The system will inform you when the camera(s) loses focus. Camera Occlusion The alarm triggers when the camera is blocked. D-Link DNR-326 User Manual 60 - D-Link DNR-326 | User Manual - Page 65
3 - Configuration Recorded Video Enhancement During playback, users can click the Enhancement button to enable post processing of the selected video. General Setting image in black and white. Default: Reset settings to their defaults. OK: Apply the modifications. D-Link DNR-326 User Manual 61 - D-Link DNR-326 | User Manual - Page 66
5: Choose the export format. Step 6: Choose the use profile. Step 7: Select the Export Audio option if the video has audio and you would like to export the audio with the video. Step 8: Click the OK button. Note: The .asf format is recommended for exporting video. D-Link DNR-326 User Manual 62 - D-Link DNR-326 | User Manual - Page 67
Section 3 - Configuration Save Image Step 1: During playback, users can choose to save an image from a selected camera. Step 2: Click the Save Image button when the desired image is -selecting a folder and format for images. See the Setting option for more details. D-Link DNR-326 User Manual 63 - D-Link DNR-326 | User Manual - Page 68
Section 3 - Configuration Print Image Step 1: During playback, the user can choose to print a selected image. Step 2: Click the Print button when the desired image is shown on Align Image: Align to the top, center, or bottom of the page. Step 4: Click the Print button. D-Link DNR-326 User Manual 64 - D-Link DNR-326 | User Manual - Page 69
and End Time that you would like to backup. Step 4: Select the cameras that you would like to backup. Step 5: Select the directory where you would like to backup the data to. Step 6: Click the Backup button. The system will then begin the backup process automatically. D-Link DNR-326 User Manual 65 - D-Link DNR-326 | User Manual - Page 70
, Display video current status, and bit rate for a selected Window: channel. Playback: View playback video remotely. Snapshot: Select the snapshot function to capture a specific video image immediately. Remote I/O: Users can remotely adjust the external I/O device. D-Link DNR-326 User Manual 66 - D-Link DNR-326 | User Manual - Page 71
this group. Step 5: Highlight the camera(s) that you would like to add into this group and then click the - D-Link DNR-326 | User Manual - Page 72
zoom in or digital zoom out the view. Every camera can use this function. Play/Stop/ Select a camera/video and click this button to play/stop/pause Pause: a particular channel. Speed: Click the + or - button to increase or decrease the playback speed. D-Link DNR-326 User Manual Remote Server 68 - D-Link DNR-326 | User Manual - Page 73
: Step forward/ Reverse: Fast forward/ Reverse: Click the Cue In or Cue Out button to set the time period for Save Video. Click to pause the playback and move to the next frame or last frame. Click to pause the playback and move to the next minute or last minute. D-Link DNR-326 User Manual 69 - D-Link DNR-326 | User Manual - Page 74
Click the Add button to add this unit into the remote server list. Step 10: Click the OK button. The Search, Playback, Video Enhancement, Print Image, Save Video, Save Image, Backup functions are the same as the steps for the Internet Explorer, please see pages 52-65. D-Link DNR-326 User Manual 70 - D-Link DNR-326 | User Manual - Page 75
backup). Step 8: Select the cameras you would like to backup. Step 9: Click the OK button. Step 10: Select the time slot which you would like to backup. Step 11: Click the Backup button. Step 12: Select the location where you would like to save the backup data. D-Link DNR-326 User Manual 71 - D-Link DNR-326 | User Manual - Page 76
Section 3 - Configuration Step 13: Check the Include Playback application option, which will add Playback application into the backup folder. Step 14: Click the OK button. D-Link DNR-326 User Manual 72 - D-Link DNR-326 | User Manual - Page 77
to list for verification. Add Folder: Choose the folder with multiple files to list for verification. Remove File: Remove indicated file(s) from list. Select All: Select all files in the list for verification. Note: Choose the file type first before selecting files. D-Link DNR-326 User Manual 73 - D-Link DNR-326 | User Manual - Page 78
Image / Video 1. Select single or multiple files for verification. 2. Click the Verify button to start verification. 3. The verification result will show on watermark column. If a file was tampered with, it will show ; if a file passed verification, it will show . D-Link DNR-326 User Manual 74 - D-Link DNR-326 | User Manual - Page 79
- Troubleshooting Troubleshooting Check Disk Status LEDs to verify condition of the NVR The new disk drive of the same or slightly greater capacity. Please make sure you have powered down the unit. Step 1: Open the unit's front cover. Step 2: Pull out will be lost. D-Link DNR-326 User Manual 75 - D-Link DNR-326 | User Manual - Page 80
process. Step 4: Click the Install button to complete the process. Cannot Login to the Unit through Internet Explorer 1. Check the settings of your anti-virus software. 2. Adjust the settings of or disable anti-virus software. D-Link DNR-326 User Manual 76 - D-Link DNR-326 | User Manual - Page 81
environments RAID 1 Advantage • Simplest RAID storage subsystem design • Can increase read performance by processing data requests in parallel since the same data resides on two different drives Disadvantage • Very high disk overhead - uses only 50% of total capacity D-Link DNR-326 User Manual 77 - D-Link DNR-326 | User Manual - Page 82
, with each providing a different method of sharing or distributing data amongst the drives. The NVR supports RAID levels 0 and 1. RAID 0 RAID 0 provides data striping, which spreads out blocks tolerance and protection, in addition to performance advantages. RAID 1 D-Link DNR-326 User Manual 78 - D-Link DNR-326 | User Manual - Page 83
you have installed the new drive, turn on the NVR and then connect to the Web UI. The NVR will prompt you to format the new drive. Note: Formatting a hard drive will erase the data stored on the hard drive. Please backup important data before formatting a hard drive. D-Link DNR-326 User Manual 79 - D-Link DNR-326 | User Manual - Page 84
RECORDING • Auto recycling when disk storage is full FILE EXPORT • Export videos to AVI or ASF file • Export images to BMP or JPG file USER ACCOUNT • Additional accounts can be created to allow user access to the system, and specify authorization for the camera channels, PTZ, etc. D-Link DNR-326 - D-Link DNR-326 | User Manual - Page 85
system time (D-Link NTP, Input time, Sync with computer, Daylight Saving Time) REMOTE BACKUP • Remote software can backup raw data to redundant storage • Auto backup recorded video to remote FTP server by daily schedule SYSTEM STATUS • Camera status, System status NETWORK SERVICE PROTOCOLS • IPV4 - D-Link DNR-326 | User Manual - Page 86
drive capacity for RAID 1 operation is dependant on the drive capacity of the lowest-sized drive. Some older generation SATA drives may not be compatible. For a list of SATA drives that have been tested to work with the NVR, visit the D-Link support web site. D-Link DNR-326 User Manual 82
-
 1
1 -
 2
2 -
 3
3 -
 4
4 -
 5
5 -
 6
6 -
 7
7 -
8
-
9
-
10
-
11
-
12
-
13
-
14
-
15
-
16
-
17
-
18
-
19
-
20
-
21
-
22
-
23
-
24
-
25
-
26
-
27
-
28
-
29
-
30
-
31
-
32
-
33
-
34
-
35
-
36
-
37
-
38
-
39
-
40
-
41
-
42
-
43
-
44
-
45
-
46
-
47
-
48
-
49
-
50
-
51
-
52
-
53
-
54
-
55
-
56
-
57
-
58
-
59
-
60
-
61
-
62
-
63
-
64
-
65
-
66
-
67
-
68
-
69
-
70
-
71
-
72
-
73
-
74
-
75
-
76
-
77
-
78
-
79
-
80
-
81
-
82
-
83
-
84
-
85
-
86
 |
 |