Dell 2130cn User Guide - Page 79
Toner smears or print comes off., Random spots/blurred images
 |
UPC - 335521301238
View all Dell 2130cn manuals
Add to My Manuals
Save this manual to your list of manuals |
Page 79 highlights
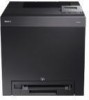
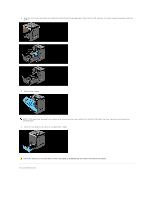
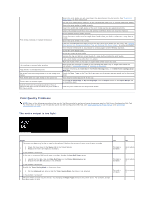
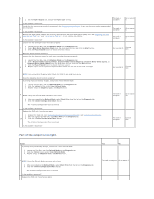
1. Replace the PHD unit. See "Replacing the Print Head Device (PHD) Unit" and "Installing the PHD Unit". 2. After you replace the PHD unit, click Chart Print on the Diagnosis tab. 2 3. Click the 4 Colors Configuration Chart button. The task is complete. Contact Dell. The 4 Colors Configuration Chart is printed. Is the problem recovered? Toner smears or print comes off. Action The print media surface may be uneven. Try changing the Paper Type setting in the printer driver. For example, change the plain paper to thick. 1 1. On the Paper/Output tab, change the Paper Type setting. Is the problem recovered? Verify that the correct print media is being used. See "Supported Paper Sizes". If not, use the print media recommended for the printer. 2 Is the problem recovered? Replace the PHD unit if you have a spare. 1. Replace the PHD unit. See "Replacing the Print Head Device (PHD) Unit" and "Installing the PHD Unit". 3 2. After you replace the PHD unit, test print your document again. Is the problem recovered? Replace the fuser if you have a spare. 1. Replace the fuser. See the fuser replacement guide, Replacing the Fuser. 4 2. After you replace the fuser, test print your document again. Is the problem resolved? Yes The task is complete. The task is complete. The task is complete. The task is complete. No Go to action 2. Go to action 3. Go to action 4. Contact Dell. Random spots/blurred images Action Ensure that the toner cartridges are installed correctly. See "Installing the Toner Cartridges". 1 Is the problem recovered? Ensure that the PHD unit is installed correctly. See "Replacing the Print Head Device (PHD) Unit" and "Installing the PHD Unit". 2 Is the problem recovered? Replace the PHD unit if you have a spare. Yes The task is complete. The task is complete. 1. Replace the PHD unit. See "Replacing the Print Head Device (PHD) Unit" and "Installing the PHD Unit". 2. After you replace the PHD unit, click Chart Print on the Diagnosis tab. 3 3. Click the Pitch Configuration Chart button. The Pitch Configuration Chart is printed. The task is complete. Is the problem recovered? No Go to action 2. Go to action 3. Contact Dell.
-
 1
1 -
2
-
3
-
4
-
5
-
6
-
7
-
8
-
9
-
10
-
11
-
12
-
13
-
14
-
15
-
16
-
17
-
18
-
19
-
20
-
21
-
22
-
23
-
24
-
25
-
26
-
27
-
28
-
29
-
30
-
31
-
32
-
33
-
34
-
35
-
36
-
37
-
38
-
39
-
40
-
41
-
42
-
43
-
44
-
45
-
46
-
47
-
48
-
49
-
50
-
51
-
52
-
53
-
54
-
55
-
56
-
57
-
58
-
59
-
60
-
61
-
62
-
63
-
64
-
65
-
66
-
67
-
68
-
69
-
70
-
71
-
72
-
73
-
 74
74 -
 75
75 -
 76
76 -
 77
77 -
 78
78 -
 79
79 -
 80
80 -
 81
81 -
 82
82 -
 83
83 -
 84
84 -
85
-
86
-
87
-
88
-
89
-
90
-
91
-
92
-
93
-
94
-
95
-
96
-
97
-
98
-
99
-
100
-
101
-
102
-
103
-
104
-
105
-
106
-
107
-
108
-
109
-
110
-
111
-
112
-
113
-
114
-
115
-
116
-
117
-
118
-
119
-
120
-
121
-
122
-
123
-
124
-
125
-
126
-
127
-
128
-
129
-
130
-
131
-
132
-
133
-
134
-
135
-
136
-
137
-
138
-
139
-
140
-
141
-
142
-
143
-
144
-
145
-
146
-
147
-
148
-
149
-
150
-
151
-
152
-
153
-
154
-
155
-
156
-
157
-
158
-
159
-
160
-
161
-
162
-
163
-
164
-
165
-
166
-
167
-
168
-
169
-
170
-
171
-
172
-
173
-
174
-
175
-
176
-
177
-
178
-
179
-
180
-
181
-
182
-
183
-
184
-
185
-
186
-
187
-
188
-
189
-
190
-
191
-
192
-
193
-
194
-
195
-
196
-
197
-
198
-
199
-
200
-
201
-
202
-
203
-
204
 |
 |