Dell Alienware Aurora R3 Service Manual - Page 18
Replacing the Optical Drives, Removing the Media Card Reader
 |
View all Dell Alienware Aurora R3 manuals
Add to My Manuals
Save this manual to your list of manuals |
Page 18 highlights
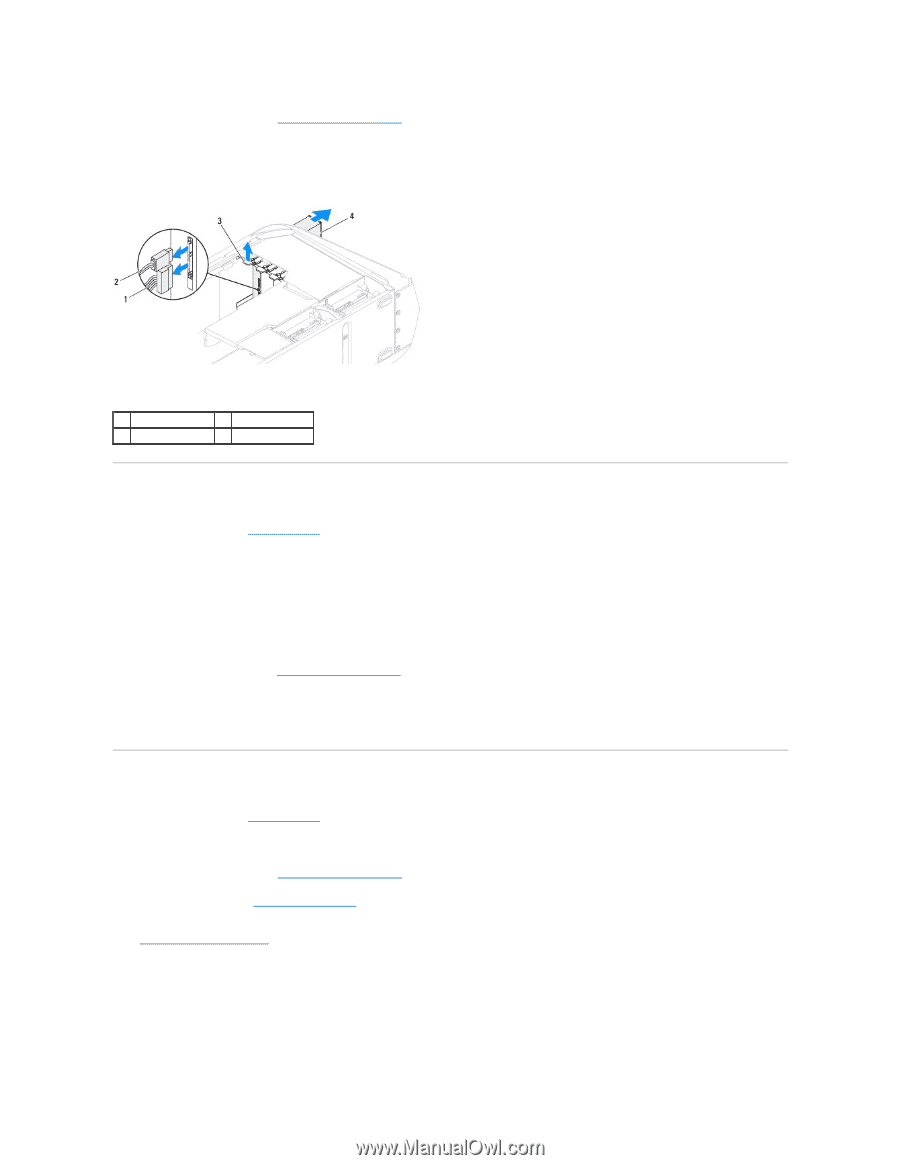
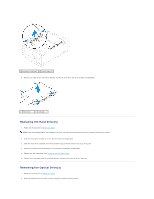
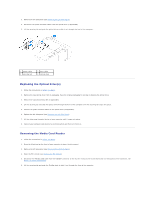
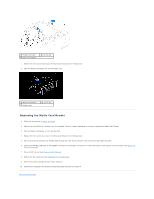
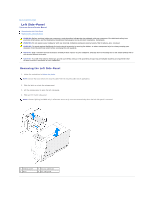
3. Remove the left side-panel (see Removing the Left Side-Panel). 4. Disconnect the power and data cables from the optical drive (if applicable). 5. Lift the securing tab and push the optical drive to slide it out through the front of the computer. 1 power cable 3 securing tab 2 data cable 4 optical drive Replacing the Optical Drive(s) 1. Follow the instructions in Before You Begin. 2. Remove the new optical drive from its packaging. Save the original packaging for storing or shipping the optical drive. 3. Remove the optical-drive bay filler (if applicable). 4. Lift the securing tab and slide the optical drive through the front of the computer until the securing tab snaps into place. 5. Connect the power and data cables to the optical drive (if applicable). 6. Replace the left side-panel (see Replacing the Left Side-Panel). 7. Lift the drive panel towards the top of your computer until it snaps into place. 8. Connect your computer and devices to electrical outlets and then turn them on. Removing the Media Card Reader 1. Follow the instructions in Before You Begin. 2. Press the AlienHead on the front of your computer to lower the drive panel. 3. Remove the left side-panel (see Removing the Left Side-Panel). 4. Open the PCI shroud (see Opening the PCI Shroud). 5. Disconnect the FlexBay USB cable from the FLEXBAY connector on the master I/O board. For more information on the location of the connector, see Master I/O Board Components. 6. Lift the securing tab and push the FlexBay dock to slide it out through the front of the computer.
-
 1
1 -
2
-
3
-
4
-
5
-
6
-
7
-
8
-
9
-
10
-
11
-
12
-
 13
13 -
 14
14 -
 15
15 -
 16
16 -
 17
17 -
 18
18 -
 19
19 -
 20
20 -
 21
21 -
 22
22 -
 23
23 -
24
-
25
-
26
-
27
-
28
-
29
-
30
-
31
-
32
-
33
-
34
-
35
-
36
-
37
-
38
-
39
-
40
-
41
-
42
-
43
-
44
-
45
-
46
-
47
-
48
-
49
-
50
-
51
-
52
-
53
-
54
-
55
-
56
-
57
-
58
-
59
-
60
-
61
-
62
-
63
-
64
 |
 |