Dell PowerConnect 6224P Getting Started Guide
Dell PowerConnect 6224P Manual
 |
View all Dell PowerConnect 6224P manuals
Add to My Manuals
Save this manual to your list of manuals |
Dell PowerConnect 6224P manual content summary:
- Dell PowerConnect 6224P | Getting Started Guide - Page 1
Dell™ PowerConnect™ 6200 Series Stackable Switches Getting Started Guide Příručka Začínáme Guide de mise en route Erste Schritte Instrukcja uruchomienia Guía de introducción Başlangıç Kılavuzu Models PC6224, PC6248, PC6224P, PC6248P, and PC6224F www.dell.com | support.dell.com - Dell PowerConnect 6224P | Getting Started Guide - Page 2
- Dell PowerConnect 6224P | Getting Started Guide - Page 3
Dell™ PowerConnect™ 6200 Series Stackable Switches Getting Started Guide Models PC6224, PC6248, PC6224P, PC6248P, and PC6224F www.dell.com | support.dell.com - Dell PowerConnect 6224P | Getting Started Guide - Page 4
damage to hardware or loss of data and tells you how to avoid the problem. CAUTION: A CAUTION indicates a potential for property damage, personal injury, or of Dell Inc. is strictly forbidden. Trademarks used in this text: Dell, the DELL logo, and PowerConnect are trademarks of Dell Inc.; - Dell PowerConnect 6224P | Getting Started Guide - Page 5
a Free-standing Switch 7 Connecting a Switch to a Terminal 7 Connecting a Switch to a Power Supply 7 Assembling a Stack 8 2 Starting and Configuring the Switch Connecting the Terminal to the Switch 10 Booting the Switch 11 Initial Configuration 12 Initial Configuration Procedure 12 Example - Dell PowerConnect 6224P | Getting Started Guide - Page 6
and Member Switches 16 Stack Startup 16 Topology Discovery 16 Auto Stack ID Assignment 16 Firmware Version Checking 16 System Initialization 17 CLI/ Telnet/ Web Interface 17 Insertion and Removal of Switches 17 Operating as Standalone Switch 17 Stack ID Renumbering 17 User Controls 18 - Dell PowerConnect 6224P | Getting Started Guide - Page 7
configure, and operate Dell™ PowerConnect™ PC6224, PC6248, PC6224P, PC6248P, and PC6224F systems. For more information, see the User's Guide, which is available on your User Documentation CD, or check the Dell Support web site at support.dell.com for the latest updates on documentation and firmware - Dell PowerConnect 6224P | Getting Started Guide - Page 8
information in the Product Information Guide as well as the safety information for other switches that connect to or support the switch. The AC and DC power connectors are on the back panel of the switch. We recommend connecting a redundant power supply, such as the PowerConnect RPS-600 for non-PoE - Dell PowerConnect 6224P | Getting Started Guide - Page 9
switches or PowerConnect EPS-470 for PoE switches to the DC power connector located on the back panel. NOTE: Do not connect the power cable to a grounded AC outlet at this time. Connect the switch to a power source as described in the step detailed in "Starting and Configuring the Switch." Getting - Dell PowerConnect 6224P | Getting Started Guide - Page 10
www.dell.com | support.dell.com Figure 1-2. Connecting Power Cable Assembling a Stack You can stack PowerConnect 6200 series switches up to 12 switches high, supporting up to 576 front panel ports. Create a stack by connecting adjacent units using the stacking ports on the left side of the switch - Dell PowerConnect 6224P | Getting Started Guide - Page 11
Figure 1-3. Connecting a Stack of Switches NOTE: Long cable not shown in Figure 1-3. The resulting ring topology allows the entire stack to function as a single switch with resilient fail-over capabilities. Getting Started Guide 9 - Dell PowerConnect 6224P | Getting Started Guide - Page 12
, connect a terminal to a switch to configure the switch or stack. Additional advanced functions are described in the User's Guide located on your User Documentation CD. NOTE: Read the release notes for this product before proceeding. You can download the release notes from the Dell Support website - Dell PowerConnect 6224P | Getting Started Guide - Page 13
stack. If you connect the terminal to a member switch, you will not be able to use the CLI. Figure 1-4. Connecting to the Console Port Booting the Switch 1 Make sure that the switch console port is connected to a VT100 terminal or VT100 terminal emulator via the RS-232 cable. 2 Locate an AC power - Dell PowerConnect 6224P | Getting Started Guide - Page 14
the network. • The IP address of the management VLAN default gateway for configuring the default route. Initial Configuration Procedure You can perform the initial configuration using the Dell Easy Setup Wizard, or by using the Command Line Interface (CLI). The Setup Wizard automatically starts when - Dell PowerConnect 6224P | Getting Started Guide - Page 15
the management VLAN is 192.168.1.100:255.255.255.0. • The user name is admin, and password is admin123. • The network management system IP address is 192.168.1.10. • The default gateway is 192.168.1.1. • The SNMP community string to be used is Dell_Network_Manager. The setup wizard configures the - Dell PowerConnect 6224P | Getting Started Guide - Page 16
the CLI and Web interface. You may set up other accounts and change privilege levels later. For more information on setting up user accounts and changing privilege levels, see the User's Guide. To set up a user account: Please enter the user name {admin}: admin Please enter the user password - Dell PowerConnect 6224P | Getting Started Guide - Page 17
Step 3: Next, an IP address is set up. The IP address is defined on the default VLAN (VLAN #1), of which all ports are members. This is the IP address you use to access the CLI, Web interface, or SNMP interface for the switch. To set up an IP address: Please enter the IP address of the device - Dell PowerConnect 6224P | Getting Started Guide - Page 18
entity when connected together. The stack can be managed from a web-based interface, an SNMP management station, or a CLI. When a stack is created, one switch automatically becomes the master switch. You can manually allocate an IP address to the master switch using the console, or let DHCP do so - Dell PowerConnect 6224P | Getting Started Guide - Page 19
in nonoperational mode. CLI/ Telnet/ Web Interface You can use the CLI / WEB / SNMP to synchronize the firmware that is stored in the Master Switch to a member switch. Insertion and Removal of Switches You can insert and remove switches to/from the current stack without cycling the power. The entire - Dell PowerConnect 6224P | Getting Started Guide - Page 20
www.dell.com | support.dell.com User Controls Use the following CLI commands to control this feature. See the CLI Reference Guide for details on the syntax of each command. movemanagement reload member set description switch priority switch renumber stacking show stack-port show stack-port counters - Dell PowerConnect 6224P | Getting Started Guide - Page 21
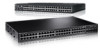
the front panels and LEDs of the Dell PowerConnect PC6224, PC6248, PC6224P, PC6248P, and PC6224F systems. Front Panels The front panels of the PowerConnect 6200 series systems are shown in the figures below. Figure 1-1. PC 6224 Figure 1-2. PC 6248 Figure 1-3. PC 6224P Getting Started Guide 19 - Dell PowerConnect 6224P | Getting Started Guide - Page 22
.dell.com | support.dell.com Figure 1-4. PC 6248P Figure 1-5. PC 6224F LEDs The following sections list the LEDs. Systems LEDs Table 1-1. System LEDs LED Fan Status Power Supply Status Redundant Power threshold limit • Red: System temperature is above threshold limit 20 Getting Started Guide - Dell PowerConnect 6224P | Getting Started Guide - Page 23
power budget. • Off: No PD, no power feeding XFP LED Table 1-3. XFP LED LED Single color: State • Green Solid: Link • Green Blinking: Activity • Off: No Link SFP LED Table 1-4. SFP LED LED Single color: State • Green Solid: Link • Green Blinking: Activity • Off: No Link Getting Started Guide - Dell PowerConnect 6224P | Getting Started Guide - Page 24
www.dell.com | support.dell.com 22 Getting Started Guide - Dell PowerConnect 6224P | Getting Started Guide - Page 25
Dell™ PowerConnect™ 6200 型号: PC6224, PC6248, PC6224P, PC6248P 和 PC6224F www.dell.com | support.dell.com - Dell PowerConnect 6224P | Getting Started Guide - Page 26
2007 Dell Inc Dell Inc Dell、DELL 徽标和 PowerConnect 是 Dell Inc Microsoft 和 Windows 是 Microsoft Corporation Dell Inc 型号: PC6224, PC6248, PC6224P, PC6248P 和 PC6224F 2007 年 9 月 P/N YC897 修订版 A02 - Dell PowerConnect 6224P | Getting Started Guide - Page 27
目录 1 安装 27 27 27 28 28 28 29 29 29 30 2 32 33 34 34 35 目录 25 - Dell PowerConnect 6224P | Getting Started Guide - Page 28
3 39 39 39 ID 39 39 39 CLI Web 40 40 40 堆叠 ID 40 41 4 LED 43 LED 44 系统 LED 44 RJ-45 LED (PoE 45 XFP LED 45 SFP LED 45 26 目录 - Dell PowerConnect 6224P | Getting Started Guide - Page 29
安装 Dell™ PowerConnect™ PC6224, PC6248, PC6224P, PC6248P 和 PC6224F User Documentation CD Dell 支持 Web 站点 support.dell.com 现场准备 PowerConnect 6200 48.26 厘米(19 100-250 VAC,50-60 Hz 0 到 45C(32 到 113F 95%, 非冷凝。 PowerConnect RS-232 User Documentation CD 27 - Dell PowerConnect 6224P | Getting Started Guide - Page 30
www.dell.com | support.dell.com 1 2 3 4 5 PoE PowerConnect RPS-600 或 PoE PowerConnect EPS-470。 1 1-1 图 1-1 2 3 4 48.26 厘米(19 28 - Dell PowerConnect 6224P | Getting Started Guide - Page 31
5 1 2 5 厘米(2 13 厘米 (5 1 RS-232 VT100 VT100 2 将 RS-232 DB-9 LED LED LED CLI。 1 1-2 2 PoE PowerConnect RPS-600 或 PoE PowerConnect EPS-470 12 VDC 29 - Dell PowerConnect 6224P | Getting Started Guide - Page 32
www.dell.com | support.dell.com 图 1-2 组装堆叠 12 台 PowerConnect 6200 576 1-3。 1 1 2 3 4 30 - Dell PowerConnect 6224P | Getting Started Guide - Page 33
图 1-3 注:图 1-3 31 - Dell PowerConnect 6224P | Getting Started Guide - Page 34
.com User Documentation CD Dell 支持 Web 站点 support.dell.com Dell 支持 Web 站点 support.dell.com DB-9 DTE VT100 VT100 RS-232 DB-9 1 将 RS-232 VT100 2 a 1 2 b 9600。 c 8 1 d none e VT100。 f Ctrl Microsoft® Windows Microsoft Windows 2000 Windows 2000 Service - Dell PowerConnect 6224P | Getting Started Guide - Page 35
图 1-4 1 RS-232 VT100 终端或 VT100 2 3 4 5 POST)。POST POST POST RAM 中。POST 60 秒钟。 33 - Dell PowerConnect 6224P | Getting Started Guide - Page 36
www.dell.com | support.dell.com 初始配置 • PowerConnect PowerConnect Dell VT100 HTTP(Web VLAN 的 IP VLAN IP VLAN IP 地址。 Dell CLI ctrl+z CLI • 启用 CLI 登录和 HTTP VLAN 的 IP SNMP SNMP IP 使用 SNMP IP IP IP 地址。 34 - Dell PowerConnect 6224P | Getting Started Guide - Page 37
HTTP 及 CLI 界面。 0.0.0.0) IP IP VLAN (1) 配置 IP Enter Dell POST Welcome to Dell Easy Setup Wizard Dell The setup wizard guides you through the initial switch configuration, and gets you up and running as quickly as possible. You can skip the setup wizard, and enter CLI mode to manually - Dell PowerConnect 6224P | Getting Started Guide - Page 38
system IP address and the "community string" or password that the particular management system uses to access the switch. The wizard automatically assigns the highest access level [Privilege Level 15] to this account. You can use Dell Open Manage Network Manager or other management interfaces to - Dell PowerConnect 6224P | Getting Started Guide - Page 39
reenter the user password Enter> 步骤 3: Next, an IP address is set up. The IP address is defined on the default VLAN (VLAN #1), of which all ports are members. This is the IP address you use to access the CLI, Web interface, or SNMP interface for the switch IP VLAN (VLAN #1) 上定义 IP CLI 界面、 Web - Dell PowerConnect 6224P | Getting Started Guide - Page 40
"@192.168.1.10) User Account set up = admin admin) Password Management IP address = 192.168.1.100:255.255.255.0 (管理 IP 地址 = 192.168.1.100:255.255.255.0) Gateway = 192.168.1.1(网关 = 192.168.1.1) 步骤 5: If the information is correct, please select (Y) to save the configuration, and copy to - Dell PowerConnect 6224P | Getting Started Guide - Page 41
管理堆叠 Web SNMP CLI IP DHCP IP 堆叠启动 拓扑搜索 MAC Web CLI 和 Web CLI ID 分配 ID ID ID FLASH CLI 或 Web ID。 ID 39 - Dell PowerConnect 6224P | Getting Started Guide - Page 42
www.dell.com | support.dell.com CLI Web 界面 CLI / WEB / SNMP 12 2 堆叠 ID ID ID ID ID ID 40 - Dell PowerConnect 6224P | Getting Started Guide - Page 43
用户控件 CLI CLI movemanagement reload member set description switch priority switch renumber stacking show stack-port show stack-port counters show stack-port diag show switch show supported switchtype 41 - Dell PowerConnect 6224P | Getting Started Guide - Page 44
www.dell.com | support.dell.com 42 - Dell PowerConnect 6224P | Getting Started Guide - Page 45
LED Dell PowerConnect PC6224、 PC6248、 PC6224P、 PC6248P 和 PC6224F LED。 前面板 PowerConnect 6200 1-1. PC 6224 图 1-2. PC 6248 图 1-3. PC 6224P 43 - Dell PowerConnect 6224P | Getting Started Guide - Page 46
www.dell.com | support.dell.com 图 1-4. PC 6248P 图 1-5. PC 6224F LED LED。 系统 LED 表 1-1. 系统 LED LED 诊断程序 温度 44 状态 - Dell PowerConnect 6224P | Getting Started Guide - Page 47
RJ-45 LED (PoE) RJ-45 LED 1-2. RJ-45 LED (PoE) LED 右 (POE 状态 10/100/1000 Mbps PD XFP LED 表 1-3. XFP LED LED 单色: 状态 SFP LED 表 1-4. SFP LED LED 单色: 状态 45 - Dell PowerConnect 6224P | Getting Started Guide - Page 48
www.dell.com | support.dell.com 46 - Dell PowerConnect 6224P | Getting Started Guide - Page 49
Dell™ PowerConnect™ Stohovatelné přepínače řady 6200 Příručka Začínáme Modely PC6224, PC6248, PC6224P, PC6248P a PC6224F www.dell.com | support.dell.com - Dell PowerConnect 6224P | Getting Started Guide - Page 50
Jakákoli reprodukce tohoto dokumentu je bez písemného souhlasu společnosti Dell Inc. přísně zakázána. Ochranné známky použité v tomto textu: Dell, logo DELL a PowerConnect jsou ochranné známky společnosti Dell Inc.; Microsoft a Windows jsou registrované ochranné známky společnosti Microsoft. V tomto - Dell PowerConnect 6224P | Getting Started Guide - Page 51
Obsah 1 Instalace Příprava místa 51 Rozbalení přepínače 51 Obsah balen 51 Postup rozbalen 52 Montáž přepínače 52 Instalace do stojanu 52 Instalace volně instalovaného přepínače 53 Připojení přepínače k terminálu 53 Připojení přepínače k napájecímu zdroji 54 Stohován 55 2 Spuštění a - Dell PowerConnect 6224P | Getting Started Guide - Page 52
63 Spuštění stohu 63 Zjištění topologie 63 Automatické přidělení Stack ID 63 Kontrola verze firmwaru 64 Inicializace systému 64 Rozhraní příkazové ení a odebrání přepína 65 Provoz samostatného přepínače 65 Přečíslování Stack ID 65 Uživatelské příkazy 65 4 Čelní panely a indikátory LED Čeln - Dell PowerConnect 6224P | Getting Started Guide - Page 53
je k dispozici na disku CD User Documentation s dokumentací pro uživatele, nebo navštivte webovou stránku technické podpory společnosti Dell na adrese support.dell.com, kde najdete nejnovější verze dokumentace a firmwaru. Příprava místa Přepínače řady PowerConnect 6200 lze instalovat do standardního - Dell PowerConnect 6224P | Getting Started Guide - Page 54
www.dell.com | support.dell.com Postup rozbalení POZNÁMKA: Před vlastním rozbalením přepínače přepínače. Doporučujeme připojit záložní napájecí zdroj, například PowerConnect RPS-600 pro jiné přepínače než PoE nebo PowerConnect EPS-470 pro přepínače PoE. Instalace do stojanu POZOR: Sadu pro - Dell PowerConnect 6224P | Getting Started Guide - Page 55
če přepínač Master, který může v rámci stohu obsadit kteroukoli pozici. Jestliže připojíte terminál k členskému přepínači, nebudete moci používat rozhraní příkazového řádku (CLI). Příručka Začínáme 53 - Dell PowerConnect 6224P | Getting Started Guide - Page 56
www.dell.com | support.dell.com Připojení přepínače k napájecímu zdroji POZOR: Přečtěte si bezpeč é záložní napájecí zdroj, připojte napájecí kabel 12 VDC ze zdroje PowerConnect RPS-600 pro jiné přepínače než PoE nebo PowerConnect EPS-470 pro přepínače PoE (zakoupený zvlášt') do napájecího konektoru - Dell PowerConnect 6224P | Getting Started Guide - Page 57
Stohování Přepínače PowerConnect 6200 series můžete integrovat do jednoho stohu až do výš Obr. 1-3. POZNÁMKA: Přepínače musí být při skládání do stohu vypnuté. 1 Instalujte zvlášt' zakoupený stohovací modul do zadní „Zásuvky 1" každého z přepínačů ve stohu. 2 Pomocí kabelů dodávaných se stohovacími - Dell PowerConnect 6224P | Getting Started Guide - Page 58
.com. POZNÁMKA: Doporučujeme stáhnout nejnovější verzi uživatelské dokumentace z webové stránky technické podpory společnosti Dell na adrese support.dell.com. Připojení terminálu k přepínači Aby bylo možné přepínač monitorovat a konfigurovat prostřednictvím sériové konzoly, propojte port konzoly na - Dell PowerConnect 6224P | Getting Started Guide - Page 59
ávně. Další informace o aktualizacích Service Pack systému Windows 2000 najdete na adrese www.microsoft.com. 3 Zásuvkový konektor kříženého kabelu RS-232 připojte přímo do portu konzoly přepínače a utáhněte zajišt'ovací šrouby. Porty konzoly jsou u přepínačů řady PowerConnect 6200 umístěny na zadn - Dell PowerConnect 6224P | Getting Started Guide - Page 60
dell.com | support.dell nahraje se platný firmware do paměti RAM Dell Easy Setup protokolu Telnet) nebo HTTP (webový prohlížeč). IP, která bude přidělena administrativní síti VLAN, jejímž prostřednictvím je přepínač spravován. • Maska IP podsítě. • Adresa IP výchozí brány administrativní sítě VLAN - Dell PowerConnect 6224P | Getting Started Guide - Page 61
HTTP s výlučným použitím místního nastavení ověřování. • Nastaví adresu IP administrativní sítě VLAN. Setup Wizard. V tomto příkladu jsou použity následující hodnoty: • Adresa IP administrativní sítě VLAN je 192.168.1.100:255.255.255.0. • Uživatelské jméno je admin a heslo je admin123. • Adresa IP - Dell PowerConnect 6224P | Getting Started Guide - Page 62
se zobrazí následující dialog: Welcome to Dell Easy Setup Wizard The setup wizard guides you through the initial switch configuration, and gets you up and running as quickly as possible. You can skip the setup wizard, and enter CLI mode to manually configure the switch. You must respond to the next - Dell PowerConnect 6224P | Getting Started Guide - Page 63
the CLI and Web interface. You may set up other accounts and change privilege levels later. For more information on setting up user accounts and changing privilege levels, see the User's Guide. To set up a user account: Please enter the user name {admin}: admin Please enter the user password - Dell PowerConnect 6224P | Getting Started Guide - Page 64
dell.com | support.dell.com Krok 3: Next, an IP address is set up. The IP address is defined on the default VLAN (VLAN #1), of which all ports are members. This is the IP address you use to access the CLI, Web interface, or SNMP interface for the switch. To set up an IP address: Please enter the IP - Dell PowerConnect 6224P | Getting Started Guide - Page 65
IP ručně s použitím konzoly nebo můžete automatické přidělení přenechat protokolu DHCP. Poté můžete celý stoh spravovat prostřednictvím adresy IP nebo webovém rozhraní najdete v příručce CLI Reference Manual a Příručce uživatele. Automatické přidělení Stack ID V průběhu procesu sběru informací - Dell PowerConnect 6224P | Getting Started Guide - Page 66
www.dell.com | support.dell.com Kontrola verze firmwaru Po přidělení Stack ID provede přepínač Master kontrolu platné pro provoz. Tento stav je označován jako pozastavený stohovací režim (Suspended Stacking Mode). Potom můžete provést synchronizaci firmwaru členského přepínače s firmwarem spuštěným - Dell PowerConnect 6224P | Getting Started Guide - Page 67
ého řádku. Další informace o syntaxi příkazů jsou uvedeny v příručce CLI Reference Guide. movemanagement reload member set description switch priority switch renumber stacking show stack-port show stack-port counters show stack-port diag show switch show supported switchtype Příručka Začínáme 65 - Dell PowerConnect 6224P | Getting Started Guide - Page 68
www.dell.com | support.dell.com 66 Příručka Začínáme - Dell PowerConnect 6224P | Getting Started Guide - Page 69
příloha popisuje čelní panely a indikátory LED systémů Dell PowerConnect PC6224, PC6248, PC6224P, PC6248P a PC6224F. Čelní panely Na níže uvedených obrázcích jsou znázorněny čelní panely systémů PowerConnect 6200 series. Obr. 1-1. PC 6224 Obr. 1-2. PC 6248 Obr. 1-3. PC 6224P Příručka Začínáme 115 - Dell PowerConnect 6224P | Getting Started Guide - Page 70
www.dell.com | support.dell.com Obr. 1-4. PC 6248P Obr. 1-5. PC 6224F Indikátory LED V následující části jsou uvedeny indikátory LED. Indikátory LED systémů Table 1-1. Indikátory LED - Dell PowerConnect 6224P | Getting Started Guide - Page 71
Indikátory LED RJ-45 (PoE) Porty RJ-45 obsahují dva integrované indikátory LED (jeden dvoubarevný a jeden jednobarevný). Table 1-2. Indikátory LED RJ-45 (PoE) Indikátor LED Levý - jednobarevný: Port - spojení/činnost Pravý (model POE) - dvoubarevný: Stav • Zelená: Spojení rychlostí 10/100/1000 Mb - Dell PowerConnect 6224P | Getting Started Guide - Page 72
www.dell.com | support.dell.com 118 Příručka Začínáme - Dell PowerConnect 6224P | Getting Started Guide - Page 73
Commutateurs empilables Dell™ PowerConnect™ - Série 6200 Guide de mise en route Modèles PC6224, PC6248, PC6224P, PC6248P et PC6224F www.dell.com | support.dell.com - Dell PowerConnect 6224P | Getting Started Guide - Page 74
de ce document de quelque manière que ce soit sans l'autorisation écrite de Dell Inc. est strictement interdite. Marques utilisées dans ce document : Dell, le logo DELL et PowerConnect sont des marques de Dell Inc. ; Microsoft et Windows sont des marques déposées de Microsoft Corporation. Tous les - Dell PowerConnect 6224P | Getting Started Guide - Page 75
77 Connexion du commutateur à un bloc d'alimentation 78 Assemblage d'une pile 79 2 Démarrage et configuration du commutateur Connexion du terminal au commutateur 80 Démarrage du commutateur 81 Configuration initiale 82 Procédure de configuration initiale 82 Exemple de session 83 Sommaire 73 - Dell PowerConnect 6224P | Getting Started Guide - Page 76
87 Attribution automatique d'un ID d'empilage 87 Vérification de la version du micrologiciel 87 Initialisation du système 87 Interfaces CLI/ Telnet/Web 88 Insertion et retrait de commutateurs 88 Fonctionnement en autonome 88 Réattribution des ID d'empilage 88 Commandes utilisateur 89 - Dell PowerConnect 6224P | Getting Started Guide - Page 77
des informations de base sur l'installation, la configuration et le fonctionnement des systèmes Dell™ PowerConnect™ PC6224, PC6248, PC6224P, PC6248P et PC6224F. Pour obtenir des informations plus détaillées, reportez-vous au document User's Guide (Guide d'utilisation), que vous trouverez sur le CD - Dell PowerConnect 6224P | Getting Started Guide - Page 78
édez en remontant vers le haut du rack. 1 Placez le support de fixation du rack sur un côté du commutateur, en alignant les orifices de montage des deux éléments. La figure 1-1 indique l'emplacement approprié pour le montage des supports. Figure 1-1. Fixation des supports 76 Guide de mise en route - Dell PowerConnect 6224P | Getting Started Guide - Page 79
n'installez pas le commutateur dans un rack, posez sur une surface plane. Cette surface doit pouvoir supporter le poids de l'appareil et de ses câbles. Le commutateur est livré avec quatre patins maître, vous ne pourrez pas utiliser l'interface de ligne de commande (CLI). Guide de mise en route 77 - Dell PowerConnect 6224P | Getting Started Guide - Page 80
| support.dell.com Connexion du commutateur à un bloc d'alimentation PRÉCAUTION : prenez connaissance des consignes de sécurité figurant dans le document Product Information Guide (Guide d'informations sur le produit), ainsi que des informations similaires concernant les autres appareils connect - Dell PowerConnect 6224P | Getting Started Guide - Page 81
) pour connecter les commutateurs. Figure 1-3. Connexion d'une pile de commutateurs REMARQUE : le câble long n'apparaît pas dans la figure 1-3. La topologie en anneau ainsi créée permet à la pile de fonctionner comme une entité unique dotée de capacités de basculement. Guide de mise en route 79 - Dell PowerConnect 6224P | Getting Started Guide - Page 82
support.dell.com Démarrage et configuration du commutateur Une fois toutes les connexions externes mises en place, connectez un terminal à un commutateur pour lancer la configuration du commutateur ou de la pile. Les fonctions supplémentaires disponibles sont décrites dans le document User's Guide - Dell PowerConnect 6224P | Getting Started Guide - Page 83
autre que le commutateur maître, vous ne pourrez pas utiliser l'interface de ligne de commande (CLI). Figure 1-4. Branchement sur le port de console Démarrage du commutateur 1 Assurez-vous que le port de console du commutateur est connecté à un terminal VT100 ou à un émulateur de terminal VT100 via - Dell PowerConnect 6224P | Getting Started Guide - Page 84
. • Masque de sous-réseau IP • Adresse IP de la passerelle par défaut du VLAN de gestion permettant de configurer la route par défaut. Procédure de configuration initiale Vous pouvez effectuer la configuration initiale à l'aide de l'interface CLI ou de l'assistant Dell Easy Setup. Cet assistant de - Dell PowerConnect 6224P | Getting Started Guide - Page 85
interfaces SNMP, HTTP et CLI. Vous pouvez également décider d'autoriser toutes les adresses IP à accéder à ces interfaces de gestion en sélectionnant l'adresse IP 0.0.0.0. • Une adresse IP est configurée pour le VLAN en compte. Le texte de l'aide est entre parenthèses. Guide de mise en route 83 - Dell PowerConnect 6224P | Getting Started Guide - Page 86
the user documentation). Would you like to configure the SNMP management interface now? [Y/N] y To configure the SNMP management account you must specify the management system IP address and the "community string" or password that the particular management system uses to access the switch - Dell PowerConnect 6224P | Getting Started Guide - Page 87
document User's Guide (Guide d'utilisation) pour plus d'informations. Étape 3: Next, an IP address is set up. The IP address is defined on the default VLAN (VLAN #1), of which all ports are members. This is the IP address you use to access the CLI, Web interface, or SNMP interface for the switch. To - Dell PowerConnect 6224P | Getting Started Guide - Page 88
that has been collected: SNMP Interface = "Dell_Network_Manager"@192.168.1.10 User Account set up = admin Password Management IP address = 192.168.1.100:255.255.255.0 Gateway = 192.168.1.1 Étape 5: If the information is correct, please select (Y) to save the configuration, and copy to the start - Dell PowerConnect 6224P | Getting Started Guide - Page 89
interface de ligne de commande (CLI) ou de l'interface Web. REMARQUE : Reportez-vous respectivement aux documents CLI Reference Manual (Manuel de référence CLI) et User's Guide (Guide d'utilisation) pour plus d'informations sur les interfaces CLI et Web (SSM, Suspended Stacking Mode). Vous pouvez - Dell PowerConnect 6224P | Getting Started Guide - Page 90
Stacking Mode). Il est alors le seul à être initialisé avec les informations du fichier de configuration. Les commutateurs membres ne sont pas initialisés et restent en mode passif (tous les ports sont désactivés par défaut). Interfaces CLI/ Telnet/Web Vous pouvez utiliser les interfaces CLI, WEB - Dell PowerConnect 6224P | Getting Started Guide - Page 91
Guide (Guide de référence CLI) pour plus d'informations sur la syntaxe de chaque commande. movemanagement reload member set description switch priority switch renumber stacking show stack-port show stack-port counters show stack-port diag show switch show supported switchtype Guide de mise en route - Dell PowerConnect 6224P | Getting Started Guide - Page 92
www.dell.com | support.dell.com 90 Guide de mise en route - Dell PowerConnect 6224P | Getting Started Guide - Page 93
avant et les voyants des systèmes Dell PowerConnect PC6224, PC6248, PC6224P, PC6248P et PC6224F. Panneau avant Les figures ci-dessous représentent le panneau avant des systèmes PowerConnect de la série 6200. Figure 1-1. PC 6224 Figure 1-2. PC 6248 Figure 1-3. PC 6224P Guide de mise en route 91 - Dell PowerConnect 6224P | Getting Started Guide - Page 94
www.dell.com | support.dell.com Figure 1-4. PC 6248P Figure 1-5. PC 6224F Voyants Les sections suivantes répertorient les voyants. Voyants système Tableau 1-1. Voyants inférieure au seuil autorisé. • Rouge : la température du système est supérieure au seuil autorisé. 92 Guide de mise en route - Dell PowerConnect 6224P | Getting Started Guide - Page 95
Voyants Monochrome : État • Vert fixe : lien. • Vert clignotant : activité. • Éteint : aucun lien détecté. Voyant du module SFP Tableau 1-4. Voyant du module SFP Voyants Monochrome : État • Vert fixe : lien. • Vert clignotant : activité. • Éteint : aucun lien détecté. Guide de mise en route 93 - Dell PowerConnect 6224P | Getting Started Guide - Page 96
www.dell.com | support.dell.com 94 Guide de mise en route - Dell PowerConnect 6224P | Getting Started Guide - Page 97
Dell™ PowerConnect™ 6200-Reihe von stackfähigen Switches Erste Schritte Modelle PC6224, PC6248, PC6224P, PC6248P und PC6224F www.dell.com | support.dell.com - Dell PowerConnect 6224P | Getting Started Guide - Page 98
ädigungen der Hardware oder vor Datenverlust und zeigt auf, wie derartige Probleme vermieden werden können. VORSICHT: Hiermit werden Sie auf eine potentiell Genehmigung von Dell Inc. ist streng untersagt. Marken in diesem Text: Dell, das DELL Logo und PowerConnect sind Marken von Dell Inc.; - Dell PowerConnect 6224P | Getting Started Guide - Page 99
stehende Einheit 102 Verbinden eines Switches mit einem Terminal 102 Anschluss eines Switches an einem Netzteil 102 Zusammenfügen eines Stacks 103 2 Starten und Konfigurieren des Switches Verbinden des Terminals mit dem Switch 105 Starten des Switches 106 Erstkonfiguration 107 Durchführen - Dell PowerConnect 6224P | Getting Started Guide - Page 100
Topologie-Erkennung 112 Automatische Zuweisung von Stack-IDs 112 Firmware-Versionsüberprüfung 113 Systeminitialisierung 113 Befehlszeilen-/Telnet-/Web-Schnittstelle 113 Hinzufügen und Entfernen von Switches 113 Betrieb als eigenständiger Switch 114 Ändern der Stack-ID 114 Vom Benutzer ausf - Dell PowerConnect 6224P | Getting Started Guide - Page 101
Dell™ PowerConnect™ 6224, PC6248, PC6224P, PC6248P- und PC6224F-Systemen. Weitere Informationen finden Sie im User's Guide (Benutzerhandbuch) auf der CD User Documentation (Benutzerdokumentation). Aktuelle Updates von Dokumentation und Firmware erhalten Sie auf der Dell Support-Website unter support - Dell PowerConnect 6224P | Getting Started Guide - Page 102
www.dell.com | support.dell.com Auspacken des Switches Inhalt der Verpackung Kontrollieren Sie beim Auspacken der einzelnen Switches, ob jeweils die folgenden Teile vorhanden sind: • Ein PowerConnect-Switch • Ein Netzstromkabel • Ein RS-232-Kabel • Ein Montagekit für die Installation im Rack (zwei - Dell PowerConnect 6224P | Getting Started Guide - Page 103
und Gleichstromanschluss befinden sich auf der Rückseite des Switches. Es wird empfohlen, ein redundantes Netzteil zu verwenden, z. B. das PowerConnect RPS-600 für einen Switch ohne PoE-Unterstützung oder das PowerConnect EPS-470 für einen Switch mit PoEUnterstützung. Montage in einem Rack VORSICHT - Dell PowerConnect 6224P | Getting Started Guide - Page 104
www.dell.com | support.dell.com Installation als frei stehende Einheit HINWEIS: Es wird nachdrücklich empfohlen, den Switch in einem Rack zu installieren. Falls kein Rack verwendet wird, installieren Sie den Switch auf einer ebenen Fläche. Die Tragfähigkeit der Fläche muss für den Switch und die - Dell PowerConnect 6224P | Getting Started Guide - Page 105
sein, während sie zu einem Stack hinzugefügt werden. 1 Installieren Sie ein separat erworbenes Stack-Modul im rückseitigen „Schacht 1" jedes Switches, der zum Stack hinzugefügt werden soll. 2 Verbinden Sie jeden Switch mit den im Lieferumfang der Stack-Module enthaltenen Kabeln mit dem jeweils - Dell PowerConnect 6224P | Getting Started Guide - Page 106
www.dell.com | support.dell.com Abbildung 1-3. Switch-Stack verbinden ANMERKUNG: Ein langes Kabel ist in Abbildung 1-3 nicht dargestellt. Mit dieser Ring-Topologie lässt sich der gesamte Stack als einzelner Switch mit flexibler FailoverFunktionalität betreiben. 104 Erste Schritte - Dell PowerConnect 6224P | Getting Started Guide - Page 107
Switch oder Stack zu konfigurieren. Weitere Funktionen sind im User's Guide (Benutzerhandbuch) auf der User Documentation-CD (Benutzerdokumentation) beschrieben. ANMERKUNG: Lesen Sie die Versionshinweise für dieses Produkt, bevor Sie fortfahren. Sie können die Versionshinweise von der Dell Support - Dell PowerConnect 6224P | Getting Started Guide - Page 108
SwitchKonsolenanschluss und ziehen Sie die Halteschrauben fest. Der Konsolenanschluss von Geräten der Reihe PowerConnect 6200 befindet auf der Rückseite, wie in Abbildung 1-4 dargestellt. ANMERKUNG: Wenn Sie einen Switch-Stack installieren, verbinden Sie das Terminal mit dem MasterSwitch. Bei diesem - Dell PowerConnect 6224P | Getting Started Guide - Page 109
-Client) oder HTTP (Web-Browser) erforderlich. Bevor Sie die Erstkonfiguration des Switches durchführen, erfragen Sie beim Netzwerkadministrator die folgenden Informationen: • IP-Adresse für das VLAN, von dem aus der Switch verwaltet wird • IP-Subnetzmaske für das Netzwerk • IP-Adresse des Standard - Dell PowerConnect 6224P | Getting Started Guide - Page 110
gültigem Kennwort. Der Assistent konfiguriert beim Setup ein uneingeschränktes Benutzerkonto. • Möglichkeit für CLI-Login und HTTP-Zugriff zur Verwendung der lokalen Authentisierungseinstellungen. • Einrichten der IP-Adresse für das Management-VLAN. • Einrichten des SNMP-Community-Strings für den - Dell PowerConnect 6224P | Getting Started Guide - Page 111
der folgende Dialog angezeigt: Welcome to Dell Easy Setup Wizard The setup wizard guides you through the initial switch configuration, and gets you up and running as quickly as possible. You can skip the setup wizard, and enter CLI mode to manually configure the switch. You must respond to the next - Dell PowerConnect 6224P | Getting Started Guide - Page 112
www.dell.com | support.dell.com To configure the SNMP management account you must specify the management system IP address and the "community string" or password that the particular management system uses to access the switch. The wizard automatically assigns the highest access level [Privilege - Dell PowerConnect 6224P | Getting Started Guide - Page 113
Schritt 3: Next, an IP address is set up. The IP address is defined on the default VLAN (VLAN #1), of which all ports are members. This is the IP address you use to access the CLI, Web interface, or SNMP interface for the switch. To set up an IP address: Please enter the IP address of the device - Dell PowerConnect 6224P | Getting Started Guide - Page 114
www.dell.com | support.dell.com Verwalten eines Stacks Master- und untergeordnete Switches Ein zusammengeschalteter Switch-Stack lässt sich als einzelne Einheit verwalten. Dies kann über eine Web-Oberfläche, eine SNMP-Verwaltungsstation oder eine Befehlszeilenschnittstelle erfolgen. Bei der Bildung - Dell PowerConnect 6224P | Getting Started Guide - Page 115
standardmäßig deaktiviert). Befehlszeilen-/Telnet-/Web-Schnittstelle Über die Schnittstellen CLI / WEB / SNMP können Sie die im Master-Switch gespeicherte Firmware auf einen untergeordneten Switch übertragen. Hinzufügen und Entfernen von Switches Sie können dem Stack Switches hinzufügen bzw. aus ihm - Dell PowerConnect 6224P | Getting Started Guide - Page 116
dell.com | support.dell.com Betrieb als eigenständiger Switch Wenn ein Switch an einem für Stack-Betrieb aktivierten Port keinen Stack-Partner feststellt, erfolgt der Betrieb als eigenständiger Switch. Wird ein Stack-Partner erkannt, findet für den Switch stets Stack-Betrieb statt. Ändern der Stack - Dell PowerConnect 6224P | Getting Started Guide - Page 117
die Frontblenden und LEDs der Dell PowerConnect-Systeme PC6224, PC6248, PC6224P, PC6248P und PC6224F. Frontblenden Die nachstehenden Abbildungen zeigen die Frontblenden der Systeme der PowerConnect 6200-Reihe. Abbildung 1-1. PC 6224 Abbildung 1-2. PC 6248 Abbildung 1-3. PC 6224P Erste Schritte 115 - Dell PowerConnect 6224P | Getting Started Guide - Page 118
www.dell.com | support.dell.com Abbildung 1-4. PC 6248P Abbildung 1-5. PC 6224F LEDs Im folgenden Abschnitt sind die LEDs aufgeführt. System-LEDs Tabelle 1-1. System-LEDs LED Lüfterstatus Netzteilstatus Redundantes - Dell PowerConnect 6224P | Getting Started Guide - Page 119
RJ-45-LEDs (PoE) Die RJ-45-Anschlüsse sind mit zwei integrierten LEDs (einer zweifarbigen und einer einfarbigen Anzeige) versehen. Tabelle 1-2. RJ-45-LEDs (PoE) LED Status Verbindungen - Einfarbig: Anschlussverbindung/- • Grün: Verbindung mit 10/100/1000 Mbps aktivität • Stetig: Verbindung - Dell PowerConnect 6224P | Getting Started Guide - Page 120
www.dell.com | support.dell.com 118 Erste Schritte - Dell PowerConnect 6224P | Getting Started Guide - Page 121
Dell™ PowerConnect™ 6200 Σειρά PC6224, PC6248, PC6224P, PC6248P και PC6224F www.dell.com | support.dell.com - Dell PowerConnect 6224P | Getting Started Guide - Page 122
2007 Dell Inc Dell Inc. Dell DELL PowerConnect Dell Inc Microsoft και Windows Microsoft Corporation. Dell Inc PC6224, PC6248, PC6224P, PC6248P και PC6224F 2007 P/N YC897 Rev. A02 - Dell PowerConnect 6224P | Getting Started Guide - Page 123
1 123 124 124 124 125 125 126 126 126 127 2 o 129 131 131 132 133 121 - Dell PowerConnect 6224P | Getting Started Guide - Page 124
3 136 137 137 137 137 137 CLI/ Telnet/ Web 138 138 138 138 139 4 LED 141 LED 142 LED 142 LED RJ-45 (PoE 143 LED XFP 143 LED SFP 143 122 - Dell PowerConnect 6224P | Getting Started Guide - Page 125
Dell™ PowerConnect™ PC6224, PC6248, PC6224P, PC6248P και PC6224F CD Dell support.dell.com PowerConnect 6200 48,26 εκ. (19 100-250 V AC, 50-60 Hz. 0 εως 45°C (32 εως 113°F 95 123 - Dell PowerConnect 6224P | Getting Started Guide - Page 126
www.dell.com | support.dell.com PowerConnect AC RS-232 CD 1 2 3 4 5 124 - Dell PowerConnect 6224P | Getting Started Guide - Page 127
AC και DC PowerConnect RPS-600 PoE ή το PowerConnect EPS-470 PoE. 1 1-1 1-1 2 3 4 48,26 εκ. (19 5 125 - Dell PowerConnect 6224P | Getting Started Guide - Page 128
www.dell.com | support.dell.com 1 2 5 εκ. (2 13 εκ. (5 1 RS-232 VT100 VT100. 2 DB-9 RS-232 LED LED CLI. 1 AC AC 1-2 2 DC 12 V DC PowerConnect RPS-600 PoE ή PowerConnect EPS-470 PoE AC 126 - Dell PowerConnect 6224P | Getting Started Guide - Page 129
1-2 PowerConnect 6200 12 576 1-3. 1 1 2 3 4 127 - Dell PowerConnect 6224P | Getting Started Guide - Page 130
www.dell.com | support.dell.com 1-3 1-3. 128 - Dell PowerConnect 6224P | Getting Started Guide - Page 131
CD Dell support.dell.com Dell support.dell.com. o DB-9 DTE). VT100 VT100 RS-232 DB-9 1 RS-232 VT100. 2 a 1 2 b 9600 baud. c 8 data bits (8 1 stop bit (1 no parity 129 - Dell PowerConnect 6224P | Getting Started Guide - Page 132
| support.dell.com d None e VT100. f Ctrl Microsoft® Windows®). HyperTerminal µε τα Microsoft Windows 2000 Windows2000 Service Pack 2 Windows 2000 Service Pack 2 VT100 του HyperTerminal www.microsoft.com Service Pack των Windows 2000. 3 RS-232 PowerConnect 6200 1-4. LED LED CLI - Dell PowerConnect 6224P | Getting Started Guide - Page 133
1 VT100 VT100 RS-232. 2 AC. 3 AC. 4 AC. 5 AC. POST POST POST POST RAM POST 60 PowerConnect PowerConnect Dell VT100 Telnet Telnet) η HTTP 131 - Dell PowerConnect 6224P | Getting Started Guide - Page 134
www.dell.com | support.dell.com IP VLAN IP IP VLAN DELL CLI ctrl+z CLI CLI HTTP IP VLAN SNMP SNMP IP SNMP IP IP. IP πύλης. 132 - Dell PowerConnect 6224P | Getting Started Guide - Page 135
IP του VLAN 192.168.1.100:255.255.255.0. admin admin123. IP 192.168.1.10. 192.168.1.1. SNMP Dell_Network_Manager. • Το SNMPv1/2c SNMPv3 SNMP, HTTP και CLI IP (0.0.0.0). IP VLAN (1 Enter Dell 133 - Dell PowerConnect 6224P | Getting Started Guide - Page 136
www.dell.com | support.dell.com POST Welcome to Dell Easy Setup Wizard The setup wizard guides you through the initial switch configuration, and gets you up and running as quickly as possible. You can skip the setup wizard, and enter CLI mode to manually configure the switch. You must respond - Dell PowerConnect 6224P | Getting Started Guide - Page 137
user password: ******** 3: Next, an IP address is set up. The IP address is defined on the default VLAN (VLAN #1), of which all ports are members. This is the IP address you use to access the CLI, Web interface, or SNMP interface for the switch. To set up an IP address: Please enter the IP - Dell PowerConnect 6224P | Getting Started Guide - Page 138
that has been collected: SNMP Interface = "Dell_Network_Manager"@192.168.1.10 User Account set up = admin Password Management IP address = 192.168.1.100:255.255.255.0 Gateway = 192.168.1.1 Βηµα 5: If the information is correct, please select (Y) to save the configuration, and copy to the start - Dell PowerConnect 6224P | Getting Started Guide - Page 139
MAC Web CLI CLI Web FLASH CLI Web 137 - Dell PowerConnect 6224P | Getting Started Guide - Page 140
www.dell.com | support.dell.com CLI/ Telnet/ Web CLI / WEB / SNMP 138 - Dell PowerConnect 6224P | Getting Started Guide - Page 141
CLI CLI movemanagement reload member set description switch priority switch renumber stacking show stack-port show stack-port counters show stack-port diag show switch show supported switchtype 139 - Dell PowerConnect 6224P | Getting Started Guide - Page 142
www.dell.com | support.dell.com 140 - Dell PowerConnect 6224P | Getting Started Guide - Page 143
LED LED Dell PowerConnect PC6224, PC6248, PC6224P, PC6248P και PC6224F. PowerConnect 6200 1-1. PC 6224 1-2. PC 6248 1-3. PC 6224P 141 - Dell PowerConnect 6224P | Getting Started Guide - Page 144
www.dell.com | support.dell.com 1-4. PC 6248P 1-5. PC 6224F LED LED: LED 1-1 LED LED 142 - Dell PowerConnect 6224P | Getting Started Guide - Page 145
LED RJ-45 (PoE) RJ-45 LED 1-2 LED RJ-45 (PoE) LED POE 10/100/1000 Mbps PD PD LED XFP 1-3 LED XFP LED LED SFP 1-4 LED SFP LED 143 - Dell PowerConnect 6224P | Getting Started Guide - Page 146
www.dell.com | support.dell.com 144 - Dell PowerConnect 6224P | Getting Started Guide - Page 147
Dell™ PowerConnect™ 6200 はじめに モデル PC6224, PC6248, PC6224P, PC6248P および PC6224F www.dell.com | support.dell.com - Dell PowerConnect 6224P | Getting Started Guide - Page 148
2007 Dell Inc Dell Inc Dell、DELL PowerConnect は Dell Inc Microsoft および Windows は Microsoft Corporation Dell Inc モデル PC6224, PC6248, PC6224P, PC6248P および PC6224F 2007 年 9 月 P/N YC897 Rev. A02 - Dell PowerConnect 6224P | Getting Started Guide - Page 149
目次 1 設置 149 149 149 150 150 150 151 151 152 153 2 154 156 156 157 157 目次 147 - Dell PowerConnect 6224P | Getting Started Guide - Page 150
3 160 161 161 ID 161 161 161 CLI/ Telnet/ Web 162 162 162 ID 162 163 4 LED 165 LED 166 LED 166 RJ-45 LED(PoE 167 XFP LED 167 SFP LED 167 148 目次 - Dell PowerConnect 6224P | Getting Started Guide - Page 151
設置 Dell™ PC6224, PC6248, PC6224P, PC6248P および PC6224F User Documentation CD support.dell.com PowerConnect 6200 19 48.26 cm AC 100 ~ 250 V、50/60 Hz 0 ~ 45 95 PowerConnect 1 台 • AC 1 本 • RS-232 1 が各 2 4 User Documentation CD はじめに 149 - Dell PowerConnect 6224P | Getting Started Guide - Page 152
www.dell.com | support.dell.com 1 2 3 4 5 AC および DC PoE PowerConnect RPS-600 または PoE PowerConnect EPS-470 1 1-1 図 1-1 150 はじめに - Dell PowerConnect 6224P | Getting Started Guide - Page 153
2 3 4 48.26 cm 5 4 1 2 5 cm 13 cm 1 付属の RS-232 VT100 VT100 PC 2 RS-232 DB-9 LED LED CLI はじめに 151 - Dell PowerConnect 6224P | Getting Started Guide - Page 154
www.dell.com | support.dell.com 1 付属の AC AC 1-2 2 DC PoE PowerConnect RPS-600 または PoE PowerConnect EPS-470 の間を 12 VDC AC 図 1-2 152 はじめに - Dell PowerConnect 6224P | Getting Started Guide - Page 155
PowerConnect 6200 12 576 1-3 1 1 2 3 4 3 m 図 1-3 1-3 はじめに 153 - Dell PowerConnect 6224P | Getting Started Guide - Page 156
www.dell.com | support.dell.com User Documentation CD support.dell.com support.dell.com DTE DB-9 • VT100 VT100 DB-9 RS-232 1 RS-232 VT100 2 a 1 2)。 b 9600 c 8 1 d e VT100 f Function, Arrow, and Ctrl keys Ctrl Terminal keys Microsoft® - Dell PowerConnect 6224P | Getting Started Guide - Page 157
注意:Microsoft Windows 2000 Windows 2000 Service Pack 2 Windows 2000 Service Pack 2 VT100 Windows 2000 www.microsoft.com 3 RS-232 1-4 PowerConnect 6200 LED LED CLI 図 1-4 はじめに 155 - Dell PowerConnect 6224P | Getting Started Guide - Page 158
www.dell.com | support.dell.com 1 RS-232 VT100 VT100 2 AC 3 AC 4 AC 5 AC POST POST POST RAM POST 60 初期設定 • PowerConnect • PowerConnect VT100 Dell Easy Setup Wizard メモ:Telnet(Telnet HTTP(Web VLAN IP IP VLAN IP 156 はじめに - Dell PowerConnect 6224P | Getting Started Guide - Page 159
Dell Easy Setup Wizard または CLI Ctrl+Z CLI 1 • CLI HTTP • 管理 VLAN 用の IP • SNMP IP SNMP SNMP IP IP IP Easy Setup Wizard • 管理 VLAN の IP 192.168.1.100:255.255.255.0 です。 admin admin123 です。 IP 192.168.1.10 です。 192.168.1.1 です。 SNMP Dell_Network_Manager です。 - Dell PowerConnect 6224P | Getting Started Guide - Page 160
| support.dell.com Enter Dell Easy Setup Wizard POST Welcome to Dell Easy Setup Wizard The setup wizard guides you through the initial switch configuration, and gets you up and running as quickly as possible.You can skip the setup wizard, and enter CLI mode to manually configure the switch.You - Dell PowerConnect 6224P | Getting Started Guide - Page 161
reenter the user password:******** メモ:1 回目と 2 Easy Setup Wizard 3: Next, an IP address is set up.The IP address is defined on the default VLAN (VLAN #1), of which all ports are members.This is the IP address you use to access the CLI, Web interface, or SNMP interface for the switch. To set - Dell PowerConnect 6224P | Getting Started Guide - Page 162
that has been collected: SNMP Interface = "Dell_Network_Manager"@192.168.1.10 User Account set up = admin Password Management IP address = 192.168.1.100:255.255.255.0 Gateway = 192.168.1.1 手順 5: If the information is correct, please select (Y) to save the configuration, and copy to the start - Dell PowerConnect 6224P | Getting Started Guide - Page 163
MAC Web メモ:CLI と Web CLI Reference Manual』(CLI ID ID ID ID ID は、CLI または Web ID 1 はじめに 161 - Dell PowerConnect 6224P | Getting Started Guide - Page 164
www.dell.com | support.dell.com CLI/ Telnet/ Web CLI / WEB / SNMP 12 2 ID ID ID ID ID ID 162 はじめに - Dell PowerConnect 6224P | Getting Started Guide - Page 165
以下の CLI CLI Reference Guide』(CLI movemanagement reload member set description switch priority switch renumber stacking show stack-port show stack-port counters show stack-port diag show switch show supported switchtype はじめに 163 - Dell PowerConnect 6224P | Getting Started Guide - Page 166
www.dell.com | support.dell.com 164 はじめに - Dell PowerConnect 6224P | Getting Started Guide - Page 167
LED Dell PowerConnect PC6224、PC6248、PC6224P、PC6248P PC6224F LED PowerConnect 6200 1-1 PC 6224 図 1-2 PC 6248 図 1-3 PC 6224P はじめに 165 - Dell PowerConnect 6224P | Getting Started Guide - Page 168
www.dell.com | support.dell.com 図 1-4 PC 6248P 図 1-5 PC 6224F LED LED LED 表 1-1 LED LED Diag 温度 状態 1 Diagnostics Diagnostics Diagnostics 166 はじめに - Dell PowerConnect 6224P | Getting Started Guide - Page 169
RJ-45 LED(PoE) RJ-45 2 LED(2 表 1-2 RJ-45 LED(PoE) LED 右(POE 2 色: 状態 10/100/1000 Mbps PD PD XFP LED 表 1-3 XFP LED LED 単色: 状態 SFP LED 表 1-4 SFP LED LED 単色: 状態 はじめに 167 - Dell PowerConnect 6224P | Getting Started Guide - Page 170
www.dell.com | support.dell.com 168 はじめに - Dell PowerConnect 6224P | Getting Started Guide - Page 171
Dell™ PowerConnect™ 6200 모델 PC6224, PC6248, PC6224P, PC6248P 및 PC6224F www.dell.com | support.dell.com - Dell PowerConnect 6224P | Getting Started Guide - Page 172
2007 Dell Inc. All rights reserved Dell Inc Dell, DELL 로고 및 PowerConnect는 Dell Inc Microsoft 및 Windows는 Microsoft Corporation Dell Inc 모델 PC6224, PC6248, PC6224P, PC6248P 및 PC6224F 2007 년 9 월 P/N YC897 Rev. A02 - Dell PowerConnect 6224P | Getting Started Guide - Page 173
차례 1 설치 173 173 173 174 174 174 175 175 175 176 2 178 179 180 180 181 차례 171 - Dell PowerConnect 6224P | Getting Started Guide - Page 174
3 184 185 185 ID 185 185 185 CLI 186 186 186 스택 ID 186 186 4 LED 187 LED 188 시스템 LED 188 RJ-45 LED(PoE 189 XFP LED 189 SFP LED 189 172 차례 - Dell PowerConnect 6224P | Getting Started Guide - Page 175
설치 Dell™ PowerConnect™ PC6224, PC6248, PC6224P, PC6248P 및 PC6224F CD Dell support.dell.com PowerConnect 6200 48.26cm(19 100-250 VAC, 50-60 Hz 95 0 ~ 45ºC(32 ~ 113ºF)입니다. PowerConnect 스위치 1대 • AC 1개 • RS-232 케이블 1 1세트(2 1세트(4 CD 173 - Dell PowerConnect 6224P | Getting Started Guide - Page 176
www.dell.com | support.dell.com 1 2 3 4 5 AC 및 DC PoE PowerConnect RPS-600 또는 PoE PowerConnect EPS-470 1 1-1 그림 1-1 2 3 174 - Dell PowerConnect 6224P | Getting Started Guide - Page 177
4 48.26cm(19 5 4 1 2 좌우로 5cm(2 13cm(5 1 제공된 RS-232 VT100 PC VT100 2 RS-232 DB-9 LED CLI 1 제공된 AC AC 1-2 2 PoE PowerConnect RPS-600 또는 PoE PowerConnect EPS-470(별매)의 12 VDC DC AC 175 - Dell PowerConnect 6224P | Getting Started Guide - Page 178
www.dell.com | support.dell.com 그림 1-2 최대 576 12 PowerConnect 6200 1-3 1 1 2 3 4 3m 176 - Dell PowerConnect 6224P | Getting Started Guide - Page 179
그림 1-3 1-3 177 - Dell PowerConnect 6224P | Getting Started Guide - Page 180
www.dell.com | support.dell.com CD Dell support.dell.com 참고: Dell support.dell.com DB-9 DTE(Data Terminal Equipment VT100 VT100 DB-9 RS-232 2000 Windows 2000 2 Windows 2000 2 VT100 Windows 2000 www.microsoft.com 3 RS-232 PowerConnect 6200 1-4 178 - Dell PowerConnect 6224P | Getting Started Guide - Page 181
LED CLI 그림 1-4 1 RS-232 VT100 VT100 2 AC 3 AC 4 AC 5 AC POST(Power-In Self-Test POST POST POST RAM POST 60 179 - Dell PowerConnect 6224P | Getting Started Guide - Page 182
support.dell.com • PowerConnect • PowerConnect Dell Easy Setup Wizard VT100 HTTP VLAN IP IP VLAN IP 주소. Dell Easy Setup Wizard CLI(Command Line Interface Setup Wizard ctrl+z CLI Setup Wizard CLI HTTP • 관리 VLAN 용 IP • 해당 IP SNMP SNMP SNMP IP IP - Dell PowerConnect 6224P | Getting Started Guide - Page 183
HTTP 및 CLI 0.0.0.0) IP IP VLAN (1 IP Enter Dell Easy Setup Wizard POST Welcome to Dell Easy Setup Wizard The setup wizard guides you through the initial switch configuration, and gets you up and running as quickly as possible. You can skip the setup wizard, and enter CLI mode to manually - Dell PowerConnect 6224P | Getting Started Guide - Page 184
see the user documentation). Would you like to configure the SNMP management interface now? [Y/N] y To configure the SNMP management account you must specify the management system IP address and the "community string" or password that the particular management system uses to access the switch - Dell PowerConnect 6224P | Getting Started Guide - Page 185
user password: ******** - Dell PowerConnect 6224P | Getting Started Guide - Page 186
to save the configuration, and copy to the start-up configuration file. If the information is incorrect, select (N) to discard configuration and restart the wizard: [Y/N] y Thank you for using the Dell Easy Setup Wizard. You will now enter CLI mode. SNMP CLI IP DHCP IP 184 - Dell PowerConnect 6224P | Getting Started Guide - Page 187
MAC 참고: CLI CLI ID 할당 ID ID ID CLI ID 스택 ID Suspended Stacking Mode Stacking Mode 185 - Dell PowerConnect 6224P | Getting Started Guide - Page 188
www.dell.com | support.dell.com CLI CLI / WEB / SNMP 12 2 스택 ID ID ID ID ID 다음 CLI CLI movemanagement reload member set description switch priority switch renumber stacking show stack-port show stack-port counters show stack-port diag show switch show supported - Dell PowerConnect 6224P | Getting Started Guide - Page 189
LED Dell PowerConnect PC6224, PC6248, PC6224P, PC6248P 및 PC6224F LED PowerConnect 6200 1-1. PC 6224 그림 1-2. PC 6248 그림 1-3. PC 6224P 187 - Dell PowerConnect 6224P | Getting Started Guide - Page 190
www.dell.com | support.dell.com 그림 1-4. PC 6248P 그림 1-5. PC 6224F LED LED 시스템 LED 표 1-1. 시스템 LED LED 진단 온도 상태 PS PS 오류 188 - Dell PowerConnect 6224P | Getting Started Guide - Page 191
RJ-45 LED(PoE) RJ-45 LED 2 1-2. RJ-45 LED(PoE) LED 오른쪽(POE 상태 10/100/1000 Mbps PD(Power Device PD XFP LED 표 1-3. XFP LED LED 상태 SFP LED 표 1-4. SFP LED LED 상태 189 - Dell PowerConnect 6224P | Getting Started Guide - Page 192
www.dell.com | support.dell.com 190 - Dell PowerConnect 6224P | Getting Started Guide - Page 193
Dell™ PowerConnect™ Przełączniki wieżowe z serii 6200 Instrukcja uruchomienia Modele PC6224, PC6248, PC6224P, PC6248P i PC6224F www.dell.com | support.dell.com - Dell PowerConnect 6224P | Getting Started Guide - Page 194
prawa zastrzeżone. Powielanie w jakikolwiek sposób bez pisemnego zezwolenia firmy Dell Inc. jest zabronione. Znaki towarowe użyte w tym tekście: Dell, logo firmy DELL oraz PowerConnect są znakami towarowyymi należącymi do firmy Dell Inc.; Microsoft i Windows są zastrzeżonymi znakami towarowymi firmy - Dell PowerConnect 6224P | Getting Started Guide - Page 195
Spis treści 1 Instalacja Przygotowanie miejsca instalacji 195 Rozpakowywanie przełącznika 196 Zawartość opakowania 196 Etapy rozpakowywania 196 Montaż przełącznika 197 Montaż na stelażu 197 Montaż przełącznika jako urządzenia wolno stojącego . . . . . 198 Podłączanie przełącznika do terminalu - Dell PowerConnect 6224P | Getting Started Guide - Page 196
208 Identyfikacja topologii 208 Automatyczne przypisanie ID do wieży 208 Kontrola wersji oprogramowania sprzętowego 209 Inicjalizacja systemu 209 CLI/ Telnet/Interfejs sieci Web 209 Wstawianie i usuwanie przełączników 210 Działanie przełącznika wolno stojącego 210 Ponowne numerowanie ID wie - Dell PowerConnect 6224P | Getting Started Guide - Page 197
przełączników Dell™ PowerConnect™ PC6224, PC6248, PC6224P, PC6248P i PC6224F. Więcej informacji można znaleźć w Podręczniku użytkownika, dostępnym na płycie CD User Documentation (Dokumentacja użytkownika) lub na witrynie sieci Web obsługi technicznej firmy Dell pod adresem: support.dell.com, sk - Dell PowerConnect 6224P | Getting Started Guide - Page 198
www.dell.com | support.dell.com Rozpakowywanie przełącznika Zawartość opakowania Podczas rozpakowywania każdego przełącznika upewnij się, że do pakietu dołączono następujące elementy: • Jeden przełącznik PowerConnect • Jeden kabel zasilania prądu zmiennego • Jeden kabel RS-232 • Jeden zestaw montaż - Dell PowerConnect 6224P | Getting Started Guide - Page 199
i zmiennego znajdują się na tylnej części przełącznika. Zalecamy podłączenie zasilacza nadmiarowego, na przykład PowerConnect RPS-600 w przypadku przełączników innych niż PoE lub PowerConnect EPS-470 w przypadku przełączników PoE. Montaż na stelażu OSTRZEŻENIE: Nie używaj zestawu do montowania stela - Dell PowerConnect 6224P | Getting Started Guide - Page 200
www.dell.com | support.dell.com 5 Zamocuj przełącznik do stelaża za pomocą śrub dołączonych do stelaża lub nakrętek klatkowych znajdować się w dowolnym miejscu wieży. W przypadku podłączenia terminalu do zwykłego przełącznika, użycie interfejsu CLI nie będzie możliwe. 198 Instrukcja uruchomienia - Dell PowerConnect 6224P | Getting Started Guide - Page 201
Aby zapewnić nadmiarowe źródło zasilania, proszę podłączyć kabel zasilania 12 VDC z (oddzielnie zakupionego) przełącznika PowerConnect RPS-600 w przypadku przełączników innych niż PeE lub PowerConnect EPS-470 w przypadku przełączników PoE do złącza prądu stałego umieszczonego na tylnym panelu. UWAGA - Dell PowerConnect 6224P | Getting Started Guide - Page 202
www.dell.com | support.dell.com Składanie stosu Można zamontować przełączniki szeregowe PowerConnect 6200 w stosie składającym się z maks. 12 jednostek, obsługującym aż do 576 portów paneli przednich. Proszę utworzyć stos poprzez połączenie sąsiadujących - Dell PowerConnect 6224P | Getting Started Guide - Page 203
User Documentation (Dokumentacja użytkownika). UWAGA: Przed przystąpieniem do konfigurowania przeczytaj informacje handlowe o tym produkcie. Uwagi do wersji można pobrać z witryny pomocy technicznej firmy Dell pod adresem support.dell witrynie sieci Web pomocy technicznej firmy Dell support.dell.com. - Dell PowerConnect 6224P | Getting Started Guide - Page 204
dell.com | support.dell.com POUCZENIE: Podczas używania terminalu HyperTerminal w systemie Microsoft Windows 2000, upewnij się, że na komputerze jest zainstalowane oprogramowanie Windows 2000 Service Pack 2 lub nowsza wersja. Dodatek Windows 2000 Service dla serii PowerConnect 6200 umieszczone - Dell PowerConnect 6224P | Getting Started Guide - Page 205
uruchomieniem. Jeżeli test POST wykryje problem krytyczny, program zatrzyma się. Jeśli ęty programu Dell Easy Setup Wizard. Wst lub HTTP (przegl IP, który ma być przypisany do sieci VLAN umożliwiającej zarządzanie przełącznikiem. • Maskę podsieci IP dla sieci. • Adres IP domyślnej bramki sieci VLAN - Dell PowerConnect 6224P | Getting Started Guide - Page 206
dell.com | support.dell.com Procedura wstępnej konfiguracji Możesz przeprowadzić wstępną konfigurację za pomocą programu Dell Easy Setup Wizard lub interfejsu linii poleceń (CLI poprzez CLI i dostęp HTTP tylko w celu użycia lokalnego ustawienia uwierzytelnienia. • Konfiguruje adres IP sieci VLAN umo - Dell PowerConnect 6224P | Getting Started Guide - Page 207
pujące pole dialogowe: Welcome to Dell Easy Setup Wizard The setup wizard guides you through the initial switch configuration, and gets you up and running as quickly as possible. You can skip the setup wizard, and enter CLI mode to manually configure the switch. You must respond to the next question - Dell PowerConnect 6224P | Getting Started Guide - Page 208
dell.com | support.dell.com Would you like to configure the SNMP management interface now? [Y/N] y To configure the SNMP management account you must specify the management system IP address and the "community string" or password that the particular management system uses to access the switch - Dell PowerConnect 6224P | Getting Started Guide - Page 209
Krok 3: Next, an IP address is set up. The IP address is defined on the default VLAN (VLAN #1), of which all ports are members. This is the IP address you use to access the CLI, Web interface, or SNMP interface for the switch. To set up an IP address: Please enter the IP address of the device - Dell PowerConnect 6224P | Getting Started Guide - Page 210
www.dell.com | support.dell.com Zarządzanie wieżą Przełącznik główny i przełączniki zwykłe Wieża składająca się z połączonych ze sobą przełączników może być zarządzana jak pojedyncza jednostka. Wieża może być zarządzana z poziomu interfejsu sieci Web, stacji zarządzania SNMP lub interfejsu CLI. Gdy - Dell PowerConnect 6224P | Getting Started Guide - Page 211
ych. W ten sposób wszystkie przełączniki zwykłe pozostają w trybie nieoperacyjnym (wszystkie porty są domyślnie wyłączone). CLI/ Telnet/Interfejs sieci Web Możesz użyć CLI / WEB / SNMP w celu zsynchronizowania oprogramowania sprzętowego przechowywanego w przełączniku głównym z przełącznikiem zwykłym - Dell PowerConnect 6224P | Getting Started Guide - Page 212
www.dell.com | support.dell.com Wstawianie i CLI Reference Guide w celu uzyskania informacji o składni każdego polecenia. movemanagement reload member set description switch priority switch renumber stacking show stack-port show stack-port counters show stack-port diag show switch show supported - Dell PowerConnect 6224P | Getting Started Guide - Page 213
i diody LED w systemach Dell PowerConnect PC6224, PC6248, PC6224P, PC6248P i PC6224F. Panele przednie Panele przednie systemów szeregowych PowerConnect 6200 są przedstawione na poniższych rysunkach. Rysunek 1-1. PC 6224 Rysunek 1-2. PC 6248 Rysunek 1-3. PC 6224P Instrukcja uruchomienia 211 - Dell PowerConnect 6224P | Getting Started Guide - Page 214
www.dell.com | support.dell.com Rysunek 1-4. PC 6248P Rysunek 1-5. PC 6224F Diody LED W poniższych sekcjach znajduje się lista diod LED. Systemowe diody LED Table 1-1. Systemowe diody LED Diody - Dell PowerConnect 6224P | Getting Started Guide - Page 215
Diody LED RJ-45 (PoE) Porty RJ-45 mają dwie zintegrowane diody LED (jedną dwukolorową i jedną jednokolorową). Table 1-2. Diody LED RJ-45 (PoE) Diody LED Lewa - jednokolorowa: Port: połączenie/ aktywność Prawa (model POE) - dwukolorowa: Stan • Zielona: Połączenie o szybkości 10/100/1000 Mb/s • Ś - Dell PowerConnect 6224P | Getting Started Guide - Page 216
www.dell.com | support.dell.com 214 Instrukcja uruchomienia - Dell PowerConnect 6224P | Getting Started Guide - Page 217
Conmutadores apilables Dell™ PowerConnect™ serie 6200 Guía de introducción Modelos PC6224, PC6248, PC6224P, PC6248P y PC6224F www.dell.com | support.dell.com - Dell PowerConnect 6224P | Getting Started Guide - Page 218
de este documento en cualquier forma sin la autorización por escrito de Dell Inc. Marcas comerciales utilizadas en este texto: Dell, el logotipo de DELL y PowerConnect son marcas comerciales de Dell Inc.; Microsoft y Windows son marcas comerciales registradas de Microsoft Corporation. Otras marcas - Dell PowerConnect 6224P | Getting Started Guide - Page 219
Contenido 1 Instalación Preparación del sitio 219 Desembalaje del conmutador 220 Contenido del paquete 220 Pasos del desembalaje 220 Montaje del conmutador 221 Instalación en un rack 221 Instalación como conmutador independiente 222 Conexión de un conmutador a un terminal 222 Conexión de un - Dell PowerConnect 6224P | Getting Started Guide - Page 220
de la topología 232 Asignación automática de ID de conmutador 232 Comprobación de la versión del firmware 232 Inicialización del sistema 232 Interfaz CLI/Telnet/Web 233 Inserción y extracción de conmutadores 233 Funcionamiento como conmutador independiente 233 Cambio de la numeración de las - Dell PowerConnect 6224P | Getting Started Guide - Page 221
, incluida en el CD User Documentation (Documentación del usuario) o visite la página web de asistencia de Dell (support.dell.com) para obtener las últimas actualizaciones de la documentación y del firmware. Preparación del sitio Los conmutadores de la serie PowerConnect 6200 se pueden montar en - Dell PowerConnect 6224P | Getting Started Guide - Page 222
www.dell.com | support.dell.com Desembalaje del conmutador Contenido del paquete Cuando desembale los conmutadores, compruebe que se han incluido los elementos siguientes: • Un conmutador PowerConnect • Un cable de alimentación de CA • Un cable RS-232 • Un kit de montaje para instalación en rack ( - Dell PowerConnect 6224P | Getting Started Guide - Page 223
PoE o PowerConnect EPS-470 para dispositivos con PoE. Instalación en un rack PRECAUCIÓN: no utilice los kits de montaje en rack para instalar el conmutador suspendido bajo una mesa o escritorio, ni para fijarlo a la pared. PRECAUCIÓN: antes de continuar, desconecte todos los cables del conmutador - Dell PowerConnect 6224P | Getting Started Guide - Page 224
dell.com | support.dell.com Instalación como conmutador independiente AVISO: se recomienda montar el conmutador en un rack. Si no instala el conmutador en un rack, instálelo en una superficie plana. La superficie debe poder soportar el peso del conmutador y de los cables utilizar la CLI. Conexión - Dell PowerConnect 6224P | Getting Started Guide - Page 225
Figura 1-2. Conexión del cable de alimentación Ensamblaje de una pila Puede apilar hasta 12 conmutadores PowerConnect serie 6200, lo que cada uno de los conmutadores que se va a apilar. 2 Utilice los cables suministrados con los módulos de apilamiento para conectar desde un conmutador al siguiente - Dell PowerConnect 6224P | Getting Started Guide - Page 226
www.dell.com | support.dell.com Figura 1-3. Conexión de una pila de conmutadores NOTA: el cable largo no se muestra en la figura 1-3. La topología en anillo resultante permite que toda la pila funcione como un conmutador único con funciones flexibles - Dell PowerConnect 6224P | Getting Started Guide - Page 227
User Documentation. NOTA: antes de continuar, lea las notas de la versión de este producto. Puede descargar las notas de la versión de la página web de asistencia de Dell (support.dell un cable cruzado RS-232 al terminal que está ejecutando el software de emulación de terminal VT100. 2 Configure el - Dell PowerConnect 6224P | Getting Started Guide - Page 228
.com para obtener información sobre los Service Pack de Windows 2000. 3 Conecte el conector hembra del cable cruzado RS-232 directamente al puerto de la consola del conmutador y apriete los pernos cautivos de retención. Los puertos de consola de la serie PowerConnect 6200 se encuentran en el panel - Dell PowerConnect 6224P | Getting Started Guide - Page 229
predeterminada de la VLAN de administración para configurar la ruta predeterminada. Procedimiento de configuración inicial La configuración inicial se puede realizar con Easy Setup Wizard (Asistente para configuración fácil) de Dell o con la interfaz de línea de comandos (CLI). El asistente para - Dell PowerConnect 6224P | Getting Started Guide - Page 230
interfaces SNMP, HTTP y CLI. También puede permitir que todas las direcciones IP tengan acceso a estas interfaces de administración especificando la dirección IP (0.0.0.0). • Se configura una dirección IP para la VLAN ón de Easy Setup Wizard (Asistente para configuración fácil) de Dell, con los - Dell PowerConnect 6224P | Getting Started Guide - Page 231
see the user documentation). Would you like to configure the SNMP management interface now? [Y/N] y To configure the SNMP management account you must specify the management system IP address and the "community string" or password that the particular management system uses to access the switch - Dell PowerConnect 6224P | Getting Started Guide - Page 232
| support.dell.com Please enter the IP address of the Management System (A.B.C.D) or wildcard (0.0.0.0) to manage from any Management Station {0.0.0.0}: 192.168.1.10 Paso 2: Now we need to configure your initial privilege (Level 15) user account. This account is used to login to the CLI and - Dell PowerConnect 6224P | Getting Started Guide - Page 233
that has been collected: SNMP Interface = "Dell_Network_Manager"@192.168.1.10 User Account set up = admin Password Management IP address = 192.168.1.100:255.255.255.0 Gateway = 192.168.1.1 Paso 5: If the information is correct, please select (Y) to save the configuration, and copy to the start - Dell PowerConnect 6224P | Getting Started Guide - Page 234
la versión del firmware y del hardware, las preferencias de administración, la dirección MAC del conmutador y el número de serie del conmutador. Puede utilizar la interfaz de línea de comandos o la interfaz web para ver esta información. NOTA: Consulte el manual de referencia de la CLI y la guía del - Dell PowerConnect 6224P | Getting Started Guide - Page 235
Inicialización del sistema en modo de apilamiento suspendido Si las versiones del firmware de la pila no son coherentes una vez que se haya completado la de forma predeterminada). Interfaz CLI/Telnet/Web Con las interfaces CLI/WEB/SNMP puede sincronizar el firmware que está almacenado en - Dell PowerConnect 6224P | Getting Started Guide - Page 236
detallada sobre la sintaxis de cada comando, consulte la guía de referencia de la CLI. movemanagement reload member set description switch priority switch renumber stacking show stack-port show stack-port counters show stack-port diag show switch show supported switchtype 234 Guía de introducción - Dell PowerConnect 6224P | Getting Started Guide - Page 237
y los LED de los sistemas Dell PowerConnect PC6224, PC6248, PC6224P, PC6248P y PC6224F. Paneles frontales En las ilustraciones siguientes se muestran los paneles frontales de los sistemas PowerConnect serie 6200. Figura 1-1. PC 6224 Figura 1-2. PC 6248 Figura 1-3. PC 6224P Guía de introducción 235 - Dell PowerConnect 6224P | Getting Started Guide - Page 238
www.dell.com | support.dell.com Figura 1-4. PC 6248P Figura 1-5. PC 6224F LED En las secciones siguientes se enumeran los LED. LED del sistema Tabla 1-1. LED del sistema LED Estado - Dell PowerConnect 6224P | Getting Started Guide - Page 239
LED de RJ-45 (PoE) Los puertos RJ-45 tendrán dos LED integrados (uno bicolor y uno de un solo color). Tabla 1-2. LED de RJ-45 (PoE) LED Izquierda - un solo color: enlace/actividad del puerto Derecha (modelo con PoE) - dos colores: Estado • Luz verde: enlace a 10/100/1 000 Mbps. • Fijo: enlace - Dell PowerConnect 6224P | Getting Started Guide - Page 240
www.dell.com | support.dell.com 238 Guía de introducción - Dell PowerConnect 6224P | Getting Started Guide - Page 241
Dell™ PowerConnect™ 6200 Serisi İstiflenebilir Anahtarlar Başlangıç Kılavuzu Modeller PC6224, PC6248, PC6224P, PC6248P ve PC6224F www.dell.com | support.dell.com - Dell PowerConnect 6224P | Getting Started Guide - Page 242
yazılı izni olmadan herhangi bir şekilde çoğaltılması kesinlikle yasaktır. Bu metinde kullanılan ticari markalar: Dell, DELL logosu ve PowerConnect Dell Inc.'nin ticari markalarıdır; Microsoft ve Windows Microsoft Corporation'un tescilli ticari markalarıdır. Bu belgede, marka ve adların sahiplerine - Dell PowerConnect 6224P | Getting Started Guide - Page 243
İçerik 1 Montaj Saha Hazrl 243 Anahtarn Paketinin Açlmas 243 Paket Muhteviyat 243 Paketi Açma Admlar 244 Anahtarn Monte Edilmesi 244 Raf çerisine Kurulum 244 Bamsz bir Anahtarn Kurulumu 245 Anahtarn bir Terminale Balanmas 245 Anahtarn bir Güç Kaynana Balanmas 245 Bir Kümenin Birletirilmesi - Dell PowerConnect 6224P | Getting Started Guide - Page 244
CLI/ Telnet/ Web Arayüz 255 Anahtarlarn Eklenmesi ve Çkarlmas 255 Bamsz bir Anahtar Olarak Çalma 255 Küme Kimlik Bilgisi Yeniden Numaralandrma 255 Kullanc Denetimleri 256 4 Ön Paneller ve LED' - Dell PowerConnect 6224P | Getting Started Guide - Page 245
Kullanc Belgeleri CD'nizde yer alan Kullanc Klavuzu'na baknz veya belgeler ve ürün bilgileri hakkndaki en son güncellemeler için support.dell.com adresine gidiniz. Saha Hazrl PowerConnect 6200 serisi anahtarlar 48,26-cm (19-inç) standart bir rafa monte edilebilir veya (düz bir yüzey üzerinde) bamsz - Dell PowerConnect 6224P | Getting Started Guide - Page 246
www.dell.com | support.dell.com Paketi Açma Admlar NOT: Paketi açmadan önce, kutuyu kontrol edin ve örleri anahtarn arka paneli üzerindedir. PoE olmayan anahtarlar için PowerConnect RPS-600 veya PoE anahtarlar için PowerConnect EPS-470 gibi yedekli bir güç kaynann kullanlmasn tavsiye ederiz. Raf - Dell PowerConnect 6224P | Getting Started Guide - Page 247
Anahtar seçerler. Terminali üye bir anahtara balarsanz, CLI kullanamazsnz. Anahtarn bir Güç Kaynana Balanmas UYARI: Anahtara in, PoE olmayan anahtarlar için (ayrca satn alnan) bir PowerConnect RPS-600 veya PoE anahtarlar için bir PowerConnect EPS-470'den gelen 12 VDC güç kablosunu arka panel üzerinde - Dell PowerConnect 6224P | Getting Started Guide - Page 248
www.dell.com | support.dell.com Şekil 1-2. Güç Kablosunun Balanmas Bir Kümenin Birletirilmesi PowerConnect 6200 serisi anahtarlar, 576 ön panel portunu destekleyecek ekilde, 12 anahtara kadar kümeleyebilirsiniz. Anahtarlarn sol arka tarafnda bulunan kümeleme portlarn kullanarak yan yana olan - Dell PowerConnect 6224P | Getting Started Guide - Page 249
Şekil 1-3. Bir Anahtar Kümesinin Balanmas NOT: Uzun kablo Şekil 1-3'de gösterilmemitir. Ortaya çkan halka topolojisi, tüm kümenin esnek yük devretme yeteneine sahip tek bir anahtar gibi çalmasna imkân salar. Başlangıç Kılavuzu 247 - Dell PowerConnect 6224P | Getting Started Guide - Page 250
. NOT: Devam etmeden önce bu ürünün sürüm notlarn okuyun. Sürüm notlarn, support.dell.com adresindeki Dell Destek web sitesinden indirebilirsiniz. NOT: Kullanc belgelerinin en son sürümünü support.dell.com adresindeki Dell Destek web sitesinden edinmenizi tavsiye ederiz. Terminalin Anahtara Balanmas - Dell PowerConnect 6224P | Getting Started Guide - Page 251
konsol portuna balayn ve sabitleme cvatalarn sktrn. The PowerConnect 6200 serisi konsol portlar Şekil 1-4'de gö erler. Terminali üye bir anahtara balarsanz, CLI kullanamazsnz. Şekil 1-4. Konsol Portuna Balanma bileenlerini kontrol eder. POST kritik bir problem tespit ederse program ak durur. POST - Dell PowerConnect 6224P | Getting Started Guide - Page 252
bir adet ayrcalkl kullanc hesabn yaplandrr. • Sadece yerel kimlik dorulama ayarn kullanmak için CLI oturum açma ve HTTP eriimini etkinletirir. • Yönetim VLAN' için IP adresini ayarlar. • Belirli bir IP adresinde SNMP yöneticisi tarafndan kullanlmak üzere SNMP ortak dizgiyi ayarlar. Bu anahtar için - Dell PowerConnect 6224P | Getting Started Guide - Page 253
iletiim kutusu görüntülenir: Welcome to Dell Easy Setup Wizard The setup wizard guides you through the initial switch configuration, and gets you up and running as quickly as possible. You can skip the setup wizard, and enter CLI mode to manually configure the switch. You must respond to the next - Dell PowerConnect 6224P | Getting Started Guide - Page 254
the CLI and Web interface. You may set up other accounts and change privilege levels later. For more information on setting up user accounts and changing privilege levels, see the User's Guide. To set up a user account: Please enter the user name {admin}: admin Please enter the user password - Dell PowerConnect 6224P | Getting Started Guide - Page 255
bakn. Adm 3: Next, an IP address is set up. The IP address is defined on the default VLAN (VLAN #1), of which all ports are members. This is the IP address you use to access the CLI, Web interface, or SNMP interface for the switch. To set up an IP address: Please enter the IP address of the device - Dell PowerConnect 6224P | Getting Started Guide - Page 256
www.dell.com | support.dell.com Bir Kümenin Yönetilmesi Ana ve Üye Anahtarlar Bir anahtar kümesi birbirine balandnda tek bir birim gibi yönetilebilir. Bir küme, web tabanl bir arayüzden, bir SNMP yönetim istasyonundan veya bir CLI'dan yönetilebilir. Bir küme oluturulduunda, bir anahtar otomatik - Dell PowerConnect 6224P | Getting Started Guide - Page 257
hiçbiri balatlmaz. Bu ilem tüm üye anahtarlar operasyonel olamayan modda kalmaya zorlar (varsaylan olarak tüm portlar devre ddr). CLI/ Telnet/ Web Arayüzü CLI / WEB / SNMP'yi Ana Anahtarda depolanan ürün bilgisini bir üye anahtara senkronize etmek için kullanabilirsiniz. Anahtarlarn Eklenmesi ve - Dell PowerConnect 6224P | Getting Started Guide - Page 258
www.dell.com | support.dell.com Kullanc Denetimleri Bu özellii kontrol etmek için aadaki CLI komutlarn kullann. Her komutun sözdizimi ayrntlar için CLI Referans Klavuzu'na baknz. movemanagement reload member set description switch priority switch renumber stacking show stack-port show stack-port - Dell PowerConnect 6224P | Getting Started Guide - Page 259
LED'ler Bu ek Dell PowerConnect PC6224, PC6248, PC6224P, PC6248P ve PC6224F sistemlerinin ön panel ve LED'lerini açıklar. Ön Paneller PowerConnect 6200 serisi sistemlerin ön panelleri aşağıdaki şekillerde gösterilmiştir. Şekil 1-1. PC 6224 Şekil 1-2. PC 6248 Şekil 1-3. PC 6224P Başlangıç Kılavuzu - Dell PowerConnect 6224P | Getting Started Guide - Page 260
www.dell.com | support.dell.com Şekil 1-4. PC 6248P Şekil 1-5. PC 6224F LED'ler Aşağıdaki kısımlar LED'leri listeler. Sistem LED'leri Tablo 1-1. Sistem LED'leri LED Fan Durumu Güç Kaynağı - Dell PowerConnect 6224P | Getting Started Guide - Page 261
RJ-45 LED'ler (PoE) RJ-45 portlarında iki adet entegre LED bulunur (Biri iki renkli ve diğeri tek renkli). Tablo 1-2. RJ-45 LED'ler (PoE) LED Sol - Tek renk: Port bağlantısı/faaliyeti Sağ (PoE Modeli) - Çift renkli: Durum • Yeşil: Bağlantı 10/100/1000 Mbps'de • Sabit: Bağlantı var ancak faaliyet - Dell PowerConnect 6224P | Getting Started Guide - Page 262
www.dell.com | support.dell.com 260 Başlangıç Kılavuzu - Dell PowerConnect 6224P | Getting Started Guide - Page 263
www.dell.com | support.dell.com )RJ-45 LEDs (PoE RJ-45 LED RJ-45 LEDs (PoE) .1-2 10/100/1000 Mbps - LED POE XFP LED XFP LED .1-3 LED SFP LED - Dell PowerConnect 6224P | Getting Started Guide - Page 264
LED LED- LED 1-1 LED LED 279 - Dell PowerConnect 6224P | Getting Started Guide - Page 265
www.dell.com | support.dell.com PC 6248P .4-1 PC 6224F .5-1 278 - Dell PowerConnect 6224P | Getting Started Guide - Page 266
show stack-port counters show stack-port diag show switch show supported switchtype LED LED Dell Power Connect PC6248P ,PC6224P ,PC6248 , PC6224ו.PC6224F - PowerConnect 6200 PC 6224 1-1 PC 6248 2-1 PC 6224P 3-1 277 - Dell PowerConnect 6224P | Getting Started Guide - Page 267
www.dell.com | support.dell.com /Telnet /CLI CLI/WEB/SNMP 12 CLI CLI Reference Guide movemanagement reload member set description switch priority switch renumber stacking show stack-port | 276 - Dell PowerConnect 6224P | Getting Started Guide - Page 268
SNMP CLI IP DHCP IP MAC CLI Reference Manual CLI FLASH CLI 275 - Dell PowerConnect 6224P | Getting Started Guide - Page 269
www.dell.com | support.dell.com :3 Next, an IP address is set up. The IP address is defined on the default VLAN (VLAN #1), of which all ports are members. This is the IP address you use to access the CLI, Web interface, or SNMP interface for the switch. To set up an IP address: Please enter the IP - Dell PowerConnect 6224P | Getting Started Guide - Page 270
the CLI and Web interface. You may set up other accounts and change privilege levels later. For more information on setting up user accounts and changing privilege levels, see the User's Guide. To set up a user account: Please enter the user name {admin}: admin Please enter the user password - Dell PowerConnect 6224P | Getting Started Guide - Page 271
HTTP ,SNMP CLI IP 0.0.0.0) IP IP 1)VLAN Enter Dell POST Welcome to Dell Easy Setup Wizard The setup wizard guides you through the initial switch configuration, and gets you up and running as quickly as possible. You can skip the setup wizard, and enter CLI mode to manually - Dell PowerConnect 6224P | Getting Started Guide - Page 272
1 VT100 VT100 RS 232 2 3 4 5 POST POST POST POST RAM POST 60 PowerConnect PowerConnect Dell VT100 Telnet Telnetאו HTTP IP VLAN IP IP VLAN Dell CLI ctrl+z CLI CLI HTTP 271 - Dell PowerConnect 6224P | Getting Started Guide - Page 273
VT100 2 1 2 9600 8 VT100 Ctrl Microsoft® Windows Microsoft Windows 2000 Windows 2000 Service Pack 2 Windows 2000 Service Pack 2 VT100של www.microsoft.com Service packs Windows 2000 3 RS-232 PowerConnect 6200 1-4 CLI- 1.4 | 270 - Dell PowerConnect 6224P | Getting Started Guide - Page 274
1.3 1-3 Dell support.dell.com Dell support.dell.com DB-9 Data Terminal Equipment (DTE VT-100 VT100 269 - Dell PowerConnect 6224P | Getting Started Guide - Page 275
www.dell.com | support.dell.com 1.2 PowerConnect 6200 12 576 1-3 1 1 2 3 4 3 | 268 - Dell PowerConnect 6224P | Getting Started Guide - Page 276
1 2 5 13 1 RS-232 VT100 VT100 2 DB-9 RS-232 CLI- 1 1-2 2 12 VDC PowerConnect RPS-600 PoEאו EPS-470 PowerConnect PoE DC 267 - Dell PowerConnect 6224P | Getting Started Guide - Page 277
www.dell.com | support.dell.com 1 2 3 4 5 ACו DC PowerConnect RPS-600 PoEאו EPS-470 PowerConnect PoE 1 1-1 1.1 2 3 4 48.26 5 | 266 - Dell PowerConnect 6224P | Getting Started Guide - Page 278
Dell™ PowerConnect PC6224 PC6248P ,PC6224P ,PC6248ו .PC6224F Dell support.dell.com 6200 48.26 100-250 VAC, 50-60 Hz 0ל 45ºC 95 PowerConnect RS-232אחד 265 - Dell PowerConnect 6224P | Getting Started Guide - Page 279
. 3 275... 275 275 275 275 275... /Telnet /CLI 276 276 276 276 276... .4 LED 277... 277...LED LED 279 280 RJ-45 LEDs (PoE 280...XFP LED 280...SFP LED | 264 - Dell PowerConnect 6224P | Getting Started Guide - Page 280
.1 265 265 265 266 266 266 267 267 267 268... .2 269 271 271 271 272... 263 - Dell PowerConnect 6224P | Getting Started Guide - Page 281
Dell Inc. 2007 Dell Inc. Dell DELLו PowerConnect Microsoft ;Dell Inc Windows Microsoft Corporation Dell Inc PC6248P ,PC6224P ,PC6248 , PC6224וPC6224F- A02 P/N YC897 2007 - Dell PowerConnect 6224P | Getting Started Guide - Page 282
Dell™ PowerConnect™ 6200 PC6224F- וPC6248P ,PC6224P ,PC6248 , PC6224 www.dell.com | support.dell.com
-
 1
1 -
 2
2 -
 3
3 -
 4
4 -
 5
5 -
 6
6 -
 7
7 -
8
-
9
-
10
-
11
-
12
-
13
-
14
-
15
-
16
-
17
-
18
-
19
-
20
-
21
-
22
-
23
-
24
-
25
-
26
-
27
-
28
-
29
-
30
-
31
-
32
-
33
-
34
-
35
-
36
-
37
-
38
-
39
-
40
-
41
-
42
-
43
-
44
-
45
-
46
-
47
-
48
-
49
-
50
-
51
-
52
-
53
-
54
-
55
-
56
-
57
-
58
-
59
-
60
-
61
-
62
-
63
-
64
-
65
-
66
-
67
-
68
-
69
-
70
-
71
-
72
-
73
-
74
-
75
-
76
-
77
-
78
-
79
-
80
-
81
-
82
-
83
-
84
-
85
-
86
-
87
-
88
-
89
-
90
-
91
-
92
-
93
-
94
-
95
-
96
-
97
-
98
-
99
-
100
-
101
-
102
-
103
-
104
-
105
-
106
-
107
-
108
-
109
-
110
-
111
-
112
-
113
-
114
-
115
-
116
-
117
-
118
-
119
-
120
-
121
-
122
-
123
-
124
-
125
-
126
-
127
-
128
-
129
-
130
-
131
-
132
-
133
-
134
-
135
-
136
-
137
-
138
-
139
-
140
-
141
-
142
-
143
-
144
-
145
-
146
-
147
-
148
-
149
-
150
-
151
-
152
-
153
-
154
-
155
-
156
-
157
-
158
-
159
-
160
-
161
-
162
-
163
-
164
-
165
-
166
-
167
-
168
-
169
-
170
-
171
-
172
-
173
-
174
-
175
-
176
-
177
-
178
-
179
-
180
-
181
-
182
-
183
-
184
-
185
-
186
-
187
-
188
-
189
-
190
-
191
-
192
-
193
-
194
-
195
-
196
-
197
-
198
-
199
-
200
-
201
-
202
-
203
-
204
-
205
-
206
-
207
-
208
-
209
-
210
-
211
-
212
-
213
-
214
-
215
-
216
-
217
-
218
-
219
-
220
-
221
-
222
-
223
-
224
-
225
-
226
-
227
-
228
-
229
-
230
-
231
-
232
-
233
-
234
-
235
-
236
-
237
-
238
-
239
-
240
-
241
-
242
-
243
-
244
-
245
-
246
-
247
-
248
-
249
-
250
-
251
-
252
-
253
-
254
-
255
-
256
-
257
-
258
-
259
-
260
-
261
-
262
-
263
-
264
-
265
-
266
-
267
-
268
-
269
-
270
-
271
-
272
-
273
-
274
-
275
-
276
-
277
-
278
-
279
-
280
-
281
-
282
 |
 |

www.dell.com | support.dell.com
Dell™ PowerConnect™
6200 Series Stackable Switches
Getting Started Guide
使用入门指南
Příručka Začínáme
Guide de mise en route
Erste Schritte
Οδηγός για γρήγορο ξεκίνηµα
はじめに
시작 설명서
Instrukcja uruchomienia
Guía de introducción
Başlangıç Kılavuzu
Models PC6224, PC6248, PC6224P, PC6248P, and PC6224F