Dell PowerConnect W-IAP175P Dell Instant 6.1.3.4-3.1.0.0 User Guide - Page 61
Splash Type, Description and steps to set up, Table 11
 |
View all Dell PowerConnect W-IAP175P manuals
Add to My Manuals
Save this manual to your list of manuals |
Page 61 highlights
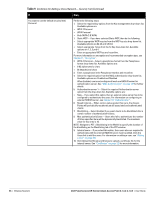
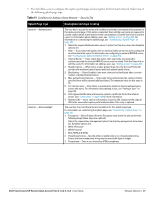
7. This tab allows you to configure the captive portal page and encryption for the Guest network. Select one of the following splash page type: Table 11 Conditions for Adding a Guest Network- Security Tab Splash Page Type Description and steps to set up Internal - Authenticated Internal - Acknowledged The user has to accept the terms and conditions and enter a username and password on the captive portal page. If this option is selected, then add the users who are required to use the captive portal authentication to the user database. Click the Users link to add the users. For information about adding a user, see "Adding a User" on page 235. For information on customizing the splash page, see "Customizing a Splash Page" on page 120. 1. Select the required Authentication server 1 option from the drop-down list. Available options are: New - If you select this option, then an external radius server has to be configured to authenticate the users. For information on configuring an external RADIUS server, see "Configuring an External RADIUS Server" on page 110. Internal Server - If you select this option, then users who are required to authenticate with the internal RADIUS server must be added. Click the Users link to add the users. For information on adding a user, see "Adding a User" on page 235. 2. Reauth interval - When set to a value greater than zero, the Access Points will periodically reauthenticate all associated and authenticated clients. 3. Blacklisting - Select Enabled if you want clients to be blacklisted after a certain number of authentication failures. 4. Max authentication failures - Users who fail to authenticate the number of times specified here will be dynamically blacklisted. The maximum value for this entry is 10. 5. For Internal users -Click Users to populate the system's internal authentication server with users. For information about adding a user, see "Adding a User" on page 161. 6. Click Upload Certificate and browse to upload a certificate file for the internal server. See "Certificates" on page 129 for more information. 7. Redirect URL- Users can be redirected to a specific URL (instead of the original URL) after successful captive portal authentication. This entry is optional. The user has to accept the terms and conditions for this splash page type. For information on customizing the splash page, see "Customizing a Splash Page" on page 120. 1. Encryption- Select Enabled from the Encryption drop-down list and perform the following steps (these steps are optional): Select the required key management option from the Key management drop-down list. Available options are: WPA-2 Personal WPA Personal Both (WPA-2 & WPA) 2. Passphrase format- Specify either an alphanumeric or a hexadecimal string. Ensure that the hexadecimal string must be exactly 64 digits in length. 3. Passphrase- Enter a pre-shared key (PSK) passphrase. Dell PowerConnect W-Series Instant Access Point 6.1.3.4-3.1.0.0 | User Guide Wireless Network | 61
-
 1
1 -
2
-
3
-
4
-
5
-
6
-
7
-
8
-
9
-
10
-
11
-
12
-
13
-
14
-
15
-
16
-
17
-
18
-
19
-
20
-
21
-
22
-
23
-
24
-
25
-
26
-
27
-
28
-
29
-
30
-
31
-
32
-
33
-
34
-
35
-
36
-
37
-
38
-
39
-
40
-
41
-
42
-
43
-
44
-
45
-
46
-
47
-
48
-
49
-
50
-
51
-
52
-
53
-
54
-
55
-
 56
56 -
 57
57 -
 58
58 -
 59
59 -
 60
60 -
 61
61 -
 62
62 -
 63
63 -
 64
64 -
 65
65 -
 66
66 -
67
-
68
-
69
-
70
-
71
-
72
-
73
-
74
-
75
-
76
-
77
-
78
-
79
-
80
-
81
-
82
-
83
-
84
-
85
-
86
-
87
-
88
-
89
-
90
-
91
-
92
-
93
-
94
-
95
-
96
-
97
-
98
-
99
-
100
-
101
-
102
-
103
-
104
-
105
-
106
-
107
-
108
-
109
-
110
-
111
-
112
-
113
-
114
-
115
-
116
-
117
-
118
-
119
-
120
-
121
-
122
-
123
-
124
-
125
-
126
-
127
-
128
-
129
-
130
-
131
-
132
-
133
-
134
-
135
-
136
-
137
-
138
-
139
-
140
-
141
-
142
-
143
-
144
-
145
-
146
-
147
-
148
-
149
-
150
-
151
-
152
-
153
-
154
-
155
-
156
-
157
-
158
-
159
-
160
-
161
-
162
-
163
-
164
-
165
-
166
-
167
-
168
-
169
-
170
-
171
-
172
-
173
-
174
-
175
-
176
-
177
-
178
-
179
-
180
-
181
-
182
-
183
-
184
-
185
-
186
-
187
-
188
-
189
-
190
-
191
-
192
-
193
-
194
-
195
-
196
-
197
-
198
-
199
-
200
-
201
-
202
-
203
-
204
-
205
-
206
-
207
-
208
-
209
-
210
-
211
-
212
-
213
-
214
-
215
-
216
-
217
-
218
-
219
-
220
-
221
-
222
-
223
-
224
-
225
-
226
-
227
-
228
-
229
-
230
-
231
-
232
-
233
-
234
-
235
-
236
-
237
-
238
-
239
-
240
-
241
-
242
-
243
-
244
-
245
-
246
 |
 |
