Denon AVR-1712 Owners Manual - Page 7
Connections, Important information - setup
 |
View all Denon AVR-1712 manuals
Add to My Manuals
Save this manual to your list of manuals |
Page 7 highlights
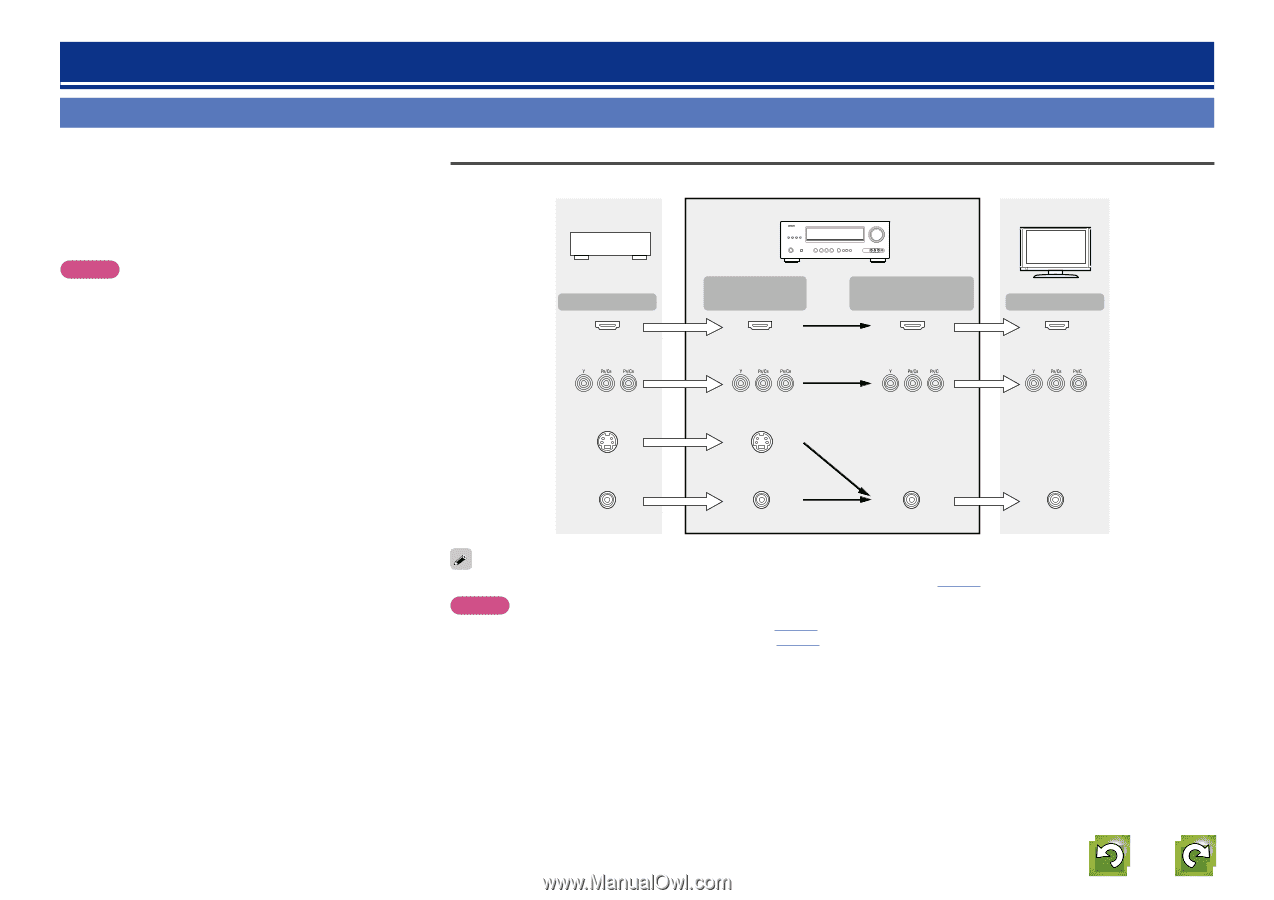
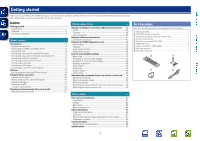
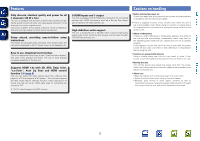
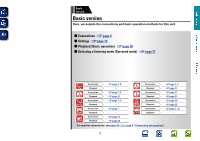
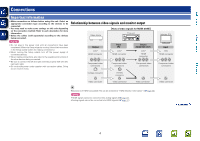
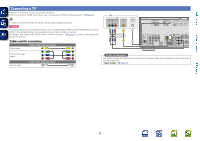
Basic version Advanced version Connections Important information • Make connections as follows before using this unit. Select an appropriate connection type according to the devices to be connected. • You may need to make some settings on this unit depending on the connection method. Refer to each description for more information. • Select the cables (sold separately) according to the devices being connected. Relationship between video signals and monitor output Video device GFlow of video signals for MAIN ZONEH This unit NOTE • Do not plug in the power cord until all connections have been completed. (When the Setup wizard is running, follow the instructions in the Setup wizard screen for making connections.) • When running the Setup wizard, turn off the power supply of connected devices. • When making connections, also refer to the operating instructions of the other devices being connected. • Be sure to connect the left and right channels properly (left with left, right with right). • Do not bundle power cords together with connection cables. Doing so can result in noise. Output HDMI connector Component video connectors Input (IN) HDMI connector Component video connectors Output (MONITOR OUT) HDMI connector Component video connectors S-Video connector S-Video connector Video connector Video connector Video connector Monitor (TV) Input HDMI connector Component video connectors Video connector Resolutions of HDMI-compatible TVs can be checked at "HDMI Monitor Information" (vpage 58). NOTE • HDMI signals cannot be converted into analog signals (vpage 91). • Analog signals cannot be converted into HDMI signals (vpage 91). vSee overleaf Information 4
-
 1
1 -
 2
2 -
 3
3 -
 4
4 -
 5
5 -
 6
6 -
 7
7 -
 8
8 -
 9
9 -
 10
10 -
 11
11 -
 12
12 -
13
-
14
-
15
-
16
-
17
-
18
-
19
-
20
-
21
-
22
-
23
-
24
-
25
-
26
-
27
-
28
-
29
-
30
-
31
-
32
-
33
-
34
-
35
-
36
-
37
-
38
-
39
-
40
-
41
-
42
-
43
-
44
-
45
-
46
-
47
-
48
-
49
-
50
-
51
-
52
-
53
-
54
-
55
-
56
-
57
-
58
-
59
-
60
-
61
-
62
-
63
-
64
-
65
-
66
-
67
-
68
-
69
-
70
-
71
-
72
-
73
-
74
-
75
-
76
-
77
-
78
-
79
-
80
-
81
-
82
-
83
-
84
-
85
-
86
-
87
-
88
-
89
-
90
-
91
-
92
-
93
-
94
-
95
-
96
-
97
-
98
-
99
-
100
-
101
-
102
-
103
-
104
 |
 |