Denon AVR-1712 Owners Manual - Page 99
Resetting the microprocessor, ON/STANDBY
 |
View all Denon AVR-1712 manuals
Add to My Manuals
Save this manual to your list of manuals |
Page 99 highlights
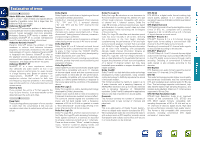
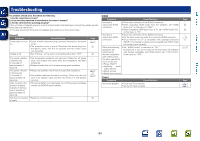
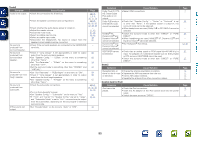
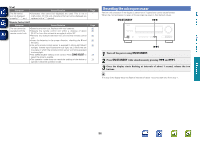
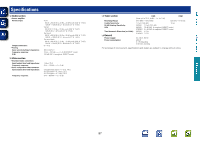
Basic version Advanced version GiPodH Symptom Cause/Solution The file names are not displayed properly ("...", etc.). • Characters that cannot be displayed are used. This is not a malfunction. On this unit, characters that cannot be displayed are replaced with a "." (period). GRemote Control UnitH Symptom Cause/Solution The set cannot be operated with the remote control unit. • Batteries are worn out. Replace with new batteries. • Operate the remote control unit within a distance of about 23 ft/7 m from this unit and at an angle of within 30°. • Remove any obstacle between this unit and the remote control unit. • Insert the batteries in the proper direction, checking the q and w marks. • The set's remote control sensor is exposed to strong light (direct sunlight, inverter type fluorescent bulb light, etc.). Move the set to a place in which the remote control sensor will not be exposed to strong light. • The ZONE SELECT setting is not correct. Press ZONE SELECT to select the zone to operate. • The operation mode does not match the settings of the device to operate. Check the operation mode. Page - Page 85 85 85 85 85 74 74 Resetting the microprocessor Perform this procedure if the display is abnormal or if operations cannot be performed. When the microprocessor is reset, all the settings are reset to their default values. ON/STANDBY 8 9 1 Turn off the power using ON/STANDBY. 2 Press ON/STANDBY while simultaneously pressing 8 and 9. 3 Once the display starts flashing at intervals of about 1 second, release the two buttons. If in step 3 the display does not flash at intervals of about 1 second, start over from step 1. Information 96
-
 1
1 -
2
-
3
-
4
-
5
-
6
-
7
-
8
-
9
-
10
-
11
-
12
-
13
-
14
-
15
-
16
-
17
-
18
-
19
-
20
-
21
-
22
-
23
-
24
-
25
-
26
-
27
-
28
-
29
-
30
-
31
-
32
-
33
-
34
-
35
-
36
-
37
-
38
-
39
-
40
-
41
-
42
-
43
-
44
-
45
-
46
-
47
-
48
-
49
-
50
-
51
-
52
-
53
-
54
-
55
-
56
-
57
-
58
-
59
-
60
-
61
-
62
-
63
-
64
-
65
-
66
-
67
-
68
-
69
-
70
-
71
-
72
-
73
-
74
-
75
-
76
-
77
-
78
-
79
-
80
-
81
-
82
-
83
-
84
-
85
-
86
-
87
-
88
-
89
-
90
-
91
-
92
-
93
-
 94
94 -
 95
95 -
 96
96 -
 97
97 -
 98
98 -
 99
99 -
 100
100 -
 101
101 -
 102
102 -
 103
103 -
 104
104
 |
 |